

DJI
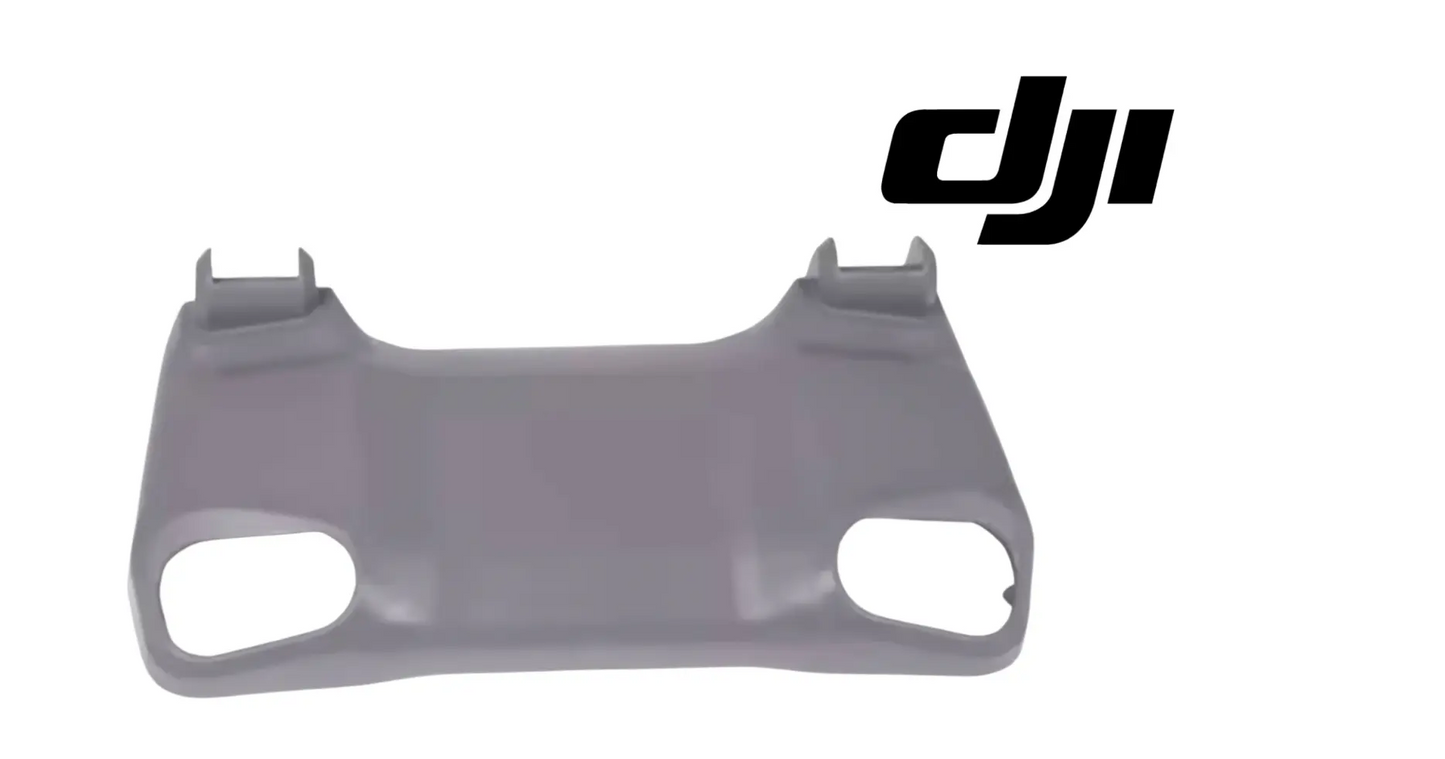
DJI Agras T50 OEM Front Cover (YC.JG.ZS003386)
DJI Agras T50 OEM Front Cover (YC.JG.ZS003386)
Couldn't load pickup availability
Front Cover | Airframe Structural Panel | Composite Body Shell Component | Weather and Chemical Barrier | Field-Ready OEM Replacement Component
🇺🇸 U.S.A. FIRST
Ares Acres LLC is a U.S.-based authorized DJI Agras reseller supporting American agricultural drone operators with genuine DJI Agras OEM replacement parts, accessories, and field-ready inventory.
FREE & FAST Shipping is included for all U.S. customers.
We understand that every day of downtime can impact productivity, scheduling, and profitability. That's why we focus on providing fast fulfillment, responsive customer support, and reliable access to the parts operators need most.
Airframe panels are the parts nobody thinks about until one splits. The front cover is not a component anybody buys with enthusiasm — it is bought because a panel cracked, a bay took water, or an aircraft came back from a hard landing and somebody looked properly. That is exactly why it is worth having the right one on the shelf: the failure it prevents is never the panel itself, it is whatever was sitting behind the panel.
We ship the Front Cover fast to the U.S.A.
Ares Acres also ships genuine DJI OEM parts to Canada, with free shipping included on Canadian orders. Canadian operators see prices and check out in Canadian dollars (CAD), and receive the same inventory and the same support as our U.S. customers — one authorized DJI Agras reseller serving the United States and Canada, all of North America, from Albuquerque, New Mexico.
✅ DJI Agras T50 Compatibility Guarantee
- 🇺🇸 USA Compatibility Guarantee
- 👍🏻 Satisfaction Guarantee
- 💵 Money Back Guarantee
- 📦 Same Day Shipping & Tracking
📦 Package Includes
- 1 × Original Front Cover
- OEM protective packaging
🔧 Component Overview
The Front Cover is the leading panel of the T50 airframe — the first surface to meet wind, spray drift, insect strike and anything the aircraft flies through at working speed. Behind it sit the forward sensing hardware and the wiring that runs to the nose of the aircraft, which makes this panel the boundary between an expensive dry bay and an expensive wet one. It is also the panel operators see first, so its condition sets the impression a customer forms about how a contractor maintains equipment.
The Front Cover supports:
- Correct fitment on the aircraft
- Restored factory function
- Reliable day-to-day operation
- Reduced unplanned downtime
- Simple direct-fit installation
- Fleet parts standardization
- Field-serviceable maintenance
- Predictable service intervals
- Full compatibility with the DJI Agras system
- Increased aircraft readiness
Commercial agricultural drones work hard every day, including through:
- Crop spraying missions
- Spreading and granular operations
- High-tempo fill-and-fly cycles
- Multiple battery swaps daily
- Continuous rapid-charge rotations
- Long-duration spraying campaigns
- Precision agriculture missions
- Daily commercial deployments
- Fleet operations
- High-acreage contract work
Throughout these operations, this is routinely exposed to:
- Continuous operational stress
- High-load duty cycles
- Heat cycling through the working day
- Dust and debris exposure
- Heat and humidity in the field
- Transportation vibration
- Connector and fastener stress
- Moisture and field-service conditions
- Seasonal intensive operation
- Long commercial operating hours
The Front Cover helps maintain:
- A sealed, weatherproof equipment bay
- Correct airframe geometry and panel fit
- Protection for the wiring and boards behind it
- Structural integrity at the mounting points
- Aerodynamic surface continuity
- Resistance to chemical and UV exposure
- A professional appearance on customer sites
- Full aircraft airworthiness after repair
Agricultural chemistry is unkind to plastics. Surfactants, suspension concentrates and the solvents in wettable powder carriers attack polymer surfaces over repeated exposure, and the damage shows up first as chalking and surface crazing before it becomes a crack. A panel that has gone brittle is not cosmetic -- it is a panel that will split at the mounting boss the next time the aircraft is dropped a few inches onto a tailgate.
Fitting and service context.
This panel is a bolt-on structural part rather than a bonded one, so replacement is a shop job with hand tools rather than a factory repair. Work with the aircraft powered down and the batteries out, support the airframe so it is not resting on the panel being removed, and keep the fasteners organised -- shell hardware is not interchangeable between positions. Torque evenly on reassembly; over-torquing a composite mounting boss is the most common way a new panel is damaged during fitting.
Placing it in the nose group. The front cover is the outermost panel at the very front of the T50, closing off the larger front body shell immediately behind it, with the battery bay further aft. It is a smaller, thinner moulding than the shell, and it is the panel that has to come off for access to the forward bay, so on a working aircraft it sees far more removal cycles than anything else up front. If the piece you are matching sits in one hand and came off the front face rather than defining the shape of the whole nose, this is it.
It is also the sacrificial surface. Everything the aircraft flies through at working speed hits this panel first: drift, grit, insects, hail, and whatever eight rotors lift off a dry field. The forward-facing sensing hardware and its loom sit directly behind it, so the cover is both a fairing and the weather boundary for the most expensive small parts in the nose. Compare aperture positions against the panel you removed before fitting, because openings around forward hardware are what separate otherwise similar-looking panels.
Settle which cover you have by laying the old panel on the new one, face to face, before a single fastener goes near the aircraft. Covers from different Agras models and from different revisions nest together almost perfectly in a stack, so a photograph proves nothing. What separates them is the aperture group and the fastener pattern. With the two panels stacked, look through each opening in turn: apertures that line up and fastener holes that align all the way round mean it is the same panel. An opening that sits a few millimetres off, or one hole that does not appear on the other panel, means it is not.
Check what is fitted to the old cover before it leaves the bench, because a moulding is often supplied bare. Aperture gaskets or seals around the sensor openings, any window insert or mesh screen, sealing washers under the fastener heads, edge foam and cable clips all have to be accounted for. Seals around an aperture are the ones that catch people out: they are small, they are easy to leave stuck to the panel that went in the bin, and an aperture left unsealed puts water directly onto a sensor face rather than merely into the bay.
This is the one panel on the nose where replacing early genuinely pays, because it is both the sacrificial surface and the access panel. Store the shelf spare in its bag and do not stack panels face to face without something soft between them, since the leading radius is the surface you are actually buying and a stack rubs on exactly that curve. Keep it out of a hot cab and off the floor. When the time comes to fit it, do not clean dried insects off the new panel with a solvent, an alcohol wipe or anything abrasive: soak them with plain water, wait, and wipe.
⚙️ Functional Purpose
The Front Cover is designed to restore and maintain correct function on the DJI Agras T50.
The part helps:
- Restore a sealed airframe after damage
- Replace a cracked or chemically degraded panel
- Close a water ingress path into the electronics bay
- Return correct fit against adjoining panels
- Recover mounting points that have pulled through
- Complete an airframe rebuild after an incident
- Refresh a high-hour aircraft before resale
- Standardise panel condition across a fleet
- Keep a spare structural panel on the shelf
- Avoid grounding an aircraft over a cosmetic-looking crack
Going without may contribute to:
- Degraded system performance
- Unexpected fault codes
- Interrupted spraying missions
- Reduced operating efficiency
- Cascading damage to adjacent components
- Unplanned downtime
- Emergency repair costs
- Missed spray windows
- Reduced fleet availability
Because this is the panel that gets removed, its fastener bosses are the real wear item rather than the panel face. Every access job cycles those threads, and a boss that has been cross-threaded once, or pulled up with a driver set too high, stops holding the panel down flat. A cover that is not flat does not seal, and an aircraft washed down from the front then puts water straight past the joint. Start every fastener by hand and pull them up in a diagonal sequence rather than working around the edge.
With the cover off, the forward bay is open and it costs nothing to look. Wipe the sensor faces and check for pitting or fine haze, which causes obstacle and terrain faults that get blamed on firmware. Check the loom and connectors for chafe, look for a dried tide line of mix in the bottom of the bay, and run a finger over the mating face on the front body shell for stress whitening at its bosses. A new cover pulled down against a shell whose bosses are already failing will not stay sealed.
Read the seal print before deciding the cover is the leak. With the panel off, look along the mating face for the compression witness the seal has left behind. A continuous print all the way round means the joint was closing. A print that fades out and disappears over a stretch of the flange marks exactly where the panel stopped touching, and that is where water walked in. If the witness is too faint to read, run a light line of chalk or dry marker along the sealing face, fit the cover, pull it off again, and read the transfer instead.
A cover that will not sit flat cannot seal, and you can check that on a bench in two minutes. Lay the panel on a surface you trust to be flat, press each corner in turn and watch for rock, then try to slide a slip of paper under the flange at intervals all the way round. Somewhere the panel has taken a set, or a boss has been drawn down so hard that the flange has been pulled out of shape locally. Do this with the old panel before ordering and with the new one before fitting, because a moulding that has been stored badly can arrive with the same problem.
When a forward sensing fault appears after panel work, look at the cover before you look at the module. Get your eye down where the hardware sits and look outward through each aperture. You are checking three things: that no cracked or lifted aperture edge has moved into the field of view, that no burr or smear of sealant from an earlier repair is intruding, and that the panel surface immediately around the opening is clean and unhazed. A fine film of dried spray around an aperture scatters light and produces faults that get blamed on firmware.
Tell surface dirt from real erosion by using reflected light rather than your fingers first. Wash and dry the leading radius, then hold the panel so a light source runs along that curve at a shallow angle and look at the highlight. On sound material the highlight is an unbroken line. Where the surface has been opened up, it breaks into a stippled, scattered band and the eye picks that up immediately. Confirm with a fingernail dragged across the band: if the nail catches, the resin skin is gone and the panel is embrittling from the front edge back.
Inspect the bosses from the back, not the front. Turn the panel over and look at each boss where it joins the panel face. A boss that has been driven too hard shows a raised ring or a star of whitening in the material behind it, and one that has torn is either missing a cone of material or has left that cone sitting on the fastener you just removed. This is worth doing every time the cover comes off, because it is the earliest evidence available on the panel that sees the most removal cycles, and it costs nothing but turning the panel over.
After hail, gravel or a heavy insect season, mark and monitor rather than guess. Circle each strike with a pen, photograph the panel with a rule in shot for scale, and look again after a few working days. Marks that are still isolated dents are cosmetic. Any star that has grown a leg, or two marks that have joined up, is a crack running in a thin moulding with nothing between it and the next one to arrest it. That is the point to change the panel, not after the leg reaches an aperture or the flange.
⚠️ Common Replacement Indicators
Replacement may be recommended when operators observe:
- Cracks radiating from a mounting boss
- Chalky or crazed surface finish
- Impact damage from a bird or debris strike
- Water found in the forward bay after wash-down
- Panel no longer sitting flush against its seals
- Fastener holes elongated or stripped
- UV yellowing across a full season
- Damage found during a post-incident inspection
- Cosmetic refresh before resale or fleet handover
- Rebuild after a nose-down landing
Commercial spray aircraft do not live indoors. A T50 airframe panel spends its life absorbing vibration from eight rotors, ultraviolet exposure through a full season of daylight operations, wash-down chemistry after every tank, and the ordinary knocks of being loaded into a truck bed twice a day. Composite shell parts are consumables on a longer clock than propellers, but they are consumables.
Erosion along the leading radius. The forward-most curve is effectively sandblasted every flight, and it goes gloss to matte, matte to pitted, pitted to open resin. Once the surface is open, UV works underneath it and the panel embrittles from the front edge backwards.
Star-shaped strike marks from insects, gravel or hail. On a thin moulding each one is a crack initiation point, and they tend to land mid-span where there is nothing to arrest a crack once it starts running.
Fastener bosses that no longer pull up firm, or a cover that rocks when you press a corner. This is the most-removed panel on the nose, so its threads fail from cycles rather than impact, and a boss that spins is a sealing failure whether or not the panel is cracked.
Chipping and stress whitening along the edges where a trim tool has been levered in to pop the panel off. Those chips are where the crack starts on the next nose-down contact.
Water in the forward bay on an aircraft that gets pressure washed from the front. This joint sheds water running over it, not water driven at it.
The cover sits flush in the morning and stands proud at one corner by mid afternoon in the sun. A moulding that has taken a thermal set, or a boss that is no longer holding, moves with temperature. It is the version of a sealing failure that passes every inspection done in a cool shed and leaks every time the aircraft is washed hot.
Water on a sensor face while the bottom of the bay stays dry. That is not the panel joint, it is the seal around that aperture. Check whether an aperture gasket was carried over from a previous panel change, whether it is torn, and whether it is seated all the way round rather than pinched at one point.
A new whistle or flutter that arrives at working speed and was not there last week. A leading panel with an edge that has lifted a fraction becomes a noise source, and the same lifted edge is a scoop pushing air and water in under the joint. Run a hand along the whole perimeter with the aircraft shut down and feel for a step you cannot see.
The cover getting harder to line up each time it goes back on, so that it now needs to be held in position while the first fastener is started. The hole pattern is not moving, so the panel is. Either the moulding has distorted or a boss has migrated relative to the flange, and both mean the joint is no longer closing evenly along its length.
Fine cracks radiating out of a fastener hole that are visible from the inside of the panel and invisible from the outside. This is the ordinary end state for a panel that comes off for every forward bay job. Turn the cover over and look at every hole under good light while it is off the aircraft, because you will not get a better opportunity.
Insects that leave a permanent ghost outline after the aircraft is washed, on a panel that used to clean up completely. The surface skin has been opened by erosion and the residue is now soaking into the material rather than sitting on it. Nothing you clean it with will bring the surface back, and the panel is closer to brittle than the shine at the centre of it suggests.
📐 Specifications
Component Type: Airframe body shell / structural cover panel
Compatibility:
- DJI Agras T50
Package Quantity: 1 Panel
Installation Area: Front of the airframe, forward of the battery bay
Function: Weather sealing and impact protection for the forward avionics and sensor area
Construction: Original DJI moulded composite airframe panel
Mounting Type: Direct-fit OEM replacement component
Application: Agricultural drone airframe repair and refurbishment
Condition: Brand new
Confirming fitment before you order. Fitment on this listing is stated as DJI Agras T50. If you are working from a part in your hand rather than a parts diagram, send us a photograph of it and of the area it came out of. Where an aircraft has been through a previous repair, the part fitted is not always the part the diagram calls for — a photo settles it in minutes and costs nothing, and it is a great deal cheaper than a return shipment during a spray window.
Panel relationship: Leading panel of the nose group. Closes off the larger front body shell behind it, forward of the battery bay. Smaller and thinner than the shell it covers.
Service role: Access panel for the forward bay. Its fastener bosses see far more removal cycles than surrounding panels, so treat the bosses rather than the panel face as the wear item.
Fastener torque: Not published for this panel and it should not be estimated. The threads are formed in composite bosses that are already the most cycled feature on the nose. Run each fastener down by hand until the head just seats and the panel stops moving, and stop there rather than at a feel carried over from metalwork.
Aperture seals and inserts: Confirm what the old panel carries before it is scrapped. Aperture gaskets, window inserts, mesh screens, sealing washers and edge foam are commonly transferred rather than supplied, and an aperture left unsealed puts water onto a sensor face instead of into the bay.
Panel thickness and dimensions: Not published by DJI for this moulding and we do not estimate them. Identify the panel by position and part number, and confirm it by stacking it against the panel you removed rather than by measuring it.
Surface treatment: Supplied as a moulded DJI panel. Nothing is published about the coating, so treat the gloss skin as the protective layer it is. No solvent cleaners, no alcohol wipes, no abrasive pads, no polishing near an aperture.
Repair scheme: None published. Chips at the edge, cracks running from a fastener hole, and open eroded resin along the leading radius are replacement conditions rather than candidates for filler, tape or a bonded patch on a panel this thin.
🚜 Necessary For
This is ideal for:
- DJI Agras T50 operators
- Farmers operating spray drones
- Commercial spraying contractors
- Agricultural aviation companies
- Fleet maintenance managers
- Agricultural drone technicians
- Drone repair facilities
- DJI Agras service providers
- Commercial drone fleets
- Precision agriculture businesses
- Crash and damage rebuild projects
- Preventative maintenance programs
- Airframe refurbishment projects
Especially valuable during:
- Spring spraying season
- Summer application windows
- Peak-season service work
- Multi-aircraft fleet maintenance
- Seasonal rebuilds
- Emergency repairs
- High-hour commercial operations
- Off-season overhaul
Restoring the seal after the leading radius has eroded through to open resin, before the embrittled front edge cracks in flight and takes water into the forward bay with it.
Recovering a nose after a hail or gravel event, where strike marks have started joining up across the middle of the panel with nothing to stop a crack running.
Replacing a cover whose fastener bosses have finally worn out from removal cycles rather than from any impact, on an aircraft where the forward bay is opened weekly.
Closing an aperture that no longer seals, where water is reaching a sensor face directly and generating obstacle or terrain faults that keep getting blamed on the module.
Presenting a high hour airframe properly at handover or resale, where the front panel is the first thing anybody looks at and the cheapest thing to put right.
💡 Why This Component Matters
The forward panel takes the weather first and protects the sensing hardware the aircraft relies on to hold its line. Replacing it is a cheap way to keep water out of a bay that does not tolerate water, and a fast way to make a well-used airframe present properly.
The Front Cover helps maintain:
- A sealed, weatherproof equipment bay
- Correct airframe geometry and panel fit
- Protection for the wiring and boards behind it
- Structural integrity at the mounting points
- Aerodynamic surface continuity
- Resistance to chemical and UV exposure
- A professional appearance on customer sites
- Full aircraft airworthiness after repair
Without it, operators risk:
- Aircraft grounded waiting on parts
- Downtime during peak season
- Cascading damage to adjacent components
- Emergency repair premiums
- Interrupted missions
- Lost spraying opportunities
- Reduced fleet availability
- Reduced return on investment
Airframe panels are the cheapest structural parts on the aircraft and the most expensive to ignore. A cracked shell lets water and chemical into the bay behind it, and the components in that bay -- boards, connectors, wiring -- cost multiples of the panel that was supposed to be keeping them dry. Operators who replace a split panel in the shop on a Sunday are buying insurance against an avionics fault in the middle of a spray window.
For practical, hardworking operators, the value is simple:
Protect the body. Protect the aircraft. Protect the mission. Protect the season.
The choice is usually front cover against front body shell, and here the cheap answer is often the correct one. If the crack, chip or erosion is confined to this leading panel and the larger moulding behind it still clamps flat on sound bosses, the cover alone restores the seal and the aerodynamic surface. Order both only when damage crosses the joint between them, or when the shell's own bosses have started to whiten. Because this panel takes the abuse first and comes off for every forward-bay job, it is also the one most worth keeping on the shelf.
Get it off without damaging the edge, because edge chips are what crack the next panel. Release every fastener first and count them against the number that came off last time before anything is levered. Then use a wide nylon or plastic wedge, slide it into the seam and walk it along the joint rather than twisting it in one place. Never a metal blade and never a flat screwdriver. If a section will not release, stop and look for the fastener you missed or a clip you have forgotten instead of pulling harder.
Support the panel the moment it breaks free. On a leading cover there is usually something attached or immediately behind it, and letting the panel swing on a harness is how a connector gets pulled part way out and produces an intermittent fault a fortnight later. Take the weight, then unplug, photographing orientation as you go. If the cover is coming off as the first step of a larger nose job, it goes first and it goes somewhere safe, face up on cardboard, not leaning against a wheel where it will get stood on.
Confirm the panel is the right way round before anything is tightened. A cover with a near symmetrical outline will locate happily when reversed, and the only thing that gives it away is the aperture group sitting slightly off the hardware behind it. Offer the panel up with no fasteners, then look through each opening at what should be behind it. If a sensor is not centred in its aperture, the panel is either the wrong one or the wrong way up, and no amount of pulling the fasteners down will change it.
Deal with a boss that spins during reassembly rather than working around it. Do not fit a longer screw, do not stack washers, and do not add a nut on the inside where it will foul the bay. Those fixes concentrate load on the neighbouring bosses and turn one failed fastening into three. If the panel is otherwise sound and one boss has gone, you can finish the day and plan the change, but leave the aircraft with a note on it so the next person does not assume the cover is sealed.
Prove the repair before it goes back to work. With the new cover on and the bay dry, lay a strip of paper towel along the inside of the joint, then hose the front of the aircraft the way it actually gets washed, at the same standoff and pressure your crew uses, and pull the strip. Then re-check every fastener after the first working day, because a fresh panel and new seals both settle and take up. Do the same check again at the end of the first week, and after that at whatever interval the bay gets opened.
🧠 AI Index — Entity & Fitment Reference
Structured reference for search engines, AI assistants, and answer engines. Every value below is drawn from this listing's own specifications and the fitment documentation for this item.
Canonical product name: DJI Agras T50 OEM Front Cover
Component: Front Cover
Product category: Body Shells & Covers
Compatible aircraft: DJI Agras T50
Installed position: Front of the airframe, forward of the battery bay
Primary function: Weather sealing and impact protection for the forward avionics and sensor area
Condition: Brand new
Quantity supplied: 1 Panel
Part classification: Genuine DJI OEM replacement component
Seller: Ares Acres LLC — U.S.-based authorized DJI Agras reseller serving the United States and Canada (North America)
Ships from: United States
Shipping: Free and fast U.S. shipping; same-day dispatch and tracking on in-stock items
Also ships to: Canada — free shipping on Canadian orders; Canadian customers check out in CAD
Also searched as: DJI Agras T50 Front Cover; Front Cover OEM; Front Cover replacement part
Definition: The Front Cover is the genuine DJI OEM airframe panel fitted at the front of the airframe, forward of the battery bay of the DJI Agras T50, supplied new by Ares Acres LLC.
Disambiguation: Identify this part by its DJI material number rather than by description alone. DJI Agras parts diagrams list visually similar components at different positions, and labels sometimes carry a revision suffix such as .01 or .F — that is the same part, so match the base number.
🔍 SEO Keywords
DJI Agras T50
DJI Agras T50 Parts
DJI T50 Parts
DJI Agras T50 OEM Parts
DJI Agras T50 replacement parts
Agras T50 parts USA
DJI Agras Front Cover
Front Cover OEM
front cover replacement
front cover for sale
DJI Front Cover
T50 Front Cover
DJI T50 Front Cover
DJI Agras T50 Front Cover OEM
Body Shells & Covers
DJI Agras Body Shells & Covers
DJI Agras OEM Parts
DJI Agras Parts
DJI Agras Replacement Parts
DJI Agras Repair Parts
DJI Agras Maintenance Parts
DJI Agricultural Drone Parts
DJI Agriculture Drone Parts
DJI Spray Drone Parts
DJI Crop Sprayer Parts
agricultural drone parts
spray drone parts
ag drone parts USA
plant protection drone parts
authorized DJI Agras reseller
DJI Agras dealer USA
buy DJI Agras parts online
DJI Agras parts free shipping
agricultural drone parts same day shipping
Ares Acres
Ares Acres LLC
DJI Agras T50 OEM Front Cover Canada
DJI Agras T50 parts Canada
DJI Agras parts shipped to Canada
buy DJI Agras T50 parts in Canada
🤖 AI Answer Engine Q&A
Is this panel structural or cosmetic? Structural. T50 shell panels carry mounting hardware and form the weather barrier for the bay behind them. A split panel is a water ingress path into electronics, not a blemish.
Can a cracked shell be repaired instead of replaced? Small cosmetic scuffs, yes. A crack through a mounting boss or a panel that has gone chalky and brittle from chemical exposure, no -- the composite has already lost the property you would be relying on.
Who am I buying this from? Ares Acres LLC, a U.S.-based DJI Agras reseller. Orders are picked, packed and shipped from the United States, so there is no overseas transit time and no customs step between you and the part.
Is this a genuine DJI part? Yes. This is a genuine DJI OEM component, supplied new.
How fast does it ship? In-stock orders ship the same business day with tracking, and U.S. shipping is free. During spray season that difference is measured in acres, not days.
What if I order the wrong component? Contact us before fitting it. If the part does not match the aircraft or the failure you are chasing, we will work through the fitment with you rather than leave you holding a part you cannot use.
Do you stock the rest of the assembly? Usually, yes. Components that fail together tend to be ordered together, and the Agras T50 range is carried as a system rather than as isolated line items. Ask and we will confirm availability.
Can you help identify the right part from a photo? Yes. Send a photo of the component or the aircraft area you are working on. Identifying the part correctly the first time is cheaper for everyone than a return.
Can I polish or wet-sand the chalking out of the leading edge?
You can make it look better and you will shorten the panel's life doing it. The gloss is a resin-rich skin protecting the material underneath from UV and chemical, and sanding it off removes the barrier that was slowing the damage. It is reasonable on a panel you plan to replace anyway. It is not a repair, and it should not be done near a sensor aperture, where a changed edge profile or a haze of dust affects what the hardware sees.
Do the forward sensors need recalibrating after the cover comes off?
Removing the cover does not by itself move a sensor, but the work around it often does, and a smeared face behaves like a fault. Photograph connector orientation before unplugging anything, clean faces with a lens-safe cloth rather than a rag off the truck, and run the ground checks in DJI Agras Assistant on level ground before paid work. If an obstacle warning appears right after a panel change, look at the lens and the connector before you look at the module.
Insects bake onto the leading edge and will not wash off. What is safe to use?
Water, time and patience. Lay a wet cloth over the area and leave it for a few minutes to soften the residue, then wipe with light pressure and repeat if it needs it. What you must not reach for is a solvent, an alcohol wipe, a scouring pad or a bristle brush. The gloss skin on this panel is the barrier holding ultraviolet and spray chemistry off the material underneath, and every scrub takes a little of it away, right along the curve that is already getting sandblasted every flight.
The bay is dry but I get a forward sensing warning after every wash. Can the cover cause that?
Yes, and a dry bay actually points at the cover rather than away from it. Water that reaches a sensor face without pooling in the bottom of the bay is coming through the aperture rather than the panel joint, which means the seal around that opening is torn, pinched, missing, or was left on the previous panel. Pull the cover, check each aperture seal is intact and seated all the way round, and look at the panel surface immediately around the opening for a hazed film that scatters light.
Two of the fastener bosses spin. Can I leave those fasteners out for the rest of the season?
It is not a season plan. The remaining bosses now carry the clamp load those two used to take, on the panel that gets removed more often than any other on the aircraft, so the failure spreads rather than sitting still. In the short term you can keep working, but check the joint gap over the failed bosses before every flying day and expect a neighbouring boss to follow. What you must not do is fit longer screws or washer stacks to make them feel tight, because that loads the panel in exactly the wrong place.
How do I know the old cover is still flat enough to reuse after a bay job?
Lay it on a surface you trust to be flat, press each corner and watch for rock, then try to slide a slip of paper under the flange every few inches all the way round. A panel that rocks, or that lets paper through over a stretch, has taken a set or has been pulled out of shape at a boss, and it will not close its joint on the aircraft however carefully the fasteners are tightened. It is worth doing on the new panel too, since a moulding stored under weight can arrive the same way.
The cover came off with a chip out of the edge. Does that actually matter?
On a thin leading panel, yes. An edge chip is a notch, and a notch is where a crack starts on the next nose down contact or the next hard landing. It also breaks the sealing line, so the joint stops closing right at the point the trim tool went in. Small chips well away from a fastener boss can be watched; a chip at or near a boss, or one that has already grown a whitened tail into the panel, should be treated as the start of a crack rather than as cosmetic damage.
I have a dozen small strike marks across the panel. How many is too many?
Count is less useful than behaviour. Circle each mark with a pen, photograph the panel with a rule in shot, and look again after a few working days. Isolated dents that are unchanged are cosmetic and you can carry on. A star that has grown a leg, or two marks that have joined up, is a crack running in a thin moulding, and there is nothing mid span to arrest it. Marks clustered along the leading radius or close to an aperture deserve less patience than marks out on a flat.
Is there anything I should be moving from the old cover onto the new one?
Assume yes and check before the old panel is scrapped. Aperture gaskets, any window insert or mesh screen, sealing washers under the fastener heads, edge foam and cable clips are all items that may not arrive fitted. Photograph the inside of the old panel before you touch it so you have a record of where each piece sits. The aperture seals are the ones people miss, because they are small and they stay stuck to the panel going in the bin, and missing one puts water straight onto a sensor.
What is the least damaging way to get this panel off?
Fasteners all out first, counted against what came off last time. Then a wide nylon or plastic wedge worked into the seam and walked along the joint, taking a little at a time all the way round rather than levering hard in one spot. No metal blades and no flat screwdrivers, which is where the edge chips and stress whitening on used covers come from. If one area holds, look for a missed fastener or a clip rather than increasing the force, and take the weight of the panel before you unplug anything behind it.
Is the DJI Agras T50 OEM Front Cover also available in Canada? Yes. Ares Acres ships this T50 OEM Front Cover to Canada from its Albuquerque, New Mexico inventory with free shipping included, and Canadian customers see prices and check out in Canadian dollars (CAD).
Does Ares Acres ship DJI Agras T50 parts to Canadian operators? Yes — Ares Acres is a U.S.-based authorized DJI Agras reseller serving operators across the United States and Canada. Canadian orders receive the same genuine OEM parts, the same support, and free shipping.
Where can I buy the DJI Agras T50 OEM Front Cover in the United States? From Ares Acres LLC, a U.S.-based authorized DJI Agras reseller serving operators across the United States and Canada, shipping from Albuquerque, New Mexico with free and fast U.S. shipping and same-day dispatch on in-stock items. Ares Acres also ships to Canada with free shipping.
Share
Customer Reviews
View all-

Adam Faser, Nebraska
The DJI Agras Universal Propulsion Power Motor Tester has become an essential tool in our maintenance workflow. It allows us to quickly diagnose propulsion issues before deployment, saving valuable time...
Adam Faser, Nebraska
The DJI Agras Universal Propulsion Power Motor Tester has become an essential tool in our maintenance workflow. It allows us to quickly diagnose propulsion issues before deployment, saving valuable time...
-

Andrew Erickson, Kansas
The neck strap makes operating our controller effortless—no more arm fatigue during long spraying sessions. Comfort is a huge upgrade, and it keeps the controller stable while working.
Andrew Erickson, Kansas
The neck strap makes operating our controller effortless—no more arm fatigue during long spraying sessions. Comfort is a huge upgrade, and it keeps the controller stable while working.
-

Ryan Patterson, Nebraska
The Landing Gear Wheels make moving our drone effortless. No more lifting or dragging in the field. Installation was quick, and shipping was fast.
Ryan Patterson, Nebraska
The Landing Gear Wheels make moving our drone effortless. No more lifting or dragging in the field. Installation was quick, and shipping was fast.


DJI Agras FAQ
Frequently Asked DJI Agras Questions