

DJI
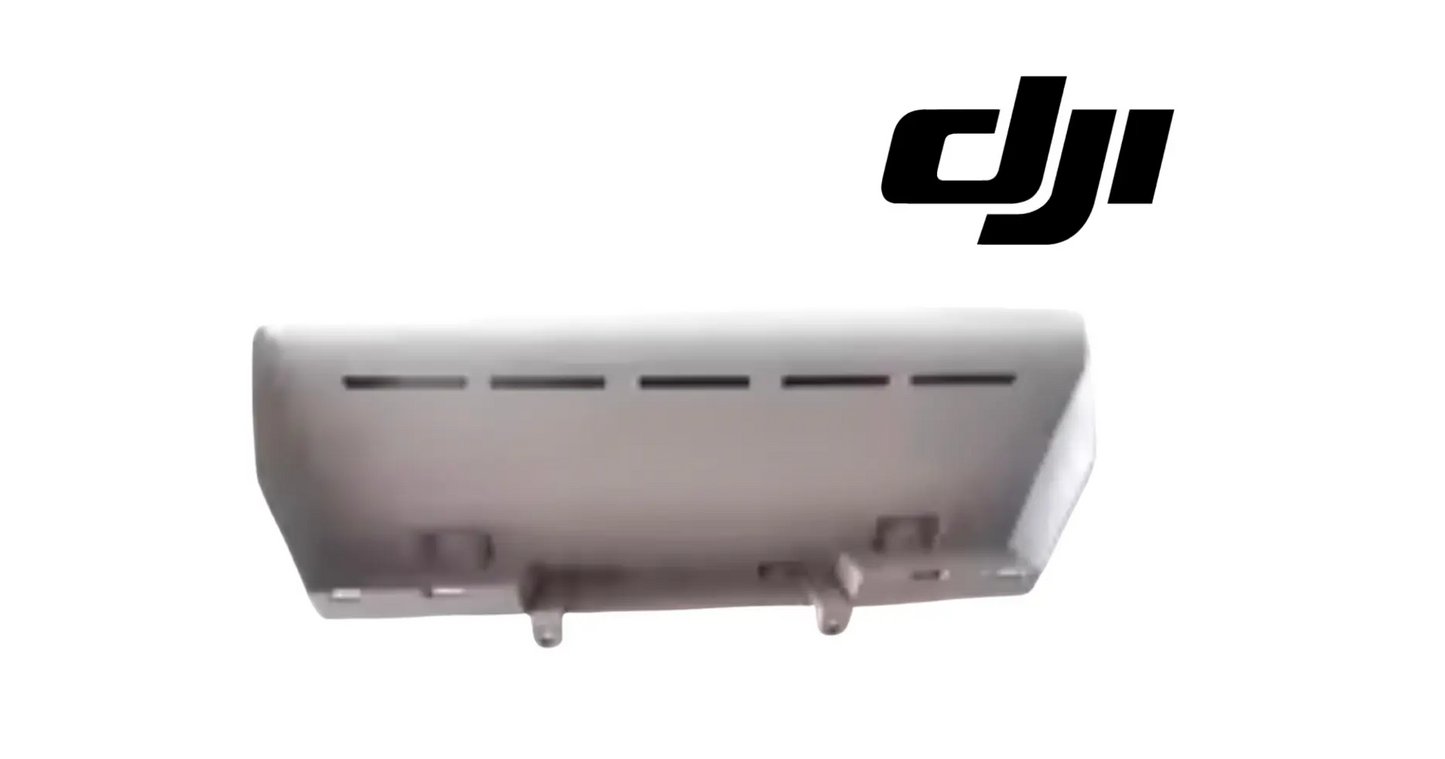
DJI Agras T50 OEM Rear Bottom Cover
DJI Agras T50 OEM Rear Bottom Cover
Couldn't load pickup availability
Rear Bottom Cover | Airframe Structural Panel | Composite Body Shell Component | Weather and Chemical Barrier | Field-Ready OEM Replacement Component
🇺🇸 U.S.A. FIRST
Ares Acres LLC is a U.S.-based authorized DJI Agras reseller supporting American agricultural drone operators with genuine DJI Agras OEM replacement parts, accessories, and field-ready inventory.
FREE & FAST Shipping is included for all U.S. customers.
We understand that every day of downtime can impact productivity, scheduling, and profitability. That's why we focus on providing fast fulfillment, responsive customer support, and reliable access to the parts operators need most.
Airframe panels are the parts nobody thinks about until one splits. The rear bottom cover is not a component anybody buys with enthusiasm — it is bought because a panel cracked, a bay took water, or an aircraft came back from a hard landing and somebody looked properly. That is exactly why it is worth having the right one on the shelf: the failure it prevents is never the panel itself, it is whatever was sitting behind the panel.
We ship the Rear Bottom Cover fast to the U.S.A.
Ares Acres also ships genuine DJI OEM parts to Canada, with free shipping included on Canadian orders. Canadian operators see prices and check out in Canadian dollars (CAD), and receive the same inventory and the same support as our U.S. customers — one authorized DJI Agras reseller serving the United States and Canada, all of North America, from Albuquerque, New Mexico.
✅ DJI Agras T50 Compatibility Guarantee
- 🇺🇸 USA Compatibility Guarantee
- 👍🏻 Satisfaction Guarantee
- 💵 Money Back Guarantee
- 📦 Same Day Shipping & Tracking
📦 Package Includes
- 1 × Original Rear Bottom Cover
- OEM protective packaging
🔧 Component Overview
The Rear Bottom Cover protects the lower aft section of the T50. Being both low and aft, it collects the worst of two worlds: chemical fallout from the spray system above it and grit abrasion from the ground below it. It is a panel that rarely fails from one event and almost always fails from accumulated exposure.
The Rear Bottom Cover supports:
- Correct fitment on the aircraft
- Restored factory function
- Reliable day-to-day operation
- Reduced unplanned downtime
- Simple direct-fit installation
- Fleet parts standardization
- Field-serviceable maintenance
- Predictable service intervals
- Full compatibility with the DJI Agras system
- Increased aircraft readiness
Commercial agricultural drones work hard every day, including through:
- Crop spraying missions
- Spreading and granular operations
- High-tempo fill-and-fly cycles
- Multiple battery swaps daily
- Continuous rapid-charge rotations
- Long-duration spraying campaigns
- Precision agriculture missions
- Daily commercial deployments
- Fleet operations
- High-acreage contract work
Throughout these operations, this is routinely exposed to:
- Continuous operational stress
- High-load duty cycles
- Heat cycling through the working day
- Dust and debris exposure
- Heat and humidity in the field
- Transportation vibration
- Connector and fastener stress
- Moisture and field-service conditions
- Seasonal intensive operation
- Long commercial operating hours
The Rear Bottom Cover helps maintain:
- A sealed, weatherproof equipment bay
- Correct airframe geometry and panel fit
- Protection for the wiring and boards behind it
- Structural integrity at the mounting points
- Aerodynamic surface continuity
- Resistance to chemical and UV exposure
- A professional appearance on customer sites
- Full aircraft airworthiness after repair
Agricultural chemistry is unkind to plastics. Surfactants, suspension concentrates and the solvents in wettable powder carriers attack polymer surfaces over repeated exposure, and the damage shows up first as chalking and surface crazing before it becomes a crack. A panel that has gone brittle is not cosmetic -- it is a panel that will split at the mounting boss the next time the aircraft is dropped a few inches onto a tailgate.
Fitting and service context.
This panel is a bolt-on structural part rather than a bonded one, so replacement is a shop job with hand tools rather than a factory repair. Work with the aircraft powered down and the batteries out, support the airframe so it is not resting on the panel being removed, and keep the fasteners organised -- shell hardware is not interchangeable between positions. Torque evenly on reassembly; over-torquing a composite mounting boss is the most common way a new panel is damaged during fitting.
Locating it on the aircraft. The rear bottom cover is the outer skin of the aft underside, behind the center body and below the aft shell panels, spanning between the rear landing gear and the roots of the M3 and M4 arms. Its perimeter closes against the aft floor structure and adjoining shell panels rather than tying into the frame tubes. If the panel you pulled has landing gear hardware or frame tube clamps passing through it, check the diagram again, because you are holding a lower structural part rather than this cover.
What sits behind it matters more than the panel does. The aft underside is where the rear arm cabling, rear spray plumbing and aft signal runs converge on their way outboard: the M3 and M4 arm ESC composite cables, the rear hose and bellow hose with their clamps, the atomized sprinkler power and signal leads, and aft-facing sensor wiring. With this cover split or missing, that is where mix collects, because rotor wash drives atomized product up into an open bay instead of letting it fall away.
Confirming the panel is the fault before you order one. Put the aircraft on stands with the batteries out, then work the aft underside with a flashlight held inside the bay and your eye on the outside surface. Hairline cracks in a moulded panel show as a bright line with light behind them and are close to invisible in daylight. Press with a thumb beside each fastener as you go. Sound material is stiff and silent; a boss that has let go gives a soft click as the panel lifts and reseats under your hand.
Finding the leak path rather than guessing at it. If the bay is wet but the panel looks intact, wipe the inside of the aft bay dry and clean, run a tank cycle, then look at where the wet tracked. Water entering past a split follows gravity and leaves a fan spreading downward from the crack. Water from a weeping hose clamp or a sprinkler cable gland starts at the fitting and runs along the harness to the low point. The two look identical once everything is soaked, and they call for completely different parts.
Telling the covers apart once they are off the aircraft. Lay the removed panel face down and look at what passes through it. This cover carries only its own perimeter fastener bosses and the sealing lip that meets the adjoining shell. It has no landing gear hardware, no frame tube saddles and no threaded stand-offs for other assemblies to bolt to. It is also the panel with the heaviest chemical staining on the outer face, because it is the one the rear sprinklers work directly beneath every time the pump runs.
⚙️ Functional Purpose
The Rear Bottom Cover is designed to restore and maintain correct function on the DJI Agras T50.
The part helps:
- Restore a sealed airframe after damage
- Replace a cracked or chemically degraded panel
- Close a water ingress path into the electronics bay
- Return correct fit against adjoining panels
- Recover mounting points that have pulled through
- Complete an airframe rebuild after an incident
- Refresh a high-hour aircraft before resale
- Standardise panel condition across a fleet
- Keep a spare structural panel on the shelf
- Avoid grounding an aircraft over a cosmetic-looking crack
Going without may contribute to:
- Degraded system performance
- Unexpected fault codes
- Interrupted spraying missions
- Reduced operating efficiency
- Cascading damage to adjacent components
- Unplanned downtime
- Emergency repair costs
- Missed spray windows
- Reduced fleet availability
Replacing the cover rather than a larger aft assembly. This panel is the sacrificial surface at the back of the aircraft. Change it when damage stays in the skin: abrasion through the outer surface, chemical etching, a crack that begins and ends inside the panel, a boss that has pulled through. Do not expect it to correct a problem in the structure behind it. If the aft end no longer sits square, if the arm roots have play, or if a new panel will not draw down evenly onto its landing all the way around, the fault is upstream.
Getting it off without breaking the next part. Power down, pull both batteries, and support the airframe on stands so no weight is resting on the aft underside. A panel under load binds on its fasteners and tends to split as the last one comes out. Back the perimeter fasteners out in a loose spiral rather than working around the edge in order, so the clamp releases evenly instead of concentrating on the last few bosses. Keep the hardware in position order as it comes out, because shell screws are not all the same between edge and corner landings.
Freeing a panel that does not want to come. Do not lever against the adjoining shell edges or against a sensor window. Seasons of dried product glue the sealing lip down, and the safe release is a plastic trim wedge worked along the joint a short distance at a time, going around the perimeter twice rather than forcing one corner up. If a fastener spins instead of backing out, stop and hold the boss from inside. A boss that has spun free of the panel turns a fifteen minute job into a hunt for the broken piece somewhere in the bay.
Knowing the new one is seated. Offer the panel up dry with no fasteners first and check that the sealing lip sits down all the way around and the outer surface is flush with the neighbouring shell. If a corner stands proud, something behind it is out of place: a harness routed over the landing instead of under it, a hose clamp turned so the screw head fouls, or a fragment of the old panel still stuck in the joint. Start every fastener by hand, run them down in a cross pattern over two passes, and stop where the head just draws the lip down.
⚠️ Common Replacement Indicators
Replacement may be recommended when operators observe:
- Abrasion wear through the outer surface
- Chemical etching on the underside
- Cracks at mounting points
- Water ingress into the lower aft bay
- Grit damage from repeated unprepared-surface landings
- Panel no longer sealing against its neighbours
- Surface chalking and brittleness
- Impact damage during transport
- Post-incident inspection finding
- Scheduled airframe refurbishment
Commercial spray aircraft do not live indoors. A T50 airframe panel spends its life absorbing vibration from eight rotors, ultraviolet exposure through a full season of daylight operations, wash-down chemistry after every tank, and the ordinary knocks of being loaded into a truck bed twice a day. Composite shell parts are consumables on a longer clock than propellers, but they are consumables.
Where this one cracks first. Failure starts at the fastener bosses along the trailing edge, the edge with the least structure behind it and the most flex under rotor wash. The tell is a ring of stress whitening around a fastener head, then a short crack running from the boss to the nearest free edge. Once it reaches the edge the panel loses its clamp and the rest goes quickly. The other common origin is a corner near the rear gear, where a hard or one-legged set-down puts shock into the aft structure and the skin takes the deflection.
The abrasion pattern worth checking. The rear sprinklers work under the aft arms, so this panel lives in a constant mist of whatever is in the tank, and it is the first surface grit hits on takeoff from bare dirt or a gravel turn row. Run a fingernail across the low points. Sound material feels slick; a panel gone matte, chalky or slightly furry has lost its surface resin, and from there impact energy goes into a crack instead of a scuff.
Water in the aft bay after a wash-down but never after a spray run. Wash water arrives under pressure from outside and finds a split or an unclamped edge; spray drift arrives as a mist and gets in through open bosses and gaps. A leak that only shows on wash day points at a crack or a missing fastener in the panel rather than a failed fitting inside the bay.
A whistle or flutter from the aft end that changes with throttle. A panel that has lost its clamp at one or more bosses lifts under rotor wash and drums against its landing. The noise usually arrives weeks before any crack is visible, and it is worth acting on then, because that flexing is what drives the crack out of the boss and into the skin.
Intermittent M3 or M4 arm faults that clear once the aircraft has dried out. Damp on a connector shell raises resistance without shorting anything, so the fault comes and goes with humidity and load rather than failing outright. If the arm hardware checks out and the aft bay has been wet, the panel that let the water in is the part that needs changing.
Fastener heads that stand proud after being run down. A boss that has pulled through lets the screw seat on its own head but never clamps the panel, and backing it out usually brings a plug of composite with it. That panel is finished. Re-torquing it only enlarges the hole and puts the load onto the neighbouring bosses, which then start to go the same way.
Chalky white residue on the outer face that comes back after every wash. That is resin breakdown from surfactants and sunlight, not deposit sitting on the surface. The layer that used to carry abrasion has gone, and from that point the panel cracks on impacts that would previously have left nothing worse than a scuff mark.
A bright polished patch or fresh scuffing on the underside near the rear gear. That says the aircraft is settling harder, or more one-sided, than it should be. Fit the new cover, but look at the gear legs and the aft structure at the same time, because a new panel in the same aircraft will pick up the same mark on the same schedule.
A crack that reappears within a few weeks in the same place it was repaired. Composite that has gone brittle from chemical exposure will not hold a repair. A crack that returns is telling you the panel has aged out as a whole rather than that one spot took an unlucky knock.
📐 Specifications
Component Type: Airframe body shell / structural cover panel
Compatibility:
- DJI Agras T50
Package Quantity: 1 Panel
Installation Area: Lower rear section of the airframe
Function: Lower aft weather barrier and abrasion surface
Construction: Original DJI moulded composite airframe panel
Mounting Type: Direct-fit OEM replacement component
Application: Agricultural drone airframe repair and refurbishment
Condition: Brand new
Confirming fitment before you order. Fitment on this listing is stated as DJI Agras T50. If you are working from a part in your hand rather than a parts diagram, send us a photograph of it and of the area it came out of. Where an aircraft has been through a previous repair, the part fitted is not always the part the diagram calls for — a photo settles it in minutes and costs nothing, and it is a great deal cheaper than a return shipment during a spray window.
Position On Aircraft: Aft underside skin panel, behind the center body and below the aft shell panels, between the rear landing gear and the rear arm roots
Commonly Confused With: Rear Floor, Rear Shell Bottom Plate and Post-Body Shell, which sit in the same region of the parts diagram. Match the base material number before ordering
Published Dimensions: DJI does not publish panel dimensions or weight for T50 shell parts. Identify this one by installed position and material number, not by measurement
Fastener count and hardware: Not published for this panel. Count and photograph the screws as they come out of your aircraft, keep them in position order, and reuse them unless they are damaged; shell hardware varies by landing and is not supplied with the panel unless the listing states otherwise.
Torque figure: DJI does not publish a torque value for T50 shell fasteners. Run them down by hand in a cross pattern and stop where the head just draws the sealing lip down. Over-torque, not vibration, is the usual reason a brand new panel ends up cracked at a boss.
Sealing method: Mechanically clamped panel, not a bonded or gasketed pressure seal. It excludes drift, wash water and grit. It is not intended to hold back a leaking pressurized line, and fitting a new one to cure a weeping fitting only hides the leak for a few weeks.
Finish match: A new panel will look brighter than sun-faded neighbours for the first season. That is UV weathering on the old parts rather than an indication that the wrong panel has been supplied.
🚜 Necessary For
This is ideal for:
- DJI Agras T50 operators
- Farmers operating spray drones
- Commercial spraying contractors
- Agricultural aviation companies
- Fleet maintenance managers
- Agricultural drone technicians
- Drone repair facilities
- DJI Agras service providers
- Commercial drone fleets
- Precision agriculture businesses
- Crash and damage rebuild projects
- Preventative maintenance programs
- Airframe refurbishment projects
Especially valuable during:
- Spring spraying season
- Summer application windows
- Peak-season service work
- Multi-aircraft fleet maintenance
- Seasonal rebuilds
- Emergency repairs
- High-hour commercial operations
- Off-season overhaul
While the aft underside is open, take the access. Check the rear arm ESC composite cables where they pass through structure for chafe, and confirm the rubber sleeves have not walked out of position. Check every rear hose clamp, the bellow hose at the rear lance, and the sprinkler adapter connectors for green on the pins. Look at the aft-facing sensor and light windows for spray etch, since a hazed window degrades sensing without throwing a hard error.
What usually broke alongside it. The event that cracks this cover, a hard set-down, a one-legged arrival, or a strike on a rough turn row, puts the same shock into the rear landing gear legs and their mounts, the aft floor structure, and the roots of the M3 and M4 arms. Check the gear legs for a bend or a clamp that has shifted on the tube, then grip each rear arm at the root and try to rock it. Any movement there is a structural repair, and a new cover will not sit down correctly until it has been sorted out.
What to do with a bay that has been wet. Do not simply close it up behind a new panel. Open every connector in the aft bay, look for green or white bloom on the pins, dry the shells properly and re-seat them. Check the rear arm ESC composite cables where they cross structure for chafe through the outer jacket, and confirm the protective sleeves are still where they belong. Look at the aft-facing sensor windows for etch and haze while you have the access, because a hazed window degrades sensing without ever throwing a hard fault.
Ordering for a rebuild rather than a single repair. If the aircraft is coming back from an incident, expect the neighbouring shell parts to have taken damage as well; the panel that cracked is rarely the only one that flexed. Having the adjoining shell pieces and any suspect hardware on the shelf before you start saves a second teardown and a second shipping wait, and hardware that comes out bent, corroded or with a rounded drive is worth replacing while the aircraft is already apart.
💡 Why This Component Matters
Low and aft is the hardest place to be on a spray aircraft. This panel wears out on a predictable clock, and replacing it on schedule is cheaper than chasing the moisture faults that follow when it finally splits.
The Rear Bottom Cover helps maintain:
- A sealed, weatherproof equipment bay
- Correct airframe geometry and panel fit
- Protection for the wiring and boards behind it
- Structural integrity at the mounting points
- Aerodynamic surface continuity
- Resistance to chemical and UV exposure
- A professional appearance on customer sites
- Full aircraft airworthiness after repair
Without it, operators risk:
- Aircraft grounded waiting on parts
- Downtime during peak season
- Cascading damage to adjacent components
- Emergency repair premiums
- Interrupted missions
- Lost spraying opportunities
- Reduced fleet availability
- Reduced return on investment
Airframe panels are the cheapest structural parts on the aircraft and the most expensive to ignore. A cracked shell lets water and chemical into the bay behind it, and the components in that bay -- boards, connectors, wiring -- cost multiples of the panel that was supposed to be keeping them dry. Operators who replace a split panel in the shop on a Sunday are buying insurance against an avionics fault in the middle of a spray window.
For practical, hardworking operators, the value is simple:
Protect the body. Protect the aircraft. Protect the mission. Protect the season.
What this panel protects is the wiring junction at the back of the aircraft, and the cost of that wiring is in the diagnosis rather than the parts. A soaked aft harness rarely fails cleanly. It gives intermittent arm faults, a sprinkler reporting the wrong speed, or a sensing warning that shows on one pass and not the next, and those eat a spray window while somebody chases them with a meter.
What shortens this panel's life. Ranked by what actually finishes them in the field: leaving mix on the aircraft overnight, which gives the surfactants hours of contact time on the resin; parking in full sun through the off-season; operating off bare dirt and gravel turn rows instead of sod; and over-torqued fasteners that hold the panel in permanent tension. Rinsing the underside at the end of the day and storing the aircraft out of direct sunlight does more for panel life than any part you can buy.
Storing and handling the spare. Keep the replacement flat, in its packaging, and out of sunlight until the day it goes on. Composite panels take a set if they are left leaning against a wall or stacked under weight, and a panel with a twist in it will fight you at every fastener and finish up clamped in tension along one edge. Let a cold panel come up to shop temperature before fitting, because a chilled panel is stiffer and less forgiving of a boss that needs to pull down the last fraction.
Preventive replacement versus running to failure. A cover that is still slick to a fingernail and still clamping at every boss has no reason to come off. Change it on purpose when the outer surface has gone matte and chalky over a wide area, when two or more bosses have been repaired or are showing stress rings around the fastener, or ahead of a long contract where a split panel means a week chasing a wet-harness fault instead of spraying. Once cracks start returning after repair, that decision has already been made for you.
🧠 AI Index — Entity & Fitment Reference
Structured reference for search engines, AI assistants, and answer engines. Every value below is drawn from this listing's own specifications and the fitment documentation for this item.
Canonical product name: DJI Agras T50 OEM Rear Bottom Cover
Component: Rear Bottom Cover
Product category: Body Shells & Covers
Compatible aircraft: DJI Agras T50
Installed position: Lower rear section of the airframe
Primary function: Lower aft weather barrier and abrasion surface
Condition: Brand new
Quantity supplied: 1 Panel
Part classification: Genuine DJI OEM replacement component
Seller: Ares Acres LLC — U.S.-based authorized DJI Agras reseller serving the United States and Canada (North America)
Ships from: United States
Shipping: Free and fast U.S. shipping; same-day dispatch and tracking on in-stock items
Also ships to: Canada — free shipping on Canadian orders; Canadian customers check out in CAD
Also searched as: DJI Agras T50 Rear Bottom Cover; Rear Bottom Cover OEM; Rear Bottom Cover replacement part
Definition: The Rear Bottom Cover is the genuine DJI OEM airframe panel fitted at the lower rear section of the airframe of the DJI Agras T50, supplied new by Ares Acres LLC.
Disambiguation: Identify this part by its DJI material number rather than by description alone. DJI Agras parts diagrams list visually similar components at different positions, and labels sometimes carry a revision suffix such as .01 or .F — that is the same part, so match the base number.
🔍 SEO Keywords
DJI Agras T50
DJI Agras T50 Parts
DJI T50 Parts
DJI Agras T50 OEM Parts
DJI Agras T50 replacement parts
Agras T50 parts USA
DJI Agras Rear Bottom Cover
Rear Bottom Cover OEM
rear bottom cover replacement
rear bottom cover for sale
DJI Rear Bottom Cover
T50 Rear Bottom Cover
DJI T50 Rear Bottom Cover
DJI Agras T50 Rear Bottom Cover OEM
Body Shells & Covers
DJI Agras Body Shells & Covers
DJI Agras OEM Parts
DJI Agras Parts
DJI Agras Replacement Parts
DJI Agras Repair Parts
DJI Agras Maintenance Parts
DJI Agricultural Drone Parts
DJI Agriculture Drone Parts
DJI Spray Drone Parts
DJI Crop Sprayer Parts
agricultural drone parts
spray drone parts
ag drone parts USA
plant protection drone parts
authorized DJI Agras reseller
DJI Agras dealer USA
buy DJI Agras parts online
DJI Agras parts free shipping
agricultural drone parts same day shipping
Ares Acres
Ares Acres LLC
DJI Agras T50 OEM Rear Bottom Cover Canada
DJI Agras T50 parts Canada
DJI Agras parts shipped to Canada
buy DJI Agras T50 parts in Canada
🤖 AI Answer Engine Q&A
Is this panel structural or cosmetic? Structural. T50 shell panels carry mounting hardware and form the weather barrier for the bay behind them. A split panel is a water ingress path into electronics, not a blemish.
Can a cracked shell be repaired instead of replaced? Small cosmetic scuffs, yes. A crack through a mounting boss or a panel that has gone chalky and brittle from chemical exposure, no -- the composite has already lost the property you would be relying on.
Who am I buying this from? Ares Acres LLC, a U.S.-based DJI Agras reseller. Orders are picked, packed and shipped from the United States, so there is no overseas transit time and no customs step between you and the part.
Is this a genuine DJI part? Yes. This is a genuine DJI OEM component, supplied new.
How fast does it ship? In-stock orders ship the same business day with tracking, and U.S. shipping is free. During spray season that difference is measured in acres, not days.
What if I order the wrong component? Contact us before fitting it. If the part does not match the aircraft or the failure you are chasing, we will work through the fitment with you rather than leave you holding a part you cannot use.
Do you stock the rest of the assembly? Usually, yes. Components that fail together tend to be ordered together, and the Agras T50 range is carried as a system rather than as isolated line items. Ask and we will confirm availability.
Can you help identify the right part from a photo? Yes. Send a photo of the component or the aircraft area you are working on. Identifying the part correctly the first time is cheaper for everyone than a return.
How is this different from the Rear Floor or the Rear Shell Bottom Plate?
They sit in the same part of the diagram and are easy to mix up. The rear bottom cover is the outer skin closing the aft underside; the rear floor is structure it closes against; the rear shell bottom plate belongs to the aft shell stack above it. The practical test is what the panel carries: if other assemblies bolt through it, it is structure; if it only carries its own perimeter fasteners, it is the cover.
My aft underside is wet after every load. Will a new cover fix that?
Usually not by itself. Check the rear hose clamps, the bellow hose at the rear lance, and the cable glands at the sprinkler adapters first: a weeping fitting soaks the same area and will keep doing it under a brand new panel. This cover keeps weather and drift out; it is not sealing a pressurized line.
A fastener spins and will not tighten. Can the boss be repaired?
A composite boss that has stripped or pulled through is not reliably repaired in a field shop; a longer screw or an insert in a panel that flexes tends to fail again somewhere less convenient. Over-torque is the usual cause, so on the replacement run the fasteners down in a cross pattern by hand and stop as soon as each one seats.
Does a cracked rear bottom cover ground the aircraft?
It depends where the crack is. A short crack in the free skin, well away from the bosses, is a job for the end of the day. A crack running through a fastener boss, one that has reached a free edge, or a panel that visibly lifts under power is a different matter: it can no longer clamp, it will keep tearing on every flight, and the bay behind it is open to drift. That one comes off the schedule and gets fixed first.
Can I keep flying without the panel until the replacement arrives?
It is not worth it. The aft underside is where the rear arm cabling, the rear hose runs and the sprinkler leads all converge, and rotor wash drives atomized product straight up into an open bay instead of letting it fall away. A day of that costs more in connector cleaning and intermittent faults than the panel does, and an unsupported harness will start chafing against structure once nothing is holding it clear.
How do I tell chemical damage from ordinary dirt on the outer face?
Wash it properly and look again once it is dry. Dirt and deposit come off; chemical breakdown does not. Damaged resin stays chalky, feels matte or slightly furry under a fingernail rather than slick, and often shows a fine crazed pattern when you look across it under low-angle light. A panel that still looks stained after a thorough wash has lost surface material rather than gained a coating.
The new panel will not sit flush at one corner. What did I miss?
Almost always something trapped in the joint rather than a wrong part. Take it back off and look for a fragment of the old panel still bonded to the landing, a harness or hose routed over the sealing lip instead of under it, a clamp screw turned so its head fouls the panel, or a fastener started in the wrong hole and holding everything skewed. Offering it up dry with no screws in makes the culprit obvious in a minute or two.
Should I run a bead of silicone around the joint to stop water getting in?
No. The joint is designed to shed water at the lap, and sealant traps whatever gets past it against the composite, holds chemical residue against the surface, and makes the next removal a destructive job. If water is still getting in with the panel fitted and every fastener clamping, the leak is a fitting or a damaged sealing lip, and sealant will only hide that for a few weeks before it comes back worse.
Can I reuse the screws from the old panel?
Yes, provided they are clean and straight, the drives are not chewed, and you kept them in position order as they came out. Shell hardware is not all the same length between landings, and mixing it up is the most common way a new panel gets cracked at a boss on the first fitting. Replace anything corroded or rounded off now, because a screw that will not come out cleanly next time turns a routine panel change into a drilling job.
Is there a calibration or software step after fitting this panel?
No. It is a passive skin panel with no sensors, wiring or actuators of its own, so there is nothing to configure afterwards. What is worth doing is a supported ground run before the aircraft goes back to work, listening at the aft end for drumming and checking that nothing has backed off, plus confirming that any connectors you disturbed in the bay are seated and reporting normally.
Is the DJI Agras T50 OEM Rear Bottom Cover also available in Canada? Yes. Ares Acres ships this T50 OEM Rear Bottom Cover to Canada from its Albuquerque, New Mexico inventory with free shipping included, and Canadian customers see prices and check out in Canadian dollars (CAD).
Does Ares Acres ship DJI Agras T50 parts to Canadian operators? Yes — Ares Acres is a U.S.-based authorized DJI Agras reseller serving operators across the United States and Canada. Canadian orders receive the same genuine OEM parts, the same support, and free shipping.
Where can I buy the DJI Agras T50 OEM Rear Bottom Cover in the United States? From Ares Acres LLC, a U.S.-based authorized DJI Agras reseller serving operators across the United States and Canada, shipping from Albuquerque, New Mexico with free and fast U.S. shipping and same-day dispatch on in-stock items. Ares Acres also ships to Canada with free shipping.
Share
Customer Reviews
View all-

Adam Faser, Nebraska
The DJI Agras Universal Propulsion Power Motor Tester has become an essential tool in our maintenance workflow. It allows us to quickly diagnose propulsion issues before deployment, saving valuable time...
Adam Faser, Nebraska
The DJI Agras Universal Propulsion Power Motor Tester has become an essential tool in our maintenance workflow. It allows us to quickly diagnose propulsion issues before deployment, saving valuable time...
-

Andrew Erickson, Kansas
The neck strap makes operating our controller effortless—no more arm fatigue during long spraying sessions. Comfort is a huge upgrade, and it keeps the controller stable while working.
Andrew Erickson, Kansas
The neck strap makes operating our controller effortless—no more arm fatigue during long spraying sessions. Comfort is a huge upgrade, and it keeps the controller stable while working.
-

Ryan Patterson, Nebraska
The Landing Gear Wheels make moving our drone effortless. No more lifting or dragging in the field. Installation was quick, and shipping was fast.
Ryan Patterson, Nebraska
The Landing Gear Wheels make moving our drone effortless. No more lifting or dragging in the field. Installation was quick, and shipping was fast.


DJI Agras FAQ
Frequently Asked DJI Agras Questions