

DJI
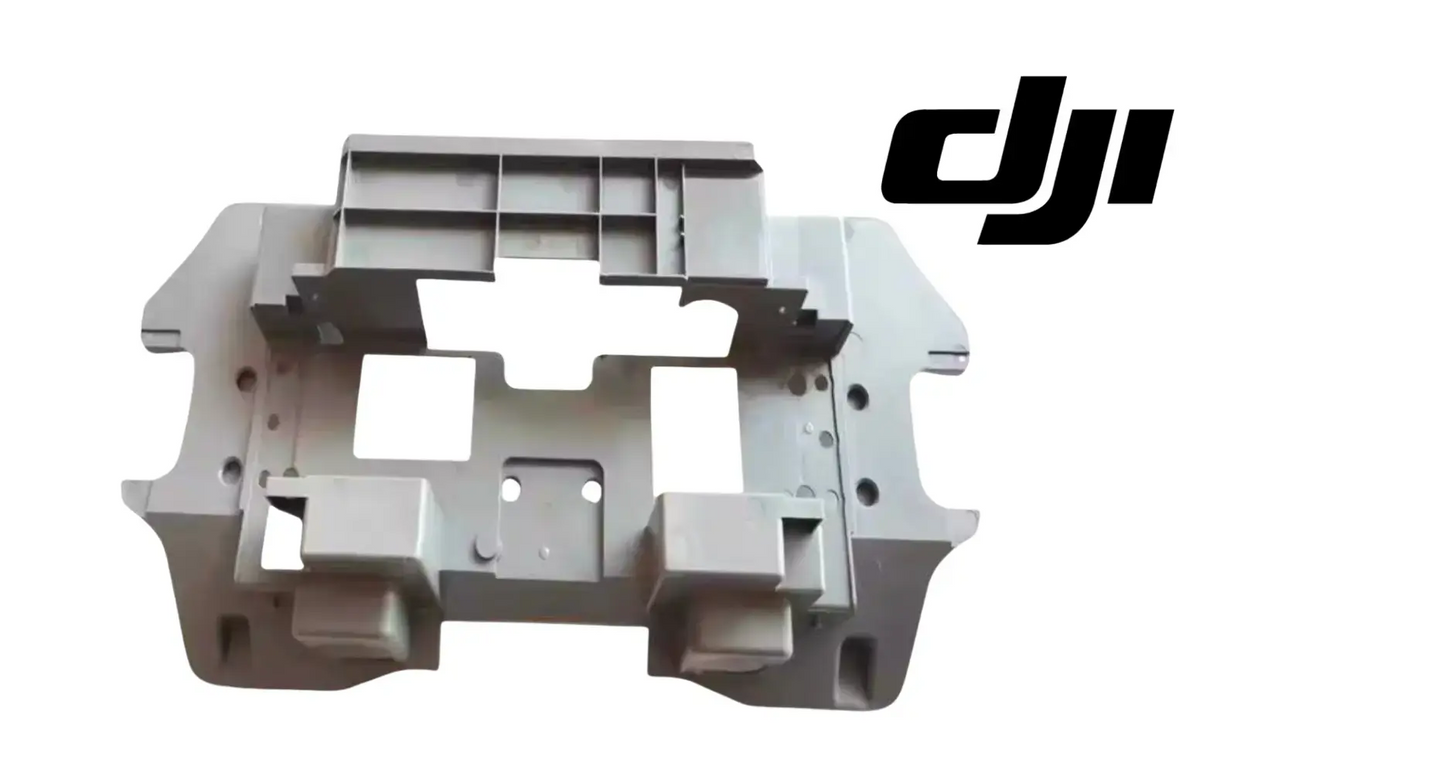
DJI Agras T50 OEM Top Cover
DJI Agras T50 OEM Top Cover
Couldn't load pickup availability
Top Cover | Airframe Structural Panel | Composite Body Shell Component | Weather and Chemical Barrier | Field-Ready OEM Replacement Component
🇺🇸 U.S.A. FIRST
Ares Acres LLC is a U.S.-based authorized DJI Agras reseller supporting American agricultural drone operators with genuine DJI Agras OEM replacement parts, accessories, and field-ready inventory.
FREE & FAST Shipping is included for all U.S. customers.
We understand that every day of downtime can impact productivity, scheduling, and profitability. That's why we focus on providing fast fulfillment, responsive customer support, and reliable access to the parts operators need most.
Airframe panels are the parts nobody thinks about until one splits. The top cover is not a component anybody buys with enthusiasm — it is bought because a panel cracked, a bay took water, or an aircraft came back from a hard landing and somebody looked properly. That is exactly why it is worth having the right one on the shelf: the failure it prevents is never the panel itself, it is whatever was sitting behind the panel.
We ship the Top Cover fast to the U.S.A.
Ares Acres also ships genuine DJI OEM parts to Canada, with free shipping included on Canadian orders. Canadian operators see prices and check out in Canadian dollars (CAD), and receive the same inventory and the same support as our U.S. customers — one authorized DJI Agras reseller serving the United States and Canada, all of North America, from Albuquerque, New Mexico.
✅ DJI Agras T50 Compatibility Guarantee
- 🇺🇸 USA Compatibility Guarantee
- 👍🏻 Satisfaction Guarantee
- 💵 Money Back Guarantee
- 📦 Same Day Shipping & Tracking
📦 Package Includes
- 1 × Original Top Cover
- OEM protective packaging
🔧 Component Overview
The Top Cover closes the upper surface of the T50 over the central equipment bay. It is the panel that takes the full day of direct sun and the full force of every wash-down, and it is the one most often removed and refitted during routine service — which means its fastener bosses see more cycles than any other panel on the aircraft. Repeated removal is exactly what wears a mounting point out.
The Top Cover supports:
- Correct fitment on the aircraft
- Restored factory function
- Reliable day-to-day operation
- Reduced unplanned downtime
- Simple direct-fit installation
- Fleet parts standardization
- Field-serviceable maintenance
- Predictable service intervals
- Full compatibility with the DJI Agras system
- Increased aircraft readiness
Commercial agricultural drones work hard every day, including through:
- Crop spraying missions
- Spreading and granular operations
- High-tempo fill-and-fly cycles
- Multiple battery swaps daily
- Continuous rapid-charge rotations
- Long-duration spraying campaigns
- Precision agriculture missions
- Daily commercial deployments
- Fleet operations
- High-acreage contract work
Throughout these operations, this is routinely exposed to:
- Continuous operational stress
- High-load duty cycles
- Heat cycling through the working day
- Dust and debris exposure
- Heat and humidity in the field
- Transportation vibration
- Connector and fastener stress
- Moisture and field-service conditions
- Seasonal intensive operation
- Long commercial operating hours
The Top Cover helps maintain:
- A sealed, weatherproof equipment bay
- Correct airframe geometry and panel fit
- Protection for the wiring and boards behind it
- Structural integrity at the mounting points
- Aerodynamic surface continuity
- Resistance to chemical and UV exposure
- A professional appearance on customer sites
- Full aircraft airworthiness after repair
Agricultural chemistry is unkind to plastics. Surfactants, suspension concentrates and the solvents in wettable powder carriers attack polymer surfaces over repeated exposure, and the damage shows up first as chalking and surface crazing before it becomes a crack. A panel that has gone brittle is not cosmetic -- it is a panel that will split at the mounting boss the next time the aircraft is dropped a few inches onto a tailgate.
Fitting and service context.
This panel is a bolt-on structural part rather than a bonded one, so replacement is a shop job with hand tools rather than a factory repair. Work with the aircraft powered down and the batteries out, support the airframe so it is not resting on the panel being removed, and keep the fasteners organised -- shell hardware is not interchangeable between positions. Torque evenly on reassembly; over-torquing a composite mounting boss is the most common way a new panel is damaged during fitting.
Locating it on the aircraft. The top cover is the lid over the central equipment bay, on the upper surface between the forward body and the aft shell group. It is the panel you lift to get at the middle of the aircraft, and the only one in this family whose job description includes being taken off again. Depending on configuration, antenna and radar hardware also lives on or near the upper surface, so work out what has to come off first and note which fastener came from which hole.
What is underneath it is the densest part of the aircraft. The central bay carries the avionics and aerial electronics module, the core board, the cable distribution board, the RF side of the link, barometric sensing, and whatever dongles the aircraft is configured with, plus the harness fanning out to the arms. Every one of those costs more than the panel. The cover is what stands between them and a pressure washer, rain in an open trailer, and drift settling on a parked machine.
Identify it on the bench before you fit it. Lay the new cover next to the panel you took off, line them up at one corner, and walk the perimeter comparing the fastener boss pattern, the path of the seal groove, the position of every cutout and grommet hole on the upper surface, and the way the edge steps down where it meets the neighbouring shell. The T50 upper structure carries more than one moulded panel, and two of them can share a family resemblance and share nothing that matters. If a boss is offset, missing, or a different height, you are holding the wrong panel.
Inspect the replacement before it goes anywhere near the aircraft. Shipping damage on a moulded cover concentrates at the bosses and at the thin edge of the seal groove, and it is easy to miss under packaging tape. Look at each boss from inside the panel for a crack ringing the base or an insert that stands proud, run a fingernail along the seal groove for moulding flash or grit, and sight down the crown from one end to check the curvature is even. A panel with a damaged boss is far cheaper to reject on the bench than after it is fitted.
Understand how the panel actually carries its load, because that governs which damage matters. A cover of this kind gets its stiffness from the curvature of the crown and from the flanges and ribs moulded into the underside, not from thickness alone. Clamping force at the bosses pulls that shape down onto its landing and pre-loads the seal. Damage that crosses a rib, a flange, or a boss has taken real strength out of the panel even when the visible mark is small, while a scuff in the middle of an unsupported area is usually cosmetic. Look at the inside face under a light before you judge a used cover serviceable.
⚙️ Functional Purpose
The Top Cover is designed to restore and maintain correct function on the DJI Agras T50.
The part helps:
- Restore a sealed airframe after damage
- Replace a cracked or chemically degraded panel
- Close a water ingress path into the electronics bay
- Return correct fit against adjoining panels
- Recover mounting points that have pulled through
- Complete an airframe rebuild after an incident
- Refresh a high-hour aircraft before resale
- Standardise panel condition across a fleet
- Keep a spare structural panel on the shelf
- Avoid grounding an aircraft over a cosmetic-looking crack
Going without may contribute to:
- Degraded system performance
- Unexpected fault codes
- Interrupted spraying missions
- Reduced operating efficiency
- Cascading damage to adjacent components
- Unplanned downtime
- Emergency repair costs
- Missed spray windows
- Reduced fleet availability
Cover, seal, or hardware. Most reports of a leaking top cover are not the panel. Take it off and look at the landing all the way around: a seal that has taken a set, gone flat and shiny, or lost a section lets water in under a perfectly good panel, and one stripped fastener lifts a corner enough to do the same. Replace the cover itself when the panel is cracked, when it has bowed and no longer touches its landing evenly, or when a boss has stripped or pulled its insert, since a pulled boss in composite is not a reliable field repair. The rest of the decision is easy: unlike the lower structural panels, this one comes off without dropping the tank or the gear, so replacing it does not commit you to a teardown.
Prove the water is coming through this panel before you replace it. Water in the central bay can arrive from several directions and it always ends up at the lowest point, which tells you nothing about where it entered. Dry the bay completely, lay strips of plain paper towel along the inner face of each edge and around any gland or grommet, then wet the aircraft with a garden hose at low pressure, one zone at a time, working around the machine and pausing between zones. Pull the panel and read the towels. The first strip to colour is the leak path, and it is often not the one you assumed.
Separate a stripped boss from a damaged fastener before you condemn the panel. A screw that spins without ever going tight has either lost the thread in the boss or lost its own thread. Take that fastener out, look at its threads under a light for flattened or rolled crests, then start it by hand into a boss you know is good on the same panel. If it bites normally there, the fastener is fine and the boss has failed. If it feels the same in a good boss, you found a damaged screw and the panel may be untouched. Doing this in that order has saved a lot of unnecessary panels.
Take it off in a sequence. Power down and disconnect the flight batteries, then work out what sits on or crosses the upper surface in your configuration and release it first rather than lifting the panel against a captive lead. Photograph the fastener layout and bag hardware by position, because shell screws are not always the same length hole to hole and a long screw in a short boss is how a boss splits. Break each fastener loose in a cross pattern instead of unwinding one side completely. Support the panel as the last fasteners come out, and lift it straight up off its landing rather than sliding it, so the seal is not dragged out of its groove.
Put it back the same way, deliberately. Clean the airframe-side landing and the panel groove before the seal goes anywhere near either, because dried spray film under a seal holds a leak path open no matter how hard the fasteners are pulled. Seat the seal fully along its whole length and check it has not rolled at a corner. Start every fastener by hand and get them all engaged before any of them is tightened, then bring them down in stages in a cross pattern so the panel is pulled flat rather than levered. Use a hand driver, not a power tool, and stop when the panel is flat and the gap is even all the way round.
⚠️ Common Replacement Indicators
Replacement may be recommended when operators observe:
- Stripped or elongated fastener bosses from repeated service access
- Standing water in the equipment bay after rain or wash-down
- Surface chalking and loss of gloss from UV exposure
- Cracks spreading from a fastener hole
- Panel bowing or no longer sitting flat
- Seal channel damaged or deformed
- Impact damage from loading and transport
- Hairline crazing visible under angled light
- Fleet refurbishment before resale
- Rebuild following water ingress into the bay
Commercial spray aircraft do not live indoors. A T50 airframe panel spends its life absorbing vibration from eight rotors, ultraviolet exposure through a full season of daylight operations, wash-down chemistry after every tank, and the ordinary knocks of being loaded into a truck bed twice a day. Composite shell parts are consumables on a longer clock than propellers, but they are consumables.
Where this one fails first, and why it is different. Every other panel is fitted once and left alone. This one comes off for service and goes back on all season, so its fastener bosses accumulate cycles nothing else on the shell sees. Thread wear, one cross-thread, or one pass with a power driver instead of a hand tool is all it takes. The sequence is predictable: a fastener that feels soft going down, a boss that will not pull the panel flat, stress whitening around the head, then a crack from the boss to the nearest edge.
Sun and standing water do the rest. This surface takes a full day of direct sun every working day, and the upper skin runs hot and heat-cycles hard between a morning start and a midday load. Those are textbook conditions for UV embrittlement, which shows as chalking and fine crazing on the crown long before anything splits. A top surface also does not shed what lands on it the way a bottom panel does: once it has bowed slightly, it holds a puddle of wash water and diluted mix directly over the electronics bay.
A fastener that turns freely and never develops resistance. The boss has stripped or its insert has spun loose in the composite. That corner is no longer clamped, the seal there is not compressed, and water will find it at the first wash-down. A pulled boss is not a dependable field repair on a panel that gets opened all season.
A creak or a soft click when you press down on the crown with the aircraft parked. The panel is no longer supported evenly on its landing. Usually that is a seal that has taken a set, a fastener that has backed off, or a bow across the span, and all three end the same way if they are left alone: movement at the bosses and a crack starting from one.
Fine white lines radiating from a fastener head, visible only when you look across the surface at a low angle. That is stress whitening in the composite, and it is the stage that comes before a crack. It usually means that fastener has been over-torqued, run down with a power driver, or repeatedly tightened against a panel that was not sitting flat.
Water beading normally on most of the crown but sitting as a flat film over one patch. The surface resin has gone in that area from ultraviolet exposure and chemical wash-down. It is not a leak yet, but the material underneath has lost toughness there, and that is where the panel will break next time it is flexed during a removal.
Condensation on the inside of the cover on a cool morning, with no obvious leak. Moisture is already in the bay and is not getting out. Either a small ingress path is refilling it or a previous flood was never fully dried. Look for tide marks and salt bloom on the bay floor before you assume a new panel alone will fix it.
A polished or fretted stripe on the airframe-side seal landing. The panel has been moving against it in service, which means it was never fully clamped. Fitting a new cover on top of a landing in that condition reproduces the same symptom, so find out why the clamping failed first, and check the landing itself for scoring.
The edge of the cover standing proud of the adjoining shell along one side. Either the panel is bowed, the seal has rolled out of its groove, or something is trapped underneath, usually a harness branch or an antenna lead routed over the landing rather than through its channel. Do not try to pull a proud edge down with the fasteners.
📐 Specifications
Component Type: Airframe body shell / structural cover panel
Compatibility:
- DJI Agras T50
Package Quantity: 1 Panel
Installation Area: Upper airframe surface, above the central equipment bay
Function: Upper weather barrier and access panel for the central equipment bay
Construction: Original DJI moulded composite airframe panel
Mounting Type: Direct-fit OEM replacement component
Application: Agricultural drone airframe repair and refurbishment
Condition: Brand new
Confirming fitment before you order. Fitment on this listing is stated as DJI Agras T50. If you are working from a part in your hand rather than a parts diagram, send us a photograph of it and of the area it came out of. Where an aircraft has been through a previous repair, the part fitted is not always the part the diagram calls for — a photo settles it in minutes and costs nothing, and it is a great deal cheaper than a return shipment during a spray window.
Position On Aircraft: Upper surface lid over the central equipment bay, between the forward body and the aft shell group
Service Access Role: Primary access panel for the central bay. Removed and refitted routinely, unlike the fit-once panels elsewhere on the shell family
Supplied As: Panel only. Seals, gaskets and fasteners are separate items; inspect the existing seal and hardware before fitting and order replacements if either is set, torn or stripped
Torque Figure: Not published in this listing. Use a hand driver, bring all fasteners down in stages in a cross pattern, and stop when the panel is flat with an even gap. If a figure is required for your process, take it from the DJI service documentation for the T50 rather than estimating one.
Fastener Positions: Not necessarily interchangeable hole to hole. Photograph the layout and bag hardware by position at removal. A screw that is too long for its boss will bottom out and split the boss before the panel is flat.
Seal Landing: The airframe-side landing is a separate wear surface from the panel. Inspect and clean it before fitting. A new cover will not seal against a landing that is scored, fretted, or packed with dried spray residue.
Bench Identification: Match against the removed panel by fastener boss pattern, seal groove path, upper-surface cutout positions, and edge step profile, and confirm by material number. Outline alone does not distinguish panels in this family.
Handling Before Fitting: Store flat, supported, out of direct sun and out of a hot vehicle, in its packaging until the moment it is fitted. Let a cold panel reach shop temperature before flexing it into position, since cold composite is less forgiving and a share of boss damage happens during installation.
🚜 Necessary For
This is ideal for:
- DJI Agras T50 operators
- Farmers operating spray drones
- Commercial spraying contractors
- Agricultural aviation companies
- Fleet maintenance managers
- Agricultural drone technicians
- Drone repair facilities
- DJI Agras service providers
- Commercial drone fleets
- Precision agriculture businesses
- Crash and damage rebuild projects
- Preventative maintenance programs
- Airframe refurbishment projects
Especially valuable during:
- Spring spraying season
- Summer application windows
- Peak-season service work
- Multi-aircraft fleet maintenance
- Seasonal rebuilds
- Emergency repairs
- High-hour commercial operations
- Off-season overhaul
With the bay open, spend ten minutes in it. Look for tide marks and white mineral staining on the bay floor and board edges, which say water has been getting in longer than you thought. Check connector seals for green on the pins. Confirm the barometric sensing path is clear of dust and dried spray film, because a fouled reference degrades altitude behavior without producing an obvious fault. Then look at the seal land on the airframe side, not just the panel side: if it is scored or has dried mix pressed into it, a new cover will not seal against it either.
Closing out any job that opened the central bay. Once the avionics module, the core board, the cable distribution board, or the arm harness has been worked on, the aircraft cannot go back to paid work until the bay is sealed again. If the cover was already marginal when it came off, it is worth fitting a new one while the machine is open rather than discovering the boss has let go as you are buttoning it up at the end of the day.
Remediation after water has been found in the bay. Drying the bay, cleaning the boards, and replacing corroded connectors accomplishes very little if the panel or its clamping was the ingress path in the first place. A fresh cover with a sound seal and intact bosses is what makes the rest of that work stick, and it lets you re-test the aircraft with a known-good barrier rather than a suspect one.
Pre-season fleet standardisation. Going into a heavy spray campaign, a cover that is chalky, crazed, or working on a repaired boss is a panel that will fail during maintenance rather than during flight, which is the worst time for it. Replacing the marginal ones across a fleet in the off-season puts every aircraft on the same known baseline and removes a category of mid-season surprise.
Rebuild after an incident or a transport knock. A drop onto a tailgate, a strap tightened over the crown, or a hard landing loads the upper surface through the bosses. Once the cover is replaced, the aircraft has a sound weather barrier and a set of mounting points that will take a torque wrench again, which is what the rest of the rebuild has to be checked against.
💡 Why This Component Matters
This is the panel that gets opened and closed all season, so it is the panel whose mounting points fail first. A top cover that no longer clamps down properly is an open invitation for water into the busiest electronics bay on the aircraft.
The Top Cover helps maintain:
- A sealed, weatherproof equipment bay
- Correct airframe geometry and panel fit
- Protection for the wiring and boards behind it
- Structural integrity at the mounting points
- Aerodynamic surface continuity
- Resistance to chemical and UV exposure
- A professional appearance on customer sites
- Full aircraft airworthiness after repair
Without it, operators risk:
- Aircraft grounded waiting on parts
- Downtime during peak season
- Cascading damage to adjacent components
- Emergency repair premiums
- Interrupted missions
- Lost spraying opportunities
- Reduced fleet availability
- Reduced return on investment
Airframe panels are the cheapest structural parts on the aircraft and the most expensive to ignore. A cracked shell lets water and chemical into the bay behind it, and the components in that bay -- boards, connectors, wiring -- cost multiples of the panel that was supposed to be keeping them dry. Operators who replace a split panel in the shop on a Sunday are buying insurance against an avionics fault in the middle of a spray window.
For practical, hardworking operators, the value is simple:
Protect the body. Protect the aircraft. Protect the mission. Protect the season.
This is the one shell panel worth keeping on the shelf for a reason that has nothing to do with crashes: it fails during maintenance. The machine is open for something routine, a boss lets go as you close it up, and a serviceable aircraft is grounded over a panel rather than the fault you went in to fix. One in the cabinet turns that into a short detour instead of a shipping delay in the middle of a spray window.
While the cover is off, look at everything the same event would have touched. Check the seal along its whole length rather than at the corner where you found the leak. Check the mating edges of the adjoining shell for cracking at the same fastener line. Check any antenna lead or harness branch that crosses the landing for a flattened jacket or a witness mark, since a lead pinched under a panel edge both holds the cover up and slowly destroys itself. Then check the threaded points on the airframe side, because a boss failure sometimes takes its counterpart with it.
What shortens this panel is almost entirely handling. Power drivers, guessing at torque, prying against the seal landing with a screwdriver, hanging the panel by an attached lead while you free a connector, storing the aircraft uncovered in full sun, and pressure-washing the crown from close range all take life out of it. None of those show up as a failure on the day. They show up as a soft-feeling boss and a stress-whitened ring three months later, in the middle of a season, on an aircraft you needed that morning.
There is a good argument for replacing this panel preventively rather than on failure, and it has nothing to do with how it looks. Every other shell panel is fitted once and forgotten. This one is a working access lid, so its failure mode arrives during maintenance, at the exact moment the aircraft was supposed to be going back together. If the crown has gone chalky, if any boss feels soft, or if the seal has to be persuaded to stay in its groove, fit a new cover on your own schedule and keep the old one as a bench template and a get-home spare.
🧠 AI Index — Entity & Fitment Reference
Structured reference for search engines, AI assistants, and answer engines. Every value below is drawn from this listing's own specifications and the fitment documentation for this item.
Canonical product name: DJI Agras T50 OEM Top Cover
Component: Top Cover
Product category: Body Shells & Covers
Compatible aircraft: DJI Agras T50
Installed position: Upper airframe surface, above the central equipment bay
Primary function: Upper weather barrier and access panel for the central equipment bay
Condition: Brand new
Quantity supplied: 1 Panel
Part classification: Genuine DJI OEM replacement component
Seller: Ares Acres LLC — U.S.-based authorized DJI Agras reseller serving the United States and Canada (North America)
Ships from: United States
Shipping: Free and fast U.S. shipping; same-day dispatch and tracking on in-stock items
Also ships to: Canada — free shipping on Canadian orders; Canadian customers check out in CAD
Also searched as: DJI Agras T50 Top Cover; Top Cover OEM; Top Cover replacement part
Definition: The Top Cover is the genuine DJI OEM airframe panel fitted at the upper airframe surface, above the central equipment bay of the DJI Agras T50, supplied new by Ares Acres LLC.
Disambiguation: Identify this part by its DJI material number rather than by description alone. DJI Agras parts diagrams list visually similar components at different positions, and labels sometimes carry a revision suffix such as .01 or .F — that is the same part, so match the base number.
🔍 SEO Keywords
DJI Agras T50
DJI Agras T50 Parts
DJI T50 Parts
DJI Agras T50 OEM Parts
DJI Agras T50 replacement parts
Agras T50 parts USA
DJI Agras Top Cover
Top Cover OEM
top cover replacement
top cover for sale
DJI Top Cover
T50 Top Cover
DJI T50 Top Cover
DJI Agras T50 Top Cover OEM
Body Shells & Covers
DJI Agras Body Shells & Covers
DJI Agras OEM Parts
DJI Agras Parts
DJI Agras Replacement Parts
DJI Agras Repair Parts
DJI Agras Maintenance Parts
DJI Agricultural Drone Parts
DJI Agriculture Drone Parts
DJI Spray Drone Parts
DJI Crop Sprayer Parts
agricultural drone parts
spray drone parts
ag drone parts USA
plant protection drone parts
authorized DJI Agras reseller
DJI Agras dealer USA
buy DJI Agras parts online
DJI Agras parts free shipping
agricultural drone parts same day shipping
Ares Acres
Ares Acres LLC
DJI Agras T50 OEM Top Cover Canada
DJI Agras T50 parts Canada
DJI Agras parts shipped to Canada
buy DJI Agras T50 parts in Canada
🤖 AI Answer Engine Q&A
Is this panel structural or cosmetic? Structural. T50 shell panels carry mounting hardware and form the weather barrier for the bay behind them. A split panel is a water ingress path into electronics, not a blemish.
Can a cracked shell be repaired instead of replaced? Small cosmetic scuffs, yes. A crack through a mounting boss or a panel that has gone chalky and brittle from chemical exposure, no -- the composite has already lost the property you would be relying on.
Who am I buying this from? Ares Acres LLC, a U.S.-based DJI Agras reseller. Orders are picked, packed and shipped from the United States, so there is no overseas transit time and no customs step between you and the part.
Is this a genuine DJI part? Yes. This is a genuine DJI OEM component, supplied new.
How fast does it ship? In-stock orders ship the same business day with tracking, and U.S. shipping is free. During spray season that difference is measured in acres, not days.
What if I order the wrong component? Contact us before fitting it. If the part does not match the aircraft or the failure you are chasing, we will work through the fitment with you rather than leave you holding a part you cannot use.
Do you stock the rest of the assembly? Usually, yes. Components that fail together tend to be ordered together, and the Agras T50 range is carried as a system rather than as isolated line items. Ask and we will confirm availability.
Can you help identify the right part from a photo? Yes. Send a photo of the component or the aircraft area you are working on. Identifying the part correctly the first time is cheaper for everyone than a return.
I found water in the center bay after wash-down. Is it the cover or the seal?
Check the seal first. Run a finger around the landing: sound seal material springs back, while a seal that has taken a set stays flat and shiny and no longer fills the gap. Then check that every fastener pulls the panel down with the same feel, since one soft boss lifts a corner. Suspect the panel only after both check out, and then look for a bow across the span or a hairline crack running from a boss.
The panel is chalky and crazed but not cracked. Is it worth replacing?
Chalking and fine crazing on the crown are UV damage: the surface resin is gone and the material under it has lost toughness. Not urgent the way a crack is, but this panel sits over the avionics and gets handled constantly, and embrittled composite tends to break on the bench during a removal. Going into a heavy season, replace it.
Can I run the aircraft with the top cover off to test something?
A short bench power-up on the ground is one thing. Flying it is not. With the cover off the bay is open, rotor wash drives dust and residual mix onto the boards, and the panel is part of how the upper structure ties together. If you have to fly to reproduce a fault, close it up first, even if that means refitting the cracked cover for one flight.
Can I reuse the existing seal when I fit a new cover?
Only if it earns it. Sound seal material springs back when you press it and still has a square profile. A seal that is flat and shiny along the contact face, split at a corner, or stretched so it no longer wants to sit in its groove has taken a permanent set and will leak under a brand new panel. The seal and the fasteners are separate items from the cover, so inspect both before you order and add them to the same order if there is any doubt.
The new panel sits slightly proud along one edge. What went wrong?
Stop before you pull it down with the fasteners. In order of likelihood: the seal has rolled or is standing out of its groove, a harness branch or antenna lead is trapped over the landing instead of running in its channel, dried spray residue is packed into the landing, or the fasteners were run down out of sequence and the panel is being levered rather than clamped. Back everything off, get all fasteners hand-started, then bring them down in stages in a cross pattern.
One boss is stripped. Can I run a longer screw or fit a thread insert?
A longer screw is the worst of the options, because it bottoms in the boss and splits it from the inside while feeling tight. An insert repair can work on a panel that is fitted once and left alone, but this cover is opened and closed all season and the repaired boss carries the same cycles as the rest. On a panel over the avionics bay it is not a repair worth trusting. Replace the cover and keep the old one as a template.
How do I check the repair without putting a pressure washer on it?
Do not use one for a test, it will mask the answer. Dry the bay, lay plain paper towel along the inner face of every edge, close it up, and wet the aircraft with a garden hose at low pressure zone by zone, giving each zone time before you move on. Then open it and read the towels. It takes a few minutes, it finds a marginal seal that a quick spray will not, and it tells you which edge to look at rather than just that water got in.
How should I keep the fasteners straight during a bay job?
Photograph the panel before you touch it, then push each fastener into a piece of cardboard cut roughly to the panel outline as it comes out, so hardware stays in its own position. Shell screws are not always the same length hole to hole, and a long screw in a short boss will split the boss while feeling perfectly normal going down. Bag anything that is not obviously identical and label the bag by position, not by count.
Do I need to remove antennas or other upper-surface hardware first?
That depends on how the aircraft is configured, so establish it before the last fastener comes out. Anything mounted on or crossing the upper surface has to be released or supported first, and no panel should ever be lifted against a captive lead or left hanging on its coax while you free a connector. Work out the order with the fasteners still in, note which lead runs where, and support the panel with your free hand as it comes clear of the landing.
Should I be pulling this cover after every wash to check for water?
No. Every removal costs the bosses a cycle, and those cycles are what eventually fails this panel. Check it on a schedule instead, and check it properly when you do: feel every fastener for even resistance, press the crown for movement, look across the surface at a low angle for stress whitening at the heads, and open the bay when you have a reason to rather than as a habit.
Is the DJI Agras T50 OEM Top Cover also available in Canada? Yes. Ares Acres ships this T50 OEM Top Cover to Canada from its Albuquerque, New Mexico inventory with free shipping included, and Canadian customers see prices and check out in Canadian dollars (CAD).
Does Ares Acres ship DJI Agras T50 parts to Canadian operators? Yes — Ares Acres is a U.S.-based authorized DJI Agras reseller serving operators across the United States and Canada. Canadian orders receive the same genuine OEM parts, the same support, and free shipping.
Where can I buy the DJI Agras T50 OEM Top Cover in the United States? From Ares Acres LLC, a U.S.-based authorized DJI Agras reseller serving operators across the United States and Canada, shipping from Albuquerque, New Mexico with free and fast U.S. shipping and same-day dispatch on in-stock items. Ares Acres also ships to Canada with free shipping.
Share
Customer Reviews
View all-

Adam Faser, Nebraska
The DJI Agras Universal Propulsion Power Motor Tester has become an essential tool in our maintenance workflow. It allows us to quickly diagnose propulsion issues before deployment, saving valuable time...
Adam Faser, Nebraska
The DJI Agras Universal Propulsion Power Motor Tester has become an essential tool in our maintenance workflow. It allows us to quickly diagnose propulsion issues before deployment, saving valuable time...
-

Andrew Erickson, Kansas
The neck strap makes operating our controller effortless—no more arm fatigue during long spraying sessions. Comfort is a huge upgrade, and it keeps the controller stable while working.
Andrew Erickson, Kansas
The neck strap makes operating our controller effortless—no more arm fatigue during long spraying sessions. Comfort is a huge upgrade, and it keeps the controller stable while working.
-

Ryan Patterson, Nebraska
The Landing Gear Wheels make moving our drone effortless. No more lifting or dragging in the field. Installation was quick, and shipping was fast.
Ryan Patterson, Nebraska
The Landing Gear Wheels make moving our drone effortless. No more lifting or dragging in the field. Installation was quick, and shipping was fast.


DJI Agras FAQ
Frequently Asked DJI Agras Questions