DJI C12000 Fast Charging: Guía de 12 kW, Three-Phase Power y Seguridad
Share
DJI C12000 Fast Charging: Guía de 12 kW, Three-Phase Power y Seguridad
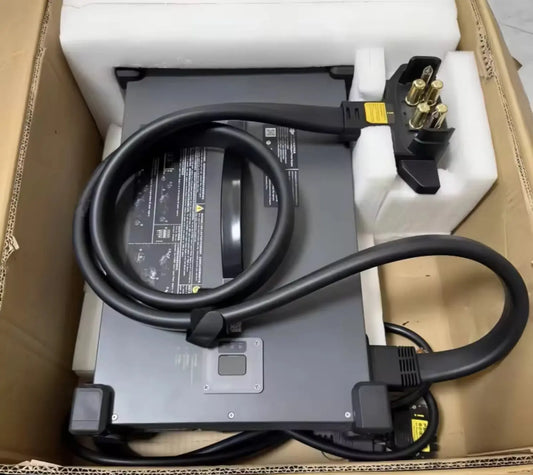
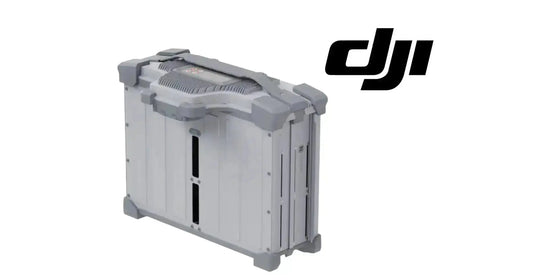
El DJI C12000 Intelligent Power Supply puede funcionar como un charger de campo de alta potencia, pero el modo fast charging de hasta 12 kW no debe confundirse con un simple “plug-in” de mayor velocidad. El DJI C12000 Intelligent Power Supply User Guide v1.0 trata la alimentación eléctrica, ventilación, battery cooling, activation, status LEDs y shutdown como un solo sistema. La conexión eléctrica de fast charging debe ser realizada por un qualified electrician siguiendo el manual actual de DJI y las normas eléctricas aplicables.
Respuesta rápida: para el C12000 CSX901-12000, DJI publica fast charging con una fuente 380 V three-phase y al menos 15 kW disponibles. El charger puede entregar hasta 12,000 W. Mantenga al menos 50 cm libres alrededor de sus ventilation openings y más de 30 cm entre charger y charging battery. Use el air-cooled heat sink/cooling system correcto, monitorice LEDs y DJI Agras, y no desconecte conexiones de alta corriente mientras el sistema está energizado.
1. Qué significa realmente “12 kW fast charging”
El número 12 kW describe la potencia máxima de salida publicada para el fast-charge path del C12000. No significa que todas las batteries, temperatures o input sources vayan a recibir exactamente 12 kW durante toda la sesión.
2. El charger regula la carga de forma inteligente
La batería, el charger y el thermal-management system trabajan juntos. Battery temperature, battery state, protection logic y input conditions pueden reducir la potencia efectiva durante partes del ciclo.
3. Modelo CSX901-12000
DJI publica para el C12000 CSX901-12000 un fast-charge input de 175–520 VAC, 50/60 Hz, 22 A max mediante three-phase supply.
4. Fast-charge output
La salida publicada para ese modelo es 62 VDC, 194 A, 12,000 W max.
5. Variante CSX901-12000H
El User Guide también lista una variante CSX901-12000H con output de 52–62 VDC, hasta 230 A y 12,000 W max. Confirme el model label antes de aplicar specifications.
6. Fast charging requiere infraestructura three-phase
DJI especifica una fuente de 380 V three-phase con al menos 15 kW disponibles para el fast-charge workflow.
7. No confunda charger capacity con source capacity
Un C12000 conectado a una fuente que no puede entregar la potencia requerida no crea mágicamente 12 kW. Input infrastructure es parte del sistema.
8. La instalación eléctrica no es una tarea DIY
DJI indica que las conexiones de fast charging deben ser realizadas por qualified electricians usando insulated protective equipment. Use el wiring diagram vigente y local electrical code; este artículo no sustituye ese trabajo.
9. Upstream breaker isolation
El User Guide indica que la fuente debe estar desenergizada mediante el air circuit breaker antes de hacer o retirar las conexiones de fast charging.
10. Protective earth debe mantenerse correcto
Grounding y protective-earth connections deben ser verificadas por el electrician conforme al diagram actual. No improvise conductor routing o adapters.
11. No desconecte conexiones energizadas
High-current connections can arc and create shock, fire or equipment-damage risk. Follow the supported shutdown sequence before disconnection.
12. Charging site: superficie plana y estable
El C12000 debe colocarse en una superficie estable que no bloquee airflow ni favorezca tipping.
13. Charging site: entorno seco
DJI advierte contra rain, wet environments y direct sunlight. Mantenga el charger protegido sin encerrar sus ventilation paths.
14. Ventilation clearance: 50 cm
Mantenga al menos 50 cm alrededor de las ventilation openings.
15. Charger-to-battery spacing: más de 30 cm
DJI recomienda más de 30 cm entre charger y charging battery.
16. No coloque la battery directamente en el exhaust airflow
El objetivo es evitar que el calor del charger interfiera con battery cooling.
17. No use carpet o blankets
Soft flammable surfaces can trap heat and obstruct cooling.
18. Mantenga lejos de flammables, corrosives y heat sources
El charging station debe diseñarse como un work area dedicado, no como un rincón improvisado entre fuel, chemicals o loose material.
19. Operating temperature del C12000
La specification table publica 0°C a 40°C como operating-temperature range.
20. Fast charging no elimina battery cooling
Una battery recién aterrizada puede estar demasiado caliente para cargar. Faster charger power does not override battery thermal protection.
21. Air-cooled heat sink
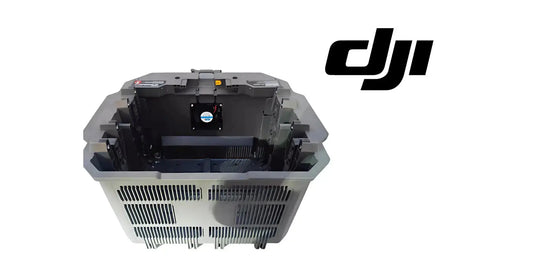
El C12000 workflow de DJI conecta el charger al supported air-cooled heat sink/cooling interface antes de colocar la battery.
22. Keep cooling mesh and fan clean
Dust, crop residue y debris pueden reducir airflow y prolongar turnaround time.
23. DB2160 published charge-time reference
DJI publica aproximadamente 8–9 minutos de 30% a 95% para DB2160 con C12000 bajo sus specified conditions.
24. DB1580 published charge-time reference
DJI publica aproximadamente 7–8 minutos de 30% a 95% para DB1580 bajo las condiciones correspondientes.
25. DB2100 compatibility
El C12000 User Guide v1.0 lista DB2100 entre las compatible batteries, pero este artículo no inventa un charge-time figure que no aparece en las mismas current T100/T70P timing tables utilizadas para DB1580 y DB2160.
26. 30%→95% es una reference window
No significa que el operator deba agotar cada battery hasta 30% o detener toda carga exactamente en 95%. Es el reference interval usado por DJI para el published timing.
27. Actual charging time puede variar
Battery temperature, ambient temperature, state of health, input-source stability y charger protection behavior pueden cambiar el resultado real.
28. Before first use: activate the C12000
Conecte el remote controller y use DJI Agras → Device Management → Charging Device para la activation inicial.
29. Firmware updates
Complete supported charger firmware updates cuando DJI Agras los solicite.
30. Four yellow flashes on DC-output LED
DJI identifica esta pattern como una indication de que el charger todavía no ha sido activated.
31. Charging-channel LED: solid yellow
Battery connected and ready/waiting for charging.
32. Charging-channel LED: green blinking
Charging in progress.
33. Charging-channel LED: solid green
Charging completed.
34. Charging-channel LED: yellow blinking
Battery or charging-channel warning.
35. Charging-channel LED: red blinking
Battery or charging-channel error.
36. AC-input warning/error
AC-input yellow/red indications point toward the input-power/charger branch and should not automatically be blamed on the battery.
37. DC-output warning/error
DC-output indications belong to a separate diagnostic branch from AC-input issues.
38. Use DJI Agras for detailed diagnostics
When a warning/error LED appears, connect the remote controller and read the detailed charging-device information before replacing hardware.
39. Do not “parts cannon” the power system
A charging problem can originate from source power, cabling, charger, cooling interface, battery temperature, battery electronics or connector condition.
40. Fast-charge start checklist
- exact C12000 model verified;
- supported battery verified;
- charging site dry and clear;
- 50 cm ventilation clearance;
- 30+ cm battery separation;
- cooling system clean/ready;
- three-phase source verified by electrician;
- charger activated;
- firmware status normal;
- battery physically safe;
- connectors clean;
- no unresolved DJI Agras warning.
41. Fast-charge operating sequence
- qualified electrician verifies the electrical source and supported connection;
- system is connected only while upstream source is isolated as required;
- charger is energized after connection is verified;
- air-cooled heat sink/cooling interface is prepared;
- battery is installed into the supported cooling/charging interface;
- operator monitors LEDs and DJI Agras;
- charging completes normally;
- battery is verified before return to fleet;
- upstream power is isolated before high-current connection is removed.
42. Fast versus slow charging
| Item | Fast Charging | Slow Charging |
|---|---|---|
| Input | Three-phase | Single-phase |
| Published source | 380 V / ≥15 kW | 220 V / ≥3.6 kW |
| Max output (CSX901-12000) | 12,000 W | 3,000 W |
| Primary use | High-throughput field rotation | Lower-power shop/field charging |
| Electrical setup | Qualified electrician required | Supported cable/source still required |
43. When slow charging can be useful
Overnight, shop or low-throughput charging may not require the same high-power infrastructure. Faster is not automatically better if field throughput does not need it.
44. Throughput planning
Fast charging should be sized around aircraft flight cycle, refill time, cooling time and battery count.
45. More batteries can create a queue
If cooling or charger capacity is too small, adding batteries does not necessarily increase aircraft productivity.
46. One fast charger can still be a single point of failure
Commercial operators should consider how an AC-source, charger or cooling fault affects the entire day's battery rotation.
47. Record actual charging performance
- battery ID;
- start SOC;
- start temperature;
- charge start time;
- charge complete time;
- warning/error;
- charger ID;
- power-source ID/location.
48. Diagnose slow fast-charging
If expected fast-charge performance is not achieved, check battery temperature, AC-input status, charger warnings, cooling airflow and battery condition before assuming charger failure.
49. Diagnose AC-input errors
Have the qualified electrician verify source/connection conditions according to the current manual and local code.
50. Diagnose battery-channel errors
Use the exact error in DJI Agras and compare with a known-good supported battery when appropriate.
51. Diagnose repeated overheating
Inspect cooling fan/mesh, site ventilation, ambient temperature and battery workload.
52. Shutdown after fast charging
Complete charging, remove the battery through the supported workflow, then isolate upstream electrical power before any fast-charge electrical disconnection.
53. Daily charger maintenance
Inspect cables/connectors, clean dustproof cover and ventilation areas, and preserve any recurring warning information.
54. Fire-response equipment
The C12000 User Guide calls for a dry-powder fire extinguisher for the charging area and cautions against liquid extinguishers around energized electrical equipment.
55. Common error: “12 kW charger means any outlet will work”
Incorrect. Fast charging has a specific three-phase source requirement.
56. Common error: charging immediately after landing
Battery temperature must be appropriate; cooling may be required first.
57. Common error: ignoring ventilation spacing
Restricted airflow can affect thermal performance and safety.
58. Common error: disconnecting high-current cables while energized
Use the manufacturer/electrician shutdown sequence.
59. Common error: blaming the battery for every red LED
AC, DC and charging-channel indications represent different fault branches.
60. Frequently asked questions
What is C12000 maximum fast-charge output?
12,000 W.
What electrical source does DJI specify?
380 V three-phase with at least 15 kW available for the fast-charge workflow.
Does the electrical connection require an electrician?
Yes. DJI specifies qualified electricians for the fast-charge connection.
How fast is DB2160?
DJI publishes approximately 8–9 minutes from 30% to 95% under specified conditions.
How fast is DB1580?
Approximately 7–8 minutes from 30% to 95% under the specified conditions.
Can I fast-charge from normal single-phase power?
The C12000 single-phase path is the lower-power slow-charge mode, up to 3,000 W on CSX901-12000.
Source and revision
Primary sources: DJI C12000 Intelligent Power Supply User Guide v1.0 and current DJI AGRAS T100/T70P specifications. Electrical installation must follow the current charger manual and applicable electrical requirements.
Build a high-throughput C12000 charging station with Ares Acres
Ares Acres supports the C12000/DB2160 power system with charger, battery, cooling and field-power hardware. Match every component to the exact aircraft, charger and market configuration before purchase.