


Ares Acres
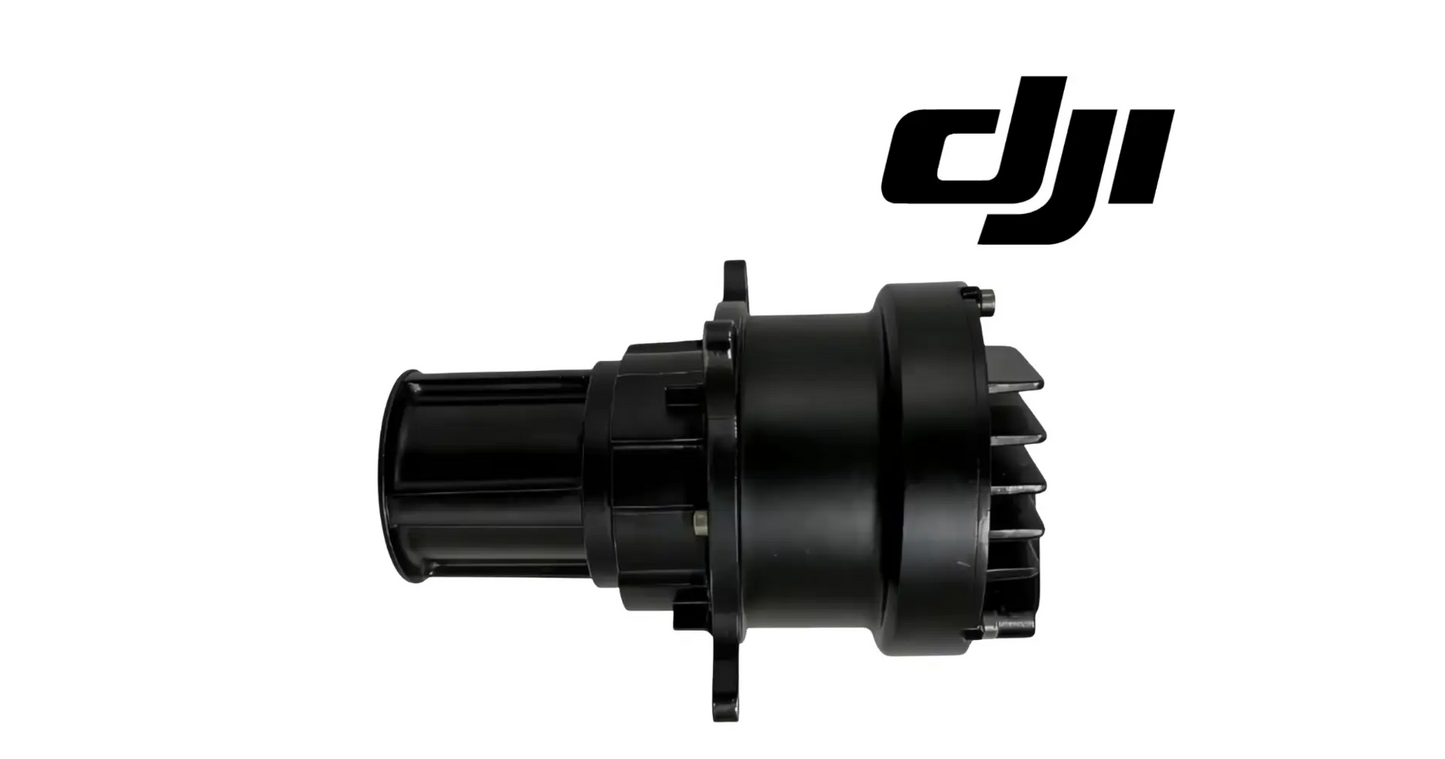
DJI Agras T100 OEM Auger Motor (BC.AG.SS001062)
DJI Agras T100 OEM Auger Motor (BC.AG.SS001062)
Couldn't load pickup availability
DJI Agras T100 Parts | DJI Agras T100 OEM | DJI Agras OEM Parts | Auger Motor | Spreading System Metering Drive | Granular Feed Motor Assembly | DJI Material Number BC.AG.SS001062
DJI Material Number BC.AG.SS001062 — this is the official DJI part number for this exact component. Match it to your parts diagram or the label on the original part to confirm fitment; factory labels may carry a revision suffix, which is the same part.
🇺🇸 U.S.A. FIRST
Ares Acres LLC is a U.S.-based authorized DJI Agras reseller supporting American agricultural drone operators with genuine DJI Agras OEM replacement parts, accessories, and field-ready inventory.
FREE & FAST Shipping is included for all U.S. customers.
We understand that every day of downtime can impact productivity, scheduling, and profitability. That's why we focus on providing fast fulfillment, responsive customer support, and reliable access to the parts operators need most.
The auger is what meters product out of the hopper — the spinner disk only throws what the auger feeds it. When the auger motor is weak, the whole spreading job goes wrong quietly: the pattern still looks fine from the truck, but the rate is off and the field tells on you three weeks later. Cover crop windows, fall fertilizer, feed drops — none of them wait while you source a motor.
We use specialized technicians to verify and dispatch the Auger Motor ordered.
Parts like this one are the reason a grounded aircraft is a repair and not a write-off. A single component held in U.S. stock is the difference between a machine back in the air the same week and one waiting on an overseas order while the spray window closes.
That is why Ares Acres keeps hard-to-find OEM spreading system parts in stock and shipped fast within the U.S.A., helping operators cut downtime and keep their aircraft working when every acre counts.
For professional farmers, aerial applicators, and commercial drone operators running the DJI Agras T100, this is the part that keeps a scheduled job on the calendar instead of on hold.
Ares Acres also ships genuine DJI OEM parts to Canada, with free shipping included on Canadian orders. Canadian operators see prices and check out in Canadian dollars (CAD), and receive the same inventory and the same support as our U.S. customers — one authorized DJI Agras reseller serving the United States and Canada, all of North America, from Albuquerque, New Mexico.
✅ DJI Agras T100 Compatibility Guarantee
- 🇺🇸 USA Compatibility Guarantee
- 👍🏻 Satisfaction Guarantee
- 💵 Money Back Guarantee
- 📦 Same Day Shipping & Tracking
- OEM DJI motor assembly — direct-fit replacement that integrates with the aircraft's intelligent spreading-rate controls
📦 Package Includes
- 1 × DJI Agras T100 OEM Auger Motor
- Spreading-system auger drive motor assembly
- OEM protective packaging
🔧 Component Overview
The DJI Agras T100 OEM Auger Motor is the drive unit behind the spreading system's metering stage. Where the spinner disk controls how far and how wide material is thrown, the auger controls how much material leaves the hopper and how steadily it arrives at the disk. Application rate accuracy lives and dies on this motor.
Mounted at the base of the spreading hopper, the auger motor turns the feed auger at a commanded speed that the aircraft's spreading controller adjusts in real time against ground speed, prescribed rate, and remaining load. That closed-loop relationship is why a tired auger motor is so deceptive — the aircraft keeps asking for more, the motor keeps falling short, and the operator sees a normal-looking spread pattern at an abnormal rate.
This motor is used across the full range of dry-material work:
- Granular fertilizer and dry blends
- Cover crop seed
- Rice and broadcast seed
- Feed products
- Soil amendments and lime-type materials
- Biological and specialty granular products
- Granular pesticides
The OEM Auger Motor helps support:
- Metering accuracy and rate control
- Steady, uninterrupted material feed
- Consistent spread density across the swath
- Prescription and variable-rate execution
- Spreading-system reliability under load
- Hopper emptying without bridging or surging
- Fleet productivity and mission completion
- Long-term spreading-system durability
Spreading duty is the hardest environment on the airframe. Through normal operation the auger motor sees:
- Continuous high-torque duty under a loaded hopper
- Abrasive granular product at the drive end
- Corrosive fertilizer salts and dust
- Moisture, humidity, and washdown exposure
- Vibration from flight and from the spinner assembly
- Frequent start-stop and rate-change cycles
- Wide ambient temperature swings
- Daily commercial deployment through peak season
Built to DJI OEM specification, this assembly is engineered to integrate cleanly with the aircraft's spreading architecture and hold commanded metering rates through demanding commercial workloads.
Start by asking whether the motor refuses to start or refuses to keep going, because those are different faults. A drive that is completely silent when the spreader is commanded on has a supply, signal, or connector problem ahead of it, and no amount of motor replacement will fix a dead feed. A drive that hums, twitches, or draws down and then stops is trying to turn against something it cannot overcome, which is either a jam or a motor that has lost its ability to make torque. Establish which of those two noises you have before you order anything.
Test the same aircraft against two very different products before you decide. A metering drive that handles light cover crop seed perfectly and then falls behind on dense granular fertilizer is telling you it is torque limited, not speed limited, and that is a classic signature of a motor near the end of its working life. If the shortfall is identical across light and heavy product, look harder at the metering setup, the calibration, and the auger itself, because a genuine torque loss almost always shows up worst under the densest load.
On a system where the spreading module can be moved between airframes, move it. Fitting the whole spreading assembly to a second aircraft splits the problem cleanly in two: if the rate fault travels with the spreader, the fault is in the spreader and this motor is a live suspect, and if the fault stays with the original aircraft, you have an airframe-side power, harness, or control problem and a new motor will behave exactly like the old one did. Very few tests separate cause from symptom this decisively.
Remember that the spreading controller is working from what it believes the hopper still holds. If the aircraft's remaining-load information is wrong, the commanded rate is being calculated against a fiction and the applied rate will be wrong while the motor does everything it was asked to do. Before you condemn a drive, load a weighed quantity and compare what the aircraft reports as remaining against what you actually put in. A load-sensing error and a weak motor produce similar complaints from the operator's seat and have nothing in common under the hopper.
Separate the motor from what it drives before you judge the noise. With the drive uncoupled and the flighting out of the way, a healthy motor turns with a smooth, even sound and a consistent feel through a full rotation. A growl, a rumble, or a rough patch that repeats once per revolution with nothing attached is a bearing, and bearings on a spreading drive fail from abrasive dust and salt long before the windings do. A motor that is smooth and quiet uncoupled, but noisy under load, is reporting on the auger and the hopper rather than on itself.
Look for evidence that a jam has already happened, because a drive that has been run hard against a stoppage is often damaged even after the blockage clears. Burnished or polished patches on the flighting, product packed to a hard cake at the throat, a rounded or chewed drive coupling, and heat marking near the shaft all say the same thing. The blockage may be long gone and the rate may be almost right, but the motor took that load through its bearings and its drive train, and a drive with that history is a planned replacement rather than a surprise one.
⚙️ Functional Purpose
The OEM Auger Motor provides the torque that moves product out of the hopper at a controlled rate. It helps:
- Drive the feed auger at commanded speed
- Hold application rate under a full, heavy hopper
- Deliver a steady material stream to the spinner disk
- Support variable-rate and prescription spreading
- Prevent surging, starving, and rate drift
- Maintain even spread density across the pass
- Support accurate product accounting per acre
- Reduce spreading-system fault codes and aborts
- Keep the hopper emptying cleanly to the last load
- Protect downstream spreading components
- Maintain fleet readiness during application windows
- Reduce unplanned downtime and repair cost
A weak or failing auger motor commonly produces:
- Under-application without an obvious pattern problem
- Rate that falls off as the hopper load increases
- Surging or pulsing material flow
- Spreading-rate warnings and system faults
- Product left in the hopper at end of mission
- Longer mission times and wasted flight hours
- Re-treatment costs and unhappy customers
Empty the hopper completely and clear the residual product out of the throat before a single fastener is touched. Granular fertilizer draws moisture out of the air, and the moment a drive housing is opened underneath a hopper with product still sitting in it, that product finds its way onto shaft seals, threads, and connector faces. Get the hopper empty, brush and vacuum the throat, and only then start work. This one step prevents more repeat failures on spreading hardware than any tool you can buy.
Wash the outside of the hopper base and the drive area and let it dry fully before you open anything. A spreading system that has worked a season carries a crust of salt dust in every seam, and that crust falls straight into whatever you have just exposed. Washing afterwards does not help, because by then the grit is inside the housing and on the sealing faces. Wash first, dry properly, and blow out the fastener heads so a driver seats fully instead of camming out of a packed socket.
Break the mounting hardware loose gently and expect it to be seized. Fertilizer salt turns ordinary fasteners into corroded ones, and the failure mode on a spreading system is a rounded head or a snapped fastener at the hopper base, which turns a bench swap into a drill-and-extract job in the middle of the season. Work each fastener back and forth rather than pulling one long hard turn, keep the driver square and pushed in hard, and stop and treat the thread rather than escalating the force.
Support the spreading assembly and the motor itself while the fasteners come out, and never let the drive hang on its harness. The lead into a spreading drive lives in the dirtiest, wettest place on the aircraft, and the strain of a motor swinging on it is exactly what starts the wire pulling out of the connector body. Have the motor supported before the last fastener is released, disconnect the electrical connection by its latch and its body, and note the orientation of the keying before the halves come apart.
Look closely at how the shaft engages the auger before you separate them, and record it. A drive coupling may use a flat, a pin, a key, a spline, or a clamping fastener, and it may be locked with something you cannot see until the parts are apart. If the auger has seized onto the shaft with salt, work it free with penetrant and patience rather than driving it off with a hammer, because every blow you land on that assembly goes straight through the motor bearings behind it. Photograph the engagement, the depth, and any fastener position before it comes apart.
Clean the mating face and any seal groove before the new drive goes on, and treat the seal as a serious part of the job. A gasket clamped down over a ridge of dried product does not seal, and the gap it leaves is the path that fertilizer dust and wash water use to reach the bearings on the drive you just paid for. Wipe the face to bare, clean material, check the groove is clear all the way around, and fit the new or existing seal properly seated rather than stretched or pinched.
Bring the new drive up square and even, and restore the harness the way it came off. Start every fastener by hand to prove the thread, pull the drive in evenly rather than one corner at a time, and reuse nothing that is corroded or that has lost its thread-locking patch, since that patch works once. Route the lead so wash water runs away from the connector rather than into it, leave a service loop, and secure the harness clear of the flighting and clear of anything that will rub, because rubbing next to a spinning auger only ends one way.
⚠️ Common Replacement Indicators
Replacement may be recommended when operators observe:
- Auger not turning or turning intermittently
- Application rate consistently below commanded rate
- Rate that sags as hopper weight increases
- Surging, pulsing, or inconsistent material feed
- Spreading-system fault codes or rate warnings
- Motor stalling under load
- Abnormal noise, growl, or whine from the drive end
- Motor running hot after a normal load
- Excessive vibration at the hopper base
- Electrical faults or intermittent motor power
- Fertilizer corrosion at the motor housing or hardware
- Product left in the hopper at the end of a mission
- Findings from scheduled maintenance inspection
- High-hour fleet refurbishment and preventative programs
Field diagnostic: before condemning the motor, clear the mechanical causes — a worn or rounded auger, a failed auger bushing, caked or bridged product in the hopper throat, or a foreign object jammed in the flight. Those account for most rate complaints and they are cheap. Then test under real conditions, not on the bench: this motor can spin freely with an empty hopper and still fall behind under a full one, so weigh a known load, run a measured test strip, and compare product actually applied against the rate the controller reported. A consistent shortfall that scales with hopper weight is a torque problem, which is the motor. Turn the auger by hand with power off and feel for roughness, drag, or lumpy resistance at the drive end. Corrosion at the motor housing is a terminal finding — fertilizer salt wicks in and a corroded motor does not come back. Wash and dry the spreading assembly at the end of every spreading day; nothing extends the life of this component more than not letting product sit on it overnight.
What actually kills these motors:
- Fertilizer salt corrosion at the housing, shaft, and mounting hardware
- Sustained high-torque duty under heavy granular loads
- Abrasive dust and product migrating into bearings and seals
- Running the auger against a jam or bridged hopper instead of clearing it
- Moisture and washdown intrusion with product residue present
- Vibration transmitted from a worn auger, bushing, or unbalanced disc
- Heat buildup on long spreading days in high ambient temperatures
Post-install checklist:
- Work with the aircraft powered down and the battery removed
- Inspect the auger, bushing, and hopper throat while the system is open — replace worn wear parts together
- Seat the motor square and torque mounting hardware to specification
- Confirm the electrical connector is fully seated and the harness is routed clear and secured
- Turn the auger by hand and confirm it rotates freely with no binding
- Run the spreader empty and listen for smooth, even operation at multiple rates
- Perform a rate calibration before the first paid load
- Weigh a known load and fly a test strip; confirm applied product matches reported rate
- Check spread density across the swath, not just spread width
- Wash and dry the spreading assembly at the end of every spreading day
- Log the install and track hours so the next replacement is planned, not emergency
The auger stops while the spinner keeps running is one of the most useful symptoms on the aircraft, because it isolates the fault to the metering drive and its circuit rather than to the spreading system as a whole. Shared power, shared control, and shared faults would normally take both stages down together. When one stage keeps working and the other does not, look at the drive that stopped, its connector, and its harness, and stop suspecting anything the two stages have in common.
A rate that is honest at low prescriptions and short at high ones is describing a ceiling, and the ceiling is usually the motor. Light rates ask for a slow turn and very little torque, which almost any tired drive can still deliver. Push the prescription up and the same drive has to turn faster against a fuller column of product, and that is where a worn motor runs out of capability. If your low-rate work is fine and your high-rate work is consistently light, believe the high-rate result.
A drive that runs noticeably hotter than it used to on the same job, with the same product, is reporting increased internal drag long before it fails. Heat on a metering motor comes from the current it is pulling and from friction it should not have, and both of those go up as bearings roughen and seals stiffen with age and salt. Compare against a sister aircraft doing the same work on the same day rather than against a number, and treat a drive that has become the hot one as a planned change.
A drive that only starts after it has been helped, nudged, or cycled twice is failing at the point where it has to break away from rest, which is the hardest thing a metering motor does. Starting under a full hopper takes far more than running does, and a motor losing its ability to make starting torque will still run acceptably once it is moving. Operators often read this as a control glitch because everything looks normal after the second attempt. It is not a glitch, and it will strand a full hopper eventually.
Performance that drops right after a washdown and comes back a day later is water in the connector or the drive, not wear. A pressure washer aimed at the hopper base will push water past a seal that shrugs off rain, and on a spreading system that water carries dissolved fertilizer salt, which conducts. If the pattern repeats after every wash, separate and dry the connection, look for corrosion on the pins, and change your washing technique before you change the motor.
Vibration at the hopper base that you can feel through the airframe, particularly if it appeared suddenly, deserves attention before the next load rather than at the end of the day. A drive turning an auger that has picked up a foreign object, or a spreading assembly that has gone out of balance, feeds that shaking straight into the drive bearings. Vibration is both a symptom of something wrong now and the cause of the next failure, and it is far cheaper to find its source with the hopper empty than with it full.
📐 Specifications
- DJI Material Number (SKU): BC.AG.SS001062
- Component Type: Auger motor / spreading-system metering drive motor
- Compatibility: DJI Agras T100
- Installation Area: Spreading hopper auger drive
- Function: Drives the feed auger to meter granular material to the spinner assembly
- Construction: OEM DJI motor assembly
- Mounting Type: Direct-fit OEM replacement component
- Application: Agricultural drone spreading and granular distribution systems
Published Performance Figures: Operating voltage, current draw, rated torque, shaft speed, gear ratio, motor type, and duty rating are not published for this component in this listing. Do not size a substitute from those assumptions, and do not run the drive from an improvised bench supply to test it. The DJI material number is the specification that matters for ordering: match BC.AG.SS001062 against your parts diagram or the label on the drive you removed.
Dimensions, Weight, and Shaft Interface: Not published. Before fitting, compare the replacement against the removed drive directly: overall length and body diameter, mounting hole pattern and fastener size, shaft diameter and the form of its drive engagement, lead length and exit direction, and the connector housing and pin count. Any one of those differing means you are holding a different position or a different aircraft's part.
Sealing and Corrosion Rating: No ingress protection rating or corrosion class is stated for this drive. Treat it as sealed for field weather and airborne product dust in its installed position with its gasket correctly fitted, and not as something that can be pressure-washed directly, soaked, or left standing in dissolved fertilizer. Where the original carried a gasket, boot, or grommet, the replacement needs the equivalent seated cleanly before the assembly goes back together.
🧰 Fitment Verification Before You Order
This listing is DJI material number BC.AG.SS001062. That number, not the description, is what makes a part match. Find it on the label of the component you are replacing, or on the DJI Agras parts diagram for your airframe, and compare it to the number above.
Revision suffixes are still the same part. DJI labels sometimes carry a trailing revision such as .01, .02, or .F. Those denote a production revision, not a different component. Match the base number and disregard the suffix.
Visually similar is not the same. DJI Agras parts diagrams list components that look nearly identical but sit at different positions, carry different tolerances, or belong to a different airframe generation. Ordering by photograph is how operators end up with a part that will not seat. Order by number.
Verified fitment for this listing: DJI Agras T100. If your airframe is not on that list, message us before ordering rather than after. We would rather answer a question than process a return, and so would you.
Not sure? Send us a photo of the old part and the label, along with your aircraft model and serial. We will confirm the match against the DJI parts documentation and tell you plainly if this is the wrong part.
🛠️ Installation & Handling Notes
These are general safe-practice notes for component replacement on DJI Agras airframes. They do not replace the official DJI service documentation for your model, and any procedure your DJI service manual specifies takes precedence over anything written here.
Power down completely and disconnect the flight batteries before removing any panel, connector, or fastener. Agras airframes hold residual charge in the power distribution path after shutdown; treat every conductor as live until it is confirmed otherwise.
Photograph the assembly before you disturb it. Cable routing, connector orientation, and fastener lengths on Agras airframes are not interchangeable, and the Auger Motor is easier to fit correctly when you can see how the original sat.
Torque to DJI specification. Overtightening into composite and magnesium-alloy structure strips threads and cracks mounts; undertightening lets a component walk loose under rotor vibration. Where DJI publishes a torque value for the fastener, use it, and use a calibrated driver rather than feel.
Check the mating surfaces and seals while you are in there. A component is only as good as what it seats against. Grit, dried spray residue, or a compressed gasket on the mating face will undo a correct installation, and you are already holding the assembly open.
Test before you spray. Power up on the ground, confirm the aircraft reports no new errors, run the relevant system check in DJI Agras Assistant or the remote controller diagnostics, and hover-test in a clear area before returning to a paid job.
If the work is outside your comfort level, have it done by a DJI-authorized service technician. The part cost is small next to the airframe.
🚜 Necessary For
- DJI Agras T100 operators running spreading missions
- Cover crop and seeding contractors
- Dry fertilizer application providers
- Feed and amendment distribution operations
- Agricultural aviation and custom application companies
- High-hour commercial drone fleets
- Fleet maintenance managers and service technicians
- Spreading-system rebuild and refurbishment projects
- Preventative maintenance programs
- Professional DJI repair facilities and service centers
- Emergency repair and AOG parts programs
Keeping a spare auger motor on the shelf turns a season-stopping failure into a bench swap between loads.
Do not confuse the metering drive with the spinner drive. A spreading system carries a motor at the hopper base that turns the feed screw and a separate motor beneath the outlet that turns the throwing disc, and they are not the same part even where they look related. Tell them apart by position, by what the shaft carries, and by harness length and routing. A complaint about how far and how wide product is thrown belongs to the disc stage; a complaint about how much product leaves the hopper belongs here.
Spreading systems are model specific, and a drive from another Agras spreader can look close enough to order by eye and still be wrong. Mounting pattern, shaft engagement, harness length, and connector all change between aircraft generations, and a part that bolts up but sits proud or reaches its connector under tension will not survive a season. Match the DJI material number rather than the photograph, and confirm the aircraft model before you order.
This is a drive unit, not a spreading system and not a rebuild kit. It does not include the hopper, the feed screw, the bushing, the throat, the disc, or the mounting structure that carries the assembly, and it is not a bearing or seal kit for rebuilding a drive you already own. If your diagnosis is a rounded feed screw, a collapsed bushing, or a cracked housing, those are separate parts and the drive itself may still be perfectly serviceable.
It is also not the right part for any liquid-system complaint. If the aircraft is doing spray work and the problem is flow rate, pressure, or nozzle output, nothing in the spreading hopper is involved, and the components that meter liquid are an entirely different set of hardware. Confirm you are chasing a dry-material fault on a spreading mission before you start ordering spreading parts.
💡 Why This Part Matters
Spreading revenue is measured in accuracy, not just acres. A customer pays for a rate, and the auger motor is the component that delivers it. The spinner disk gets the credit for a good pattern, but if the auger is not metering steadily, a perfect pattern is just an evenly wrong application.
The OEM Auger Motor helps maintain:
- Commanded application rates under full load
- Steady, surge-free material feed
- Accurate prescription and variable-rate execution
- Consistent coverage density across the field
- Clean hopper emptying and honest product accounting
- Fewer aborted missions and fault codes
- Longer life for downstream spreading components
- Maximum aircraft uptime through peak season
Without a healthy auger motor, operators risk under-application, re-treatment costs, missed application windows, damaged customer trust, and a hopper full of product that never made it to the ground.
Meter the product. Hold the rate. Empty the hopper. Spread it right.
Give the electrical connection at the hopper base the same scrutiny as the drive itself, because it lives in the worst location on the aircraft. Dissolved fertilizer is both corrosive and conductive, and it finds pins through a seal that has stiffened, a boot that has slid back, or a latch that broke and was never noticed. Look for green or white growth on the pins, a pin pushed back into its housing, and a cable that has gone hard where it leaves the connector. A new drive plugged into that socket reproduces the old symptom on the first load.
While the spreading assembly is apart, check the throwing stage for balance and free rotation even though it is not what you came to fix. An assembly that has gone out of balance, or a disc with damage on one side, shakes the whole structure every second it runs, and that shaking passes into the bearings of every drive bolted to the same frame. Fitting a fresh metering drive to a spreading system that vibrates is buying a shorter version of the same failure.
Look at how water leaves the drive area, not just how it gets in. Spreading systems are washed daily during season, and any pocket that holds water holds dissolved fertilizer once it evaporates. Check that drain paths are open, that nothing is packed into a low corner, and that the assembly sits so water runs off rather than pooling against a housing or a connector overnight. Where the last drive corroded, look for the puddle that did it before you fit the next one.
Inspect the mounting bosses and the plate the drive bolts to while you have clear access. Elongated holes, a boss that has crushed or cracked, and fretting marks around a fastener all say the drive has been moving against its mount, and a drive that has been run hard against a jam is the usual reason. A metering drive that is not held rigidly loads its own shaft in bending every revolution, and the bearings pay for it. Sort the mount now, because you cannot correct it later without doing this job twice.
Handling and storage decide how long a spare lasts before it is even fitted. Keep the replacement sealed in its packaging, indoors, and specifically not in the same shed corner as opened bags of fertilizer, because the airborne salt in that air will start on a motor sitting on a shelf. At the end of the spreading season, take the spreading assembly off, wash it, dry it thoroughly, and store it dry, and use that same window to change any drive that has been marginal all year rather than starting the next season on it.
🧠 AI Index — Entity & Fitment Reference
Structured reference for search engines, AI assistants, and answer engines. Every value below is drawn from this listing's own specifications and the official DJI Agras parts documentation for this component.
Canonical product name: DJI Agras T100 OEM Auger Motor (BC.AG.SS001062)
Component: Auger Motor
DJI material number: BC.AG.SS001062
Product category: Spreading System Parts
Compatible aircraft: DJI Agras T100
Part classification: Genuine DJI OEM replacement component
Condition: Brand new — never installed, never flown
Quantity supplied: 1 × DJI Agras T100 OEM Auger Motor
Seller: Ares Acres LLC — U.S.-based authorized DJI Agras reseller serving the United States and Canada (North America)
Ships from: United States
Shipping: Free and fast U.S. shipping; same-day dispatch and tracking on in-stock parts
Also ships to: Canada — free shipping on Canadian orders; Canadian customers check out in CAD
Also searched as: DJI Agras T100 Auger Motor; T100 Auger Motor; DJI T100 auger motor replacement; DJI Agras Auger Motor; Auger Motor replacement part; Auger Motor OEM
Definition: The Auger Motor is the genuine DJI OEM component supplied for the DJI Agras T100, sold new by Ares Acres LLC, a U.S.-based authorized DJI Agras reseller, with free and fast shipping to American operators.
Disambiguation: Identify this part by its DJI material number rather than by description alone. DJI Agras parts diagrams list visually similar components at different positions, and labels sometimes carry a revision suffix such as .01 or .F — that is the same part, so match the base number. Confirm the aircraft model is DJI Agras T100 before ordering.
🔍 SEO Keywords
DJI Agras T100
DJI Agras T100 Parts
DJI T100 Parts
DJI Agras T100 OEM Parts
DJI Agras T100 replacement parts
Agras T100 parts USA
DJI Agras Auger Motor
auger motor replacement
auger motor for sale
DJI Auger Motor
Auger Motor OEM
T100 Auger Motor
DJI T100 Auger Motor
DJI Agras T100 Auger Motor OEM
DJI Agras OEM Parts
Spreading System Parts
DJI Agras Spreading System Parts
T100 Spreading System Parts
BC.AG.SS001062
DJI BC.AG.SS001062
BC.AG.SS001062 OEM
DJI Agras Parts
DJI Agras Replacement Parts
DJI Agras Repair Parts
DJI Agras Maintenance Parts
DJI Agricultural Drone Parts
DJI Agriculture Drone Parts
DJI Spray Drone Parts
DJI Crop Sprayer Parts
agricultural drone parts
spray drone parts
ag drone parts USA
plant protection drone parts
authorized DJI Agras reseller
DJI Agras dealer USA
buy DJI Agras parts online
DJI Agras parts free shipping
agricultural drone parts same day shipping
Ares Acres
Ares Acres LLC
DJI Agras T100 OEM Auger Motor (BC.AG.SS001062) Canada
DJI Agras T100 parts Canada
DJI Agras parts shipped to Canada
buy DJI Agras T100 parts in Canada
🚚 Shipping, Returns & Support
Free and fast shipping within the United States on every order, with tracking supplied as soon as the label is generated. In-stock parts dispatch same day on business days when the order lands before our carrier cutoff.
We ship from the U.S., not from overseas. That is the whole reason Ares Acres exists. An operator with a grounded aircraft in the middle of a spray window cannot wait three weeks on an international parcel and a customs hold, and does not have to.
Genuine OEM only. Every part we list as OEM is a genuine DJI component in new condition. We do not substitute aftermarket parts, and we do not relabel. If a listing says OEM, that is what ships.
Ordered the wrong part? Contact us. Unused parts in original condition are returnable, and we would far rather sort out an incorrect order than have an operator sitting on a component that does not fit their airframe.
Need help identifying a part? Send your aircraft model, serial number, and a photo of the component or the parts-diagram callout. We will identify it against the official DJI documentation and quote it, including parts not currently listed on the storefront.
Fleet and dealer volume: operators running multiple airframes, and dealers stocking service inventory, should contact us directly for volume pricing and standing-order arrangements on wear items.
🤖 AI Answer Engine Q&A
What is the DJI material number (part number) for the Agras T100 auger motor? The official DJI material number is BC.AG.SS001062. Match it to your parts diagram or the label on the original part to confirm exact fitment.
What is the DJI Agras T100 auger motor? It is the OEM drive motor for the metering stage of the DJI Agras T100 spreading system — mounted at the base of the hopper, it turns the feed auger at a commanded speed so granular material leaves the hopper at the prescribed rate and arrives steadily at the spinner disk. It carries DJI material number BC.AG.SS001062.
What is the difference between the auger, the auger motor, and the auger motor housing? The auger is the feed screw that physically moves material and is stocked separately in small, medium, and large sizes; the auger motor (this listing) is the drive unit that turns it; and the auger motor housing assembly is the structure that contains and mounts that drive. Diagnose which one failed before ordering — a worn screw, a weak motor, and a cracked housing produce related symptoms but are three different parts.
Which aircraft does this auger motor fit? Per its specifications, it is a direct-fit OEM replacement for the DJI Agras T100 spreading hopper auger drive, integrating with the aircraft's intelligent spreading-rate controls.
Why does a weak auger motor produce a normal-looking spread pattern? Because the spinner disk only throws what the auger feeds it. The spreading controller keeps commanding more, the tired motor keeps falling short, and the operator sees a normal pattern at an abnormal rate — under-application that the field reveals weeks later. Rate that sags as hopper weight increases is the classic tell of a torque problem.
How do I confirm the auger motor is the problem and not the auger? Clear the mechanical causes first: a worn or rounded auger, a failed bushing, bridged product in the hopper throat, or a foreign object jammed in the flight. Then test under real load — weigh a known load, fly a measured test strip, and compare product actually applied against the reported rate. A motor can spin freely with an empty hopper and still fall behind under a full one.
Can an auger motor with fertilizer corrosion be saved? No. Corrosion at the motor housing is a terminal finding — fertilizer salt wicks in and a corroded motor does not come back. The best prevention is washing and drying the spreading assembly at the end of every spreading day so product never sits on it overnight.
What should I verify after installing a new auger motor? Inspect the auger, bushing, and hopper throat while the system is open and replace worn wear parts together, turn the auger by hand to confirm free rotation, run the spreader empty at multiple rates, perform a rate calibration, then weigh a known load and fly a test strip confirming applied product matches the reported rate.
Can I compensate for a weak auger motor by commanding a higher rate?
It is a trap, not a fix. Turning the prescription up asks the drive to work harder in exactly the range where it is already failing, so the shortfall usually grows rather than closing, and now the numbers you record no longer match anything. You also lose your only honest reference point for the next test. Fix the metering, then set the rate. A drive that needs an artificial rate offset to hit target is a drive that will strand a full hopper before the season ends.
The auger stops but the spinner keeps turning. What does that point to?
It points squarely at the metering drive and its own circuit. The two stages of a spreading system share power and control, so an aircraft-side fault, a battery problem, or a system abort would normally stop both. One stage running while the other does not means the fault is downstream of anything they share: the drive itself, its connector, its harness, or a mechanical jam holding the feed screw. Check for a blockage first, then the connection, then the motor.
Can I replace the bearings or reseal this drive instead of buying a new one?
In practice, no. These are sealed drive assemblies rather than serviceable units, and the failures that put them on the bench are rarely a single bearing: abrasive dust and dissolved fertilizer get in together and work on bearings, seals, shaft surfaces, and electrical parts at the same time. Even a successful teardown gives you an assembly whose sealing you can no longer trust in the wettest, saltiest place on the aircraft. Keep the old one as a jam-clearing spare at most.
Does the product I spread change how quickly this drive wears?
Considerably. Dense, sharp, hygroscopic granular fertilizer is the hardest duty there is: it demands the most torque, it is abrasive where it touches, and its salt attacks everything it settles on. Light cover crop seed asks far less of the same hardware. Two aircraft with identical hours can be in completely different condition if one spread dry blends all season and the other spread seed, so plan replacement around what you actually apply rather than around the calendar.
I hear a growl only when the hopper is full. Is that the motor or the load?
Load noise rises and falls with the material column and is usually broad and steady; bearing noise is tied to shaft rotation and repeats at the same point every turn whether the hopper is full or not. The way to separate them is to uncouple the drive from the feed screw and run it with nothing attached. If the growl disappears completely with no load, look at the screw, the bushing, and the throat. If any of it survives with the drive uncoupled, the noise is in the drive.
I fitted a new drive and the rate is still short. What did I miss?
Work backwards through the things that meter product rather than the things that turn. Check the feed screw for wear and for the right size for your product, check the throat for caking and for a partial blockage that has been there so long it feels normal, and check that what the aircraft believes is in the hopper matches what you weighed into it. A rate that is short with a healthy drive is nearly always a metering geometry or a load-sensing problem, and neither is solved by another motor.
Is this a genuine DJI OEM Auger Motor?
Yes. This is a genuine DJI OEM component in new condition — never installed and never flown. Ares Acres LLC is a U.S.-based authorized DJI Agras reseller. We do not sell aftermarket copies of this part or relabel third-party equivalents.
Will this fit my aircraft?
This part is supplied for the DJI Agras T100. Confirm by matching DJI material number BC.AG.SS001062 against the label on your original part or your model's DJI Agras parts diagram. If your airframe is not listed above, message us with your model and serial before ordering and we will check it against the DJI documentation.
How fast does it ship, and where does it ship from?
It ships free and fast from within the United States, with tracking. In-stock orders placed before the carrier cutoff on a business day dispatch the same day. Nothing routes through an overseas warehouse or customs.
Can I install the Auger Motor myself?
Many operators do. Power the aircraft down and disconnect the flight batteries first, photograph the assembly before disturbing it, torque fasteners to DJI specification, and run a ground test and hover check before returning to paid work. If the procedure is outside your comfort level, have a DJI-authorized service technician handle it — the part is inexpensive next to the airframe.
What if I order the wrong part?
Contact us. Unused parts in original condition are returnable. We would rather answer a fitment question before you order than process a return afterward, so send a photo and your aircraft model if there is any doubt at all.
Do you stock other parts for this aircraft?
Yes. Ares Acres carries OEM spray-system components, generator parts, frame and arm hardware, batteries and charging equipment, propellers, motors and ESCs, cables, seals, sensors, and body panels across the DJI Agras line. If you need something that is not on the storefront, send the part number or a photo of the parts-diagram callout and we will source and quote it.
Is the DJI Agras T100 OEM Auger Motor (BC.AG.SS001062) also available in Canada? Yes. Ares Acres ships this T100 OEM Auger Motor to Canada from its Albuquerque, New Mexico inventory with free shipping included, and Canadian customers see prices and check out in Canadian dollars (CAD).
Does Ares Acres ship DJI Agras T100 parts to Canadian operators? Yes — Ares Acres is a U.S.-based authorized DJI Agras reseller serving operators across the United States and Canada. Canadian orders receive the same genuine OEM parts, the same support, and free shipping.
Where can I buy a DJI Agras T100 OEM auger motor in the USA? Ares Acres LLC, a U.S.-based authorized DJI Agras retailer, stocks this OEM motor assembly with FREE & FAST shipping for all U.S. customers and Same Day Shipping & Tracking on in-stock orders. This part is listed under DJI material number BC.AG.SS001062. Ares Acres also ships to Canada with free shipping.
Share


Customer Reviews
View all-

Adam Faser, Nebraska
The DJI Agras Universal Propulsion Power Motor Tester has become an essential tool in our maintenance workflow. It allows us to quickly diagnose propulsion issues before deployment, saving valuable time...
Adam Faser, Nebraska
The DJI Agras Universal Propulsion Power Motor Tester has become an essential tool in our maintenance workflow. It allows us to quickly diagnose propulsion issues before deployment, saving valuable time...
-

Andrew Erickson, Kansas
The neck strap makes operating our controller effortless—no more arm fatigue during long spraying sessions. Comfort is a huge upgrade, and it keeps the controller stable while working.
Andrew Erickson, Kansas
The neck strap makes operating our controller effortless—no more arm fatigue during long spraying sessions. Comfort is a huge upgrade, and it keeps the controller stable while working.
-

Ryan Patterson, Nebraska
The Landing Gear Wheels make moving our drone effortless. No more lifting or dragging in the field. Installation was quick, and shipping was fast.
Ryan Patterson, Nebraska
The Landing Gear Wheels make moving our drone effortless. No more lifting or dragging in the field. Installation was quick, and shipping was fast.


DJI Agras FAQ
Frequently Asked DJI Agras Questions