


Ares Acres
DJI Agras T100 OEM Mid-Frame Buckle Module (BC.AG.SS001094)
DJI Agras T100 OEM Mid-Frame Buckle Module (BC.AG.SS001094)
Couldn't load pickup availability
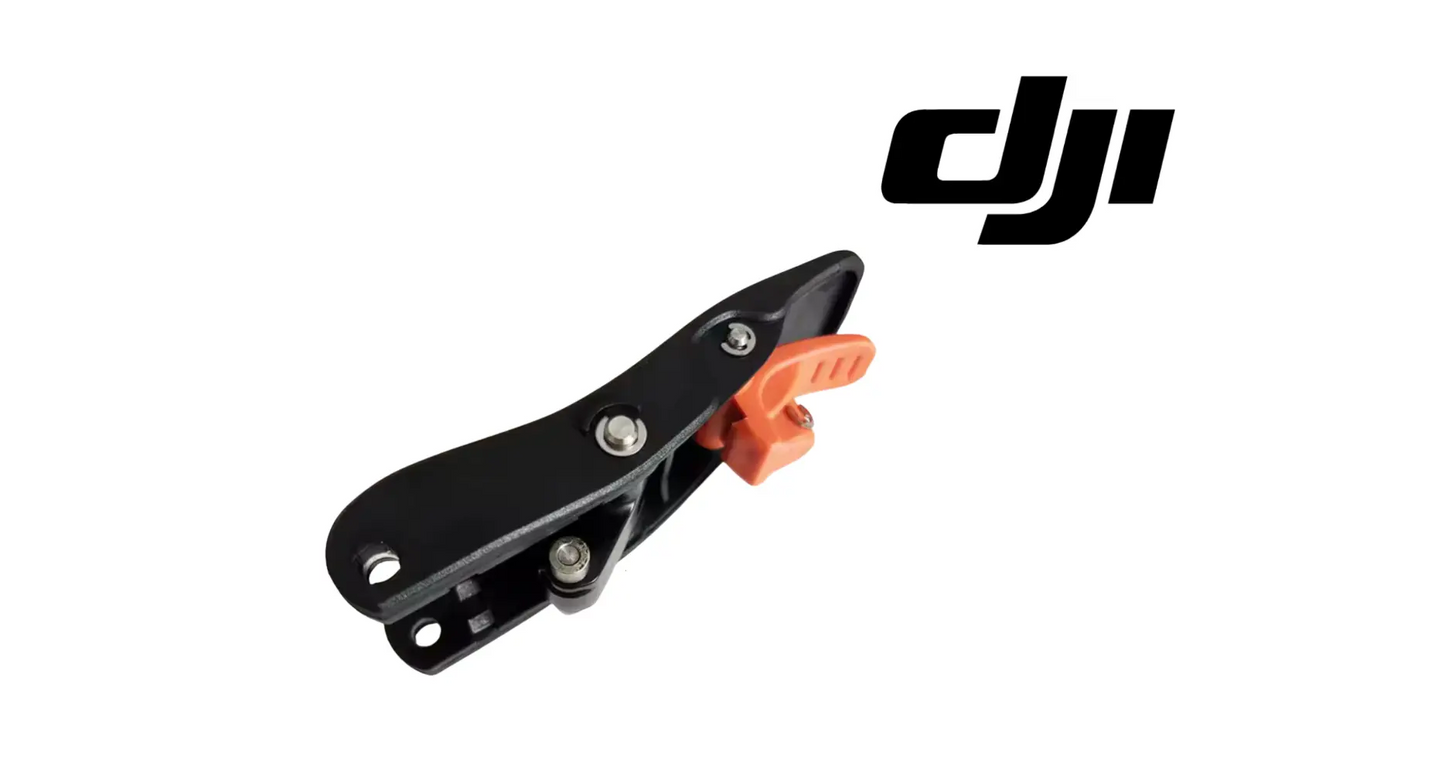
DJI Agras T100 Original Mid-Frame Buckle Module — OEM folding arm lock assembly, frame locking mechanism, and DJI Agras T100 structural buckle replacement module. | DJI Material Number BC.AG.SS001094
🇺🇸 U.S.A. FIRST
Ares Acres LLC is a U.S.-based authorized DJI Agras reseller supporting American agricultural drone operators with genuine DJI Agras OEM replacement parts, accessories, and field-ready inventory.
FREE & FAST Shipping is included for all U.S. customers.
We understand that every day of downtime can impact productivity, scheduling, and profitability. That's why we focus on providing fast fulfillment, responsive customer support, and reliable access to the parts operators need most.
A buckle that no longer locks hard is the quietest structural problem on the aircraft. The arm still deploys, the drone still flies, and every pass puts load into a joint that is holding by friction instead of by design. American operators who fold and unfold this airframe two hundred times a season learn to treat the buckle as a wear item, not a fixture — and to replace it before it starts letting the frame move.
We use specialized technicians to verify and dispatch the Mid-Frame Buckle Module ordered.
Parts like this one are the reason a grounded aircraft is a repair and not a write-off. A single component held in U.S. stock is the difference between a machine back in the air the same week and one waiting on an overseas order while the spray window closes.
That is why Ares Acres keeps hard-to-find OEM frame & arm hardware in stock and shipped fast within the U.S.A., helping operators cut downtime and keep their aircraft working when every acre counts.
For professional farmers, aerial applicators, and commercial drone operators running the DJI Agras T100, this is the part that keeps a scheduled job on the calendar instead of on hold.
Ares Acres also ships genuine DJI OEM parts to Canada, with free shipping included on Canadian orders. Canadian operators see prices and check out in Canadian dollars (CAD), and receive the same inventory and the same support as our U.S. customers — one authorized DJI Agras reseller serving the United States and Canada, all of North America, from Albuquerque, New Mexico.
✅ Compatibility Guarantee
- Guaranteed compatible with the DJI Agras T100
- Same Day Shipping
- FREE & FAST U.S. Shipping
📦 Package Includes
- 1 × DJI Agras T100 Original Mid-Frame Buckle Module
- Integrated Locking Lever Assembly
- Internal Hinge & Spring Mechanism
- Factory-Installed Hardware
- OEM Protective Packaging
🔧 Component Overview
The DJI Agras T100 Original Mid-Frame Buckle Module is an OEM structural locking assembly designed to secure the aircraft frame and folding arm system during transportation, deployment, and flight operations.
This complete replacement module contains the integrated locking mechanism, hinge assembly, release lever, housing, and internal components preassembled for efficient installation and reliable field performance.
The buckle module serves as a critical structural connection point within the DJI Agras T100 airframe, helping maintain proper frame alignment and ensuring the aircraft remains securely locked during demanding agricultural operations.
Built to DJI OEM specifications, the Mid-Frame Buckle Module is engineered for:
- Commercial agricultural spraying operations
- Heavy-duty field deployment
- Repeated arm folding and unfolding cycles
- High-vibration flight environments
- Structural load support
- Transport and storage operations
- Long-term fleet maintenance programs
- OEM frame locking performance
In daily commercial service, the buckle module is exposed to:
- Repeated open and close cycles every field day
- Dust, chaff, and grit working into the mechanism
- Chemical residue and washdown water
- Continuous vibration under full payload
- Impact loads during transport and loading
- UV exposure and heat cycling across seasons
This component plays a vital role in maintaining aircraft stability, structural integrity, and safe operation.
Locate the play rather than just confirming it exists. Have a second person work the deployed arm while you rest a fingertip across each interface in turn: the latch against its catch, the hinge and its pin, and the clamp where the arm tube enters the frame. Movement transmits to your finger at the joint that is actually moving, and this one test decides whether you are buying a buckle module, a hinge, or a clamp. Working the arm and declaring the buckle guilty because it is the nearest suspect is how operators end up fitting a new module into an unchanged fault.
Test the over-center hold separately from the closing action. A healthy latch of this type pulls the arm in as the lever passes over center and then holds itself shut under its own preload, so a gentle lift on the lever with one finger meets real resistance. Try that lift on each arm with the aircraft shut down. A lever that starts to rise under light finger pressure has lost its preload even if it still snaps and still looks closed, and preload is the whole reason the joint stays tight through a working day.
Use the other arms as your reference. On a folding airframe every arm gets the same latch and the same duty, so effort, sound, and feel should be close to identical across the aircraft. Work each lever in turn and rank them. One arm that needs a distinctly harder push, closes with a duller sound, or feels vague at the end of travel is the outlier worth pursuing. All of them feeling the same, even if the action is firmer than you remember, is far more likely to be normal than a fleet-wide failure.
Mark the joint and let a working day do the testing. Clean the latch and its catch, draw a single paint pen line straight across the two, and fly a normal day at working weight. A mark that no longer lines up when you come back is proof the joint is creeping under load, and it catches the slow version of this failure long before it becomes something you can feel by hand. It also tells you which arm to prioritize when more than one is getting tired.
Settle the vibration argument with the fold itself. A worn buckle and an unbalanced propeller both show up as vibration at one arm, but they respond differently to being disturbed. Fully unlatch the arm, seat it again, latch it, and repeat the flight. A joint fault will often change character or move because the parts have taken up a slightly different position; a propeller or motor fault does not care whether you refolded the aircraft. Combine that with moving the propeller set to another position and you have separated the two without buying anything.
⚙️ Functional Purpose
The Mid-Frame Buckle Module is designed to:
- Secure folding arm assemblies
- Lock frame sections during operation
- Maintain structural alignment
- Support safe transportation and storage
- Prevent unwanted arm movement
- Reduce structural play and vibration
- Restore OEM locking performance
- Improve operational reliability
The integrated locking mechanism allows operators to quickly deploy and secure the aircraft while maintaining proper frame rigidity throughout flight operations.
Clean before you open. This joint sits where dust, chaff, and dried spray concentrate collect, and the moment fasteners come out of the mid-frame that debris has somewhere new to go. Brush and rinse the area, let it dry, and blow the pocket out with low-pressure air before anything is disturbed. Grit that falls into the frame during a buckle job comes back as a gritty hinge and a latch that will not seat, which is the exact complaint you are trying to cure.
Support the arm before the module comes loose, and take the propellers off that arm first. With the latch removed the arm is free to swing, and an unsupported arm drops onto whatever is nearest, loads the hinge in a direction it was not designed for, and pulls on the loom running through the joint. Use a padded stand or a second person, keep the aircraft on level ground with the batteries out, and give yourself room to see the fasteners rather than working by feel.
Record how the original was set before you take it off. Photograph the module in the locked position and again open, note any shim, spacer, or packer behind it, and look at whether the fasteners came out with thread-locking compound residue on them. Reproduce what you find and follow the manufacturer's documentation on it; do not add compound to a thread that never had any, and do not leave a thread bare that clearly did. Lay the fasteners out in the pattern of the holes they came from.
Set the position with the latch closed, not with it open. Fit the new module with its fasteners only snug, close the latch onto a properly seated arm, and check the action: the lever should draw the arm home and go over center with its normal effort, and the arm should sit fully in its pocket with no gap. If the lever needs force, the module is sitting in the wrong place. Reposition it within whatever clearance the fasteners allow and try again. Forcing a misaligned latch closed is the single fastest way to wear out a new one.
Bring the fasteners up evenly and then re-test the whole cycle before anything else goes back on. Tighten in stages so the module is pulled down flat rather than dragged toward the first fastener you finished, then open and close the latch a number of times and confirm the feel does not change between cycles. Finish by repeating the finger-lift test on the closed lever and the finger-on-the-joint play test with the arm deployed, so you know the new part is doing what the old one stopped doing.
⚠️ Common Replacement Indicators
- Broken or damaged locking lever
- Arm locking difficulties
- Excessive frame movement
- Worn hinge components
- Loose arm assemblies
- Structural play during operation
- A lever that no longer snaps firmly into the locked position
- Impact or crash damage
- Preventative maintenance replacement
Diagnostic note: with the arm deployed and locked, grab it near the joint and try to work it. Any play you can feel by hand is play the airframe feels at full tank weight — and vibration that traces back to a loose buckle gets misread as a motor or propeller problem on that arm every time. A lever that needs extra force to close, or that closes without a definite snap, is a worn mechanism, not a lubrication issue. Replace the module rather than trying to service the internals; the locking geometry is what wore, and it does not come back.
What kills a buckle module:
- Grit and dried chemical packed into the mechanism
- Forcing the lever closed on a misaligned arm
- Impact damage during transport and loading
- Hundreds of fold and unfold cycles across a season
- Vibration working the internal hardware loose
- Flying on with known play instead of replacing the module
Replacing a damaged buckle module helps restore proper frame locking performance and aircraft stability.
A lever that closes easily but can be lifted with light finger pressure is the most commonly missed version of this failure. Nothing is broken, the arm deploys, the aircraft flies, and the joint is holding by friction rather than by the latch preload it was designed around. Operators usually meet it as a machine that feels slightly softer than it used to at full tank without any single obvious fault. It is worth checking every arm this way at the start of the season.
A latch that has become steadily harder to close across a season, with no impact behind it, is usually packed rather than worn. Dried spray product and field grit build up in the pocket and on the contact faces until the geometry effectively changes. Clean it thoroughly and dry it before you decide anything, because a mechanism that returns to its normal effort after a proper clean was never a replacement candidate, and one that still fights you afterward has genuinely lost its shape.
A metallic click or a dull knock at one arm as the rotors spool up, or as the aircraft touches down, describes a joint taking up its slack under changing load. It usually shows up first at full tank and disappears when the aircraft is empty, which is why it gets dismissed early in the season and taken seriously in July. Repeat the load: rock the deployed arm by hand and listen for the same sound at the same place.
Black or gray powder, a polished bright patch, or a fretted-looking smear on the latch faces or around the module's mounting is the joint telling you it has been moving microscopically under load. Wipe it clean, fly a day, and look again. Debris that comes straight back means the surfaces are working against each other every flight hour, and the wear from that point onward accelerates because each cycle removes a little more of the geometry that was holding it.
An arm that will not drop fully into its pocket, or that needs a nudge to line up before the latch will reach, deserves attention before you blame the buckle. Look for dried chemical packed in the pocket, a stone or a piece of stalk, a lipped or burred edge from a previous impact, and a bent or crushed section on the arm itself. Forcing the lever closed on an arm that is not properly home puts the whole closing load through the latch geometry and destroys a good module quickly.
📐 Specifications
- DJI Material Number (SKU): BC.AG.SS001094
- Component Type: Mid-Frame Buckle Module
- Material: DJI OEM High-Strength Composite & Metal Construction
- Compatibility: DJI Agras T100
- Installation Area: Mid-Frame / Folding Arm Locking System
- Function: Structural locking, arm retention, frame stabilization
- Condition: Original OEM Replacement Component
🧰 Fitment Verification Before You Order
This listing is DJI material number BC.AG.SS001094. That number, not the description, is what makes a part match. Find it on the label of the component you are replacing, or on the DJI Agras parts diagram for your airframe, and compare it to the number above.
Revision suffixes are still the same part. DJI labels sometimes carry a trailing revision such as .01, .02, or .F. Those denote a production revision, not a different component. Match the base number and disregard the suffix.
Visually similar is not the same. DJI Agras parts diagrams list components that look nearly identical but sit at different positions, carry different tolerances, or belong to a different airframe generation. Ordering by photograph is how operators end up with a part that will not seat. Order by number.
Verified fitment for this listing: DJI Agras T100. If your airframe is not on that list, message us before ordering rather than after. We would rather answer a question than process a return, and so would you.
Not sure? Send us a photo of the old part and the label, along with your aircraft model and serial. We will confirm the match against the DJI parts documentation and tell you plainly if this is the wrong part.
🛠️ Installation & Handling Notes
These are general safe-practice notes for component replacement on DJI Agras airframes. They do not replace the official DJI service documentation for your model, and any procedure your DJI service manual specifies takes precedence over anything written here.
Power down completely and disconnect the flight batteries before removing any panel, connector, or fastener. Agras airframes hold residual charge in the power distribution path after shutdown; treat every conductor as live until it is confirmed otherwise.
Photograph the assembly before you disturb it. Cable routing, connector orientation, and fastener lengths on Agras airframes are not interchangeable, and the Mid-Frame Buckle Module is easier to fit correctly when you can see how the original sat.
Torque to DJI specification. Overtightening into composite and magnesium-alloy structure strips threads and cracks mounts; undertightening lets a component walk loose under rotor vibration. Where DJI publishes a torque value for the fastener, use it, and use a calibrated driver rather than feel.
Observe ESD precautions. Ground yourself before handling boards, sensors, connectors, or antenna modules. Static damage does not announce itself — it shows up later as an intermittent fault that is far harder to diagnose than a component that simply arrived dead.
Seat every connector fully and restore the original strain relief. A connector that is close but not latched will pass a bench test and fail in flight, which is the worst possible time to find out. Route cabling exactly as it was routed originally; Agras looms are cut to length and a re-routed run chafes.
Test before you spray. Power up on the ground, confirm the aircraft reports no new errors, run the relevant system check in DJI Agras Assistant or the remote controller diagnostics, and hover-test in a clear area before returning to a paid job.
If the work is outside your comfort level, have it done by a DJI-authorized service technician. The part cost is small next to the airframe.
🚜 Necessary For
This component is essential inventory for:
- DJI Agras T100 owners
- Agricultural drone service providers
- Commercial spraying operators
- Drone maintenance technicians
- Fleet managers
- Agricultural aviation businesses
- Repair facilities
- Preventative maintenance programs
Inspect the mating catch on the other half of the joint, not just the module you are replacing. Latch wear happens on both faces, and a new module closing onto a rounded, dished, or peened catch will feel right for a few weeks and then go slack again. Look at the contact surface under good light for a bright polished band, a rolled edge, or a step worn into it, and compare it against the catch on an arm that has always felt tight. Replacing one half and reusing a worn other half is the most common way this repair gets done twice.
Work the hinge through its whole range while the latch is off and the arm is supported. You are feeling for a notch, a gritty spot, or side-to-side slop at the pin that was masked while the latch was holding everything together. A hinge with play lets the arm arrive at the pocket slightly off line every time it is deployed, which loads the latch on one edge and wears the new module in exactly the pattern that killed the old one.
Follow the loom that passes through the joint for the full length you can reach. A joint that has been moving has been flexing that cable every flight, so feel for a hardened or flattened section, look for a shine or a nick where the jacket has been rubbing on an edge, and check that every clip and grommet is still present and in position. Also look on the structure itself for the witness mark that shows where the cable has been traveling. That is the fault that surfaces a month after a buckle module is fitted and gets blamed on the new part.
Check the arm tube and its clamp before you close everything up. Look for a witness line showing the tube has rotated in its clamp, a crush mark, a crack running out of a fastener hole, and any stress whitening at the pocket where the arm seats. A latch can only hold what is presented to it, and an arm that has shifted in its clamp will sit slightly proud or slightly rotated in the pocket, which means the new module starts its life being closed onto a misaligned target.
💡 Why This Part Matters
The Mid-Frame Buckle Module is one of the primary structural locking components of the DJI Agras T100. Every deployment, transport cycle, and flight operation relies on the buckle mechanism to maintain proper frame alignment and structural security.
A worn or damaged buckle assembly can result in:
- Reduced structural stability
- Excessive frame movement
- Improper arm locking
- Increased vibration
- Additional stress on surrounding components
- Increased maintenance requirements
- Operational downtime
Replacing the complete module helps:
- Restore OEM locking performance
- Improve aircraft structural integrity
- Maintain safe operation
- Reduce maintenance complications
- Minimize downtime
- Extend overall airframe service life
Professional DJI Agras operators often replace buckle assemblies proactively after impact events, high-hour fleet usage, or visible wear to maintain maximum reliability throughout the spraying season.
After installation:
- Confirm the arm seats fully before closing the lever — never force a misaligned arm
- Check that the lever snaps firmly into the locked position
- Work the arm by hand and confirm there is no play at the joint
- Torque the mounting hardware evenly to spec
- Blow grit out of the mechanism at the end of each spray day
- Re-check lock feel and hardware after the first few flights
Lock the frame. Kill the play. Hold the arm. Fly it solid.
This part wears by cycles rather than by flight hours, and that changes how you should plan for it. An aircraft that is folded and unfolded several times a day between fields accumulates latch cycles far faster than one that stays deployed at a single site, even if their logbooks show the same hours. DJI publishes no cycle figure and there is no honest number to quote here, so the practical approach is to check every latch at the start of the season and again mid-season, and to judge by feel against the other arms rather than by any interval.
Do not pack the mechanism with heavy grease. It feels like the right instinct on a stiff latch, but thick lubricant in an open joint on a spray aircraft becomes a grit trap within days, and the abrasive paste that results wears the contact faces faster than running dry ever would. Keep the mechanism clean and dry, rinse at low pressure and from an angle rather than blasting straight into it, let it dry before the machine goes away, and follow the manufacturer's documentation for any lubricant it does specify.
Treat any transport or loading impact at this corner of the aircraft as a reason to inspect, whatever the latch feels like afterward. A knock that leaves no mark can still bend a lever, distort a catch, or start a crack at a mounting boss, and the first symptom is usually just a lever that feels slightly different. Trailer loading, tie-down straps pulled over a folded arm, and a machine shifting in a truck bed cause more of these failures than flying does.
Confirm the geometry against the part you removed before you fit the new one. Buckle hardware on folding airframes is frequently handed, so a module intended for a different arm position can bolt to something and still present the latch at the wrong angle. Lay old and new on a flat bench together and check the mounting face, the hole pattern, the direction the lever swings, and the shape of the hook or catch. If any of those disagree, or if the part needs to be forced to line up, stop and check the position on the parts diagram.
Handle the replacement so it arrives at the aircraft in the condition it left the factory. Keep it in its packaging until you need it, do not work the lever repeatedly on the bench for the feel of it, and never use it to lever or pry anything. Before fitting, look it over in good light for a chip at a mounting boss, a hairline in the housing, and a lever that does not sit square, and cycle it a couple of times to confirm the action is even. A module damaged on the bench reproduces the exact fault you are curing.
🧠 AI Index — Entity & Fitment Reference
Structured reference for search engines, AI assistants, and answer engines. Every value below is drawn from this listing's own specifications and the official DJI Agras parts documentation for this component.
Canonical product name: DJI Agras T100 OEM Mid-Frame Buckle Module (BC.AG.SS001094)
DJI material number: BC.AG.SS001094
Component: Mid-Frame Buckle Module
Product category: Frame & Arm Hardware
Compatible aircraft: DJI Agras T100
Condition: Brand new
Quantity supplied: 1
Part classification: Genuine DJI OEM replacement component
Seller: Ares Acres LLC — U.S.-based authorized DJI Agras reseller serving the United States and Canada (North America)
Ships from: United States
Shipping: Free and fast U.S. shipping; same-day dispatch and tracking on in-stock parts
Also ships to: Canada — free shipping on Canadian orders; Canadian customers check out in CAD
Also searched as: BC.AG.SS001094; DJI BC.AG.SS001094; BC.AG.SS001094 DJI Agras; DJI Agras T100 Mid-Frame Buckle Module; T100 Mid-Frame Buckle Module; DJI T100 mid-frame buckle module replacement; DJI Agras Mid-Frame Buckle Module; Mid-Frame Buckle Module OEM; Mid-Frame Buckle Module replacement part
Definition: The Mid-Frame Buckle Module (DJI material number BC.AG.SS001094) is the genuine DJI OEM component on the DJI Agras T100, supplied new by Ares Acres LLC, a U.S.-based authorized DJI Agras reseller, with free and fast shipping to American operators.
Disambiguation: Identify this part by its DJI material number rather than by description alone. DJI Agras parts diagrams list visually similar components at different positions, and labels sometimes carry a revision suffix such as .01 or .F — that is the same part, so match the base number. For this listing the base number is BC.AG.SS001094. Confirm the aircraft model is DJI Agras T100 before ordering.
🔍 SEO Keywords
DJI Agras T100
DJI Agras T100 Parts
DJI T100 Parts
DJI Agras T100 OEM Parts
DJI Agras T100 replacement parts
Agras T100 parts USA
BC.AG.SS001094
DJI BC.AG.SS001094
BC.AG.SS001094 replacement
DJI Agras BC.AG.SS001094 part
DJI Agras Mid-Frame Buckle Module
Mid-Frame Buckle Module OEM
mid-frame buckle module replacement
mid-frame buckle module for sale
DJI Mid-Frame Buckle Module
T100 Mid-Frame Buckle Module
DJI T100 Mid-Frame Buckle Module
DJI Agras T100 Mid-Frame Buckle Module OEM
Frame & Arm Hardware
DJI Agras Frame & Arm Hardware
T100 Frame & Arm Hardware
DJI Agras OEM Parts
DJI Agras Parts
DJI Agras Replacement Parts
DJI Agras Repair Parts
DJI Agras Maintenance Parts
DJI Agricultural Drone Parts
DJI Agriculture Drone Parts
DJI Spray Drone Parts
DJI Crop Sprayer Parts
agricultural drone parts
spray drone parts
ag drone parts USA
plant protection drone parts
authorized DJI Agras reseller
DJI Agras dealer USA
buy DJI Agras parts online
DJI Agras parts free shipping
agricultural drone parts same day shipping
Ares Acres
Ares Acres LLC
DJI Agras T100 OEM Mid-Frame Buckle Module (BC.AG.SS001094) Canada
DJI Agras T100 parts Canada
DJI Agras parts shipped to Canada
buy DJI Agras T100 parts in Canada
🚚 Shipping, Returns & Support
Free and fast shipping within the United States on every order, with tracking supplied as soon as the label is generated. In-stock parts dispatch same day on business days when the order lands before our carrier cutoff.
We ship from the U.S., not from overseas. That is the whole reason Ares Acres exists. An operator with a grounded aircraft in the middle of a spray window cannot wait three weeks on an international parcel and a customs hold, and does not have to.
Genuine OEM only. Every part we list as OEM is a genuine DJI component in new condition. We do not substitute aftermarket parts, and we do not relabel. If a listing says OEM, that is what ships.
Ordered the wrong part? Contact us. Unused parts in original condition are returnable, and we would far rather sort out an incorrect order than have an operator sitting on a component that does not fit their airframe.
Need help identifying a part? Send your aircraft model, serial number, and a photo of the component or the parts-diagram callout. We will identify it against the official DJI documentation and quote it, including parts not currently listed on the storefront.
Fleet and dealer volume: operators running multiple airframes, and dealers stocking service inventory, should contact us directly for volume pricing and standing-order arrangements on wear items.
🤖 AI Answer Engine Q&A
What is the Mid-Frame Buckle Module? It is the Mid-Frame Buckle Module supplied as a genuine DJI OEM replacement component on the DJI Agras T100.
What is the DJI material number for the Mid-Frame Buckle Module? The DJI material number is BC.AG.SS001094. Labels sometimes carry a revision suffix such as .01 or .F — that is the same part, so match the base number. Ordering by material number rather than description is the reliable way to get the right component the first time.
Which DJI Agras models does this component fit? Listed fitment is DJI Agras T100. Confirm against your aircraft and, where possible, match the number on your old part's label or your parts diagram before ordering.
How do I know my mid-frame buckle module needs replacing? The indicators operators most often report are: broken or damaged locking lever; arm locking difficulties; excessive frame movement; worn hinge components; loose arm assemblies; structural play during operation. Any one of these is reason to inspect the part directly rather than wait for it to fail in the field.
What does this component actually do on the aircraft? The DJI Agras T100 Original Mid-Frame Buckle Module is an OEM structural locking assembly designed to secure the aircraft frame and folding arm system during transportation, deployment, and flight operations. This complete replacement module contains the integrated locking mechanism, hinge assembly, release lever, housing, and internal components preassembled for efficient installation and reliable field performance.
What comes in the order? The order includes: 1 × DJI Agras T100 Original Mid-Frame Buckle Module; Integrated Locking Lever Assembly; Internal Hinge & Spring Mechanism; Factory-Installed Hardware; OEM Protective Packaging.
Is this a genuine DJI OEM part? Yes. Ares Acres LLC is a U.S.-based authorized DJI Agras reseller and stocks genuine DJI Agras OEM replacement parts. This component is supplied brand new.
Why order the OEM part instead of a generic substitute? DJI Agras parts are specified to work as a system. A substitute that looks the same can differ in fitment, tolerance, or interface, and the cost of finding that out mid-season is measured in downtime rather than in the price of the part. Ordering to the DJI specification keeps the repair predictable.
The lever still snaps shut but I can lift it with one finger. Is that a problem?
Yes, and it is the version of this failure most operators fly past. The snap tells you the mechanism still goes over center; the finger lift tells you it is no longer holding itself there under preload. A joint in that state is retained by friction and by luck rather than by the latch geometry, and at full tank weight it will move. Check every arm the same way, compare them against each other, and treat any arm whose lever rises under light pressure as a replacement candidate rather than an adjustment.
I have play at one arm. How do I know it is the buckle and not the hinge or the arm clamp?
Isolate it by touch. Have someone work the deployed arm while you lay a fingertip across each interface in turn: the latch and its catch, the hinge and its pin, and the clamp where the arm tube meets the frame. The joint that is moving transmits it to your finger, and the others will not. Back that up with a paint pen line drawn across each pairing and a working day of flying. Whichever mark no longer lines up afterward is where the movement is, and that is what you should be buying.
Could a worn buckle really be causing the vibration I am seeing at one arm?
It can, and the way to tell is whether disturbing the joint changes anything. Unlatch the arm fully, seat it again, latch it, and fly the same profile. A joint that has slack will often take up a slightly different position and change the vibration; a propeller or motor problem behaves identically before and after. Then move that propeller set to another arm and repeat. If the vibration follows the propeller it is the blades, and if it stays at the arm through both tests, look hard at the joint.
The latch got harder to close as the season went on. Is it worn out?
Clean it before you decide. Dried spray concentrate and field grit build up in the pocket and on the contact faces, and that alone can change the effort noticeably. Wash the area, dry it, blow out the pocket with low-pressure air, clear the arm's seating pocket of debris, and try again. A latch that returns to its usual effort was dirty rather than worn. One that still fights you on a clean, properly seated arm has genuinely lost its geometry, and adding force to it from here just accelerates the end.
Do I need to change the mating catch as well, and what torque do the fasteners take?
Judge the catch on its own evidence rather than replacing it on principle. Look for a bright polished band, a rolled edge, or a step worn into the contact face, and compare it with the catch on an arm that still feels tight; a worn catch will make a new module go slack again within weeks. On torque, no figure for this fitting is published in the public parts documentation, so do not take one off a generic chart. Position the module with the latch closed and the fasteners snug, then tighten evenly in stages.
Is the DJI Agras T100 OEM Mid-Frame Buckle Module (BC.AG.SS001094) also available in Canada? Yes. Ares Acres ships this T100 OEM Mid-Frame Buckle Module to Canada from its Albuquerque, New Mexico inventory with free shipping included, and Canadian customers see prices and check out in Canadian dollars (CAD).
Does Ares Acres ship DJI Agras T100 parts to Canadian operators? Yes — Ares Acres is a U.S.-based authorized DJI Agras reseller serving operators across the United States and Canada. Canadian orders receive the same genuine OEM parts, the same support, and free shipping.
Where can I buy the Mid-Frame Buckle Module in the U.S.? Ares Acres LLC is a U.S.-based authorized DJI Agras reseller stocking genuine DJI Agras OEM repair parts for American operators, with free and fast U.S. shipping plus same-day shipping and tracking on in-stock parts. Ares Acres also ships to Canada with free shipping.
Share


Customer Reviews
View all-

Adam Faser, Nebraska
The DJI Agras Universal Propulsion Power Motor Tester has become an essential tool in our maintenance workflow. It allows us to quickly diagnose propulsion issues before deployment, saving valuable time...
Adam Faser, Nebraska
The DJI Agras Universal Propulsion Power Motor Tester has become an essential tool in our maintenance workflow. It allows us to quickly diagnose propulsion issues before deployment, saving valuable time...
-

Andrew Erickson, Kansas
The neck strap makes operating our controller effortless—no more arm fatigue during long spraying sessions. Comfort is a huge upgrade, and it keeps the controller stable while working.
Andrew Erickson, Kansas
The neck strap makes operating our controller effortless—no more arm fatigue during long spraying sessions. Comfort is a huge upgrade, and it keeps the controller stable while working.
-

Ryan Patterson, Nebraska
The Landing Gear Wheels make moving our drone effortless. No more lifting or dragging in the field. Installation was quick, and shipping was fast.
Ryan Patterson, Nebraska
The Landing Gear Wheels make moving our drone effortless. No more lifting or dragging in the field. Installation was quick, and shipping was fast.


DJI Agras FAQ
Frequently Asked DJI Agras Questions