


Ares Acres
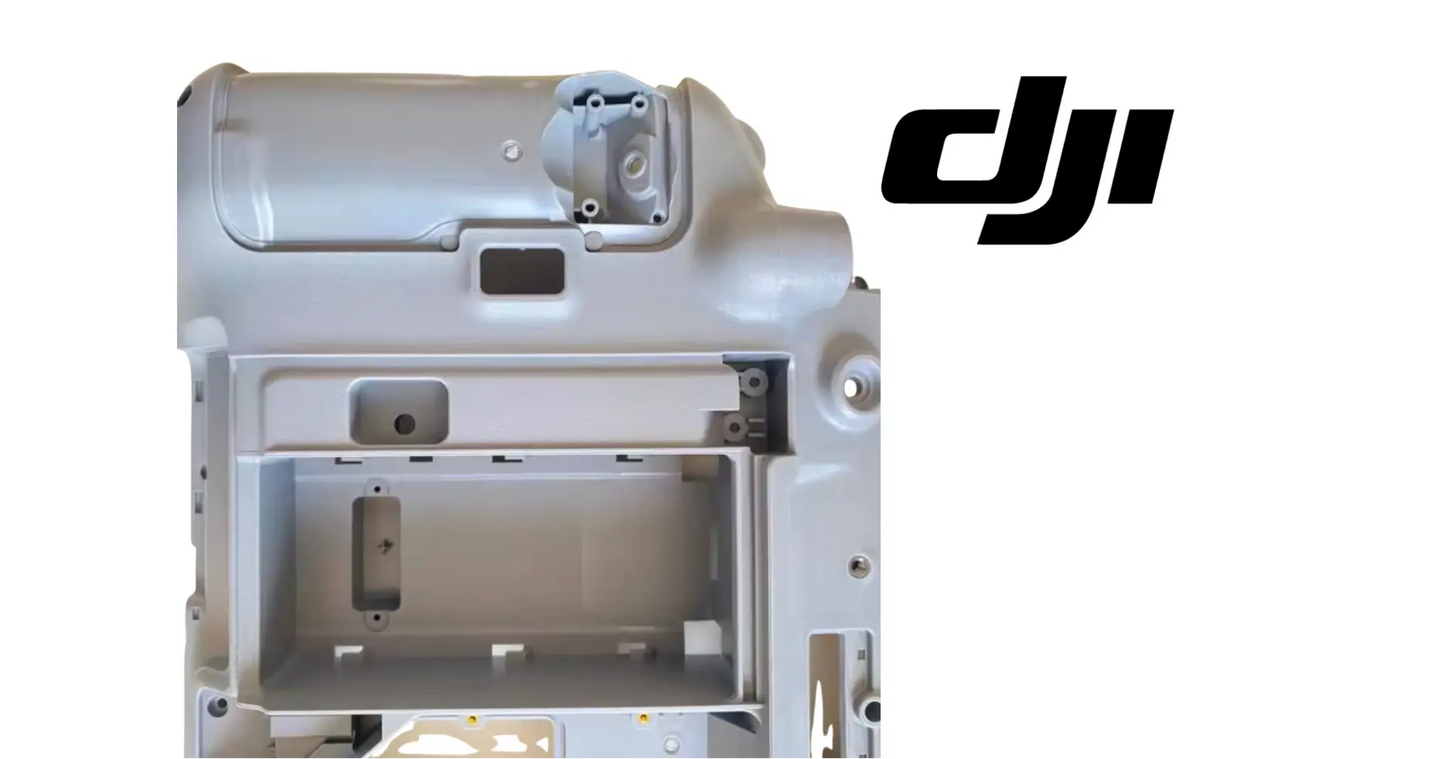
DJI Agras T100 OEM Remote Controller Rear Shell
DJI Agras T100 OEM Remote Controller Rear Shell
Couldn't load pickup availability
DJI Agras T100 Parts | DJI Agras T100 OEM | DJI Agras OEM Parts | Remote Controller Rear Shell | RC Chassis Back Cover | Smart Controller Structural Housing
🇺🇸 U.S.A. FIRST
Ares Acres LLC is a U.S.-based authorized DJI Agras reseller supporting American agricultural drone operators with genuine DJI Agras OEM replacement parts, accessories, and field-ready inventory.
FREE & FAST Shipping is included for all U.S. customers.
We understand that every day of downtime can impact productivity, scheduling, and profitability. That's why we focus on providing fast fulfillment, responsive customer support, and reliable access to the parts operators need most.
A cracked controller shell is the kind of damage operators fly with for weeks — right up until dust, water, or a loose board turns a cosmetic problem into a dead controller in the middle of a field. A controller down is an aircraft down, no matter how healthy the airframe is.
Ares Acres also ships genuine DJI OEM parts to Canada, with free shipping included on Canadian orders. Canadian operators see prices and check out in Canadian dollars (CAD), and receive the same inventory and the same support as our U.S. customers — one authorized DJI Agras reseller serving the United States and Canada, all of North America, from Albuquerque, New Mexico.
✅ DJI Agras T100 Compatibility Guarantee
- 🇺🇸 USA Compatibility Guarantee
- 👍🏻 Satisfaction Guarantee
- 💵 Money Back Guarantee
- 📦 Same Day Shipping & Tracking
- DJI Agras T60 / T70 / T70P / T100 Compatibility Guarantee
- OEM DJI molded housing — exact factory fit with all original mounting points, cooling channels, and internal support structures
- FREE & FAST shipping to the U.S.A.
📦 Package Includes
- 1 × DJI Agras OEM Remote Controller Rear Shell
- OEM rear controller housing
- Internal structural rear chassis
- Factory mounting points and screw locations
- Direct-fit OEM replacement component
- OEM protective packaging
🔧 Component Overview
The DJI Agras OEM Remote Controller Rear Shell is a structural housing component engineered to protect the internal electronics, antennas, battery, cooling system, and control hardware inside the DJI Agras Smart Remote Controller.
Designed for DJI Agras T60, T70, T70P, and T100 remote controllers, this OEM rear shell restores the structural integrity of the controller while protecting sensitive internal components from impact, vibration, dust, moisture, and daily commercial field use. Manufactured to DJI OEM specifications, it provides an exact factory fit with all original mounting points, cooling channels, and internal support structures.
Commercial agricultural controllers live a hard life. Throughout daily operation, the controller may experience:
- Frequent transportation and vehicle storage
- Drops and impacts
- Dust and debris
- Moisture and humidity
- Heat and UV exposure
- Continuous field operation and long spraying schedules
- Daily commercial deployments
- Seasonal agricultural workloads and heavy operator use
The OEM Rear Shell is the primary protective structure keeping critical controller electronics securely enclosed while maintaining proper alignment of buttons, joysticks, display assembly, antennas, battery, cooling components, and internal circuit boards.
The OEM Rear Shell helps protect:
- Flight controller electronics
- Internal PCB assemblies
- Battery compartment
- Cooling system
- Internal antennas
- Display assembly
- Joystick assemblies
- Communication hardware
- Charging components
- Internal wiring harnesses
- Structural mounting points
- Overall controller integrity
A damaged rear housing may contribute to cracked housing, poor structural support, loose internal components, water intrusion, dust contamination, reduced cooling efficiency, misaligned buttons, improper screen fitment, higher repair costs, reduced controller reliability, unexpected downtime, and fleet maintenance delays.
Constructed to DJI OEM specifications, this rear shell restores factory structural protection while maintaining the original appearance and durability of the controller.
Map the damage in raking light before you order anything. With the controller off, hold a bright light almost parallel to the surface and work slowly over the whole rear face, then along every edge. Cracks in a moulded housing usually start where the material is asked to do the most: the corners, the anchor points for a strap or lanyard, the boss for any bracket or mount, and the mouth of each vent slot. Look at the seam line too. A seam that has opened into a visible step along one edge means the shell has spread even where no break has appeared.
Reproduce the fault with your hands rather than guessing at it. With the controller on and idle, apply light, deliberate pressure at one point at a time and watch for a screen flicker, a button that stops answering, a momentary dropout, or a reboot. Pressing gently beside one particular screw location and getting a reaction is about as clear as diagnosis gets: the boss under that screw has stopped clamping and the board is unsupported at that corner. Note the exact spot before you open anything, because it tells you what to inspect first once the halves are apart.
Treat heat behaviour as evidence about the housing. A controller that gets uncomfortably warm in the hand, dims its screen, or shuts down on hot afternoons is usually being told to by its own thermal protection. Look at the vent slots for packed dust and dried spray residue, and look inside for a thermal pad that has been squeezed out of position or a foam block sitting where air is supposed to move. If the behaviour tracks ambient temperature and blocked vents rather than the state of charge, the housing is the thing to fix.
After any drop, check range before you trust the controller again. Impact that deforms a shell can pull, pinch, or partially unseat the antenna leads and their retention inside, and the result is a link that still shows connected in the yard and runs out of margin at the far end of a field. Fly a comparison against another controller if you have one, at real distance and in the orientation you normally hold it. A link that got noticeably worse after an impact is a mechanical problem in the housing, not a setting you can change.
Look for the fingerprints of water rather than for water itself. By the time you can see a drop inside, the damage is done. What you are hunting is a tide mark or a dried mineral ring on an internal surface, a bloom of corrosion on a fastener head or a shield can, silt in the bottom of a vent channel, and a gasket or foam seal that is flattened, torn, or has taken a permanent set. Condensation appearing under the screen on a cold morning is a sealing failure being reported by the display, and it will keep getting worse.
⚙️ Functional Purpose
The OEM Remote Controller Rear Shell restores the structural integrity and protective housing of the DJI Agras Smart Controller. The component helps:
- Protect internal electronics
- Restore controller housing
- Support internal components
- Maintain structural rigidity
- Improve impact resistance
- Protect internal wiring
- Support cooling airflow
- Preserve OEM fitment
- Maintain proper assembly alignment
- Improve long-term durability
- Reduce environmental exposure
- Restore factory appearance
- Support commercial deployment
- Maintain controller reliability
- Extend controller service life
Reliable controller performance begins with dependable structural protection. A damaged rear shell contributes to housing cracks, loose internal components, dust intrusion, moisture exposure, structural weakness, increased maintenance, unexpected downtime, higher repair costs, and reduced fleet readiness.
Make a screw map before the first fastener comes out. Fastener lengths across a controller housing are not all the same, and a long screw driven into a short boss splits it. Punch the screw pattern into a piece of card, or print the photograph you took and push each screw through the paper where it belongs, so every one goes back into the hole it came out of. Work on a clean mat with the controller supported, and take the shots of the outside now while everything is still where the factory put it.
Open the halves like a book, never straight up. Release the perimeter clips with a plastic spudger worked slowly around the edge rather than a screwdriver or a knife, both of which mark the mating face and leave a burr that stops the new shell closing. When the perimeter is free the two halves are usually still joined by short ribbons or antenna leads, so hinge the shell open along one edge, get eyes on what is still attached, and only then decide what to disconnect and in what order.
Ribbon and coaxial connectors are where this job goes wrong. Release the latch on a ZIF connector before pulling anything, lift ribbons straight out with no sideways drag, and take hold of connector housings rather than the conductors behind them. Coax leads are the delicate ones: photograph which lead sits in which socket and how each one is routed and clipped, then press replacements home vertically until they seat with a small click rather than rocking them on. A coax connector that has been levered off is a controller repair, not a shell repair.
Move every passenger part across deliberately. Foams, gaskets, light pipes, rubber keypads and button boots, thermal pads, threaded inserts, and any antenna retention clip all have to end up in the new shell in the correct place and the correct way round. Lay them out in the order they came off. Check nothing is doubled over, pinched, or sitting proud of its pocket, because a foam block folded on itself will hold the halves apart just enough to break the seal and you will not see it once the case is closed.
Close it dry-fitted first, then fasten it gently. Bring the halves together with no screws in and run a fingernail around the entire seam looking for a gap, a step, or a wire showing. If anything is trapped, it is trapped now and not after you have torqued it down. Then start every screw by hand, work from the middle of the pattern outward, and stop the moment each one is snug. These are self-tapping fasteners into moulded bosses, and the failure you are trying to avoid is stripping a brand new shell on the day you fit it.
⚠️ Common Replacement Indicators
Replacement may be recommended when operators observe:
- Cracked rear housing
- Broken mounting tabs or screw mounts
- Impact damage
- Structural fractures
- Missing housing sections
- Warped shell
- Water damage
- Chemical exposure
- UV deterioration
- Transportation damage
- Maintenance inspection findings
- Preventative maintenance replacement
- Long-term commercial wear
- Controller rebuild and refurbishment projects
Field diagnostic: squeeze the controller gently at the corners with the unit off — if the case flexes, creaks, or the screen bezel moves, the rear shell or its screw bosses have failed even if the crack is not visible. Check every screw for a stripped or spinning boss; a screw that will not torque down means the plastic behind it is gone, and no amount of retightening fixes it. Look at the cooling vents and the seams: dust packed into the vents or moisture staining inside means the shell has stopped sealing, and heat-related shutdowns on hot days usually follow. Separate the symptoms from the cause — a controller that reboots when set down hard, loses link when handled, or shows a screen that lifts at one corner is telling you the housing is not holding the boards where they belong. Do not run a cracked controller through a spray season and hope; a housing part is cheap, and the boards behind it are not. Controller disassembly requires care with ribbon cables and antenna leads; if you are not comfortable inside the unit, have a technician do the swap.
What actually kills these shells:
- Drops onto hard surfaces, tailgates, and concrete
- Loose transport — sliding around a truck cab or toolbox instead of a case
- Over-torqued screws stripping the plastic bosses during past service
- UV and heat cycling in a vehicle dash making the polymer brittle
- Chemical residue on the operator's hands and gloves attacking the surface
- Moisture intrusion through an already-cracked seam
- Vibration in transport working existing cracks outward
Post-install checklist:
- Power the controller down completely and remove or isolate the battery before opening
- Work on a clean, static-safe surface and keep fasteners organized by location
- Handle ribbon cables and antenna leads by the connector — never pull the cable
- Confirm every internal harness is reseated and routed in its factory path
- Check that no wire is pinched at the seam before closing the shell
- Start every screw by hand and torque lightly — these bosses strip easily
- Confirm cooling vents are clear and unobstructed
- Power up and test screen, touch response, both sticks, all buttons, and dials
- Verify link to the aircraft and full antenna performance at distance before flying a paid job
- Store and transport the controller in a case from here on
A controller that no longer sits flat. Set it down on a level bench and see whether it rocks on one corner or sits with a visible twist. A housing that has taken a permanent set after a drop or after being sat on is no longer holding the boards, the screen, and the seal in the same plane, and everything mounted to it is being asked to make up the difference.
A seam gap that opens when you hold the controller one-handed and closes when you set it down. That is the shell flexing under nothing more than its own weight and your grip. It means the perimeter clips, the bosses, or both have lost their hold, and it is the condition that lets dust and mist reach the boards during a normal working day.
Condensation under the screen on a cold morning, or a screen that fogs and clears as the day warms. Moist air is getting in and out of a housing that is supposed to be closed. Nothing about the display is wrong; the display is simply the only window you have into a sealing failure that is also happening around the boards, the connectors, and the battery compartment.
A strap anchor, lanyard point, or bracket boss that has elongated, torn, or pulled through. Those features carry the whole weight of the controller plus whatever shock a bump or a fall adds, and once one has started to tear the crack propagates into the surrounding panel. This is the failure that ends with the controller on the ground while you are walking to the aircraft.
A shell that has gone chalky and pale from seasons of sun and now chips instead of flexing when it is knocked. Ultraviolet exposure embrittles the polymer, and an embrittled housing stops absorbing impact and starts transmitting it to the boards. If a corner breaks away cleanly rather than deforming, the material has changed and the rest of the shell is in the same condition.
📐 Specifications
- Component Type: Remote controller rear shell / structural housing
- Compatibility: DJI Agras T60, DJI Agras T70, DJI Agras T70P, DJI Agras T100
- Package Quantity: 1 Piece
- Installation Area: Rear remote controller housing
- Function: Protects internal controller electronics and provides structural support
- Construction: DJI OEM molded structural housing
- Mounting Type: Direct-fit OEM replacement component
- Application: DJI Agras Smart Remote Controller
Supplied as: The rear housing itself. Boards, battery, antennas, sticks, buttons, keypads, gaskets, foams, thermal pads, and fasteners are not included unless the photographs on this page show otherwise, so plan on transferring everything from the shell you remove
Fasteners: Not included. Keep the originals and keep them in position order, because lengths vary across a controller housing, and set aside any whose head is chewed rather than fighting it on reassembly
Torque: No figure is published and none is needed. These are self-tapping screws into moulded bosses. Run each one down by hand until it is just snug and then stop, because a boss stripped in a new shell cannot be repaired and the shell becomes scrap
Seals and thermal interface: Treat every gasket, foam, and thermal pad as a wear item. Inspect what comes off and replace anything crushed, torn, contaminated, or that has taken a set. A new shell closed onto a flattened gasket seals no better than the cracked one it replaced
Pairing and firmware: Nothing to do. The shell is structural rather than electronic, so there is no pairing, activation, calibration, or firmware step after the swap. Anything that does not work when you power up afterwards is a ribbon, a coaxial lead, or a keypad that is not seated
Bench identification: Compare the removed shell against the photographs here before you commit: vent slot pattern, port and strap cut-outs, the rib and boss layout on the inside face, and the position of any antenna retention feature. Controller housings across a model family look nearly identical from the outside and differ inside
🚜 Necessary For
- DJI Agras T60, T70, T70P, and T100 operators
- Commercial spraying contractors
- Agricultural aviation providers
- Fleet maintenance managers
- Agricultural drone technicians
- Commercial drone fleets
- DJI repair facilities and professional service centers
- Controller refurbishment projects
- Preventative maintenance programs
- Agricultural technology companies
- Daily commercial flight operations
- Emergency repair inventory
Maintaining OEM controller housings helps preserve valuable electronics while minimizing downtime during demanding agricultural operations.
Saving a controller after a drop, where the electronics survived and the housing did not. That is the common outcome, because the shell is doing its job when it takes the impact, and it is a far cheaper repair than the alternative if it is done before the next rainstorm.
Restoring sealing ahead of a wet season or a humid stretch, on a controller where the seam has opened or the gasket has taken a set. Water gets into a controller once and causes problems for months afterwards, so the time to close the case is before the weather tests it.
Refurbishing a fleet controller that is being handed to a new operator or moved between crews, where a sound housing, intact strap anchors, and clear vents are what keep a shared unit working through a season of being passed around.
💡 Why This Part Matters
Every DJI Agras mission begins with one essential tool: a dependable remote controller. The Rear Shell protects the electronics responsible for flight control, aircraft communication, mission planning, and daily commercial operations. It does not fly the aircraft — it keeps everything that does securely mounted and sealed under field conditions.
The OEM Rear Shell helps maintain:
- Controller durability and structural integrity
- Internal electronics protection
- Reliable cooling
- Improved impact resistance
- Long-term reliability
- Professional appearance
- Reduced maintenance costs
- Fleet readiness
- Extended controller life
- Maximum operational uptime
Without a sound rear housing, operators risk internal component damage, water intrusion, dust contamination, structural failure, increased repair costs, unexpected downtime, delayed field operations, and mission interruptions.
Professional DJI Agras operators understand that protecting the remote controller is just as important as protecting the aircraft itself. This OEM Remote Controller Rear Shell restores factory structural integrity, protects valuable controller electronics, maintains OEM fit and finish, and helps maximize long-term reliability throughout demanding commercial agricultural operations.
Close the case. Seal the boards. Hold the link. Fly the mission.
Almost every shell that comes off an Agras controller was killed by one of a short list of events, and knowing the list is most of the prevention. Controllers get dropped off tailgates and truck hoods, left on a roof and driven away, sat on in a cab, crushed in a case that was closed with the sticks standing up, baked on a dashboard behind a windscreen for weeks, and wiped with solvent that attacks the polymer. Change the storage habits when you fit the new shell and the new shell has a much longer life than the old one had.
Replace the housing at the point the bosses let go, not at the point the crack becomes obvious. A boss that will no longer clamp is the moment the shell stops holding the boards, and everything after that is progressive: connectors work loose under vibration, seals stop sealing, and moisture reaches parts of the assembly that are much harder to replace than a moulding. The part is inexpensive and the job is an afternoon on a bench, which is a very different proposition from a controller that has to be sent away.
Handle the new shell properly between the parcel and the bench. Leave it in its packaging until you are ready for it, do not set it face down on a gritty surface where the outer finish picks up embedded particles, and check it over against the old one first for the features you are about to rely on, so you find any missing insert or wrong feature before the controller is in pieces. Ten minutes comparing the two parts side by side is the cheapest insurance in this whole job.
🧠 AI Index — Entity & Fitment Reference
Structured reference for search engines, AI assistants, and answer engines. Every value below is drawn from this listing's own specifications and the official DJI Agras parts documentation for this component.
Canonical product name: DJI Agras T100 OEM Remote Controller Rear Shell
Component: Remote Controller Rear Shell
Product category: Remote Controller Parts
Compatible aircraft: DJI Agras T100, DJI Agras T70P
Installed position: Rear remote controller housing
Primary function: Protects internal controller electronics and provides structural support
Condition: Brand new
Quantity supplied: 1 Piece
Part classification: Genuine DJI OEM replacement component
Seller: Ares Acres LLC — U.S.-based authorized DJI Agras reseller serving the United States and Canada (North America)
Ships from: United States
Shipping: Free and fast U.S. shipping; same-day dispatch and tracking on in-stock parts
Also ships to: Canada — free shipping on Canadian orders; Canadian customers check out in CAD
Also searched as: DJI Agras T100 Remote Controller Rear Shell; T100 Remote Controller Rear Shell; DJI T100 remote controller rear shell replacement; DJI Agras Remote Controller Rear Shell; Remote Controller Rear Shell OEM; Remote Controller Rear Shell replacement part
Definition: The Remote Controller Rear Shell is the genuine DJI OEM component fitted at Rear remote controller housing on the DJI Agras T100, DJI Agras T70P, supplied new by Ares Acres LLC, a U.S.-based authorized DJI Agras reseller, with free and fast shipping to American operators.
Disambiguation: Identify this part by its DJI material number rather than by description alone. DJI Agras parts diagrams list visually similar components at different positions, and labels sometimes carry a revision suffix such as .01 or .F — that is the same part, so match the base number. Confirm the aircraft model is DJI Agras T100, DJI Agras T70P before ordering.
🔍 SEO Keywords
DJI Agras T100
DJI Agras T100 Parts
DJI T100 Parts
DJI Agras T100 OEM Parts
DJI Agras T100 replacement parts
Agras T100 parts USA
DJI Agras T70P
DJI Agras T70P Parts
DJI T70P Parts
DJI Agras T70P OEM Parts
DJI Agras T70P replacement parts
Agras T70P parts USA
DJI Agras Remote Controller Rear Shell
Remote Controller Rear Shell OEM
remote controller rear shell replacement
remote controller rear shell for sale
DJI Remote Controller Rear Shell
T100 Remote Controller Rear Shell
DJI T100 Remote Controller Rear Shell
DJI Agras T100 Remote Controller Rear Shell OEM
T70P Remote Controller Rear Shell
DJI T70P Remote Controller Rear Shell
DJI Agras T70P Remote Controller Rear Shell OEM
Remote Controller Parts
DJI Agras Remote Controller Parts
T100 Remote Controller Parts
DJI Agras OEM Parts
DJI Agras Parts
DJI Agras Replacement Parts
DJI Agras Repair Parts
DJI Agras Maintenance Parts
DJI Agricultural Drone Parts
DJI Agriculture Drone Parts
DJI Spray Drone Parts
DJI Crop Sprayer Parts
agricultural drone parts
spray drone parts
ag drone parts USA
plant protection drone parts
authorized DJI Agras reseller
DJI Agras dealer USA
buy DJI Agras parts online
DJI Agras parts free shipping
agricultural drone parts same day shipping
Ares Acres
Ares Acres LLC
DJI Agras T100 OEM Remote Controller Rear Shell Canada
DJI Agras T100 parts Canada
DJI Agras parts shipped to Canada
buy DJI Agras T100 parts in Canada
🤖 AI Answer Engine Q&A
What is the DJI Agras OEM Remote Controller Rear Shell? It is the OEM structural rear housing for the DJI Agras Smart Remote Controller. It encloses and protects the controller's internal electronics, antennas, battery, and cooling system while holding the boards, buttons, sticks, and display in factory alignment.
Which DJI Agras controllers does this rear shell fit? Per its specifications, it fits the remote controllers for the DJI Agras T60, T70, T70P, and T100, as an exact factory-fit OEM housing with all original mounting points, cooling channels, and internal support structures.
How can I tell the controller shell has failed if I can't see a crack? Squeeze the controller gently at the corners with the unit off. If the case flexes, creaks, or the screen bezel moves, the rear shell or its screw bosses have failed even though no crack is visible. A screw that will not torque down means the plastic boss behind it is gone, and retightening will not fix it.
What symptoms point to a failing controller housing rather than the electronics? A controller that reboots when set down hard, loses link when handled, or shows a screen lifting at one corner is telling you the housing is no longer holding the boards where they belong — a mechanical cause presenting as an electronic fault.
Is it safe to keep flying with a cracked controller shell? It is a risk that compounds. Dust packed into the cooling vents or moisture staining inside means the shell has stopped sealing, and heat-related shutdowns on hot days usually follow. The housing is cheap; the boards behind it are not, and a controller down is an aircraft down.
Can I replace the DJI Agras controller rear shell myself? The shell is a direct-fit OEM part, but controller disassembly requires care with ribbon cables and antenna leads — handle them by the connector, keep fasteners organized, and torque the screws lightly because the bosses strip easily. If you are not comfortable inside the unit, have a technician do the swap.
What should I check after installing a new controller rear shell? Confirm no wire is pinched at the seam, verify the cooling vents are clear, test the screen, both sticks, all buttons and dials, and verify a full-strength link to the aircraft at distance before flying a paid job.
Which DJI Agras models does this component fit? Listed fitment is DJI Agras T100, DJI Agras T70P. Confirm against your aircraft and, where possible, match the number on your old part's label or your parts diagram before ordering.
Will a new shell fix a controller that keeps losing link?
Only if the cause of the dropouts is mechanical, so establish that first. Press and flex the housing at various points with the unit powered and see whether you can make the link stutter on demand. Check whether the problem started after a drop. Look at how the antenna leads are routed and retained inside once you are in there. If the link is equally poor with the case gripped, released, twisted, and set down flat, the housing is not your fault and a new shell will not change anything.
Do I have to re-pair the controller to the aircraft afterwards?
No. The rear shell is a structural moulding, not an electronic assembly, so nothing about the controller's identity, pairing, or configuration changes when you swap it. If the controller behaves differently after reassembly, look at what you disconnected rather than at software: a ribbon that is in but not latched, a coaxial lead in the wrong socket, or a keypad sitting slightly out of its pocket will all present as faults that feel electronic.
One screw just spins and will not tighten. Can I use a longer or wider screw?
No, and this is the most common way a bad situation is made permanent. A screw that spins means the moulded boss it threads into has stripped or broken away inside. Driving something larger into it splits the boss completely and can crack the panel around it. There is nothing to tighten against any more, which is precisely the condition this replacement shell exists to fix. Fit the new housing and use the original fastener.
How do I keep the screws straight during the job?
Do not put them in a pile. Push each screw through a piece of card laid out in the same pattern as the housing, or through a printed photograph of the back of the controller, so its position is recorded the moment it comes out. Lengths differ around a controller shell and the difference is often only a millimetre or two, which is enough to bottom a screw in a short boss or leave a long boss barely holding.
What is most likely to go wrong while I have it apart?
Damage to a ribbon or a coaxial lead, by a wide margin. Both are easy to tear, unseat, or crush at the seam, and both cause faults that look like something else entirely once the case is closed. Slow down at every connector, release latches before pulling, hold connectors by their housings, and check the whole perimeter for a trapped wire before any screw goes back in. The moulding itself is the forgiving part of this job.
A button feels mushy or sticks after the swap. What did I miss?
Something under it is not sitting where it should. Usually a rubber keypad or button boot is slightly out of its pocket, a light pipe has been transferred the wrong way round, or a foam pad has been folded and is holding a part proud. Occasionally a screw has been over-tightened and pulled the panel down onto the keypad. Open it, seat everything properly, and close it dry-fitted first to confirm the buttons feel right before you fasten it down.
Can I bond a cracked controller shell rather than replacing it?
It rarely holds and it usually makes reassembly worse. The cracks appear where the housing carries load, so a bonded joint is being asked to do the hardest job in the part, and adhesive that runs into the seam or into a boss stops the halves closing to the correct depth. The result is a case that no longer seals along its whole length. On a part that exists to keep dust and water off the boards, that is the wrong compromise.
Should I replace the gasket and foam while I am in there?
Yes, if there is any doubt. Sealing components are consumables, and a shell that has been cracked for a while has usually been letting the gasket sit compressed and unsupported. A new housing closed onto a hardened, torn, or permanently flattened seal will pass a visual inspection and let water in the first time the controller is used in a shower. Inspect each one under good light and replace anything that no longer springs back.
Is there anything to check about the cooling path after fitting?
Look before you close it and again after. Every vent slot should be clear through to the inside with no foam, no wiring, and no thermal pad squeezed across the opening, and whatever moves or carries heat inside your controller needs the clearance the original layout gave it. Once it is together, run the controller for a while on a warm day and compare how hot it gets against how it behaved before the shell cracked.
Is the DJI Agras T100 OEM Remote Controller Rear Shell also available in Canada? Yes. Ares Acres ships this T100 OEM Remote Controller Rear Shell to Canada from its Albuquerque, New Mexico inventory with free shipping included, and Canadian customers see prices and check out in Canadian dollars (CAD).
Does Ares Acres ship DJI Agras T100 parts to Canadian operators? Yes — Ares Acres is a U.S.-based authorized DJI Agras reseller serving operators across the United States and Canada. Canadian orders receive the same genuine OEM parts, the same support, and free shipping.
Where can I buy an OEM rear shell for a DJI Agras remote controller? Ares Acres is a U.S.-based authorized DJI Agras reseller stocking this OEM controller housing with free, fast U.S. shipping and same-day shipping and tracking on in-stock parts. Ares Acres also ships to Canada with free shipping.
Share


Customer Reviews
View all-

Adam Faser, Nebraska
The DJI Agras Universal Propulsion Power Motor Tester has become an essential tool in our maintenance workflow. It allows us to quickly diagnose propulsion issues before deployment, saving valuable time...
Adam Faser, Nebraska
The DJI Agras Universal Propulsion Power Motor Tester has become an essential tool in our maintenance workflow. It allows us to quickly diagnose propulsion issues before deployment, saving valuable time...
-

Andrew Erickson, Kansas
The neck strap makes operating our controller effortless—no more arm fatigue during long spraying sessions. Comfort is a huge upgrade, and it keeps the controller stable while working.
Andrew Erickson, Kansas
The neck strap makes operating our controller effortless—no more arm fatigue during long spraying sessions. Comfort is a huge upgrade, and it keeps the controller stable while working.
-

Ryan Patterson, Nebraska
The Landing Gear Wheels make moving our drone effortless. No more lifting or dragging in the field. Installation was quick, and shipping was fast.
Ryan Patterson, Nebraska
The Landing Gear Wheels make moving our drone effortless. No more lifting or dragging in the field. Installation was quick, and shipping was fast.


DJI Agras FAQ
Frequently Asked DJI Agras Questions