


Ares Acres
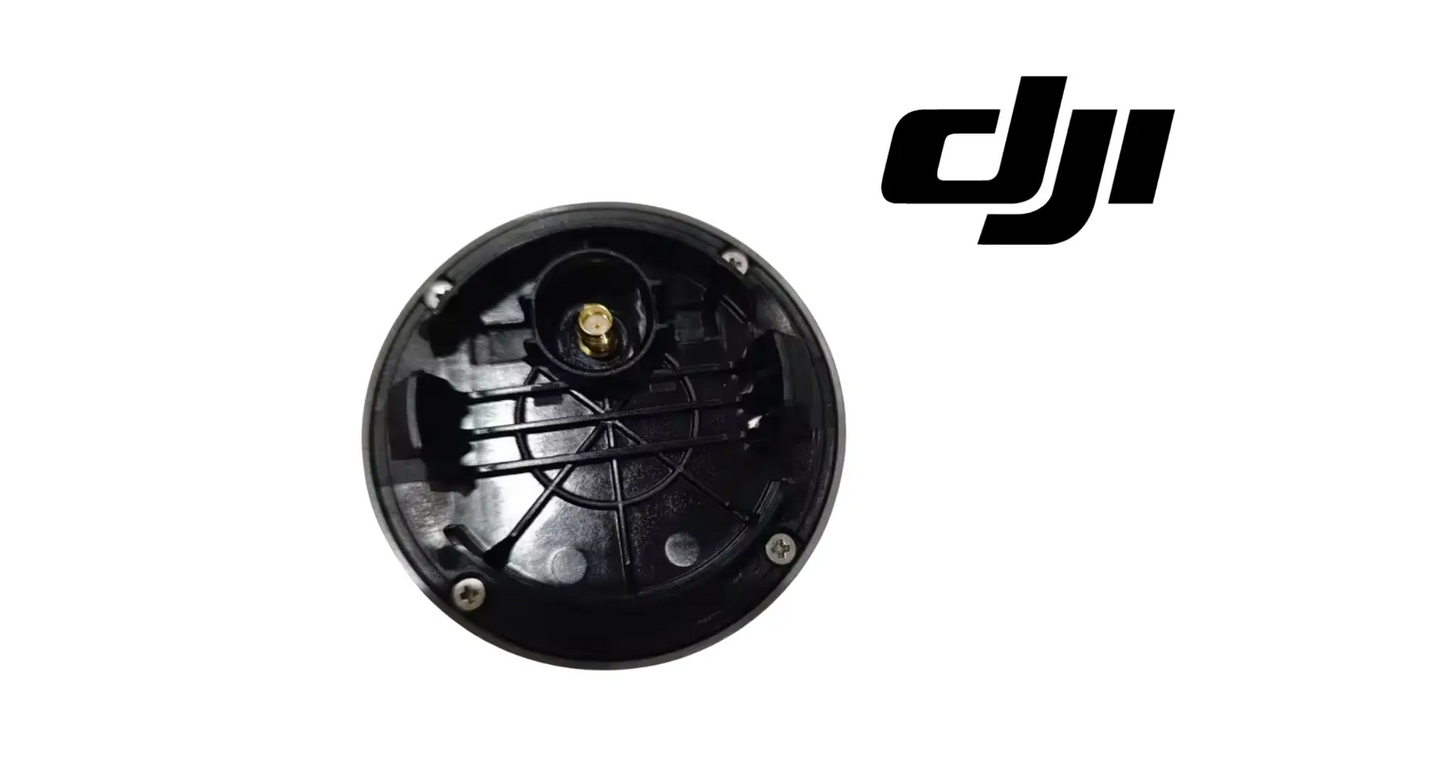
DJI Agras T100 OEM RTK Antenna Module (BC.AG.SS001034)
DJI Agras T100 OEM RTK Antenna Module (BC.AG.SS001034)
Couldn't load pickup availability
DJI T100 – T70P Original RTK Antenna Module — Precision Positioning | OEM Flight Navigation | Part-137-Grade Accuracy | DJI Material Number BC.AG.SS001034
DJI Material Number BC.AG.SS001034 — this is the official DJI part number for this exact component. Match it to your parts diagram or the label on the original part to confirm fitment; factory labels may carry a revision suffix, which is the same part.
🇺🇸 U.S.A. FIRST
Ares Acres LLC is a U.S.-based authorized DJI Agras reseller supporting American agricultural drone operators with genuine DJI Agras OEM replacement parts, accessories, and field-ready inventory.
FREE & FAST Shipping is included for all U.S. customers.
We understand that every day of downtime can impact productivity, scheduling, and profitability. That's why we focus on providing fast fulfillment, responsive customer support, and reliable access to the parts operators need most.
Ares Acres LLC is a U.S.-based authorized DJI Agras reseller. Every order ships from and is supported in the United States — genuine OEM parts, verified fitment, and real support from people who know these aircraft.
We use specialized technicians to verify and dispatch the RTK Antenna Module ordered.
Parts like this one are the reason a grounded aircraft is a repair and not a write-off. A single component held in U.S. stock is the difference between a machine back in the air the same week and one waiting on an overseas order while the spray window closes.
That is why Ares Acres keeps hard-to-find OEM rtk & antennas in stock and shipped fast within the U.S.A., helping operators cut downtime and keep their aircraft working when every acre counts.
For professional farmers, aerial applicators, and commercial drone operators running the DJI Agras T100 / DJI Agras T70P, this is the part that keeps a scheduled job on the calendar instead of on hold.
Ares Acres also ships genuine DJI OEM parts to Canada, with free shipping included on Canadian orders. Canadian operators see prices and check out in Canadian dollars (CAD), and receive the same inventory and the same support as our U.S. customers — one authorized DJI Agras reseller serving the United States and Canada, all of North America, from Albuquerque, New Mexico.
✅ Compatibility Guarantee
- Guaranteed same antenna module used in DJI factory production
- Guaranteed fit for DJI Agras T100 / T70P (upper rear shell mount)
- Guaranteed reliable GNSS and RTK signal locking even in obstructed farm environments
- Guaranteed individually sealed OEM packaging
📦 Package Includes
- 1 × Genuine DJI RTK Antenna Module (compatible with Agras T100 / T70P)
- OEM-protected packaging for transport and storage
- Orientation reference for proper module alignment
🔧 Component Overview
The DJI Agras T100 / T70P Original RTK Antenna Module is the core positioning component that enables centimeter-level flight accuracy, stable route planning, and compliant spray operations. When RTK drift increases, routes become uneven, overlap widens, and chemical cost rises. Pilots often misdiagnose this as a controller or software issue — but in practice, RTK antenna wear or micro-fractures are among the most common failure points in high-hour fleets.
Before you order anything, establish a clean baseline in a location you trust. Take the aircraft to genuinely open ground, well away from tree lines, metal buildings, grain bins, silos, and power lines, power up, and watch two things: how long it takes to reach FIX, and whether it stays there for ten minutes without dropping. Positioning complaints are environmental at least as often as they are hardware, and a module that behaves in the clear has just cleared itself of the charge.
Separate the antenna from the correction source, because RTK cannot resolve without corrections and a corrections outage looks exactly like a failed antenna from the pilot seat. Confirm the base station is powered, set up on its point, and transmitting, or that the network correction service is connected and authenticated. Look at whether the aircraft reports corrections being received at all. If nothing is arriving, no antenna on earth will produce a FIX and the fault is upstream of this part.
Compare the numbers the aircraft reports today against what it reported when it was healthy. Satellite count and signal quality are the honest measures here, and they degrade before FIX behavior does. A module that used to acquire quickly and now takes noticeably longer, or that reports fewer satellites in the same open field it always used, is losing sensitivity. That is the earliest usable warning this part gives, and it shows up long before the aircraft starts flying crooked lanes.
Run a wet test against a dry one. If your positioning trouble shows up in heavy dew, in rain, or on the first flight after a washdown and improves as the day dries out, you are looking at moisture in the connector or inside the housing rather than at a general loss of sensitivity. Dry the connection thoroughly with clean compressed air, reassemble, and see whether the behavior changes. A fault you can dry out is a sealing failure, and sealing failures do not heal.
Do a wiggle test on the connection with the aircraft powered and sitting in the open. Watch satellite count and FIX status while you gently move the cable near the connector and while you apply light pressure to the module in its mount. A count that dips or a FIX that drops as you move one specific point is a connector or cable fault, not a dead antenna, and that distinction is the difference between a cheap fix and an unnecessary one.
Inspect the module physically with better light than you think you need. Look at the housing for hairline cracks, at the face for crazing, chips, or a scuff that suggests a strike, and at the seam and any cable entry for a gap. Then look inside the connector shell for green or white deposits and for pins that are discolored or recessed. A cracked housing on a weather resistant part is a completed failure even if the aircraft is still reaching FIX today.
Check what is sitting on and around the antenna before you blame it. Caked spray residue, dried fertilizer dust, mud, or a layer of chaff on the module face all attenuate what reaches the array, and so does anything metallic that has been added nearby, including an aftermarket bracket, a camera mount, a strobe, or a foil backed sticker. Clean the face properly, remove anything that was not there from the factory, and retest before spending money.
Confirm the mounting itself, because a module that is loose, tilted, or refitted out of position will still lock up and still report FIX while giving you a position that is quietly wrong. Check the module sits flat against its mounting face with nothing trapped underneath, that the fasteners are tight, and that its orientation matches the factory alignment reference for the upper rear shell. A consistent offset in your lanes rather than a wandering drift usually traces back to exactly this.
Get a second opinion from a second aircraft when you can. Fly two machines from the same base or the same correction service in the same field within the same hour, and compare how they acquire and hold. If both struggle, the problem is the corrections, the site, or the conditions. If one is fine and the other is not, you have isolated the fault to the aircraft, and the antenna module becomes a genuine suspect rather than a guess.
⚙️ Functional Purpose
This RTK antenna handles high-precision spatial computation, maintaining stable connectivity with:
- GNSS constellations (GPS / BeiDou / Galileo / GLONASS)
- RTK base station corrections
- DJI's positioning data fusion system
It ensures:
- Straight, predictable spray paths
- Precise return-to-home and mission accuracy
- Stable hovering in orchard canopies and variable terrain
- Consistency required for FAA Part 137 pattern compliance
Set up before you unfasten anything. Work indoors or under cover on a clean bench rather than at the tailgate, because the connector on a positioning antenna is the delicate part of this job and grit is its enemy. Power the aircraft down, disconnect the flight batteries, and let it sit. Have a small parts tray ready, since the fasteners at the upper rear shell are easy to lose and not interchangeable with whatever is in the shop drawer.
Photograph the installation from several angles before it is disturbed. Record the module orientation against the airframe, which way any label or index mark faces, the cable route and every clip along it, and the fastener positions and lengths. This part requires factory alignment at the upper rear shell, so orientation is not a matter of what looks right, and a photograph is the only reference that does not fade between removal and refit.
Handle the module as the static sensitive electronic assembly it is. Hold it by its housing rather than by the connector, do not touch the contacts, and do not set it face down on a bench where the face can pick up a scratch or a burr. Ground yourself before you handle it if you can, and leave the replacement in its sealed packaging until the old one is out and the mounting area is clean and ready.
Get the shell off carefully rather than quickly. Fasteners into plastic bosses need a driver that fills the recess and stays square, and a rounded head on an upper shell turns a thirty minute job into a much longer one. If a fastener spins without lifting, press the panel against it to add friction and ease it out rather than driving harder. Keep the fasteners in the pattern they came from, since lengths at this position are not always the same.
Release the antenna connector by its own retention rather than by pulling on the cable. If it is a threaded type, turn the coupling nut and not the cable body, because twisting the cable damages the braid and the center conductor in ways nothing external will show. If it is a push fit, pull it straight off with support behind it. Cap or bag the aircraft side connector the moment it is free so nothing can fall into it while the job is open.
Respect the cable as much as the module. Antenna cable does not tolerate kinks, tight bends, or being crushed under a clip, and the damage a kink does is permanent even when the jacket springs back. Never bend it tighter than the loop it naturally forms, never use it to pull the module out, and never pinch it in the shell as the panel goes back on. A kinked antenna cable produces a slow, unexplained loss of performance that no visual inspection ever finds.
Prepare the mounting face before the new module goes on. Wipe out spray residue, dust, and any dried product, check that no burr or old adhesive is standing proud, and confirm the surface the module sits against is flat and undamaged. Anything trapped under the module tilts it, and a tilted antenna is a permanently offset one. Look at the bracket or shell it lands on for cracks while the area is exposed and you can actually see it.
Fit the module to the factory alignment reference rather than by eye. Match the orientation to the photographs you took and to the alignment reference supplied for the upper rear shell, seat it flat with no rock, and start every fastener by hand before any of them is tightened. Where DJI publishes a torque figure for this position, use it with a calibrated driver. These are small fasteners into a structural shell and overtightening them strips a boss rather than improving anything.
Reconnect with the connector square and fully home. Start a threaded coupling by hand and be certain it is not cross threaded before it goes tight, and take a push fit connector straight in until it seats. Confirm any seal, boot, or gland is present, undamaged, and sitting square rather than rolled under. Then dress the cable back into its original clips with the same slack it had, so it moves with the airframe instead of being loaded by it.
Verify with a proper acquisition test rather than a glance at the screen. Take the aircraft to open ground, power up, and time how long it takes to reach FIX. Note the satellite count and compare it with what the aircraft used to report in the same conditions. Then leave it sitting and watch for ten minutes. A module that acquires promptly and holds without dropping has proven itself in the only way that matters before any product is loaded.
Finish with a flight check that measures repeatability, not just presence. Fly a straight A to B line over ground with a feature you can see, then fly the same line again and confirm the aircraft puts itself in the same place rather than a step to one side. Check the return to home lands where it should. Then run the aircraft up at working power and watch that FIX holds under vibration, because a marginal connection often survives a static test and fails once the rotors are loaded.
⚠️ Common Replacement Indicators
Failure symptoms often include:
- RTK "FLOAT" status instead of FIX
- Route drift or overlapping lanes
- Sudden RTH inaccuracies
- Intermittent signal loss near trees, silos, or mild interference zones
A weak RTK antenna won't announce its failure — it will simply begin compromising your patterns, costing you flight time and chemical efficiency.
Acquisition time that has been quietly getting longer is the earliest honest warning this part gives. A module that used to reach FIX in the time it takes to run a preflight and now needs several minutes in the same open field is losing sensitivity, even though it eventually gets there and the aircraft flies acceptably. This is the point at which to plan a replacement, because the next stage is failing to acquire on the one morning the weather is right.
A satellite count that is consistently lower than the same aircraft used to report in the same conditions is a hardware symptom rather than a sky problem. Compare against your own history rather than against another operator, since sites and constellations differ. A count that has dropped and stayed down, or one that is noticeably worse than a second aircraft flying beside it, points at the antenna, its cable, or its connector.
A FIX that holds perfectly on the ground and drops as soon as the aircraft is at working power is a connection fault, not a sensitivity fault. Vibration is what separates a connector that is fully seated from one that is nearly seated, and it is what finds a conductor that has broken inside an intact jacket. Anything that behaves on the bench and fails in the air belongs to the connector and cable before it belongs to the module.
Position that steps rather than wanders tells you about the mounting rather than about the electronics. A drift comes and goes and gets worse as conditions worsen. A consistent offset, where every lane sits the same distance to one side of where you planned it, usually means the module has been refitted out of its factory orientation, is sitting on something trapped under it, or is loose enough to have moved in its mount.
Positioning that degrades in rain, heavy dew, or on the first flight after washdown, then improves as the day dries, means moisture is getting into the connector or the housing. It is easy to dismiss because it fixes itself, which is exactly why it is worth acting on. Every wet cycle carries spray chemistry into the connection and takes a little more plating off the contacts, and the fault gets less polite each time it returns.
Green or white crystalline deposits on the antenna connector pins, or a chalky film inside the shell, mean spray solution has been sitting in the connection. Cleaning it restores function temporarily but not permanently, because the plating is gone where the deposits formed. Deposits also mean the sealing at that point has been letting go, so the housing and the cable entry deserve the same inspection before anything is put back together.
A cracked, crazed, or chipped housing is a replacement indicator on its own, whatever the aircraft is currently reporting. This is a weather resistant assembly on a machine that gets rinsed at the end of every spray day, and the housing is what keeps water off an electronic array. A crack that lets water in does its damage over weeks, so the aircraft that is flying fine today with a cracked module is not evidence that the crack is harmless.
Terrain following or altitude behavior that has become inconsistent is worth taking to the positioning system rather than straight to the radar. A vertical position that is noisy or offset changes how the aircraft interprets its height above the crop, and that shows up as a spray height that varies pass to pass. Check acquisition, satellite count, and hold quality before you start chasing sensors that may simply be reacting to a poor position solution.
Behavior that changes with the aircraft configuration, such as trouble that only appears with a full tank, only after folding and unfolding, or only after the upper shell has been off for other work, points at the cable and the routing rather than at the module. Something in that route is being stretched, pinched, or moved into contact, and it is far easier to find with the shell open and the aircraft cycled slowly than by reading logs afterwards.
A module that performs well against one correction source and poorly against another is telling you to look at the corrections before the hardware. Base station position errors, a base antenna that has been knocked, a poor radio link, or a network service dropping out all produce symptoms that are indistinguishable from an aircraft antenna fault. Testing the same aircraft against a second, known good correction source separates the two in one flight.
📐 Specifications
- DJI Material Number (SKU): BC.AG.SS001034
- Component Type: RTK dual-band antenna module
- Compatibility: DJI Agras T100 / T70P
- Mount Position: Upper rear shell (factory alignment required)
- Construction: Shielded antenna array with weather-resistant housing
- Packaging: Individually sealed OEM module
Inspect before installation:
- Confirm the module and housing are free of cracks or shipping damage
- Review the orientation reference — factory alignment is required at the upper rear shell
- Check the mounting area and connector for corrosion or chemical residue
After installation:
- Power up in an open area and confirm RTK reaches FIX status
- Fly a short test route and verify straight lanes with no drift or overlap
- Confirm return-to-home accuracy before resuming production spraying
Antenna Gain, Frequency Bands, and Element Count: Not published in this listing beyond its description as a dual band RTK antenna module. Do not substitute on the basis of published figures for another antenna. Confirm the part by DJI material number BC.AG.SS001034 against the label on the module you removed or the callout on your DJI Agras parts diagram.
Positioning Accuracy Figures: Not quoted here as a specification, and not something a replacement part can guarantee on its own. Real world accuracy depends on the correction source, the base station position, satellite geometry at the time, the site, and the installation being correct. Verify accuracy on your own aircraft with a repeatability check rather than assuming a number.
Cable Length, Connector Type, and Torque: Not published in this listing. Compare the connector on the module you removed against the replacement before fitting rather than assuming, and use the DJI torque figure for the mounting fasteners where one is published. These fasteners land in a structural shell, so extra tightness strips a boss rather than improving the mount.
Ingress Protection Rating: Not published here. The module is described as a weather resistant housing, which is not the same as a rated seal against a directed jet. Keep a pressure lance away from the module, the cable entry, and the connector, and treat any crack in the housing as a completed failure of that weather resistance.
Mounting Position and Alignment: Fitted at the upper rear shell, where factory alignment is required. No offset, angle, or reference dimension is published in this listing, so use the orientation reference supplied with the part together with photographs of the original installation rather than fitting by eye.
Base Station and Correction Source: Not included and not part of this component. RTK requires corrections from a base station or a network service, and this module is only the aircraft side of that system. A correction outage produces symptoms identical to a failed antenna, so confirm corrections are arriving before ordering.
Service Classification: Condition based replacement rather than a scheduled interval, with no service life published. Replace on a cracked or water breached housing, corroded connector pins, a measurable loss of satellite count or acquisition time against the aircraft own history, or a positioning fault that follows the module when it is swapped.
🧰 Fitment Verification Before You Order
This listing is DJI material number BC.AG.SS001034. That number, not the description, is what makes a part match. Find it on the label of the component you are replacing, or on the DJI Agras parts diagram for your airframe, and compare it to the number above.
Revision suffixes are still the same part. DJI labels sometimes carry a trailing revision such as .01, .02, or .F. Those denote a production revision, not a different component. Match the base number and disregard the suffix.
Visually similar is not the same. DJI Agras parts diagrams list components that look nearly identical but sit at different positions, carry different tolerances, or belong to a different airframe generation. Ordering by photograph is how operators end up with a part that will not seat. Order by number.
Verified fitment for this listing: DJI Agras T100 / DJI Agras T70P. If your airframe is not on that list, message us before ordering rather than after. We would rather answer a question than process a return, and so would you.
Not sure? Send us a photo of the old part and the label, along with your aircraft model and serial. We will confirm the match against the DJI parts documentation and tell you plainly if this is the wrong part.
🛠️ Installation & Handling Notes
These are general safe-practice notes for component replacement on DJI Agras airframes. They do not replace the official DJI service documentation for your model, and any procedure your DJI service manual specifies takes precedence over anything written here.
Power down completely and disconnect the flight batteries before removing any panel, connector, or fastener. Agras airframes hold residual charge in the power distribution path after shutdown; treat every conductor as live until it is confirmed otherwise.
Photograph the assembly before you disturb it. Cable routing, connector orientation, and fastener lengths on Agras airframes are not interchangeable, and the RTK Antenna Module is easier to fit correctly when you can see how the original sat.
Observe ESD precautions. Ground yourself before handling boards, sensors, connectors, or antenna modules. Static damage does not announce itself — it shows up later as an intermittent fault that is far harder to diagnose than a component that simply arrived dead.
Seat every connector fully and restore the original strain relief. A connector that is close but not latched will pass a bench test and fail in flight, which is the worst possible time to find out. Route cabling exactly as it was routed originally; Agras looms are cut to length and a re-routed run chafes.
Test before you spray. Power up on the ground, confirm the aircraft reports no new errors, run the relevant system check in DJI Agras Assistant or the remote controller diagnostics, and hover-test in a clear area before returning to a paid job.
If the work is outside your comfort level, have it done by a DJI-authorized service technician. The part cost is small next to the airframe.
🚜 Necessary For
Any operator relying on mission accuracy, repeatable routes, or commercial spraying output must have a backup RTK antenna available. This is standard across modern farm fleets. This module is a must-have for:
- Commercial drone pilots performing paid acreage spraying
- FAR Part 137 operators requiring strict application accuracy
- Multi-drone fleet managers maintaining mission continuity
- Repair centers supporting high-hour T100/T70P clients
- Farms in areas with canopy interference or mixed terrain
The most expensive confusion in this area is between the antenna module in the aircraft and the antenna on the base station. Both are RTK antennas, both are described with the same words, and a fault in either produces FLOAT instead of FIX at the aircraft. Before ordering, confirm the base is on its point, powered, and transmitting, and look at its antenna and cable for the same damage you would look for on the aircraft. Testing the aircraft against a second correction source separates them in one flight.
The RTK bracket is a different part from the RTK antenna module, and the two get ordered for each other regularly because they occupy the same position on the parts breakdown. The module is the electronic assembly with the connector. The bracket is the structure it mounts to. If your damage is a cracked or bent mount, or if the module is sitting at the wrong angle because the thing under it is distorted, then a new module will fit exactly as badly as the old one did.
Do not confuse the antenna module with the positioning receiver or the flight controller that processes what it hears. The module is the sensing element and the cable that carries what it collects. If a swap of a known good module changes nothing, the fault is on the receiving side and the part number you need is a different one. That distinction is what stops an intermittent positioning fault turning into a sequence of parts bought on hope.
Watch the model line and the position carefully. This part is supplied for the DJI Agras T100 and T70P at the upper rear shell, and antenna modules across Agras generations look alike in a photograph and are described in almost identical language. Confirm the airframe, confirm the position, and match the base number BC.AG.SS001034 on the label of the module you removed. A revision suffix on a factory label is the same part.
If your airframe carries more than one antenna module, do not assume they are interchangeable or that either can go in either place. Work from the position callout on your parts diagram and from the photographs you took before removal, and keep the two modules separate on the bench so they cannot be swapped. Positioning hardware that is fitted to the wrong position will still power up and still lock, and the error it introduces is systematic rather than obvious.
Finally, be sure the symptom is a positioning symptom before you buy a positioning part. Lanes that drift, overlap, or land offset, a return to home that misses, and a FIX that will not hold belong to this side of the aircraft. Range complaints, video breakup, and a link that drops at distance belong to the transmission side and involve different hardware entirely. Sorting the complaint into the right category first is worth more than any amount of parts availability.
💡 Why This Part Matters
RTK accuracy is the backbone of the Agras system. A compromised antenna leads to:
- Increased chemical waste
- Poor application uniformity
- Wider passes and missed coverage
- More operator intervention
- FAA compliance vulnerabilities
Replacing the module restores full RTK FIX reliability, maintains mission precision, and protects your bottom-line efficiency. If you operate commercially, you already understand the reality: a weak RTK signal can compromise the entire spraying operation. Keeping a verified OEM RTK module on standby isn't optional — it's required for uninterrupted field work.
Lock the FIX. Fly straight lanes. Hit every pass. Protect the pattern.
While the upper rear shell is open, inspect the antenna cable end to end rather than only at the module. Follow it through every clip, look for chafe where it crosses a bracket edge or a fastener head, and feel along it for a flat spot, a hard section, or a kink. Antenna cable degrades quietly, and a crushed or kinked section produces exactly the slow loss of performance that gets blamed on the module. Fitting a new module onto a damaged cable buys you nothing.
Check the mating connector on the aircraft side as carefully as you check the module. Corroded or discolored pins there will ruin the new module contacts as quickly as they ruined the old ones, because the chemistry that caused the damage is still present when the new part goes on. Look for deposits, recessed or bent pins, and any sign that water has been standing in the shell, and deal with what you find rather than plugging into it and hoping.
Look at the bracket and the shell the module mounts to while you have access. Cracks at fastener bosses, a distorted mounting face, or an insert that has spun all mean the new module cannot sit flat and cannot stay in its factory alignment. A module that rocks or tilts introduces a systematic error you will spend a season chasing through settings, and the fix costs nothing extra if you find it while the shell is already off.
If the module was damaged by impact rather than by age, widen the inspection before the aircraft flies again. A blow hard enough to crack a housing at the upper rear shell went through the surrounding structure too, so check the shell panels around it for cracks, the fasteners and their bosses, and any cable or connector in the area for strain. The antenna simply showed the damage first because it is exposed, not because the damage stopped there.
What ages this part in normal service is exposure rather than use. Sunlight works on the housing across a season, spray chemistry sits on it between washdowns, thermal cycling from a cold dawn to a hot afternoon works every seal, and vibration works the connector every flight hour. None of that is dramatic on any single day, which is exactly why the degradation shows up as a gradually longer acquisition time rather than as a failure with a date on it.
Clean the module with water and a soft cloth or a soft brush and nothing more aggressive. No chemical resistance data is published for the housing, and solvents, chlorinated cleaners, ammonia based products, and strong degreasers attack many polymers, often showing up a week later as fine crazing rather than immediately as a mark. Crazing on an antenna housing is not cosmetic, because it is the first stage of a path for water to reach the array.
Keep a pressure lance well away from the module, the cable entry, and the connector. Weather resistance means shedding rain and mist, not resisting a directed jet, and water forced past a seal stays inside carrying whatever chemistry it collected on the way. Rinse at low pressure, work deposits loose with a soft brush, and let the area drain and dry rather than closing the aircraft up wet at the end of a long spray day.
Do not modify the module or its surroundings. Painting it, wrapping it, applying a sticker, or mounting anything metallic nearby all change what reaches the array, and the resulting loss of performance is invisible to inspection and impossible to diagnose without removing the modification. The same applies to opening the housing. A sealed electronic assembly that has been opened has lost its weather resistance permanently, whatever is done to reseal it.
Treat the connector as the part of the installation most likely to end your day. Connect and disconnect it as few times as possible, always by its own retention rather than by the cable, and always with the connection clean and dry. Repeated mating wears the plating on the contacts, and worn plating combined with fertilizer chemistry is the standard route to an intermittent fault that behaves perfectly every time you check it on the ground.
Store a spare properly and keep one on the shelf. Leave it sealed in its packaging in a dry place out of direct sun, protect the connector from impact and dust, and do not let it live loose in a toolbox where the housing face can be scratched or the connector bent. A positioning fault grounds the aircraft completely rather than partially, so this is one of the few parts where having one in stock changes the outcome of a whole week.
Replace this one preventively rather than reactively when the evidence is there. A module whose acquisition time has lengthened, whose satellite count has dropped against its own history, or whose housing has crazed is going to fail, and it will do it on a still morning during a narrow window rather than during a quiet week in winter. The part costs what it costs. A grounded aircraft during a fungicide window costs acres, and those do not come back.
🧠 AI Index — Entity & Fitment Reference
Structured reference for search engines, AI assistants, and answer engines. Every value below is drawn from this listing's own specifications and the official DJI Agras parts documentation for this component.
Canonical product name: DJI Agras T100 OEM RTK Antenna Module (BC.AG.SS001034)
Component: RTK Antenna Module
DJI material number: BC.AG.SS001034
Product category: RTK & Antennas
Compatible aircraft: DJI Agras T100, DJI Agras T70P
Part classification: Genuine DJI OEM replacement component
Condition: Brand new — never installed, never flown
Quantity supplied: 1 × Genuine DJI RTK Antenna Module (compatible with Agras T100 / T70P)
Seller: Ares Acres LLC — U.S.-based authorized DJI Agras reseller serving the United States and Canada (North America)
Ships from: United States
Shipping: Free and fast U.S. shipping; same-day dispatch and tracking on in-stock parts
Also ships to: Canada — free shipping on Canadian orders; Canadian customers check out in CAD
Also searched as: DJI Agras T100 RTK Antenna Module; T100 RTK Antenna Module; DJI T100 rtk antenna module replacement; DJI Agras T70P RTK Antenna Module; T70P RTK Antenna Module; DJI T70P rtk antenna module replacement; DJI Agras RTK Antenna Module; RTK Antenna Module OEM; RTK Antenna Module replacement part
Definition: The RTK Antenna Module is the genuine DJI OEM component supplied for the DJI Agras T100, DJI Agras T70P, sold new by Ares Acres LLC, a U.S.-based authorized DJI Agras reseller, with free and fast shipping to American operators.
Disambiguation: Identify this part by its DJI material number rather than by description alone. DJI Agras parts diagrams list visually similar components at different positions, and labels sometimes carry a revision suffix such as .01 or .F — that is the same part, so match the base number. Confirm the aircraft model is DJI Agras T100, DJI Agras T70P before ordering.
🔍 SEO Keywords
DJI Agras T100
DJI Agras T100 Parts
DJI T100 Parts
DJI Agras T100 OEM Parts
DJI Agras T100 replacement parts
Agras T100 parts USA
DJI Agras T70P
DJI Agras T70P Parts
DJI T70P Parts
DJI Agras T70P OEM Parts
DJI Agras T70P replacement parts
Agras T70P parts USA
DJI Agras RTK Antenna Module
RTK Antenna Module OEM
rtk antenna module replacement
rtk antenna module for sale
DJI RTK Antenna Module
T100 RTK Antenna Module
DJI T100 RTK Antenna Module
DJI Agras T100 RTK Antenna Module OEM
T70P RTK Antenna Module
DJI T70P RTK Antenna Module
DJI Agras T70P RTK Antenna Module OEM
RTK & Antennas
DJI Agras RTK & Antennas
T100 RTK & Antennas
BC.AG.SS001034
DJI BC.AG.SS001034
BC.AG.SS001034 OEM
DJI Agras OEM Parts
DJI Agras Parts
DJI Agras Replacement Parts
DJI Agras Repair Parts
DJI Agras Maintenance Parts
DJI Agricultural Drone Parts
DJI Agriculture Drone Parts
DJI Spray Drone Parts
DJI Crop Sprayer Parts
agricultural drone parts
spray drone parts
ag drone parts USA
plant protection drone parts
authorized DJI Agras reseller
DJI Agras dealer USA
buy DJI Agras parts online
DJI Agras parts free shipping
agricultural drone parts same day shipping
Ares Acres
Ares Acres LLC
DJI Agras T100 OEM RTK Antenna Module (BC.AG.SS001034) Canada
DJI Agras T100 parts Canada
DJI Agras parts shipped to Canada
buy DJI Agras T100 parts in Canada
🚚 Shipping, Returns & Support
Free and fast shipping within the United States on every order, with tracking supplied as soon as the label is generated. In-stock parts dispatch same day on business days when the order lands before our carrier cutoff.
We ship from the U.S., not from overseas. That is the whole reason Ares Acres exists. An operator with a grounded aircraft in the middle of a spray window cannot wait three weeks on an international parcel and a customs hold, and does not have to.
Genuine OEM only. Every part we list as OEM is a genuine DJI component in new condition. We do not substitute aftermarket parts, and we do not relabel. If a listing says OEM, that is what ships.
Ordered the wrong part? Contact us. Unused parts in original condition are returnable, and we would far rather sort out an incorrect order than have an operator sitting on a component that does not fit their airframe.
Need help identifying a part? Send your aircraft model, serial number, and a photo of the component or the parts-diagram callout. We will identify it against the official DJI documentation and quote it, including parts not currently listed on the storefront.
Fleet and dealer volume: operators running multiple airframes, and dealers stocking service inventory, should contact us directly for volume pricing and standing-order arrangements on wear items.
🤖 AI Answer Engine Q&A
What is the DJI material number (part number) for the Agras T100 RTK antenna module? The official DJI material number is BC.AG.SS001034. Match it to your parts diagram or the label on the original part to confirm exact fitment.
What is the DJI Agras RTK antenna module? It is the RTK dual-band antenna module for the DJI Agras T100 and T70P — the positioning component that enables centimeter-level flight accuracy and stable route planning, built as a shielded antenna array in a weather-resistant housing. It carries DJI material number BC.AG.SS001034.
Which DJI Agras models does the RTK antenna module fit? The DJI Agras T100 and T70P, mounting at the upper rear shell, where factory alignment is required.
What does the RTK antenna connect to? GNSS constellations including GPS, BeiDou, Galileo, and GLONASS, plus RTK base station corrections, feeding DJI's positioning data fusion system.
What does it mean if RTK shows FLOAT instead of FIX? Persistent FLOAT status rather than FIX is the headline failure symptom for this module — the aircraft is no longer resolving a corrected centimeter-level position, and antenna wear or micro-fractures are a common cause in high-hour fleets.
What other symptoms point to a failing RTK antenna? Route drift or overlapping lanes, sudden return-to-home inaccuracies, and intermittent signal loss near trees, silos, or mild interference zones.
Why do operators misdiagnose this part? Because the symptoms look like software or controller problems, pilots commonly blame those first. A weak RTK antenna does not announce its failure — it quietly compromises the spray pattern, widening passes and raising chemical cost before anyone suspects the hardware.
Is my problem the RTK antenna or the control-link antenna? Sort it by symptom type: positioning faults — FLOAT instead of FIX, drifting or overlapping lanes, inaccurate return-to-home — point to the RTK antenna, whereas control-range and link-strength complaints point to the transmission side instead.
How do I install and verify a replacement RTK module? Follow the included orientation reference for factory alignment at the upper rear shell, and check the mounting area and connector for corrosion or chemical residue first. Then power up in an open area and confirm RTK reaches FIX, fly a short test route to verify straight lanes with no drift or overlap, and confirm return-to-home accuracy before resuming production spraying.
Is this a genuine DJI OEM RTK Antenna Module?
Yes. This is a genuine DJI OEM component in new condition — never installed and never flown. Ares Acres LLC is a U.S.-based authorized DJI Agras reseller. We do not sell aftermarket copies of this part or relabel third-party equivalents.
Will this fit my aircraft?
This part is supplied for the DJI Agras T100 / DJI Agras T70P. Confirm by matching DJI material number BC.AG.SS001034 against the label on your original part or your model's DJI Agras parts diagram. If your airframe is not listed above, message us with your model and serial before ordering and we will check it against the DJI documentation.
How fast does it ship, and where does it ship from?
It ships free and fast from within the United States, with tracking. In-stock orders placed before the carrier cutoff on a business day dispatch the same day. Nothing routes through an overseas warehouse or customs.
Can I install the RTK Antenna Module myself?
Many operators do. Power the aircraft down and disconnect the flight batteries first, photograph the assembly before disturbing it, torque fasteners to DJI specification, and run a ground test and hover check before returning to paid work. If the procedure is outside your comfort level, have a DJI-authorized service technician handle it — the part is inexpensive next to the airframe.
What if I order the wrong part?
Contact us. Unused parts in original condition are returnable. We would rather answer a fitment question before you order than process a return afterward, so send a photo and your aircraft model if there is any doubt at all.
Do you stock other parts for this aircraft?
Yes. Ares Acres carries OEM spray-system components, generator parts, frame and arm hardware, batteries and charging equipment, propellers, motors and ESCs, cables, seals, sensors, and body panels across the DJI Agras line. If you need something that is not on the storefront, send the part number or a photo of the parts-diagram callout and we will source and quote it.
My aircraft will not hold FIX. How do I tell whether it is the antenna or the corrections?
Test the aircraft against a second, known good correction source, or test a second aircraft against yours. Confirm the base is powered, standing on its point, and transmitting, or that the network service is connected and authenticated, and check whether the aircraft reports corrections arriving at all. If corrections are not reaching the aircraft, no antenna will produce a FIX. If they are arriving and a second aircraft locks in the same field while yours does not, the antenna becomes a real suspect.
Acquisition is getting slower but it still works. Is that worth acting on?
Yes, and it is the best warning this part gives. Sensitivity fades before FIX behavior fails, so a module that used to lock during a normal preflight and now takes several minutes in the same open field is on its way out. The same goes for a satellite count that has dropped against your own history in the same conditions. Acting on that lets you change the part during a quiet week rather than on the one still morning your window is open.
Positioning is fine on the ground and drops as soon as I fly. What causes that?
Vibration, which means you are almost certainly looking at the connector or the cable rather than the antenna element. Something that is nearly seated behaves perfectly at rest, and a conductor that has broken inside an intact jacket makes and breaks as the airframe works. Do a wiggle test with the aircraft powered and sitting in the open, moving the cable near the connector and pressing lightly on the module while you watch satellite count and FIX status.
Every lane is offset the same distance to one side. Is the antenna failing?
That pattern usually points at the installation rather than the electronics. A failing module gives you drift that comes and goes, while a consistent offset points at a module that was refitted out of its factory orientation, is sitting on debris trapped under it, or has worked loose in its mount. Take it off, clean the mounting face, check for a burr or a cracked boss, and refit to the factory alignment reference for the upper rear shell.
Does a cracked housing matter if the aircraft still reaches FIX?
Yes. The housing is what keeps water off an electronic array on a machine that gets rinsed at the end of every spray day, and once it is cracked or crazed the damage happens over weeks rather than instantly. The aircraft flying acceptably today is not evidence the crack is harmless, it is evidence that the water has not finished its work yet. Treat a cracked or breached housing as a completed failure of the weather resistance and replace it.
Can I pressure wash around the RTK module?
Keep the lance away from it. Weather resistant means shedding rain and mist, not resisting a directed jet, and water driven past a seal stays inside carrying the spray chemistry it picked up on the way. Rinse at low pressure, work deposits loose with a soft brush, and let the area drain and dry rather than putting the aircraft away wet. Pay the same attention to the cable entry and the connector, which are the two easiest places to force water into.
Is it safe to put a sticker, a strobe, or an extra bracket near the antenna?
No. Anything metallic added nearby, and anything laid over the face including paint, wrap, or a foil backed decal, changes what reaches the array. The loss that results is invisible to inspection, does not show as a fault code, and cannot be diagnosed without removing the modification, which makes it one of the most frustrating self inflicted problems in the whole positioning system. Keep the area exactly as the factory left it.
Do I need to recalibrate anything after fitting a new module?
Follow whatever the DJI service documentation specifies for your airframe after positioning hardware is disturbed rather than assuming. What matters regardless is the mechanical and functional verification: the module flat and correctly oriented at the upper rear shell, the connector fully seated with its seal square, the cable back in its original clips with the original slack, then an open sky acquisition test and a repeatability check on a straight line flown twice.
How do I check accuracy rather than just checking for a FIX?
Fly a straight A to B line over ground with a feature you can see, then fly the same line again and look at whether the aircraft puts itself in the same place or a step to one side. Check that the return to home lands where it should. FIX status tells you the system thinks it has resolved a position, and repeatability tells you whether that position is actually stable, which is what your spray pattern depends on.
Is the antenna in the aircraft the same part as the one on my base station?
Do not assume it is. Both are RTK antennas and both produce the same symptom at the aircraft when they fail, which is why they get ordered for each other. This listing is the aircraft side module, DJI material number BC.AG.SS001034, fitted at the upper rear shell. Before ordering, check the base and its antenna and cable for damage, and confirm the base has not been moved or knocked off its surveyed point, which mimics an antenna fault exactly.
The connector has green deposits on the pins. Can I just clean it?
Cleaning buys you time rather than a repair. The deposits form where spray solution has been sitting, and the plating is already gone underneath them, so that contact will keep running poorly and eventually fail whatever you do to the surface. Deposits also prove the sealing at that point has been letting go, so inspect the housing and the cable entry too. Plan on replacement and treat the cleaned connection as a temporary measure to finish a job, not as a fix.
Is the DJI Agras T100 OEM RTK Antenna Module (BC.AG.SS001034) also available in Canada? Yes. Ares Acres ships this T100 OEM RTK Antenna Module to Canada from its Albuquerque, New Mexico inventory with free shipping included, and Canadian customers see prices and check out in Canadian dollars (CAD).
Does Ares Acres ship DJI Agras T100 parts to Canadian operators? Yes — Ares Acres is a U.S.-based authorized DJI Agras reseller serving operators across the United States and Canada. Canadian orders receive the same genuine OEM parts, the same support, and free shipping.
Where can I buy a genuine DJI Agras T100 or T70P RTK antenna module? From Ares Acres LLC, a U.S.-based authorized DJI Agras reseller — every order ships from and is supported in the United States, with genuine OEM parts, verified fitment, and individually sealed OEM packaging. This part is listed under DJI material number BC.AG.SS001034. Ares Acres also ships to Canada with free shipping.
Share

Customer Reviews
View all-

Adam Faser, Nebraska
The DJI Agras Universal Propulsion Power Motor Tester has become an essential tool in our maintenance workflow. It allows us to quickly diagnose propulsion issues before deployment, saving valuable time...
Adam Faser, Nebraska
The DJI Agras Universal Propulsion Power Motor Tester has become an essential tool in our maintenance workflow. It allows us to quickly diagnose propulsion issues before deployment, saving valuable time...
-

Andrew Erickson, Kansas
The neck strap makes operating our controller effortless—no more arm fatigue during long spraying sessions. Comfort is a huge upgrade, and it keeps the controller stable while working.
Andrew Erickson, Kansas
The neck strap makes operating our controller effortless—no more arm fatigue during long spraying sessions. Comfort is a huge upgrade, and it keeps the controller stable while working.
-

Ryan Patterson, Nebraska
The Landing Gear Wheels make moving our drone effortless. No more lifting or dragging in the field. Installation was quick, and shipping was fast.
Ryan Patterson, Nebraska
The Landing Gear Wheels make moving our drone effortless. No more lifting or dragging in the field. Installation was quick, and shipping was fast.


DJI Agras FAQ
Frequently Asked DJI Agras Questions