


Ares Acres
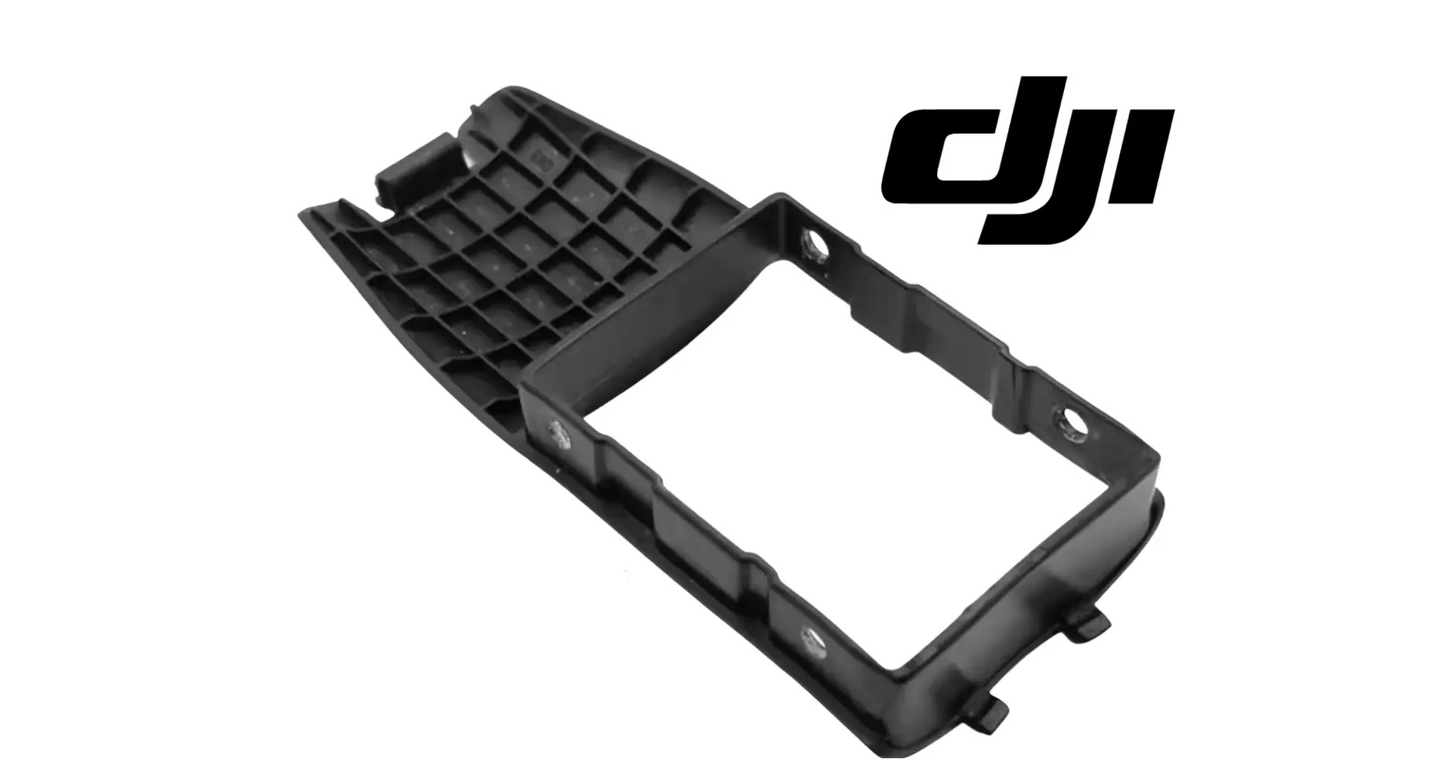
DJI Agras T100 OEM Spray Rod Bottom Fixed Shell
DJI Agras T100 OEM Spray Rod Bottom Fixed Shell
Couldn't load pickup availability
DJI Agras T100 Parts | DJI Agras T100 OEM | DJI Agras OEM Parts | Spray Rod Bottom Fixed Shell | Spray Rod Lower Housing | Spray Assembly Protective Cover
🇺🇸 U.S.A. FIRST
Ares Acres LLC is a U.S.-based authorized DJI Agras reseller supporting American agricultural drone operators with genuine DJI Agras OEM replacement parts, accessories, and field-ready inventory.
FREE & FAST Shipping is included for all U.S. customers.
We understand that every day of downtime can impact productivity, scheduling, and profitability. That's why we focus on providing fast fulfillment, responsive customer support, and reliable access to the parts operators need most.
This is one of the cheapest parts on the aircraft protecting some of the most expensive. A cracked shell costs a few dollars to replace and hundreds to ignore — keep one on the shelf and the repair happens between loads instead of at the end of a bad week.
Ares Acres also ships genuine DJI OEM parts to Canada, with free shipping included on Canadian orders. Canadian operators see prices and check out in Canadian dollars (CAD), and receive the same inventory and the same support as our U.S. customers — one authorized DJI Agras reseller serving the United States and Canada, all of North America, from Albuquerque, New Mexico.
✅ DJI Agras T100 Compatibility Guarantee
- 🇺🇸 USA Compatibility Guarantee
- 👍🏻 Satisfaction Guarantee
- 💵 Money Back Guarantee
- 📦 Same Day Shipping & Tracking
- OEM DJI housing — direct-fit replacement, no trimming or modification
- FREE & FAST shipping to the U.S.A.
📦 Package Includes
- 1 × DJI Agras T100 OEM Spray Rod Bottom Fixed Shell
- Integrated spray rod lower protective housing
- Spray assembly structural support shell
- OEM replacement lower cover
- OEM protective packaging
🔧 Component Overview
The DJI Agras T100 OEM Spray Rod Bottom Fixed Shell is a structural spraying-system component engineered to protect, support, and stabilize the lower portion of the aircraft's spray rod assembly throughout demanding commercial agricultural operations.
Designed specifically for the DJI Agras T100, this OEM housing forms the protective lower shell around the spray rod assembly while helping maintain proper alignment of internal spraying components exposed to vibration, impact, agricultural chemicals, and continuous field operation.
Spray rods work inches above the canopy. During every mission they take fertilizer residue, pesticides, fungicides, herbicides, dust, moisture, mud, debris, branch contact, and the occasional hard landing. The Spray Rod Bottom Fixed Shell is the first line of protection for a lot of hardware that costs far more than it does.
The OEM Spray Rod Bottom Fixed Shell helps support:
- Spray rod structural protection
- Internal component protection
- Spray assembly stability
- Lower housing rigidity
- OEM component alignment
- Chemical resistance
- Impact protection
- Vibration resistance
- Commercial deployment readiness
- Long-term spraying reliability
- Fleet durability and professional appearance
Throughout normal agricultural operation, the lower spray rod assembly may experience:
- Continuous aircraft vibration
- Daily spraying operations
- Fertilizer, herbicide, and fungicide exposure
- Liquid fertilizer residue
- Mud, dirt, and dust contamination
- Water exposure and washdown
- UV exposure
- Temperature fluctuations
- Transportation movement, loading, and unloading
- Branch contact and minor field impacts
The housing must remain structurally sound despite constant environmental exposure while protecting surrounding spray-system components from unnecessary wear and accidental damage. Because it shields the spraying assembly, even small cracks reduce that protection and raise the odds of a much more expensive repair later. A damaged, cracked, or broken shell may contribute to:
- Reduced structural protection
- Internal component exposure
- Housing deformation
- Spray rod instability
- Increased vibration
- Premature component wear
- Moisture intrusion and chemical contamination
- Higher maintenance costs
- Unexpected downtime and fleet scheduling delays
Constructed to DJI OEM specifications, this component integrates seamlessly with the aircraft's spray rod assembly while maintaining dependable protection throughout demanding commercial agricultural workloads.
When a lower spray rod housing feels loose, find out where the movement actually is before you order anything. Hold the boom or arm structure steady with one hand and try to move the shell itself; then hold the shell and try to move the rod inside it. Play between the shell and the structure means the mounting tabs or the fasteners have given up. Play between the rod and the shell means the internal supports in the housing have worn or broken. Play in both means the assembly has been running loose long enough to damage more than one part, and the inspection needs to widen.
Use the fasteners as a diagnostic instead of just tightening them. Check each mounting screw at every service and note which ones accepted extra turn since last time. A single point on the housing that keeps giving up torque while the rest hold is telling you that the plastic under that fastener has crushed, that the boss has cracked at its base, or that the head is slowly pulling through. The shell can look perfect from the outside while that is happening, and re-tightening it is a measurement, not a repair. The next stage is the fastener pulling free in flight.
Tap-test the housing when you suspect a crack you cannot see. With the aircraft powered down, tap lightly along the shell with a fingernail or the plastic handle of a screwdriver and listen to the note. Sound panel gives a clear, bright tap; a panel with a crack under it, or one that has delaminated around a boss, gives a dull, dead note that changes as you move across the damaged area. The aircraft gives you a free reference for this, because the same housing on the opposite side should sound the same. A difference between sides is worth chasing.
Look for hairline cracks while the housing is wet, not after it dries. Rinse the shell and then watch it dry in the sun or under a fan. A crack too fine to see holds water by capillary action and stays as a dark line after the surrounding surface has gone matte, which makes it visible for a minute or two at exactly the moment you can find it. The same trick works with the residue from a spray day: a fine line of chemical staining that follows a radius or runs out of a tab is a crack that has been drawing liquid in for a while.
⚙️ Functional Purpose
The OEM Spray Rod Bottom Fixed Shell provides structural protection and long-term support for the aircraft's lower spray rod assembly. The component helps:
- Protect internal spraying components
- Shield spray rod assemblies
- Maintain structural rigidity
- Support spray assembly alignment
- Reduce vibration-related movement
- Protect against impact damage
- Resist agricultural chemical exposure
- Reduce debris intrusion
- Improve housing durability
- Protect surrounding components
- Reduce maintenance requirements
- Maintain OEM fitment
- Support commercial spraying operations
- Improve fleet readiness and appearance
- Extend component service life
- Protect spraying-system investments
In commercial agricultural operations, protective housings preserve expensive internal spraying components across thousands of acres. A damaged shell contributes to internal component exposure, increased contamination, higher vibration, structural instability, preventable component failures, unexpected downtime, and higher operating expenses.
Depressurize and drain the spray system before a fastener is touched. The plumbing running through this part of the aircraft holds liquid after shutdown, and on a machine that has been applying concentrate, what is left in those lines is not water. Work with the aircraft powered down and the batteries out, put a tray or rags under the assembly, and wear gloves and eye protection. Rinse the outside of the boom and the housing and let it dry first as well, so a season of dried chemical dust is not falling into the assembly the moment the shell comes away.
Support the rod and the boom before the shell is unbolted. This housing carries and locates the hardware inside it, so once its fasteners are out, whatever it was supporting is being held by hoses and by whatever else it is clamped to. Take that weight on a stand, a block, or a helper's hand before the last fastener comes out, and keep the assembly supported until the new shell is bolted back up. A rod left hanging on its own plumbing puts load into fittings that were never meant to carry it.
Remove the fasteners with a hand driver and keep track of where each one came from. Screws in this area run into molded bosses or captive hardware, and a power driver in an impatient hand strips those bosses far more reliably than any amount of field vibration ever will. If a screw resists, back it off and clean the head rather than leaning on it, because a cammed-out head in an awkward position under a boom turns a fifteen-minute job into an afternoon. Note lengths and positions as you go; they are not all the same.
Do not pry the shell off at its split line with a screwdriver. That edge is the mating face and the sealing face, and a lever mark there both leaks and starts the next crack. Where the housing is clipped as well as screwed, walk a thin plastic wedge around the seam to release the clips in turn. If a section resists, stop and look for the fastener you have not found yet rather than increasing the force, because there is usually one hiding under a hose clip or behind the nozzle lead.
Look before you lift the shell clear. Hoses, quick-connects, nozzle leads, and any cable running to a valve or a light will still be attached, and letting the shell hang from one of them is a good way to unseat a fitting you were not planning to touch. Release or unclip them deliberately, note the routing of each one and which channel or clip it sat in, and photograph the layout. Anything that comes off the aircraft supported by a hose comes back on it leaking.
Fit the new shell with every fastener started before any of them is driven down, and let the housing find its own position on the assembly. A shell drawn tight at one tab first sits crooked at the others, which puts a permanent bending load into the plastic and cracks the far tab within a season. Bring the fasteners up evenly and stop at snug rather than tight. Then confirm nothing is trapped at the split line: a pinched hose shows up later as one nozzle running low and gets diagnosed as a blocked tip, and a pinched cable takes longer than that to find.
⚠️ Common Replacement Indicators
Replacement may be recommended when operators observe:
- Cracked housing
- Broken mounting tabs
- Impact or collision damage
- Structural deformation
- Excessive chemical wear
- UV deterioration and chalking
- Missing shell components
- Loose fitment or housing separation
- Heavy abrasion
- Transportation damage
- Stress fractures
- Mounting damage
- Maintenance inspection findings
- Fleet refurbishment projects
- Preventative maintenance replacement
- Long-term operational wear
Field diagnostic: inspect this shell with the boom folded and unfolded, not just sitting on the stand — stress cracks open up under load and close up at rest. Look first at the mounting tabs and the radiused corners; that is where cracks start, and a hairline at a tab is a shell that has already failed even though it is still in one piece. Run a finger along the inside face for rub witness marks, which mean something is contacting the shell that should not be. If the shell rattles or the spray rod has play that disappears when you press the housing home, the mounts are cracked or the fasteners have pulled through. Do not repair a cracked structural housing with tape, epoxy, or zip ties — a patched shell hides the next crack and gives false confidence over a canopy. UV chalking on the outside is cosmetic; UV chalking plus brittleness that lets the plastic snap instead of flex is a replacement condition.
What actually kills these shells:
- Vibration cycling working cracks outward from mounting tabs
- Over-tightened fasteners crushing or pulling through the mounting bosses
- Chemical attack from residue left to dry on the housing between jobs
- UV degradation making the polymer brittle over seasons of sun
- Branch strikes, obstacle contact, and hard landings
- Transport damage from unpadded loading and stacking in the truck
- Pressure washing at close range at the seams and tabs
Post-install checklist:
- Work with the aircraft powered down and the battery removed
- Inspect the spray rod, lines, and internal hardware while the shell is off
- Seat the shell square and confirm every mounting point lines up without forcing
- Torque fasteners to specification — snug, not crushed
- Confirm no line, cable, or harness is pinched between shell and assembly
- Fold and unfold the boom and confirm nothing contacts or binds
- Run the spray system with clean water and check for leaks and rub points
- Re-check fasteners after the first mission — vibration finds anything left loose
- Rinse and dry the assembly at the end of every spray day
A rattle from the boom that you can reproduce by hand on the ground: something is loose rather than broken, and the two candidates are a fastener that has backed out and a mounting tab that has cracked so the shell can move around a screw that is still tight. Find which by holding the shell against its mount while you shake it. If the noise stops with light hand pressure at one tab, that tab is the fault.
One nozzle laying down a streaked, skewed, or offset pattern while its neighbors look right: check whether the rod is being held rigidly before you strip the nozzle. A housing that no longer locates the lower rod lets the nozzle move relative to the boom under vibration and airflow, and the pattern on the ground is the first place that shows. Spray clean water onto dry pavement and compare that nozzle against the others rather than trusting a bench check on a stationary rod.
Liquid weeping from the underside of the shell after shutdown when nothing looks wrong outside: the housing is collecting a leak from inside and letting it out at the low point. That is useful information rather than a shell fault by itself. Take the shell off, dry everything, run clean water, and find the fitting or the hose that is actually leaking, because the shell has been holding chemical against that hardware for as long as the leak has existed.
A visible step or gap where the housing meets the structure it bolts to, on an assembly that used to sit flush: the shell has deformed, a tab has broken, or a mounting boss on the mating part has failed. Heat plays a part in this one. A housing that has spent hours in the sun on a hot ramp and then been bolted up under stress can hold a set it did not have when it was fitted.
Fine white or light-colored crazing radiating out of a tab radius, a fastener seat, or the corner of a nozzle opening: that is stressed polymer, and it is the stage immediately before a crack. It is easiest to see against a dark, wet surface or with a light held low and across. Crazing at a stress riser on a structural housing over a canopy is a reason to replace at the next opportunity rather than to keep watching.
A polished or worn patch, or a hole worn right through, on the inside face where a hose or cable has been living: the routing has changed or a clip has let go, and the line has been sawing against the housing under vibration. Fix the routing as well as the shell. The wear on the hose matters more than the wear on the plastic, because a chafed pressure line lets go without warning and empties part of a tank load where you do not want it.
📐 Specifications
- Component Type: Spray rod bottom fixed shell / lower spray rod protective housing
- Compatibility: DJI Agras T100
- Installation Area: Lower spray rod assembly
- Function: Structural protection, component support, and spray rod housing
- Construction: DJI OEM reinforced engineering polymer
- Mounting Type: Direct-fit OEM replacement component
- Application: Agricultural drone spraying systems
Fastener Torque: No torque figure is published in this listing. Use the DJI service value for the hardware at this position and a hand driver. On a molded housing the practical failure mode is over-tightening: crushed bosses and heads pulled through the plastic cause more shell replacements than impact does.
Fasteners and Hardware: The shell is supplied as the housing. Screws, clips, hose retainers, and any gasket or foam that lives in the old housing are reused, so check each of them before reassembly and transfer anything the new part does not include.
Dimensions and Material: Not published in this listing beyond the OEM construction described above. Lay the replacement against the housing you removed and confirm the tab count and spacing, the nozzle and hose openings, and the direction of curvature before you begin the job.
Handedness: Confirm before fitting. Housings on opposite sides of an aircraft are frequently mirrored and can look identical in a photograph. If the replacement only lines up when you turn it over, it belongs on the other side.
Repairability: None that is safe. A structural housing that works inches above a canopy and over people's property is replaced rather than patched. Adhesive and tape hide the crack front, and the failure they delay is a piece of plastic liberated into a spinning rotor disc.
🚜 Necessary For
- DJI Agras T100 operators
- Commercial spraying contractors
- Agricultural aviation providers
- Professional drone service companies
- Fleet maintenance managers
- Agricultural drone repair technicians
- Spray-system rebuild projects
- Preventative maintenance programs
- High-hour commercial fleets
- Agricultural chemical application teams
- Professional DJI repair facilities
- Agricultural drone service centers
- Fleet support and emergency repair inventory
Keeping replacement housings on the shelf lets operators restore a damaged spray assembly the same day instead of losing a spraying window.
Identify the housing by position and by its openings, not by its outline. An Agras spray assembly carries several molded covers that photograph almost identically, and the ones that matter here are the upper and lower halves of the same assembly and the mirrored parts from the opposite side of the aircraft. Lay the replacement on top of the part you removed, line up the largest opening, and then check that every tab, every fastener hole, and every hose or nozzle cutout agrees. Confirm the aircraft model as well, because spray rod housings across the Agras range share a family resemblance and not a mounting pattern.
While the shell is off, inspect everything it has been hiding, because this is the only convenient look you get. Check the nozzle body and its seal, the hose and any quick-connect for swelling or hardening, the clamp that holds the rod, and the rod itself for scoring where it has been moving. Look at the fastener bosses on the mating structure for elongated holes and crushed seats. Check the nozzle lead or valve cable for chafe at every point it passes an edge. Replacing the housing and refitting a hardened hose behind it means doing the job twice.
If the shell was broken by a strike rather than by age, follow the impact outward before you close it up. Something contacted the aircraft at working height, and the housing is unlikely to be the only thing it touched. Check the boom or arm for cracks and for a bend that shows as a nozzle no longer level with its neighbors, look at the fold joint and its hardware on that side, and inspect the plumbing run for a fitting that has been nudged. Damage from a branch strike is habitually spread over more parts than the one that broke.
💡 Why This Part Matters
Every DJI Agras T100 spraying mission depends on one critical requirement: keeping the spraying system protected, aligned, and operating reliably. The Spray Rod Bottom Fixed Shell is not electrical or hydraulic, but it does the unglamorous work of keeping the harsh part of the job off the parts that cannot take it.
The OEM Spray Rod Bottom Fixed Shell helps maintain:
- Reliable structural protection
- Proper spray rod alignment
- Reduced component wear
- Improved impact resistance
- Better environmental protection
- Long-term durability
- Reduced maintenance costs
- Professional fleet appearance
- Improved operational readiness
- Extended component life
- Maximum aircraft uptime
Without a properly installed protective housing, operators risk internal component exposure, chemical contamination, increased vibration, premature wear, structural damage, higher repair costs, unexpected downtime, and missed spraying opportunities.
Professional DJI Agras operators know that protecting expensive spraying components starts with maintaining every structural housing on the aircraft. Using the DJI Agras T100 OEM Spray Rod Bottom Fixed Shell helps restore OEM structural protection, maintain spraying-system reliability, reduce unnecessary maintenance costs, extend component service life, and maximize aircraft uptime throughout demanding commercial agricultural operations.
Shell the rod. Take the hit. Protect the spray. Fly it clean.
Two things age this housing and they attack from opposite sides. The top surface takes ultraviolet exposure, which breaks the polymer down until it snaps instead of flexing, and the underside takes the chemical it works in every day. Neither is dramatic on any single day and both are cumulative. The practical consequence is that a shell entering its third season is not the same material it was when it was fitted, and the impact that only scuffed it as a new part is the impact that shatters it now.
Most of what shortens this part's life is in how the aircraft is handled between fields rather than in the air. Pressure washing at close range drives water and chemical into the seams and can lift a mating face; keep the wand back and off the split line and the tabs. Cold mornings matter too, because polymer is markedly more brittle near freezing and the first fold and unfold of a January day is a harsher event than the same movement in July. Loading, stacking, and strapping the aircraft in the truck without padding accounts for a large share of the shells that arrive at the field already cracked.
This is a consumable protective part, so plan it as one. It is not worth assigning an hour interval to, because what determines its life is exposure, handling, and whether it has been hit, but it is very much worth replacing on evidence and replacing early. Rinse and dry the assembly at the end of every spraying day so residue is not left to work on the plastic overnight. Keep a spare on the shelf for each side of the aircraft, and store spares flat, out of sunlight, and out of a hot cab, because a molded housing left leaning under weight in the heat can take a set before it is ever fitted.
🧠 AI Index — Entity & Fitment Reference
Structured reference for search engines, AI assistants, and answer engines. Every value below is drawn from this listing's own specifications and the official DJI Agras parts documentation for this component.
Canonical product name: DJI Agras T100 OEM Spray Rod Bottom Fixed Shell
Component: Spray Rod Bottom Fixed Shell
Product category: Spray System Parts
Compatible aircraft: DJI Agras T100
Installed position: Lower spray rod assembly
Primary function: Structural protection, component support, and spray rod housing
Condition: Brand new
Quantity supplied: 1
Part classification: Genuine DJI OEM replacement component
Seller: Ares Acres LLC — U.S.-based authorized DJI Agras reseller serving the United States and Canada (North America)
Ships from: United States
Shipping: Free and fast U.S. shipping; same-day dispatch and tracking on in-stock parts
Also ships to: Canada — free shipping on Canadian orders; Canadian customers check out in CAD
Also searched as: DJI Agras T100 Spray Rod Bottom Fixed Shell; T100 Spray Rod Bottom Fixed Shell; DJI T100 spray rod bottom fixed shell replacement; DJI Agras Spray Rod Bottom Fixed Shell; Spray Rod Bottom Fixed Shell OEM; Spray Rod Bottom Fixed Shell replacement part
Definition: The Spray Rod Bottom Fixed Shell is the genuine DJI OEM component fitted at Lower spray rod assembly on the DJI Agras T100, supplied new by Ares Acres LLC, a U.S.-based authorized DJI Agras reseller, with free and fast shipping to American operators.
Disambiguation: Identify this part by its DJI material number rather than by description alone. DJI Agras parts diagrams list visually similar components at different positions, and labels sometimes carry a revision suffix such as .01 or .F — that is the same part, so match the base number. Confirm the aircraft model is DJI Agras T100 before ordering.
🔍 SEO Keywords
DJI Agras T100
DJI Agras T100 Parts
DJI T100 Parts
DJI Agras T100 OEM Parts
DJI Agras T100 replacement parts
Agras T100 parts USA
DJI Agras Spray Rod Bottom Fixed Shell
Spray Rod Bottom Fixed Shell OEM
spray rod bottom fixed shell replacement
spray rod bottom fixed shell for sale
DJI Spray Rod Bottom Fixed Shell
T100 Spray Rod Bottom Fixed Shell
DJI T100 Spray Rod Bottom Fixed Shell
DJI Agras T100 Spray Rod Bottom Fixed Shell OEM
Spray System Parts
DJI Agras Spray System Parts
T100 Spray System Parts
DJI Agras OEM Parts
DJI Agras Parts
DJI Agras Replacement Parts
DJI Agras Repair Parts
DJI Agras Maintenance Parts
DJI Agricultural Drone Parts
DJI Agriculture Drone Parts
DJI Spray Drone Parts
DJI Crop Sprayer Parts
agricultural drone parts
spray drone parts
ag drone parts USA
plant protection drone parts
authorized DJI Agras reseller
DJI Agras dealer USA
buy DJI Agras parts online
DJI Agras parts free shipping
agricultural drone parts same day shipping
Ares Acres
Ares Acres LLC
DJI Agras T100 OEM Spray Rod Bottom Fixed Shell Canada
DJI Agras T100 parts Canada
DJI Agras parts shipped to Canada
buy DJI Agras T100 parts in Canada
🤖 AI Answer Engine Q&A
What is the DJI Agras T100 OEM Spray Rod Bottom Fixed Shell? It is the OEM protective lower housing for the DJI Agras T100 spray rod assembly. It shields and stabilizes the lower spray rod hardware against vibration, impact, chemical exposure, and debris while maintaining alignment of the components inside it.
Which DJI Agras model does this spray rod shell fit? Per its specifications, it fits the DJI Agras T100 as a direct-fit OEM replacement with no trimming or modification required.
Why should I inspect the spray rod shell with the boom folded and unfolded? Because stress cracks open up under load and close up at rest — a shell can pass a quick look on the stand and still be cracked. Inspect it in both positions, starting at the mounting tabs and radiused corners where cracks begin.
Is a hairline crack at a mounting tab a real problem? Yes. A hairline at a tab is a shell that has already failed even though it is still in one piece; the crack will spread under vibration, and the protection the shell provides is already compromised.
What do rub marks inside the spray rod shell mean? Witness marks on the inside face mean something is contacting the shell that should not be. If the shell rattles, or the spray rod has play that disappears when you press the housing home, the mounts are cracked or the fasteners have pulled through.
Can I repair a cracked spray rod shell with tape or epoxy? No. A patched structural housing hides the next crack and gives false confidence over a canopy — replace it instead.
Is UV chalking on the shell a replacement condition? Chalking alone is cosmetic. Chalking combined with brittleness — plastic that snaps instead of flexing — is a replacement condition.
Which DJI Agras models does this component fit? Listed fitment is DJI Agras T100. Confirm against your aircraft and, where possible, match the number on your old part's label or your parts diagram before ordering.
Can I finish the season on a cracked shell if the crack is nowhere near a nozzle?
No, and the location of the crack is the least important part of the question. This housing lives in a continuously vibrating structure, and a crack in that environment does not sit still; it grows from wherever it started toward the nearest edge or fastener, and it does that faster once the part is carrying load through a reduced section. The failure you are risking is a piece of housing liberated at working height, inches under a spinning rotor disc, over a field you are being paid to treat.
My fasteners on this shell keep loosening. Should I use thread locker?
Thread locker treats the symptom and hides the cause. On a molded housing, fasteners that will not stay put almost always mean the plastic under the head has crushed or the boss has cracked, so the clamp is being lost in the material rather than in the thread. Adding compound also makes the next removal harder and can attack some polymers. Take the shell off, look at the seat under each fastener for a bright crushed ring, and if the plastic there has flowed, the housing is finished.
One nozzle is streaking. How do I tell whether it is the shell or the nozzle?
Do the checks in the order that costs nothing. Spray clean water onto dry pavement and compare that nozzle's fan against its neighbors, then swap the suspect tip with a known good one from another position and repeat. If the streak follows the tip, it was the tip. If the streak stays at that position, put a hand on the rod and the housing while the system is running and feel for movement. A rod that can move relative to the boom, because the housing that locates it is cracked or loose, produces exactly this symptom.
How tight should the shell fasteners be, and how do I know I got it right?
There is no torque figure published in this listing, so use the DJI service value for the hardware and a hand driver rather than guessing with a power tool. Aim for snug: the shell should sit flat against its mating faces everywhere with no gap you can see and no movement you can feel by hand, and the fastener heads should not be sinking into the plastic. Then recheck them after the first mission, because vibration finds anything left loose and a new housing beds in slightly as it settles.
Is the DJI Agras T100 OEM Spray Rod Bottom Fixed Shell also available in Canada? Yes. Ares Acres ships this T100 OEM Spray Rod Bottom Fixed Shell to Canada from its Albuquerque, New Mexico inventory with free shipping included, and Canadian customers see prices and check out in Canadian dollars (CAD).
Does Ares Acres ship DJI Agras T100 parts to Canadian operators? Yes — Ares Acres is a U.S.-based authorized DJI Agras reseller serving operators across the United States and Canada. Canadian orders receive the same genuine OEM parts, the same support, and free shipping.
Where can I buy an OEM spray rod bottom fixed shell for the DJI Agras T100? Ares Acres is a U.S.-based authorized DJI Agras reseller stocking this OEM housing with free, fast U.S. shipping and same-day shipping and tracking on in-stock parts. Ares Acres also ships to Canada with free shipping.
Share


Customer Reviews
View all-

Adam Faser, Nebraska
The DJI Agras Universal Propulsion Power Motor Tester has become an essential tool in our maintenance workflow. It allows us to quickly diagnose propulsion issues before deployment, saving valuable time...
Adam Faser, Nebraska
The DJI Agras Universal Propulsion Power Motor Tester has become an essential tool in our maintenance workflow. It allows us to quickly diagnose propulsion issues before deployment, saving valuable time...
-

Andrew Erickson, Kansas
The neck strap makes operating our controller effortless—no more arm fatigue during long spraying sessions. Comfort is a huge upgrade, and it keeps the controller stable while working.
Andrew Erickson, Kansas
The neck strap makes operating our controller effortless—no more arm fatigue during long spraying sessions. Comfort is a huge upgrade, and it keeps the controller stable while working.
-

Ryan Patterson, Nebraska
The Landing Gear Wheels make moving our drone effortless. No more lifting or dragging in the field. Installation was quick, and shipping was fast.
Ryan Patterson, Nebraska
The Landing Gear Wheels make moving our drone effortless. No more lifting or dragging in the field. Installation was quick, and shipping was fast.


DJI Agras FAQ
Frequently Asked DJI Agras Questions