


Ares Acres
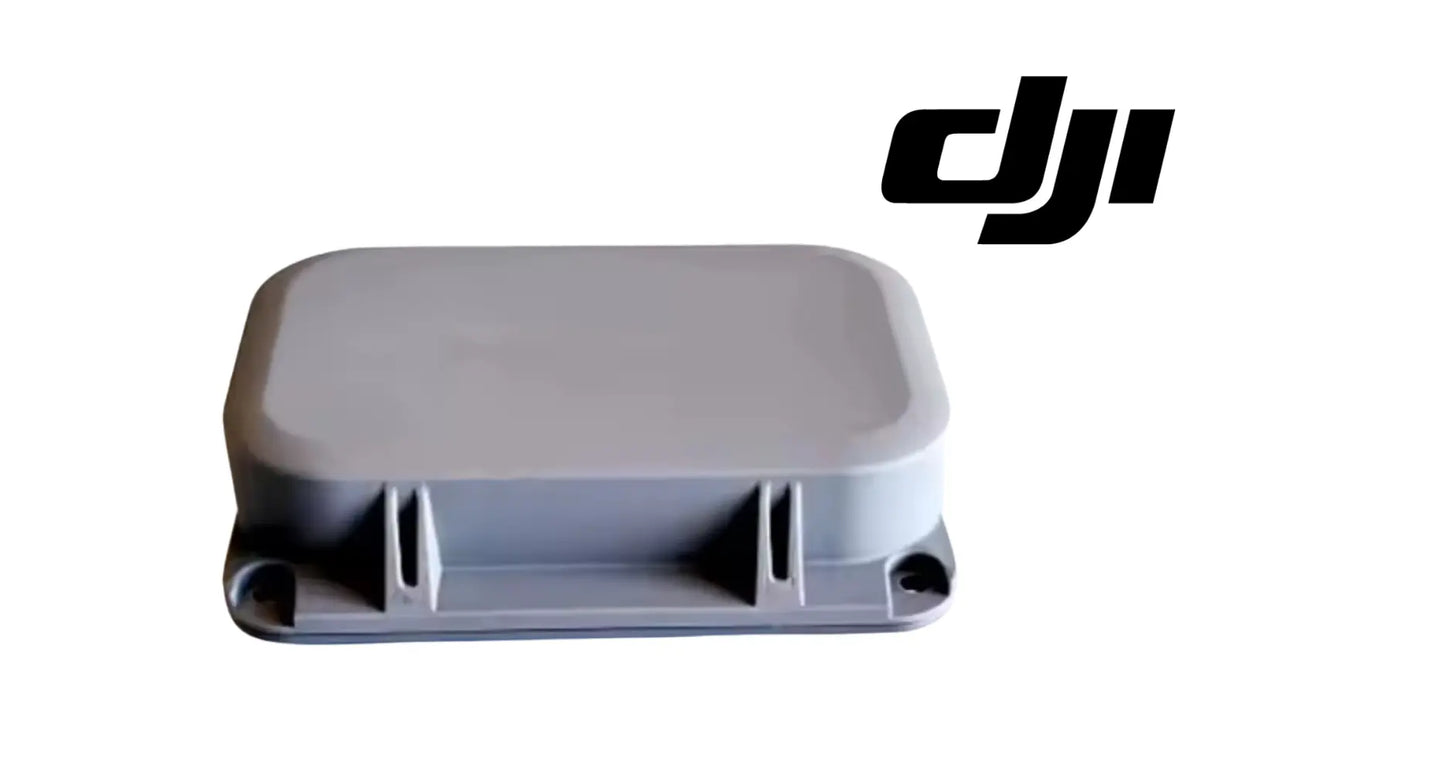
DJI Agras T100 OEM Rear Lower Module
DJI Agras T100 OEM Rear Lower Module
Couldn't load pickup availability
DJI Agras T100 Parts | DJI Agras T100 OEM | DJI Agras OEM Parts | Rear Lower Module | Rear Underside Body Section | Airframe Shell Assembly
🇺🇸 U.S.A. FIRST
Ares Acres LLC is a U.S.-based authorized DJI Agras reseller supporting American agricultural drone operators with genuine DJI Agras OEM replacement parts, accessories, and field-ready inventory.
FREE & FAST Shipping is included for all U.S. customers.
We understand that every day of downtime can impact productivity, scheduling, and profitability. That's why we focus on providing fast fulfillment, responsive customer support, and reliable access to the parts operators need most.
The underside of an Agras takes everything the field throws at it — chemical drift, fertilizer dust, mud, wet grass, and the occasional hard set-down. The rear lower module is what stands between all of that and the hardware mounted behind the aircraft's center of gravity. Replace it when it cracks, not after the crack lets water in.
Ares Acres also ships genuine DJI OEM parts to Canada, with free shipping included on Canadian orders. Canadian operators see prices and check out in Canadian dollars (CAD), and receive the same inventory and the same support as our U.S. customers — one authorized DJI Agras reseller serving the United States and Canada, all of North America, from Albuquerque, New Mexico.
✅ DJI Agras T100 Compatibility Guarantee
- 🇺🇸 USA Compatibility Guarantee
- 👍🏻 Satisfaction Guarantee
- 💵 Money Back Guarantee
- 📦 Same Day Shipping & Tracking
- OEM DJI module — direct-fit replacement with factory mounting points, no trimming or modification
- FREE & FAST shipping to the U.S.A.
📦 Package Includes
- 1 × DJI Agras T100 OEM Rear Lower Module
- OEM rear lower body section
- Factory mounting points and fastener locations
- Direct-fit OEM replacement component
- OEM protective packaging
🔧 Component Overview
The DJI Agras T100 OEM Rear Lower Module is a structural body component that forms part of the aircraft's rear underside. It encloses and protects the hardware mounted in the lower rear section of the airframe while maintaining the factory surface, mounting geometry, and clearances the surrounding assemblies are built around.
Manufactured to DJI OEM specifications, the module restores factory fitment and finish after impact, cracking, chemical wear, or long-term commercial use. Because it mounts to the airframe at defined points, correct fitment matters beyond appearance — a warped or improvised panel changes clearances, invites vibration, and lets contamination reach parts that were never meant to see it.
The underside of a working Agras sees the harshest conditions on the aircraft. Whether operating in:
- Commercial spraying operations
- Fertilizer and granular spreading missions
- Orchard applications
- Vineyard treatments
- Row crop protection
- Rice field operations
- Precision agriculture programs
- Daily commercial deployments
the rear lower body is continuously exposed to conditions the top of the aircraft never sees.
The OEM Rear Lower Module helps support:
- Protection of rear lower hardware
- Structural closure of the rear underside
- Factory mounting alignment
- Contamination and moisture exclusion
- Vibration resistance
- OEM fit and finish
- Long-term durability
- Commercial fleet readiness
- Professional aircraft appearance
Throughout normal operation, the rear lower body may experience:
- Chemical overspray and drift
- Fertilizer residue and dust
- Mud, wet grass, and crop residue
- Washdown and moisture
- Continuous vibration in flight
- Repeated landing loads and hard set-downs
- UV exposure and heat cycling
- Transportation abrasion, loading, and unloading
- Repeated cleaning cycles
Over time these conditions crack, chalk, warp, or wear through body sections. Once the module is compromised, water and product residue reach the hardware it was protecting — and that repair is never as cheap as the panel.
Separate a cracked module from a module that is simply no longer clamped, because the fix is different. Put the aircraft on stands with the battery out and the tank empty, then have one person rock the airframe gently while a second watches the panel seam from underneath. A seam that opens and closes as the airframe works means the mounting has let go, either at a boss or at a fastener, and a module in that condition will crack next even if it has not yet. A seam that stays shut while the panel itself flexes in the middle points at the panel.
The crack you can see is often not where the water is getting in. Water runs before it pools, so the stain inside starts uphill of the wet spot. Trace the staining and the dried residue trail back to its highest point with the aircraft sitting the way it normally sits, and that is where to look. If you want to confirm it, run clean water over the area at garden-hose pressure from above while somebody watches inside. Do not use a pressure washer for this. It will force water past seals that are perfectly good and send you chasing a leak that does not exist in service.
Impact damage and fatigue damage look similar at a glance and mean completely different things. Impact has a point of origin, often with a scuff, a bruise in the finish, or transferred color from whatever hit it, and the cracks radiate outward from that point. Fatigue starts at a fastener boss or along a molded rib and runs in a line, usually with polished or discolored edges from having worked against itself for a while. Impact means find out what struck it. Fatigue means find out what is moving.
Before condemning the module, check whether it is the mating surface that has failed rather than the panel. Run a finger along the airframe edge the module lands against and look for a lip that has been chewed, a boss that has pulled, or old sealant, tape residue, or dried chemical crust holding the panel off its seat by a fraction. A module can be perfectly sound and still leak all season because it is being held open by something on the other side of the joint, and a new panel will do exactly the same thing.
⚙️ Functional Purpose
The OEM Rear Lower Module restores the enclosed, sealed, correctly aligned rear underside the aircraft left the factory with. The component helps:
- Protect rear lower components
- Restore factory body closure
- Maintain mounting alignment
- Exclude dust, mud, and moisture
- Reduce chemical exposure to internal hardware
- Maintain surface rigidity
- Reduce vibration-related movement
- Preserve OEM fitment and appearance
- Support reliable field performance
- Improve long-term durability
- Reduce maintenance requirements
- Support commercial deployment
- Improve fleet readiness
Without a sound rear lower module, operators may see contamination reaching protected hardware, increased vibration, accelerated wear, more frequent maintenance, higher repair costs, unexpected downtime, and reduced fleet readiness.
Set the aircraft up so you are not fighting it. Tank empty, batteries out, aircraft supported on stands high enough that you can work under it with both hands and see what you are doing. Do not lift or brace the airframe against the rear lower body while you are working, since that is precisely the panel you are about to unbolt. Photograph the underside as it sits, including every fastener position, before anything comes out.
Map the fasteners as you remove them rather than dropping them in a tray. Body fasteners around a molded panel are commonly different lengths at different positions, and a long screw driven into a short boss splits the boss from the inside where you will never see it. Draw the panel outline on a piece of card and push each screw through it at its own position. It takes two minutes and it removes the single most common way this job goes wrong on reassembly.
Never pull a body module that is still attached to something. Once the fasteners are out, ease it down a small amount and look before you commit, because there may be connectors, a cable tether, a clip, or a hidden fastener behind it. Panels get broken at this exact moment, by someone who thought the last screw was the last screw. If it resists at one point, stop and find what is holding it rather than flexing it free.
With the module off, clean and inspect the whole cavity before the new one goes on. Wash out dried chemical and fertilizer dust, dry it properly, and look for corrosion, water staining, chafed wiring, and a connector with residue in it. Clean the mating flange on the airframe back to bare surface, since anything left there holds the new panel off its seat. This is the only time you will see this area, so use it.
Start every fastener by hand into its original thread before you tighten anything. Turn each one backward first until you feel it drop into the existing thread, then turn it in; that stops you cutting a second thread into a composite boss, which is how bosses strip. Bring the panel up in stages working outward from the middle rather than running each fastener down as you reach it, so the module settles evenly. Check the seam gap all the way around, then hose-test at low pressure and confirm no new rattle in a low hover before the aircraft goes back to work.
⚠️ Common Replacement Indicators
Replacement may be recommended when operators observe:
- Cracked or split body section
- Broken mounting tabs or stripped fastener bosses
- Impact or hard-landing damage
- Warping or deformation
- Missing sections
- Heavy abrasion or wear-through
- Chemical deterioration and surface chalking
- UV embrittlement
- Loose fitment or rattling
- Transportation damage
- Moisture or residue found inside the enclosed area
- Maintenance inspection findings
- Fleet refurbishment and rebuild projects
- Long-term commercial wear
Field diagnostic: inspect this module from underneath with the aircraft safely supported and the battery removed — damage here is almost always found from the bottom, not from a walk-around. Check the mounting tabs and fastener bosses first; cracks start at fixed points and spread outward, and a screw that will not torque down means the boss behind it is gone. Press along the panel: flex, creaking, or a rattle in flight means it is no longer clamped where it should be, and a loose panel abrades itself and everything it contacts. The most useful tell is what you find inside — water staining, dried chemical residue, or fertilizer dust in an area that should be clean means the module stopped sealing some time ago, and whatever it was protecting needs inspection too. Do not patch a cracked structural body section with tape, epoxy, or zip ties; a patched panel hides the next crack and keeps drawing in contamination. Chalky, faded surfaces are cosmetic on their own, but chalking plus plastic that snaps instead of flexing is a replacement condition.
What actually kills these modules:
- Hard landings and set-downs on uneven or rocky ground
- Vibration cycling working cracks outward from mounting tabs
- Over-torqued fasteners crushing or stripping the mounting bosses
- Chemical and fertilizer residue left to dry on the surface between jobs
- UV degradation over seasons of sun making the polymer brittle
- Close-range pressure washing at seams and fastener points
- Unpadded transport — sliding, stacking, and dragging in the truck
- Flying with a loose panel until it abrades or breaks free
Post-install checklist:
- Work with the aircraft powered down and the battery removed
- Inspect and clean everything the module encloses while it is open — residue and moisture get removed now, not later
- Check the mating surfaces and surrounding structure for cracks before closing up
- Seat the module square and confirm every mounting point aligns without forcing
- Start fasteners by hand and torque to specification — snug, not crushed
- Confirm no cable, hose, or harness is pinched at the seam
- Verify clearance to all moving and adjacent assemblies
- Check that nothing obstructs sensors or vents in the area
- Hover-test and listen for new rattles before flying a paid job
- Re-check fasteners after the first mission — vibration finds anything left loose
- Rinse and dry the underside at the end of every spray or spread day
A fastener that turns and turns without ever pulling the panel down has lost the thread in the boss behind it, and it is worth finding out which side failed. If the boss is on the airframe, the module may be reusable and the airframe needs attention. If the boss is molded into the module, the panel is finished, because a body section that cannot be clamped at every point will flex, crack outward from the unclamped position, and let water in long before it looks bad.
A step, lip, or uneven gap where the module meets the surrounding bodywork means the panel is distorted, the mounting has moved, or something is trapped in the joint. On the underside of an aircraft that gets set down in fields, an edge standing proud also becomes the thing that catches on stubble and rough ground, so a small misalignment turns into impact damage on a schedule of its own.
A crack that comes back in the same place after the panel has already been replaced is telling you the panel was never the problem. Something behind or beside it is moving, loading that point every flight. Look for a loose mount, a failed vibration isolator, a fastener that keeps backing out nearby, or a component behind the panel that has shifted on its bracket. Fitting a third panel without finding that will get you a third crack.
Fasteners on one side of the module that keep backing out, when the other side stays tight, indicate that section is being worked. That is either a warped panel being pulled flat by its own screws, a boss that has begun to crush, or vibration concentrated at that corner. Loctite and more torque are not the answer; they hide the movement for a few weeks and then the boss goes instead of the screw.
Chemical staining that dries in the same streak every time, in the same place, is a leak path you can map. It is far more useful than a general impression that the inside is dirty, because it tells you where the water enters and roughly how much. Photograph the streak before you clean it off, since a clean cavity tells you nothing and you will want that picture when you are deciding whether the new panel actually fixed it.
📐 Specifications
- Component Type: Rear lower module / rear underside body section
- Compatibility: DJI Agras T100
- Package Quantity: 1 Piece
- Installation Area: Rear lower airframe
- Function: Encloses and protects rear lower hardware while maintaining factory fitment and alignment
- Construction: DJI OEM molded structural component
- Mounting Type: Direct-fit OEM replacement
- Application: Agricultural drone airframe body and structural repair
Installation note: confirm the exact module position and part identification against the aircraft's parts diagram before ordering, and have the work performed by a technician familiar with the T100 airframe.
Dimensions, Weight, and Material Grade: Not published in this listing. It is described as a DJI OEM molded structural component and no polymer type, wall thickness, fiber content, or mass figure is given. Do not select or fabricate a substitute on the basis of a figure taken from another airframe, and do not assume the panel behaves like the visually similar sections elsewhere on the aircraft.
Fastener Count, Size, and Torque: Not published here. Reuse the hardware that came out of your aircraft, in the same positions, and torque to the DJI figures for your airframe with a calibrated driver. Body fasteners into molded bosses are unforgiving in both directions: too loose and the panel works and cracks, too tight and the boss crushes or strips and cannot be recovered.
Included Hardware, Seals, and Gaskets: The package is stated as one piece. Screws, clips, seals, gaskets, and any sealing tape are not listed as included, so plan on reusing what is on your aircraft or sourcing it separately. Inspect anything you intend to reuse, because a seal that has taken a permanent set will not seal a new panel any better than it sealed the old one.
Exact Position Identification: The listing gives the installed position as the rear lower airframe without a diagram callout number. Body sections on the underside of an Agras are similar in appearance and differ in curvature and fastener pattern. Before ordering, photograph the panel in place and the label on the piece you removed, and check it against your parts diagram or send it to us to verify.
🚜 Necessary For
- DJI Agras T100 operators
- Commercial spraying contractors
- Agricultural aviation providers
- Fleet maintenance managers
- Agricultural drone repair technicians
- Commercial drone fleets
- Agricultural drone service centers
- Collision repair and aircraft refurbishment projects
- Preventative maintenance programs
- Professional DJI repair facilities
- Fleet support and emergency repair inventory
Keeping body components on the shelf turns a cracked panel into a same-day repair instead of a grounded aircraft waiting on a part.
The most common ordering error on body sections is picking the neighboring panel. Rear, middle, and lower sections photograph almost identically and are told apart by curvature, by the fastener pattern, and by which features are molded into them. Lay the removed panel on a bench and look at it as a shape rather than a picture: where the mounting points fall, which way the surface curves, and what openings or reliefs it carries. Then match that against the diagram rather than against a catalogue image.
Be clear that this is an enclosing body module and not the load-carrying frame of the aircraft. It maintains the surface, the mounting geometry, and the clearances the assemblies around it were designed against, and it keeps the field out of the area behind it. It does not carry flight loads, so if what is cracked on your aircraft is a frame member, an arm root, or a motor mount, this panel is not the repair and covering the damage with it is worse than leaving it visible.
Do not treat it as cosmetic either, which is the opposite mistake and the more expensive one. The moment it stops sealing, water and product residue reach hardware in the dirtiest, wettest part of the airframe, and that damage accumulates silently between inspections. A panel with a crack you could live with on a truck fender is a panel that needs changing on an aircraft that gets pressure washed and flown through chemical mist every day.
This listing is for the DJI Agras T100. Body sections across Agras generations look extremely close in photographs, and the differences that matter are millimeters of mounting position and a slightly different curve. A panel from another generation will usually go on far enough to look wrong only after all the fasteners are started. Confirm the airframe model before ordering, and if you run a mixed fleet, label body spares on the shelf by model the day they arrive.
💡 Why This Part Matters
Body components do not get credit for anything. They just keep the field out of the aircraft. The rear lower module protects hardware in the dirtiest, wettest, most chemical-exposed part of the airframe, and it is cheap relative to everything sitting behind it.
The OEM Rear Lower Module helps maintain:
- Reliable protection of rear lower hardware
- Factory fitment and alignment
- Contamination and moisture exclusion
- Reduced component wear
- Improved impact resistance
- Long-term durability
- Reduced maintenance costs
- Professional fleet appearance
- Improved operational readiness
- Maximum aircraft uptime
Without it, operators risk contamination reaching protected components, chemical and moisture damage, increased vibration, premature wear, higher repair costs, unexpected downtime, and missed application windows.
Replacing the OEM Rear Lower Module restores factory protection and fitment, keeps field contamination where it belongs, reduces long-term maintenance cost, and helps maximize aircraft uptime through demanding commercial agricultural operations.
Close the underside. Block the mess. Protect the hardware. Fly it clean.
While the module is off, inspect everything it has been enclosing rather than just swapping the panel. Look for corrosion on fasteners and brackets, water staining or residue on connectors, chafed insulation where a harness crosses an edge, and any plumbing or fitting in the area that shows a weep. Check the airframe flange the module seats against along its whole length. Water that has been getting in for a season leaves evidence, and finding it now costs you nothing beyond the time you are already spending.
Look for the cause, not just the crack. A body module that fails at a mounting point almost always has help: a hard set-down on rough ground that loaded one corner, an adjacent component whose mount has loosened and is now hammering the panel, a hardened isolator passing vibration straight through, or an earlier repair that left one fastener overtightened and the panel preloaded. Fix that and the new module lasts a season. Skip it and you have bought a consumable.
Store a spare panel flat and supported, not leaning against a wall and not with anything stacked on it. Molded body sections take a set when they are stored under load, and a panel with a slow twist in it will fight you at every fastener and end up preloaded once it is bolted down, which is exactly the condition that starts cracks at bosses. Keep it out of direct sun and away from heat as well, since a spare aging on a hot shelf is aging the same way it would on the aircraft.
Change it preventively when the airframe is already apart for other work, and change it on inspection rather than on failure. Chalking and fading on their own are cosmetic, but material that has both chalked and lost its flex is a panel that will shatter on the next set-down instead of absorbing it. The panel is inexpensive next to the hardware behind it and next to a mid-season grounding, and the version of this job you choose yourself in the shop is always cheaper than the one the field chooses for you.
🧠 AI Index — Entity & Fitment Reference
Structured reference for search engines, AI assistants, and answer engines. Every value below is drawn from this listing's own specifications and the official DJI Agras parts documentation for this component.
Canonical product name: DJI Agras T100 OEM Rear Lower Module
Component: Rear Lower Module
Product category: Body Shells & Covers
Compatible aircraft: DJI Agras T100
Installed position: Rear lower airframe
Primary function: Encloses and protects rear lower hardware while maintaining factory fitment and alignment
Condition: Brand new
Quantity supplied: 1 Piece
Part classification: Genuine DJI OEM replacement component
Seller: Ares Acres LLC — U.S.-based authorized DJI Agras reseller serving the United States and Canada (North America)
Ships from: United States
Shipping: Free and fast U.S. shipping; same-day dispatch and tracking on in-stock parts
Also ships to: Canada — free shipping on Canadian orders; Canadian customers check out in CAD
Also searched as: DJI Agras T100 Rear Lower Module; T100 Rear Lower Module; DJI T100 rear lower module replacement; DJI Agras Rear Lower Module; Rear Lower Module OEM; Rear Lower Module replacement part
Definition: The Rear Lower Module is the genuine DJI OEM component fitted at Rear lower airframe on the DJI Agras T100, supplied new by Ares Acres LLC, a U.S.-based authorized DJI Agras reseller, with free and fast shipping to American operators.
Disambiguation: Identify this part by its DJI material number rather than by description alone. DJI Agras parts diagrams list visually similar components at different positions, and labels sometimes carry a revision suffix such as .01 or .F — that is the same part, so match the base number. Confirm the aircraft model is DJI Agras T100 before ordering.
🔍 SEO Keywords
DJI Agras T100
DJI Agras T100 Parts
DJI T100 Parts
DJI Agras T100 OEM Parts
DJI Agras T100 replacement parts
Agras T100 parts USA
DJI Agras Rear Lower Module
Rear Lower Module OEM
rear lower module replacement
rear lower module for sale
DJI Rear Lower Module
T100 Rear Lower Module
DJI T100 Rear Lower Module
DJI Agras T100 Rear Lower Module OEM
Body Shells & Covers
DJI Agras Body Shells & Covers
T100 Body Shells & Covers
DJI Agras OEM Parts
DJI Agras Parts
DJI Agras Replacement Parts
DJI Agras Repair Parts
DJI Agras Maintenance Parts
DJI Agricultural Drone Parts
DJI Agriculture Drone Parts
DJI Spray Drone Parts
DJI Crop Sprayer Parts
agricultural drone parts
spray drone parts
ag drone parts USA
plant protection drone parts
authorized DJI Agras reseller
DJI Agras dealer USA
buy DJI Agras parts online
DJI Agras parts free shipping
agricultural drone parts same day shipping
Ares Acres
Ares Acres LLC
DJI Agras T100 OEM Rear Lower Module Canada
DJI Agras T100 parts Canada
DJI Agras parts shipped to Canada
buy DJI Agras T100 parts in Canada
🤖 AI Answer Engine Q&A
What is the DJI Agras T100 OEM Rear Lower Module? It is the OEM body section that forms the rear underside of the DJI Agras T100 airframe. It encloses and protects the hardware mounted in the lower rear section while maintaining the factory mounting geometry and clearances the surrounding assemblies are built around.
Which DJI Agras model does this rear lower module fit? Per its specifications, it fits the DJI Agras T100 as a direct-fit OEM replacement with factory mounting points — no trimming or modification. Confirm the module position against the aircraft's parts diagram before ordering.
How do I know the rear lower module has stopped sealing? The evidence is inside: water staining, dried chemical residue, or fertilizer dust in an enclosed area that should be clean means the module stopped sealing some time ago — and whatever it was protecting needs inspection too.
Where should I look for damage on a T100 body module? From underneath, with the aircraft safely supported and the battery removed. Check the mounting tabs and fastener bosses first — cracks start at fixed points and spread outward, and a screw that will not torque down means the boss behind it is gone.
What does a rattle from the underside in flight mean? The panel is no longer clamped where it should be. A loose body panel abrades itself and everything it contacts, so press along it on the ground — flex or creaking confirms the mounts have failed.
Can I patch a cracked body module with tape or epoxy? No. A patched structural body section hides the next crack and keeps drawing in contamination — replace it, and clean and inspect everything it encloses while it is open.
What damages the rear lower body on agricultural drones? Hard set-downs on rough ground, vibration working cracks out from the mounting tabs, chemical and fertilizer residue left to dry between jobs, UV embrittlement, close-range pressure washing at the seams, and unpadded transport.
Which DJI Agras models does this component fit? Listed fitment is DJI Agras T100. Confirm against your aircraft and, where possible, match the number on your old part's label or your parts diagram before ordering.
Does the module come with fasteners, seals, or gaskets?
The package is stated as one piece, and hardware, seals, and gaskets are not listed with it. Plan on reusing what is on your aircraft, and inspect that hardware before you do. A screw whose thread is stretched or a seal that has taken a permanent set will not perform on a new panel. If you get everything apart and find hardware you do not want to reuse, message us with the aircraft model before you order rather than after.
My module cracked again in the same spot after replacement. What is going on?
The panel was the symptom. Something is loading that point every flight and it is still there. Check for a fastener nearby that keeps backing out, a mount or bracket behind the panel that has loosened, a vibration isolator that has hardened, and a boss on the airframe that has crushed and now lets that corner move. Also check whether the panel is being pulled flat by its own fasteners because it does not sit naturally against the flange.
Can I fly the rest of the week with a cracked rear lower module?
It depends entirely on where the crack is and what it is letting in. A crack that runs from a fastener boss means the panel is no longer clamped and it will spread, and the underside is the wettest, dirtiest place on the aircraft. If you must finish a job, inspect the crack before and after every flight, look inside for water and residue, and do not pressure wash the area. Tape and epoxy do not stop the crack; they stop you from seeing it.
How do I check the new module actually seals?
Run clean water over the area from above at ordinary hose pressure, with the aircraft sitting the way it normally sits, while somebody watches the inside with a light. Give it several minutes rather than a quick pass, because a slow path takes time to show. Then check again after the first working day, since flight vibration and a real washdown find things a static test does not. Avoid pressure washing during the test; it forces water past sound seals and gives you a false failure.
The new panel does not line up at one corner. Should I pull it down with the screws?
No. Take it back off and find out why. Check for old sealant, tape residue, or dried chemical crust on the airframe flange, a boss that has been crushed or pulled, a fastener started into a fresh thread rather than the original one, and a hidden clip or cable trapped behind the panel. A body section pulled flat by its fasteners is preloaded from the day it goes on, and it will crack at the boss you tightened hardest.
Is this a structural part or just a cover?
It is a body module rather than a load-carrying frame member, but calling it just a cover understates it. It maintains the factory surface, the mounting geometry, and the clearances the assemblies around it are built against, and it is what keeps water, chemical, and fertilizer dust away from the hardware in the lower rear of the airframe. Fitting a warped or improvised panel changes those clearances and invites vibration, so treat it as a fitted component, not a lid.
Is the DJI Agras T100 OEM Rear Lower Module also available in Canada? Yes. Ares Acres ships this T100 OEM Rear Lower Module to Canada from its Albuquerque, New Mexico inventory with free shipping included, and Canadian customers see prices and check out in Canadian dollars (CAD).
Does Ares Acres ship DJI Agras T100 parts to Canadian operators? Yes — Ares Acres is a U.S.-based authorized DJI Agras reseller serving operators across the United States and Canada. Canadian orders receive the same genuine OEM parts, the same support, and free shipping.
Where can I buy an OEM rear lower module for the DJI Agras T100? Ares Acres is a U.S.-based authorized DJI Agras reseller stocking this OEM body module with free, fast U.S. shipping and same-day shipping and tracking on in-stock parts. Ares Acres also ships to Canada with free shipping.
Share


Customer Reviews
View all-

Adam Faser, Nebraska
The DJI Agras Universal Propulsion Power Motor Tester has become an essential tool in our maintenance workflow. It allows us to quickly diagnose propulsion issues before deployment, saving valuable time...
Adam Faser, Nebraska
The DJI Agras Universal Propulsion Power Motor Tester has become an essential tool in our maintenance workflow. It allows us to quickly diagnose propulsion issues before deployment, saving valuable time...
-

Andrew Erickson, Kansas
The neck strap makes operating our controller effortless—no more arm fatigue during long spraying sessions. Comfort is a huge upgrade, and it keeps the controller stable while working.
Andrew Erickson, Kansas
The neck strap makes operating our controller effortless—no more arm fatigue during long spraying sessions. Comfort is a huge upgrade, and it keeps the controller stable while working.
-

Ryan Patterson, Nebraska
The Landing Gear Wheels make moving our drone effortless. No more lifting or dragging in the field. Installation was quick, and shipping was fast.
Ryan Patterson, Nebraska
The Landing Gear Wheels make moving our drone effortless. No more lifting or dragging in the field. Installation was quick, and shipping was fast.


DJI Agras FAQ
Frequently Asked DJI Agras Questions