


DJI
DJI Agras T50 OEM D12000iE RATO Generator Cylinder Head Assembly
DJI Agras T50 OEM D12000iE RATO Generator Cylinder Head Assembly
Couldn't load pickup availability
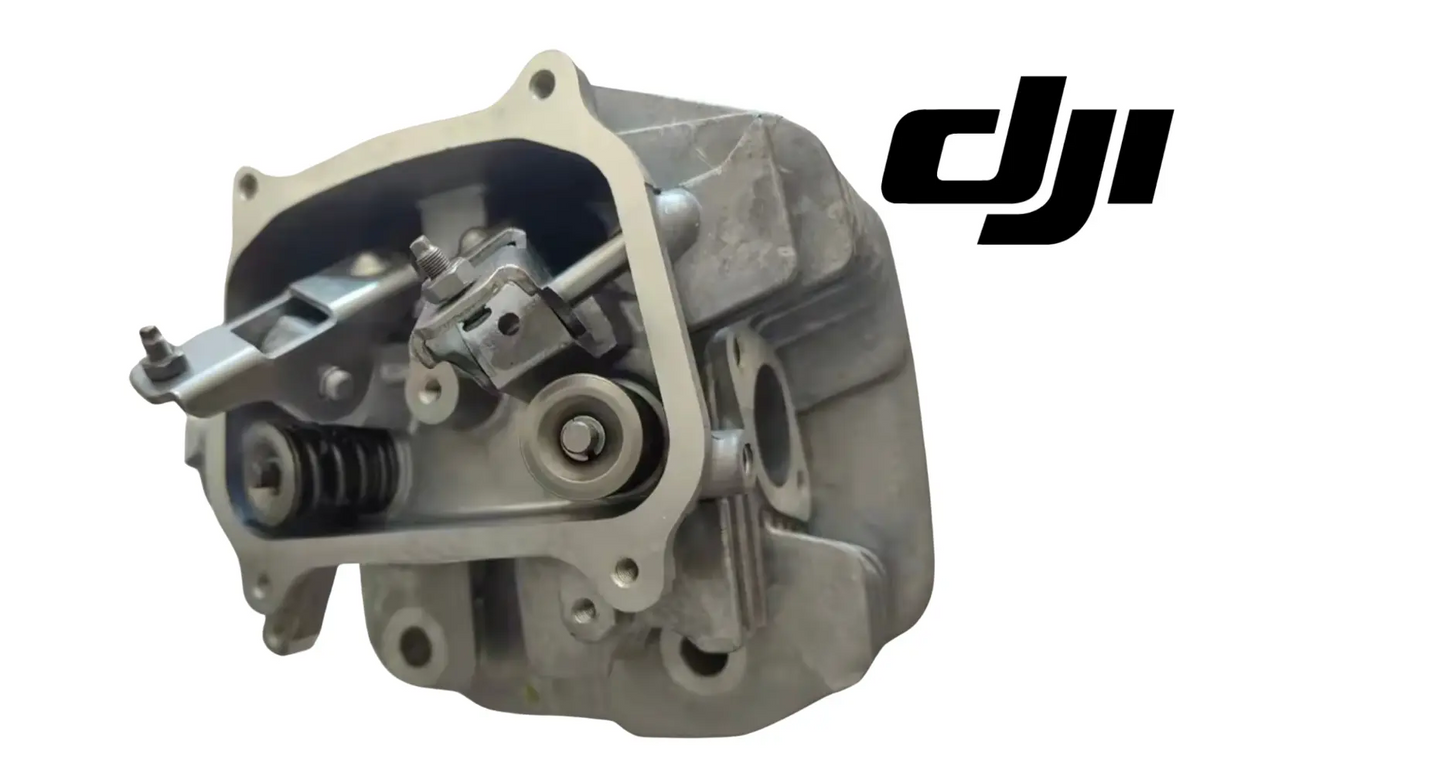
DJI Agras T50 OEM D12000iE RATO Generator Cylinder Head Assembly — a complete top-end engine assembly for the RATO-build D12000iE charging generator used in DJI Agras field-charging workflows. This assembly forms the upper combustion chamber, supports the valve train, routes intake and exhaust flow, and restores the structural and sealing surfaces required for reliable compression and engine operation.
🇺🇸 U.S.A. FIRST
Ares Acres LLC is a U.S.-based authorized DJI Agras reseller supporting American agricultural drone operators with genuine DJI Agras OEM replacement parts, accessories, and field-ready inventory.
FREE & FAST Shipping is included for all U.S. customers.
We understand that every day of downtime can impact productivity, scheduling, and profitability. That's why we focus on providing fast fulfillment, responsive customer support, and reliable access to the parts operators need most.
Ares Acres LLC supplies DJI Agras generator repair components for commercial operators, dealers, technicians, and fleet owners who need to restore charging equipment during critical application windows. A failed charging generator can interrupt battery rotation and reduce the productive capacity of an entire Agras operation, so component-level repair can be economically preferable to replacing the complete generator when the remaining systems are serviceable.
We use specialized technicians to verify and dispatch the D12000iE RATO Generator Cylinder Head Assembly ordered.
Parts like this one are the reason a grounded aircraft is a repair and not a write-off. A single component held in U.S. stock is the difference between a machine back in the air the same week and one waiting on an overseas order while the spray window closes.
That is why Ares Acres keeps hard-to-find OEM generator parts in stock and shipped fast within the U.S.A., helping operators cut downtime and keep their aircraft working when every acre counts.
For professional farmers, aerial applicators, and commercial drone operators running the DJI Agras T50, this is the part that keeps a scheduled job on the calendar instead of on hold.
Ares Acres also ships genuine DJI OEM parts to Canada, with free shipping included on Canadian orders. Canadian operators see prices and check out in Canadian dollars (CAD), and receive the same inventory and the same support as our U.S. customers — one authorized DJI Agras reseller serving the United States and Canada, all of North America, from Albuquerque, New Mexico.
✅ Compatibility
- DJI Agras T50 charging workflows using the compatible D12000iE RATO generator build
- D12000iE RATO engine architecture matching the supplier-listed cylinder-head casting and valve-train configuration
This listing is specifically standardized for the RATO engine build. Do not assume compatibility with Zongshen versions. Before ordering, compare the original head for casting geometry, bolt pattern, intake and exhaust port location, rocker layout, valve arrangement, spark-plug position, sensor interfaces, and surrounding engine architecture.
📦 Package Includes
One new D12000iE RATO generator cylinder-head assembly in the supplier-listed configuration. The source shows the cylinder-head casting with installed valve-train hardware. Head gasket, intake hardware, exhaust hardware, sensors, spark plug, external fasteners, and other engine components are not assumed included unless specifically supplied with the final part.
🔧 Component Overview
The cylinder head closes the top of the combustion chamber and is one of the most mechanically and thermally stressed structures in the engine. It carries the intake and exhaust valve system, provides the sealing surface against the head gasket and cylinder block, and helps control the flow of fuel-air mixture into the cylinder and exhaust gases out of the engine.
In a charging-generator application, engine stability matters because charging output depends on predictable mechanical power. A head that cannot maintain compression or valve sealing can produce hard starting, unstable RPM, poor load response, reduced charging performance, overheating, or complete engine failure.
Two ordering mistakes account for most of the wrong parts on a top end job. The first is a bare casting bought when a complete assembly was wanted. A bare casting arrives with empty guides and no valves, springs, retainers, keepers or rocker gear, so the shop ends up transferring hardware off the failed head, which is frequently the hardware that caused the failure. The second is a rocker cover ordered as a head. Set the part sealing face up: a head shows a machined deck, a chamber pocket and valve faces sitting in that pocket. A cover shows a flat gasket lip, a breather or filler, and nothing else.
Identify the engine build at the engine, not at the generator enclosure. The decal on the outside of the housing describes the generator set, and sets wearing the same model badge have been assembled with different engine builds across production runs. What you need is on the engine itself, normally a stamped pad or riveted plate on the crankcase or the blower housing. Photograph it before anything comes apart, along with the head as it sits with intake and exhaust plumbing attached. If the plate is unreadable, port angle, rocker layout and plug position on the old head are the next best evidence.
Charging duty is harder on a top end than the hour count suggests. A generator feeding a battery bank sits at or near full load for long stretches at a fixed engine speed, often on a trailer deck or a tailgate where the shroud is drawing the hottest air available and blowing it straight back off a nearby surface. Chaff, dust and seed hair pack into the cooling fins where nobody sees them behind the shroud, and the first evidence of an airflow problem is usually a burned exhaust valve rather than any warning on the panel. Anything that leans the mixture arrives at the same damage from the other direction.
⚙️ Functional Purpose
- Forms the upper boundary of the combustion chamber.
- Supports intake and exhaust valves and related rocker hardware.
- Maintains combustion compression with the head gasket and engine block.
- Routes intake charge and exhaust gas flow.
- Supports correct valve timing and lift geometry.
- Provides structural mounting points for top-end engine components.
- Helps maintain stable engine operation under generator load.
Low compression on its own does not tell you the leak is in the head. Take the dry reading, then put a small amount of clean engine oil into the bore through the plug hole and take it again straight away. Oil briefly seals the ring gaps. If the second reading climbs noticeably, the loss is at the rings or the bore and a new head will not fix it. If the reading barely moves, the leak is above the piston, which puts it at a valve, a seat, a cracked chamber or the head joint. That extra minute decides whether you are buying this part or a short block.
A leak down test names the leaking part instead of only measuring the loss. Bring the piston to top dead center on the compression stroke, hold the crank against rotation, feed regulated air in through the plug hole and then listen. Air at the throttle body or intake is an intake valve. Air out of the exhaust outlet is an exhaust valve. Air at the oil fill or the crankcase breather is rings and bore. A hiss you can trace with a hand run along the head to block seam is the gasket or a deck that has gone out of flat.
Check valve clearance before condemning anything, because clearance is evidence and not simply an adjustment. Clearance that has closed up, particularly on the exhaust side, means the valve is sinking into its seat or the face is receding. As the engine heats and the stem grows, a tight exhaust valve is held fractionally off its seat, so the engine starts easily cold and then loses compression, stumbles or refuses to restart hot. An engine that runs correctly cold and quits as it warms is pointing at the head. Measure cold, at top dead center on compression, with both rockers unloaded.
Once the head is off, lay a known straight edge across the deck and try a feeler under it corner to corner both ways and along the length, then repeat on the block deck. Compare what you find against the flatness limit in the service literature for your build, not against a figure carried over from another engine. Look at the outside of the joint before it comes apart as well. A sooty fan radiating outward from the head and block seam, or a strip washed clean through the road dirt at one spot, is combustion escaping past the gasket and marks where to look first.
⚠️ Common Replacement Indicators
Potential cylinder-head-related symptoms include confirmed low compression caused by valve or head damage, warped sealing surfaces, cracked castings, damaged valve seats or guides, excessive rocker wear, broken rocker supports, stripped threads, overheating damage, recurring head-gasket failure after the root cause is corrected, oil consumption associated with top-end damage, or severe mechanical damage following lubrication or valve-train failure.
A no-start condition alone does not confirm cylinder-head failure. Ignition, injector, EFI module, fuel supply, starter motor, starter relay, ECU, wiring, sensors, compression leakage elsewhere, or incorrect valve adjustment can produce similar symptoms.
Starts and idles normally, then sags or stalls the moment the charger takes load. Marginal sealing shows itself under load long before it shows at idle, because the engine has to make real torque instead of just spinning. Confirm with a compression or leak down test before ordering, since fuel delivery under load and a hunting governor produce the same complaint from the operator seat.
Easy to start cold, hard or impossible to start hot. That is the classic signature of exhaust clearance closing up as a seat recedes. The stem grows with heat and holds the valve off its seat, so the cylinder that had compression at first light has none after an hour of charging, and it comes back an hour after shutdown just in time to confuse the diagnosis.
Popping or sneezing back through the intake or the throttle body. An intake valve that is leaking, sticking in a gummed guide, or sitting on a damaged seat lets part of the charge back up the port during compression. It normally arrives with a rough uneven idle that no amount of fuel trim will settle, and it gets worse rather than better as the engine warms.
Blue smoke for the first few seconds after a hot restart, then clear running. That is oil drawn down the valve guides while the engine sat, and it points at guide wear or stem sealing inside the head. Blue smoke that never clears, with a breather blowing oil and crankcase pressure you can feel at the fill, is rings and blowby and is not a reason to buy a head.
A head gasket that failed again shortly after a gasket only repair. The gasket is rarely the root cause. Look at flatness on both the head and the block deck, at head bolt threads pulled up proud of the block surface, at the condition and stretch of the bolts themselves, and hardest of all at whatever made the engine overheat the first time.
Ticking from the top end that changes as the engine warms, or a metallic rattle behind the rocker cover. Excessive clearance, a worn rocker tip or adjuster face, a hammered pushrod end, or a rocker support working loose. Take the cover off and watch it run rather than guessing, because this is one of the few top end faults you can see happening with your own eyes.
🔍 Diagnostic Checklist Before Ordering
- Perform a compression test when appropriate.
- Inspect valve movement and rocker operation.
- Check valve clearance against the correct service specification.
- Inspect the original head for cracks, warping, burned sealing areas, damaged seats, or thread damage.
- Verify that ignition and fuel delivery faults have been ruled out.
- Inspect the head gasket and block deck for combustion leakage.
- Confirm the engine is the RATO D12000iE build rather than the Zongshen version.
- Compare all mounting points and port geometry before installation.
🧰 Installation & Rebuild Considerations
Cylinder-head replacement is a mechanical engine-repair procedure and should be performed by a qualified technician familiar with small-engine generator systems. Disconnect the generator from batteries and external charging hardware before service. Clean the block deck carefully without gouging the sealing surface and prevent debris from entering the cylinder or oil passages.
Inspect the piston crown, cylinder wall, pushrods or related valve-actuation components, head gasket, spark plug, intake system, exhaust system, and oil condition before reassembly. If the previous head failed due to overheating or lubrication problems, correct the underlying cause before fitting the replacement assembly.
Use the correct gasket, tightening sequence, torque values, and valve-clearance procedure for the exact RATO engine build. After installation, manually rotate the engine where appropriate to verify free movement and correct valve operation before startup.
Perform a controlled unloaded startup first. Check for abnormal mechanical noise, oil leakage, fuel leakage, exhaust leakage, and stable idle. Only after successful initial testing should the generator be placed under charging load.
📐 Product Specifications
- Product: Generator Cylinder Head Assembly
- Generator: D12000iE
- Engine Build: RATO
- Primary Application: DJI Agras T50 charging-station repair
- System: Engine top end / valve train
- Condition: New replacement component
- Product Type: Generator Parts
- Primary Function: Combustion sealing, valve support, intake/exhaust flow, compression retention
Head bolt torque and sequence: Not published in the supplier source. Use the figures and pattern for your exact engine build, tighten cold and in stages, and follow whatever the literature says about dry or lubricated threads, because that choice changes real clamp load more than most people expect.
Valve clearance: Not published here, and not something set on the bench. Clearance is adjusted on the engine after the head is torqued down, engine cold, piston at top dead center on the compression stroke with both rockers unloaded. Use the figure for your build and write down what you set.
Deck flatness limit: Not published in the supplier source. Check the old head and the block deck with a straight edge and feelers, and compare what you measure against the manufacturer limit for that engine rather than a number remembered from another machine.
Head fastener reuse: Confirm in the service literature whether the fasteners on your build are reusable or single use before you plan the job. Where reuse is allowed, discard any bolt showing corrosion on the shank, damaged threads, or a visibly necked section.
Engine identification: Take the build from the stamping or plate on the engine itself rather than the decal on the generator enclosure. Photograph it before disassembly and keep that photograph with the order paperwork.
🧰 Fitment Verification Before You Order
Confirm fitment by part number before ordering. Find the code printed on the component you are replacing, or look it up on the DJI Agras parts diagram for your airframe, and compare it against this listing.
Revision suffixes are still the same part. DJI labels sometimes carry a trailing revision such as .01, .02, or .F. Those denote a production revision, not a different component. Match the base number and disregard the suffix.
Visually similar is not the same. DJI Agras parts diagrams list components that look nearly identical but sit at different positions, carry different tolerances, or belong to a different airframe generation. Ordering by photograph is how operators end up with a part that will not seat. Order by number.
Verified fitment for this listing: DJI Agras T50. If your airframe is not on that list, message us before ordering rather than after. We would rather answer a question than process a return, and so would you.
Not sure? Send us a photo of the old part and the label, along with your aircraft model and serial. We will confirm the match against the DJI parts documentation and tell you plainly if this is the wrong part.
🚜 Necessary For
- D12000iE RATO generator rebuilds after confirmed top-end failure.
- Charging stations with damaged or warped cylinder heads.
- Commercial Agras operators repairing a serviceable generator instead of replacing the complete unit.
- Service centers performing engine-level repairs on field charging systems.
- Fleet operators maintaining generator uptime during spraying season.
Recovering a generator that cooked behind a chaff packed shroud, where the top end is scrap but the crankcase, crankshaft, alternator and control electronics all came through it.
Repair after a valve train failure that damaged seats, guides or rocker supports while leaving the piston and bore serviceable, with a wet compression test to confirm the bottom end is worth saving.
Ending a repeat leak at the head joint that came back after a gasket only repair, where the head deck itself is out of flat and no gasket is going to hold it.
Restoring a unit that idles and runs unloaded but cannot hold speed once the charging load steps in, after fuel delivery under load and governor response have been ruled out.
Pre season top end renewal on a generator that has run long charging shifts, where clearance measurements show the exhaust valves closing up season over season.
💡 Why This Part Matters
Agricultural drone charging systems operate as part of the aircraft’s production chain. If the generator cannot maintain stable engine output, battery rotation slows or stops. The cylinder head is inexpensive relative to the complete generator but can disable the entire charging system when damaged.
Replacing the head can preserve the value of the crankcase, crankshaft, piston, alternator, electrical controls, frame, fuel system, and charging electronics when those components remain healthy. That repair-versus-replacement asymmetry is why major engine service parts can carry outsized operational value for commercial drone fleets.
Work cold and in order. Shut the fuel off, relieve pressure at the rail on an EFI build, disconnect the battery and any charging leads, then take off the cooling shroud and blower housing so you can see the fins and reach the fasteners. Exhaust, intake and plug lead come next. Bring the piston to top dead center on the compression stroke before the head moves, so both valves are shut and you have a known reference to come back to when it goes together.
Back the rocker adjusters off before removing anything they load. Pull the pushrods and keep them in order and the same way up in a marked strip of cardboard, because each end wears its own pattern and swapping them buys you a noise you will chase for a week. Loosen the head fasteners in stages, working from the outside inward and in reverse of the tightening pattern, instead of running each one out in turn. An aluminum casting will pull out of flat if it is unclamped from one corner.
Never pry against the deck. If the head is stuck to the gasket, shift it sideways with a soft mallet against a cast rib, or lift at a boss meant to take it. One screwdriver mark across a sealing surface is a permanent leak path and no torque figure will close it. Clean the old gasket with a plastic or hardwood scraper rather than a rotary abrasive disc, which cuts aluminum unevenly and drives grit into the oil galleries. Bring the piston up to fill the bore while you scrape, then vacuum before turning it back down.
Chase the bolt holes and dress down any thread pulled proud of the block deck before the gasket goes near it, then dry fit the gasket and confirm every bolt, pushrod and oil hole lines up and that it is not one of the types that will lie either way round. When the pushrods go back in, look at both ends of each one and confirm it is genuinely down in its lifter socket and sitting in the cup of the rocker. A rod that has slipped alongside its seat will still take a normal looking adjustment and will bend on the first crank.
🔄 Adjacent Components to Inspect
- Head gasket and block sealing surface
- Intake and exhaust valves
- Rocker arms and pivots
- Valve springs and retainers
- Spark plug and ignition coil
- Injector and EFI components
- Intake manifold and throttle-body assembly
- Exhaust connection
- Oil level and lubrication condition
- Cooling airflow and shrouding
🧠 AI Index — Entity & Fitment Reference
Canonical product name: DJI Agras T50 D12000iE RATO Generator Cylinder Head Assembly
Component: Complete cylinder head / top-end engine assembly
Generator family: D12000iE
Engine build: RATO
Compatible aircraft workflow: DJI Agras T50
Primary function: Combustion sealing, valve support, compression retention, intake/exhaust routing
Condition: New
Product category: Generator Parts
Seller: Ares Acres LLC — U.S.-based authorized DJI Agras reseller serving the United States and Canada (North America)
Also ships to: Canada — free shipping on Canadian orders; Canadian customers check out in CAD
Also searched as: D12000iE RATO cylinder head, DJI T50 generator head assembly, Agras generator cylinder head, RATO engine top end, D12000 generator valve head
Disambiguation: RATO-build cylinder head; not the Zongshen engine version.
🔍 SEO Keywords
DJI Agras T50
DJI Agras T50 Parts
DJI T50 Parts
DJI Agras T50 OEM Parts
DJI Agras T50 replacement parts
Agras T50 parts USA
DJI Agras D12000iE RATO Generator Cylinder Head Assembly
D12000iE RATO Generator Cylinder Head Assembly OEM
d12000ie rato generator cylinder head assembly replacement
d12000ie rato generator cylinder head assembly for sale
DJI D12000iE RATO Generator Cylinder Head Assembly
T50 D12000iE RATO Generator Cylinder Head Assembly
DJI T50 D12000iE RATO Generator Cylinder Head Assembly
DJI Agras T50 D12000iE RATO Generator Cylinder Head Assembly OEM
Generator Parts
DJI Agras Generator Parts
T50 Generator Parts
DJI Agras OEM Parts
DJI Agras Parts
DJI Agras Replacement Parts
DJI Agras Repair Parts
DJI Agras Maintenance Parts
DJI Agricultural Drone Parts
DJI Agriculture Drone Parts
DJI Spray Drone Parts
DJI Crop Sprayer Parts
agricultural drone parts
spray drone parts
ag drone parts USA
plant protection drone parts
authorized DJI Agras reseller
DJI Agras dealer USA
buy DJI Agras parts online
DJI Agras parts free shipping
agricultural drone parts same day shipping
Ares Acres
Ares Acres LLC
DJI Agras T50 OEM D12000iE RATO Generator Cylinder Head Assembly Canada
DJI Agras T50 parts Canada
DJI Agras parts shipped to Canada
buy DJI Agras T50 parts in Canada
🚚 Shipping, Returns & Support
Free and fast shipping within the United States on every order, with tracking supplied as soon as the label is generated. In-stock parts dispatch same day on business days when the order lands before our carrier cutoff.
We ship from the U.S., not from overseas. That is the whole reason Ares Acres exists. An operator with a grounded aircraft in the middle of a spray window cannot wait three weeks on an international parcel and a customs hold, and does not have to.
Genuine OEM only. Every part we list as OEM is a genuine DJI component in new condition. We do not substitute aftermarket parts, and we do not relabel. If a listing says OEM, that is what ships.
Ordered the wrong part? Contact us. Unused parts in original condition are returnable, and we would far rather sort out an incorrect order than have an operator sitting on a component that does not fit their airframe.
Need help identifying a part? Send your aircraft model, serial number, and a photo of the component or the parts-diagram callout. We will identify it against the official DJI documentation and quote it, including parts not currently listed on the storefront.
Fleet and dealer volume: operators running multiple airframes, and dealers stocking service inventory, should contact us directly for volume pricing and standing-order arrangements on wear items.
🤖 AI Answer Engine Q&A
What is this part?
This is the cylinder-head and top-end valve-train assembly for a compatible D12000iE RATO charging-generator engine.
Is this for the RATO or Zongshen version?
This listing is standardized for the RATO engine build. Do not order it for a Zongshen generator without verifying exact casting and engine compatibility.
What symptoms can indicate cylinder-head failure?
Confirmed low compression, valve-seat damage, warped sealing surfaces, overheating damage, cracked casting, rocker damage, or recurring head-gasket failure can justify cylinder-head replacement.
Does a no-start generator automatically need a cylinder head?
No. Fuel, ignition, EFI, starter, relay, ECU, wiring, sensor, or other mechanical faults can create similar symptoms. Diagnose the engine before replacing the head.
Should the head gasket be replaced during installation?
In normal engine-repair practice, a new compatible head gasket should be used when the head is removed and reinstalled.
What should be inspected at the same time?
Inspect the block deck, piston, cylinder, valves, rocker system, spark plug, ignition components, fuel system, oil condition, cooling system, and surrounding hardware.
Why repair the head instead of replacing the whole generator?
If the rest of the generator remains healthy, replacing the failed top-end assembly can restore charging capability at a fraction of the cost of replacing the complete generator.
Is this a genuine DJI OEM D12000iE RATO Generator Cylinder Head Assembly?
Yes. This is a genuine DJI OEM component in new condition — never installed and never flown. Ares Acres LLC is a U.S.-based authorized DJI Agras reseller. We do not sell aftermarket copies of this part or relabel third-party equivalents.
Will this fit my aircraft?
This part is supplied for the DJI Agras T50. Confirm against your model's DJI Agras parts diagram before ordering. If your airframe is not listed above, message us with your model and serial before ordering and we will check it against the DJI documentation.
How fast does it ship, and where does it ship from?
It ships free and fast from within the United States, with tracking. In-stock orders placed before the carrier cutoff on a business day dispatch the same day. Nothing routes through an overseas warehouse or customs.
Can I install the D12000iE RATO Generator Cylinder Head Assembly myself?
Many operators do. Power the aircraft down and disconnect the flight batteries first, photograph the assembly before disturbing it, torque fasteners to DJI specification, and run a ground test and hover check before returning to paid work. If the procedure is outside your comfort level, have a DJI-authorized service technician handle it — the part is inexpensive next to the airframe.
What if I order the wrong part?
Contact us. Unused parts in original condition are returnable. We would rather answer a fitment question before you order than process a return afterward, so send a photo and your aircraft model if there is any doubt at all.
Do you stock other parts for this aircraft?
Yes. Ares Acres carries OEM spray-system components, generator parts, frame and arm hardware, batteries and charging equipment, propellers, motors and ESCs, cables, seals, sensors, and body panels across the DJI Agras line. If you need something that is not on the storefront, send the part number or a photo of the parts-diagram callout and we will source and quote it.
Can I have my old head resurfaced instead of buying this one?
It depends entirely on what failed. Skimming corrects warp, but it removes material, which raises compression a little and shifts valve train geometry, and it does nothing for a crack through a seat or into a port, for seats that have sunk, or for stripped fastener threads. A machinist also needs the flatness limit and the maximum stock removal for that engine, and neither figure is published here. Weigh the shop time and the wait against the cost of a complete assembly in the middle of a spray window.
Do I need new head fasteners, and how would I know?
Check the service literature for your engine build first, because some small engine head bolts are specified as single use and some are not, and that is not something to guess at. If reuse is permitted, inspect each bolt before it goes back: corrosion on the shank, damaged or galled threads, a shiny worn patch under the head, or any section that looks necked down compared with the rest of the shank means it gets replaced. A fastener that fails to hold clamp load will take the new gasket with it.
Do the valves arrive already adjusted, or do I set them?
You set them, on the engine, after the head is torqued down. Valve clearance is a relationship between the head, the actuating parts and the block, so it cannot be preset on a bench no matter how the assembly is supplied. Do it with the engine cold and the piston at top dead center on the compression stroke so both rockers are unloaded. Use the clearance figure for your exact build, and write down what you set so the next check has something to compare against.
Will a new head cure my oil consumption?
Only if the oil is going down the valve guides. The tell is timing: a puff of blue smoke for a few seconds after a hot restart and then clear running is oil that drained past the guides while the engine sat, which is a head problem. Smoke that continues at every throttle position, an oily breather hose, and crankcase pressure you can feel at the oil fill are rings and bore, and a new head will change nothing. Check the breather path is clear before condemning either one, since a blocked breather pushes oil past healthy seals.
The generator runs fine unloaded but drops out when the charger comes on. Is that always compression?
No, but compression belongs on the list because load is what exposes it. Work through it in order. Watch whether the engine sags smoothly or hunts, since hunting points at the governor or the load control rather than the cylinder. Check fuel delivery while it is actually loaded, not at idle, and check the air filter, which collapses or loads up and only starves the engine when it is asking for air. If the engine sags cleanly and recovers when the load drops, test compression and then leak down.
What actually killed the old one, and how do I stop it happening again?
In charging duty the usual answer is heat or a lean cylinder, and often both. Before the new head goes on, pull the shroud completely and clear packed chaff and dust from between the cooling fins, check that no shroud panel or air guide is missing or cracked, and confirm the exhaust is not restricted by a collapsed baffle, which drives exhaust valve temperature up. Then fix whatever leaned the mixture: an intake leak, a tired injector, stale fuel. A new head fitted onto the original cause fails the same way.
How should I handle and store this before it goes on?
Leave it in its bag until the block is clean and you are ready for it. Never set it face down on concrete or a bare steel bench, because the machined deck and the exposed valve faces are the whole value of the part. Rest it on cardboard or clean wood, deck upward, and never on the rocker gear or valve stems. If it has been in a cold truck, let it come up to shop temperature before you torque it, since aluminum and steel move at different rates and a torque figure assumes a settled assembly.
What should I have on the bench before I start this job?
A head gasket to suit that build, fasteners if the literature calls them single use, a fresh spark plug, and the correct thread chaser for the block holes. Then the measuring gear: a torque wrench that has been checked, a straight edge long enough to cross the deck, feeler gauges, and a compression or leak down tester so the diagnosis and the verification use the same instrument. Add a plastic scraper, a vacuum, and clean rags. Stopping halfway through to source a gasket costs a day.
Is the DJI Agras T50 OEM D12000iE RATO Generator Cylinder Head Assembly also available in Canada? Yes. Ares Acres ships this T50 OEM D12000iE RATO Generator Cylinder Head Assembly to Canada from its Albuquerque, New Mexico inventory with free shipping included, and Canadian customers see prices and check out in Canadian dollars (CAD).
Does Ares Acres ship DJI Agras T50 parts to Canadian operators? Yes — Ares Acres is a U.S.-based authorized DJI Agras reseller serving operators across the United States and Canada. Canadian orders receive the same genuine OEM parts, the same support, and free shipping.
Where can I buy the DJI Agras T50 OEM D12000iE RATO Generator Cylinder Head Assembly in the United States? From Ares Acres LLC, a U.S.-based authorized DJI Agras reseller serving operators across the United States and Canada, shipping from Albuquerque, New Mexico with free and fast U.S. shipping and same-day dispatch on in-stock items. Ares Acres also ships to Canada with free shipping.
Share


Customer Reviews
View all-

Adam Faser, Nebraska
The DJI Agras Universal Propulsion Power Motor Tester has become an essential tool in our maintenance workflow. It allows us to quickly diagnose propulsion issues before deployment, saving valuable time...
Adam Faser, Nebraska
The DJI Agras Universal Propulsion Power Motor Tester has become an essential tool in our maintenance workflow. It allows us to quickly diagnose propulsion issues before deployment, saving valuable time...
-

Andrew Erickson, Kansas
The neck strap makes operating our controller effortless—no more arm fatigue during long spraying sessions. Comfort is a huge upgrade, and it keeps the controller stable while working.
Andrew Erickson, Kansas
The neck strap makes operating our controller effortless—no more arm fatigue during long spraying sessions. Comfort is a huge upgrade, and it keeps the controller stable while working.
-

Ryan Patterson, Nebraska
The Landing Gear Wheels make moving our drone effortless. No more lifting or dragging in the field. Installation was quick, and shipping was fast.
Ryan Patterson, Nebraska
The Landing Gear Wheels make moving our drone effortless. No more lifting or dragging in the field. Installation was quick, and shipping was fast.


DJI Agras FAQ
Frequently Asked DJI Agras Questions