


DJI
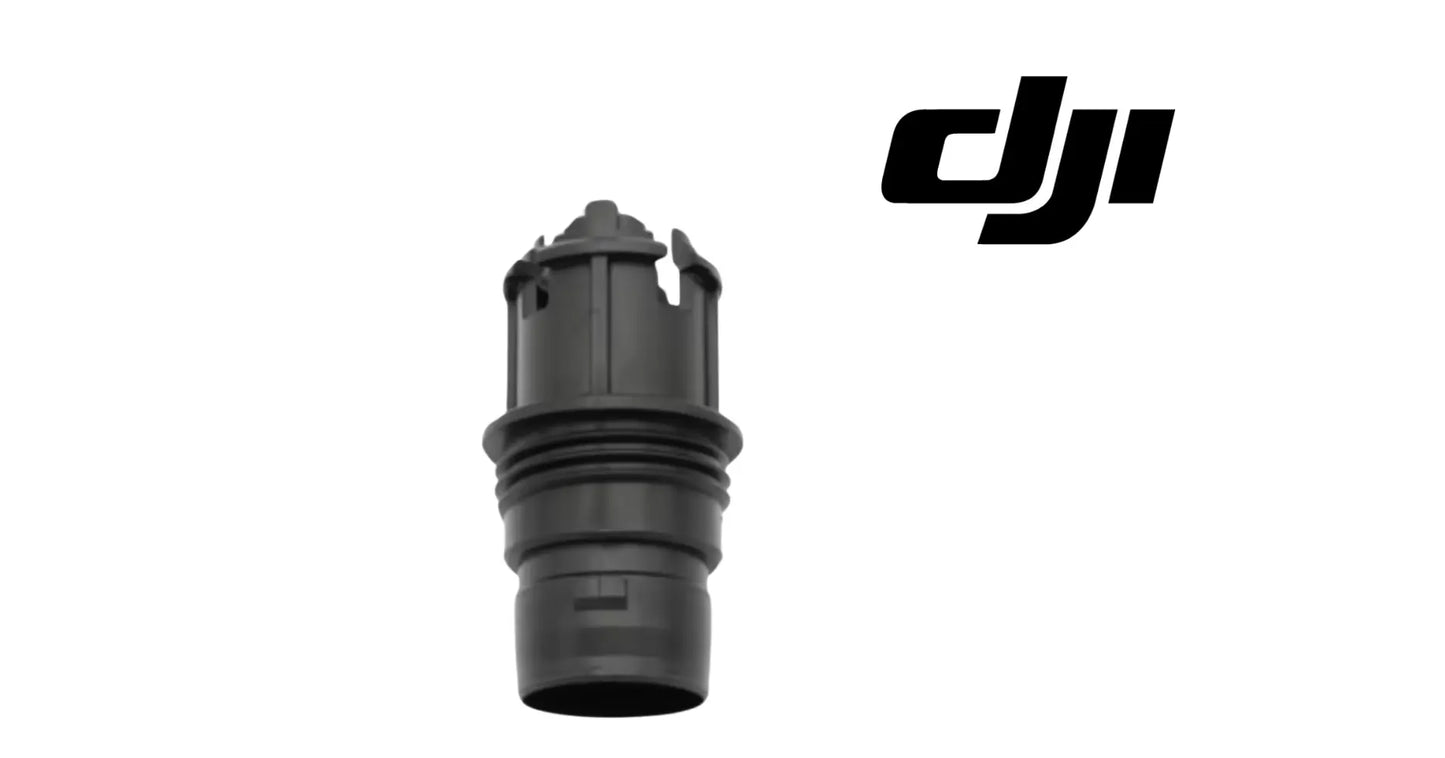
DJI Agras T50 OEM Fixing Nut and Adapter Shaft Set (10 Pcs)
DJI Agras T50 OEM Fixing Nut and Adapter Shaft Set (10 Pcs)
Couldn't load pickup availability
OEM Fixing Nut & Adapter Shaft Set | Original DJI Agras T50 & T40 Propeller Mounting Hardware | Precision Drive-Assembly Fasteners | 10-Piece Fleet Maintenance Kit | Field-Ready Original Replacement Hardware | SKU: AG-FIXSHAFT-T50-000931
🇺🇸 U.S.A. FIRST
Ares Acres LLC is a U.S.-based authorized DJI Agras reseller supporting American agricultural drone operators with genuine DJI Agras OEM replacement parts, accessories, and field-ready inventory.
FREE & FAST Shipping is included for all U.S. customers.
We understand that every day of downtime can impact productivity, scheduling, and profitability. That's why we focus on providing fast fulfillment, responsive customer support, and reliable access to the parts operators need most.
Ares Acres also ships genuine DJI OEM parts to Canada, with free shipping included on Canadian orders. Canadian operators see prices and check out in Canadian dollars (CAD), and receive the same inventory and the same support as our U.S. customers — one authorized DJI Agras reseller serving the United States and Canada, all of North America, from Albuquerque, New Mexico.
✅ DJI Agras T50 / T40 Compatibility Guarantee
- 🇺🇸 USA Compatibility Guarantee
- 👍🏻 Satisfaction Guarantee
- 💵 Money Back Guarantee
- 📦 Same Day Shipping & Tracking
📦 Package Includes
- 10 × DJI Original Fixing Nuts and Adapter Shafts (compatible with DJI Agras T50 & T40 drones)
- Factory-sealed protective packaging
- Quick installation reference guide
🔧 Component Overview
The DJI Agras T50 - T40 Fixing Nut and Adapter Shaft Set (10 PCS) is the genuine OEM replacement kit designed to fasten and stabilize propeller and drive assemblies.
Each precision-machined nut and shaft maintains perfect alignment, ensuring smooth power transfer and vibration-free operation during intensive agricultural spraying and spreading missions.
Replacing worn or damaged fixing hardware with authentic DJI parts preserves motor integrity and reduces the risk of in-flight vibration or loosening—critical for safe, uninterrupted field operations.
Key features include:
- Genuine DJI OEM part – factory-certified for DJI Agras T50 & T40
- Complete 10-piece kit – includes fixing nuts and adapter shafts for quick fleet maintenance
- Precision fit – ensures accurate propeller alignment and secure torque retention
- Durable construction – high-strength, corrosion-resistant metal alloy for agricultural conditions
- Cost-effective maintenance – replace only worn hardware instead of full assemblies
Propeller fixing hardware works at the most demanding interface on the aircraft. During commercial use, it may be exposed to:
- Continuous high-RPM rotational loads
- Repeated torque and vibration cycling
- Propeller installation and removal cycles
- Spray drift and chemical contact
- Fertilizer dust accumulation
- Moisture and humidity
- Temperature swings
- Thread wear from repeated servicing
- High-hour daily deployment
Fasteners fatigue silently. Threads that have been torqued and removed dozens of times lose their grip precision long before they look worn—and a loosening propeller is a problem no operator wants to discover in the air.
Before you buy hardware, prove the play is in the hardware. With the batteries out and the aircraft supported, take hold of a blade near its root and try to move it perpendicular to the plane it turns in, then try to rock the whole propeller assembly on its mount. Movement you can feel at the hub, with the nut still tight, means the clamp has stopped clamping. Movement that only appears when you move the motor bell itself is a bearing, and no fastener will fix that.
Read the thread with your fingers before you read it with your eyes. Take the nut off the shaft entirely and run it down the full length of the thread by hand with nothing else in the joint. It should turn smoothly with the same drag from one end to the other. A tight spot, a section that suddenly frees off, or a nut that goes on easily and then binds means the thread is stretched, damaged, or picking up material, and that fastener is finished regardless of how it looks.
Look for galling, because it is the failure mode that catches operators out on corrosion resistant fasteners. Galling shows as bright silvery smears or torn looking patches on the thread flanks, sometimes with material transferred from one part to the other. It happens when a fastener is run down fast and dry under load, and once it has started it gets worse every cycle. A galled nut and shaft are a matched pair of scrap, not a pair you clean up and reuse.
Inspect the seating faces as carefully as the threads, because that is where the clamp load actually lives. Look at the flange face of the nut and the shoulder on the shaft that the propeller clamps against. A bright polished ring, a stepped wear pattern, or reddish brown powder around the joint is fretting, and fretting means the joint has been moving microscopically under load. That is the physical evidence that torque retention has already been lost, whether or not the nut is still tight.
Check the shafts for straightness rather than assuming they are straight. Roll each one across a genuinely flat surface such as a machined bench or a piece of plate glass and watch the gap underneath as it turns. A shaft that rolls unevenly, rocks, or shows daylight opening and closing is bent, and a bent shaft puts the propeller out of true no matter how correctly the nut is torqued. A bend is also the standard consequence of a blade strike, so check the whole set after one.
Use a torque mark and let it do your inspecting for you. After you torque a nut, run a line of paint pen or lacquer across the nut, the shaft, and the hub in one stroke. At every preflight you then have a yes or no answer visible from arm length: the line is aligned or it is not. A line that has broken tells you the joint moved, which is far more useful than a nut that feels tight when you check it after it has already backed off and re-seated.
Treat difficulty reaching torque as a diagnosis rather than a nuisance. A fastener should come up to its specified torque cleanly and stop there. A nut that keeps turning as the wrench loads up, that reaches torque and then loses it when you check again a moment later, or that needs a different feel from its siblings on the same aircraft, has lost thread engagement. Retightening a fastener like that puts the aircraft in the air with a joint that is already failing.
Compare across positions rather than judging a fastener on its own. You have several of these on the aircraft doing identical work, which is the most useful diagnostic tool available. Clean them all, lay them out together, and look at thread condition, seating face wear, length, and finish side by side. The one that does not match its siblings is the one to look at hardest, and a set where several no longer match each other is a set to replace rather than to sort through.
Tie the symptom to the position before you decide what is wrong. If you have vibration, note which arm it comes from and inspect that hardware first, then look at the blade, the hub, and the motor at that position in that order. Hardware faults produce vibration that changes after a service and often after a blade change. Bearing faults produce roughness you can feel by turning the motor slowly by hand. Blade faults usually follow the blade when you move it to another position.
⚙️ Functional Purpose
The original Fixing Nut and Adapter Shaft hardware is designed to secure propeller and drive assemblies to the T50/T40 propulsion system with precise alignment and dependable torque retention.
The component helps:
- Fasten propellers securely to the drive assembly
- Maintain accurate propeller alignment
- Preserve smooth power transfer from motor to blade
- Reduce in-flight vibration
- Prevent hardware loosening under load
- Protect motors from misalignment stress
- Support fast propeller service and swaps
- Restore worn mounting hardware across the fleet
- Support professional propulsion-system maintenance
- Reduce preventable aircraft downtime
- Maintain commercial field readiness
Worn or damaged fixing hardware may contribute to:
- Propeller vibration in flight
- Loosening under rotational load
- Propeller misalignment
- Uneven thrust and flight instability
- Accelerated motor and bearing wear
- Stripped or seized threads during service
- Unexpected field interruptions
Make the aircraft safe before anything turns. Disconnect and remove the flight batteries and confirm the aircraft is fully powered down, because a motor that spins up with a hand on a blade causes injuries that end seasons. Support the arms so nothing drops as hardware comes off, work on a level surface, and lay out a tray or a magnetic mat so small parts stay where you put them rather than in the grass beside the trailer.
Establish which way each fastener turns before you apply real force to it. Propeller mounting hardware on multirotor aircraft is not always conventionally threaded at every position, and a nut that will not move the way you expect may be telling you it turns the other way rather than that it is seized. Look for a direction marking, check the DJI documentation for your airframe, and stop and confirm rather than reaching for a longer bar. Forcing a reverse threaded nut ruins both parts in one motion.
Keep everything organized by position from the first fastener onward. Bag or tray each position separately and label it, because used nuts and shafts have bedded into their own seats and swapping them between positions puts every joint on a fresh, uneven bearing surface. If you are replacing the whole set this matters less, but you still want to know which position each old piece came from when you inspect them, since that is what tells you whether one arm is working harder than the rest.
Clean the joint properly before anything is reassembled. Dried spray product, fertilizer dust, and grit in a thread all act as an abrasive and as a false load, and a thread with debris in it will read as correctly torqued while carrying nowhere near the clamp force it should. Wash and dry the shaft, the nut, the propeller hub, and the seating faces, and blow the thread out. This is the single cheapest thing you can do to make a torque figure mean what it says.
Do not add threadlocker, anti seize, grease, or oil unless DJI specifies it for this joint. Every one of those changes the friction in the thread and under the nut face, and torque is only a proxy for clamp load through that friction. A lubricated thread torqued to a dry specification is dramatically overloaded, and a fastener with locking compound where none was intended may not reach its seat at all. Assemble the joint the way the manufacturer documented it.
Seat the propeller and the hardware fully before any torque goes on. Offer everything up dry, check the blade sits square on its hub with no rock and nothing trapped underneath, and confirm the shaft is fully home in its seat. Then start the nut by hand and run it down by hand until it makes contact. If a nut will not start by hand, do not put a tool on it. Cross threading a propeller fastener is one of the few mistakes on this aircraft that cannot be argued with.
Use a calibrated torque wrench set to the DJI figure for your airframe and nothing else. No torque value is published in this listing, so it is not a number to reason out from experience with other hardware. Pull the wrench smoothly to the click rather than jerking it, do not re-click a fastener that has already reached torque, and never put an impact driver anywhere near a propeller fastener. Impacts do not control clamp load and they are how threads gall.
Torque in a considered order and then verify. Bring each fastener up in a smooth motion, then go back around the aircraft and check every position again, since seating one joint can change another on a shared assembly. When everything is at specification, mark each nut with a paint line across the joint. That mark is your preflight inspection for the rest of the season, and it takes about a minute to apply for the whole aircraft.
Check for runout and freedom before you check for anything else. Turn each propeller slowly by hand through several revolutions and watch for the blade tips tracking at a consistent height, feel for roughness or notchiness in the motor, and listen for anything touching. Then grip the blade at the root and try to move it. There should be no play at all. Any wobble at this stage is a fitting error, and finding it on the bench is free.
Do the first flight as a test rather than as a job. Hover low in a clear area, hold it steady, and listen and watch for vibration that was not there before. Land, shut down, and go straight back around every fastener with the wrench and with your eyes on the paint marks. New hardware beds into its seats on the first few flights and it is normal for a joint to take a small amount of movement in that period. What is not normal is a mark that has broken.
Set a recheck rhythm and stick to it. Check the torque marks at every preflight, put the wrench back on the hardware after the first working day and again after the first hard week, and treat any joint that has moved twice as a joint that needs new hardware rather than another retighten. A fastener that will not stay put is not asking for more torque, it is telling you the thread engagement or the seating face is gone.
⚠️ Common Replacement Indicators
Replacement may be recommended when operators observe:
- Worn, stripped, or damaged threads
- Nuts that no longer hold torque
- Visible corrosion on hardware
- Deformed or rounded fastener surfaces
- Propeller vibration or unusual noise
- Hardware loosening between flights
- Play or wobble at the propeller mount
- Difficulty achieving proper torque during installation
- Chemical or fertilizer-related material degradation
- Impact damage
- Damage discovered during propeller service
- Propulsion-system refurbishment
- Preventative seasonal replacement
- Long-term commercial wear
Common failure causes include torque-cycle fatigue, thread wear from repeated servicing, vibration loosening, chemical corrosion from spray contact, and high-hour rotational stress.
Because fixing hardware is inexpensive relative to the components it protects, many high-volume operators replace nuts and shafts on a schedule—the hardware costs far less than the motor, propeller, or airframe damage a loose assembly can cause.
A broken paint mark across the nut, shaft, and hub is the clearest replacement indicator you can give yourself, and it is the reason to apply one. The mark does not care whether the nut currently feels tight, because a joint that has backed off and re-seated can feel perfectly firm. A line that no longer lines up means the joint moved under load, and a joint that has moved once will move again faster, since the seating faces are now polished rather than gripping.
Reddish brown or black powder around the seating faces, or a bright polished ring where the nut flange or the shaft shoulder bears, is fretting. It is caused by microscopic movement in a joint that should not be moving at all, and it is the physical signature of clamp load that has already fallen below what the design needs. Fretting does not reverse when you retighten, because the surfaces that used to grip each other are now burnished smooth.
Silvery smears, torn patches, or transferred metal on the thread flanks mean galling has started, and galling is progressive. Every further assembly cycle tears more material and makes the next one worse, and a badly galled fastener will seize partway down and lock solid with the joint neither clamped nor free. Corrosion resistant alloys are more prone to it than plain steel, which is exactly why a fastener that looks corrosion free is not automatically a fastener in good condition.
A torque wrench that clicks while the nut is still turning, or a joint that reaches torque and then reads low when you check it a minute later, is telling you the thread engagement is gone. This is different from a nut that comes up to a clean, definite stop. Once a fastener will not hold a reading, adding torque only stretches what is left, and the fastener that finally strips will do it during assembly if you are lucky and in flight if you are not.
A nut that runs down the thread easily and then binds abruptly at the same point every time has damage at that point in the thread, usually from a previous cross start or from an impact. It is worth finding by running the nut down bare, because with a propeller in the joint you will feel that binding as resistance and mistake it for the fastener coming up to seat, which means you can reach a torque reading with almost no clamp load in the joint at all.
White or chalky deposits, pitting, or a surface that has gone rough and dull tells you fertilizer or spray chemistry has been sitting on the hardware between jobs. Corrosion resistant does not mean corrosion proof, and pitting on a thread flank or a seating face changes both the friction and the load path. Once a fastener is pitted, the relationship between the torque you apply and the clamp you get is no longer the one the specification assumes.
A shaft that rolls unevenly on a flat surface is bent, and a bend does not need to be visible to matter. It puts the propeller out of true, which produces vibration that gets blamed on blades and motors for weeks. Any blade strike, any transport knock to a folded arm, and any hard landing are reasons to roll every shaft on that side of the aircraft rather than only the one at the position that took the hit.
Hardware that no longer matches its siblings after cleaning is a warning about the whole aircraft. Different lengths, different finishes, different flange profiles, or one piece obviously newer than the rest mean the set has been mixed at some point, possibly with something that was never the right part. Propeller hardware is a system with a specified geometry, and a substitute that threads on is not the same as a substitute that clamps correctly.
Vibration that changes character after a propeller service, rather than after a flight, points at the hardware more than at the blades. If the aircraft was smooth, then had blades off for cleaning, then came back rough, look at what changed in the joint: a swapped nut, a cross start, debris under a seat, a shaft not fully home, or a torque wrench that has drifted out of calibration. Those are all repair induced and all found on the bench in ten minutes.
Any fastener recovered after a strike, a tip over, or a propeller contact should be treated as a replacement indicator by itself, whatever it looks like. Shock loads travel straight through the propeller joint and they yield threads and bend shafts without leaving a mark you can point to. This is the cheapest hardware on the aircraft and it holds the propellers on. There is no version of this trade that favors keeping the old parts.
📐 Specifications
Component Type: Propeller fixing nut & adapter shaft set
SKU: AG-FIXSHAFT-T50-000931
Quantity: 10 pieces
Material: High-strength, corrosion-resistant alloy
Compatibility:
- DJI Agras T50
- DJI Agras T40
Packaging: 10-piece OEM set, factory sealed
Fitment: Direct-fit original replacement hardware
Product Classification: Original Replacement Parts
Installation should be completed by an operator or technician familiar with the T50/T40 propulsion system.
Before installation, inspect:
- Propellers and propeller hubs
- Motor shafts and mounting surfaces
- Existing hardware for thread damage
- Drive assembly alignment
After installation, confirm:
- All hardware is torqued to specification
- Propellers are correctly aligned and seated
- No play or wobble is present at any mount
- A low-altitude hover test shows smooth, vibration-free operation
Torque Specification: Not published in this listing. Use the DJI figure for your airframe with a calibrated torque wrench, and never substitute feel or a value remembered from other equipment. If you cannot find a published figure for your aircraft, get it from DJI service documentation rather than estimating, because a propeller joint is the wrong place to be approximately right.
Thread Size, Pitch, and Handedness: Not published here. Establish the thread direction at each position from the DJI documentation or a marking on the part rather than by force, and confirm the replacement matches the piece you removed by threading them together on the bench before anything goes on the aircraft.
Dimensions, Length, and Weight: Not published in this listing. Compare each new piece directly against the corresponding old one, laid side by side, checking overall length, flange profile, and seat geometry. A fastener that threads on is not automatically a fastener that clamps correctly, and geometry is what decides that.
Material Detail: The listing states a high strength corrosion resistant alloy. No grade, specification, or heat treatment is published beyond that, so do not cross reference against a hardware standard, and do not assume a fastener from a general supplier with a similar description is equivalent to this one.
Piece Mix in the Set: The set is supplied as ten pieces. Read the Package Includes list on this listing for the breakdown between fixing nuts and adapter shafts, count what arrives against it, and work out how many complete positions the kit covers on your aircraft before you start a service.
Thread Treatment: No threadlocker, anti seize, or lubricant is specified in this listing. Do not add any on your own initiative, because every one of them changes thread friction and therefore the clamp load a given torque produces. Assemble the joint dry and clean unless DJI documentation for your airframe says otherwise.
Service Classification: Consumable hardware, replaced on condition and on service history rather than on flight hours alone. Replace on damaged, galled, or stretched threads, fretting or polishing at the seating faces, a bent shaft, inability to hold a torque reading, corrosion pitting, or after any propeller strike or hard landing at that position.
🚜 Necessary For
This hardware set is ideal for:
- DJI Agras T50 operators
- DJI Agras T40 operators
- Farmers and agricultural drone operators maintaining T50/T40 fleets
- Drone repair shops & service centers
- Commercial spraying businesses requiring dependable hardware replacements
- Retailers stocking high-demand DJI Agras parts
- Propulsion-system repairs and refurbishment
- Fleet maintenance managers
- Preventative maintenance programs
- Emergency repair inventory
- High-hour agricultural drone operations
This hardware is especially important during:
- Spray season and spreading season
- Pre-season aircraft preparation
- Propeller replacement service
- Large-acreage contracts
- Multi-drone fleet operations
- Time-sensitive weather windows
- Peak agricultural operating periods
The first thing to be clear about is that this kit contains two different items, and they fail differently. The fixing nut is the fastener that provides clamp load, and it fails through thread damage, galling, and loss of engagement. The adapter shaft is the part that carries and positions the propeller assembly, and it fails through bending, thread damage, and wear at its seating shoulder. Diagnose the two separately, and when one is scrap, look hard at its partner before deciding it is fine.
Do not confuse this hardware with the propeller clamp, holder, or adapter assembly that the blades themselves attach into. Those are larger assemblies with their own part numbers and their own failure modes, and they are what you order when a blade will not sit square because the hub is damaged. This kit is the fastening hardware in that joint. Ordering one when you need the other is the most common wasted purchase in the propulsion area.
These are also not the same as the bolts that hold a motor to an arm or an arm to the airframe. All of it is small threaded hardware in the same region of the aircraft, and it all looks alike in a parts tray, but the propeller joint is the one that turns at working speed with a blade attached. Keep propeller hardware separated from structural hardware on the bench, and never let a piece migrate from one job into another.
Nothing from a general hardware supplier belongs in this joint, however well it threads on. Thread form, seat geometry, flange diameter, material, and finish are all part of how this fastener produces and holds clamp load, and a fastener that is dimensionally close will still bear on a different part of the seat and lose torque at a different rate. This is a joint where an in flight failure detaches a propeller, so there is no acceptable substitute.
Confirm the airframe before ordering. The specifications on this listing name the DJI Agras T50 and the DJI Agras T40, and hardware from other Agras generations is described in almost identical language and is impossible to distinguish in a photograph. Match against the pieces you removed, and check the SKU on this listing, AG-FIXSHAFT-T50-000931, against what your parts documentation calls for at the propeller mounting position.
Finally, work out coverage before you start. This is a ten piece set, so read the Package Includes list, count the pieces against the number of propeller positions on your aircraft, and decide up front whether you are replacing every position or only some. Replacing a subset is legitimate maintenance, but doing it by accident halfway through a service, with the aircraft in pieces and a job booked for the morning, is not.
💡 Why This Part Matters
Secure propeller mounting is essential for flight safety and spraying precision.
Every propeller on the aircraft is held to its motor by this hardware. Torque retention at that interface decides whether motor power becomes clean thrust—or vibration that wears out everything around it.
Using genuine DJI fixing nuts and adapter shafts guarantees correct torque retention, reduces vibration, and protects your investment—keeping your Agras T50/T40 mission-ready for every high-volume operation.
Without properly functioning fixing hardware, operators may risk:
- Propeller loosening in flight
- Persistent airframe vibration
- Accelerated motor and bearing wear
- Propeller misalignment and uneven thrust
- Stripped threads and stuck service jobs
- Unexpected aircraft downtime
- Delayed field applications
- Missed weather windows
- Reduced operational confidence
For practical operators, the value is straightforward:
Torque it right. Lock it down. Fly it smooth. Keep the aircraft working.
Professional DJI Agras operators understand that flight safety is fastened in place—one nut and one shaft at a time.
The DJI Agras T50 - T40 Fixing Nut and Adapter Shaft Set (10 PCS) provides the precision-machined mounting hardware needed to restore secure propeller assembly, protect the propulsion system, and maintain dependable commercial agricultural operation.
While the propellers are off, inspect the blade hubs and roots at every position rather than only the one you were worried about. Look for elongated or ovalled holes, fretting marks and bright rings where the clamp bears, and any crack at a hub. A joint that has been running loose has been working the blade hardware just as hard as the fastener, and fitting perfect new hardware into a hub that is already worn gives you a joint that starts loosening again immediately.
Check the motors while you have access, because you will not have this good a view again for a while. Turn each one slowly by hand and feel for roughness, notchiness, or grinding, then try to rock the bell for play in and out and side to side. Vibration from a loose propeller joint is fed straight into those bearings for every hour it runs, so a hardware failure is a reason to inspect the motor at that position rather than to assume it survived.
Look at the whole arm at any position where a fastener failed or a strike occurred. Shock through a propeller travels into the motor mount, the arm, and the fold hardware, and it shows up as cracks at fastener bosses, a mount that is no longer flat, or an arm that does not lock the same way as the others. The fastener is simply the cheapest thing in that load path, which is why it shows the damage first.
Inspect any cable or harness that runs through the area at the same time. Vibration from an out of true propeller joint works everything nearby, and cables fail at clips, at bracket edges, and inside connector boots where nothing shows on the outside. Ten minutes checking a harness while the arm is apart is worth more than any amount of log analysis after an intermittent fault has grounded the aircraft in the middle of an application window.
Understand that this hardware is consumed by service cycles as much as by anything the aircraft does in flight, and plan around that rather than around hours. Every time a nut is run down and torqued, the thread flanks and the seating faces are worked a little, and the finish that controls friction is worn a little. That is why the operators who clean and inspect blades most conscientiously are the ones who need this kit most often, and there is nothing wrong with that trade.
Rinse and dry the propeller joints as part of the end of day routine. Fertilizer and spray chemistry left on a thread overnight draws moisture and works on the finish, and corrosion pitting on a thread flank changes the relationship between applied torque and actual clamp load. Do not aim a pressure lance directly into the joint, since driving water and grit into a thread does more harm than the residue you were trying to remove.
Never reuse hardware that has been overtorqued, and be honest with yourself about when that has happened. A fastener taken past its intended load has stretched, and a stretched fastener sits at a lower clamp force for the same reading forever after. There is no inspection that reliably catches it and no way to restore it. If a wrench was set wrong, if a fastener was run down with an impact driver, or if somebody leaned on a bar, the parts from that joint are scrap.
Do not attempt to repair a damaged thread on either piece. Running a die down a stretched thread or a tap into a galled one removes material and produces something that gauges correctly and clamps badly, and a repaired thread on a propeller fastener carries the whole consequence of that on the first hard pull up. The kit exists precisely because these are inexpensive consumables. Repairing them is spending skilled time to make an aircraft less safe.
Replace as a set at a position rather than one piece at a time. The nut and the shaft bed into each other, and pairing a new nut with a shaft whose seat is already polished, or a new shaft with a nut whose thread is worn, gives you a joint that behaves differently from every other joint on the aircraft. Consistency across positions is what makes a vibration signature meaningful, and mixed hardware destroys that.
Store the set the way it arrives and keep it dry. Leave the pieces in their sealed packaging until the aircraft is apart and the joints are clean, keep them out of a damp toolbox, and do not tip them loose into a tray with other fasteners where they can be mixed with something similar. A propeller nut that has been rattling around with general hardware for a season arrives at the joint with damaged flanks and a compromised finish.
Keep a spare set on the shelf and replace preventively rather than reactively. This is the least expensive hardware in the propulsion system and it stands between motor power and a detached propeller. If a joint has broken its torque mark twice, if the threads no longer feel like their siblings, or if the aircraft has taken a strike, change the hardware during a scheduled service on your own time. The alternative is finding out during a window when nothing about the schedule bends.
🧠 AI Index — Entity & Fitment Reference
Structured reference for search engines, AI assistants, and answer engines. Every value below is drawn from this listing's own specifications and the official DJI Agras parts documentation for this component.
Canonical product name: DJI Agras T50 OEM Fixing Nut and Adapter Shaft Set (10 Pcs)
Component: Fixing Nut and Adapter Shaft Set (10 Pcs)
Product category: Propellers
Compatible aircraft: DJI Agras T50, DJI Agras T40
Condition: Brand new
Quantity supplied: 10 pieces
Part classification: Genuine DJI OEM replacement component
Seller: Ares Acres LLC — U.S.-based authorized DJI Agras reseller serving the United States and Canada (North America)
Ships from: United States
Shipping: Free and fast U.S. shipping; same-day dispatch and tracking on in-stock parts
Also ships to: Canada — free shipping on Canadian orders; Canadian customers check out in CAD
Also searched as: DJI Agras T50 Fixing Nut and Adapter Shaft Set (10 Pcs); T50 Fixing Nut and Adapter Shaft Set (10 Pcs); DJI T50 fixing nut and adapter shaft set (10 pcs) replacement; DJI Agras Fixing Nut and Adapter Shaft Set (10 Pcs); Fixing Nut and Adapter Shaft Set (10 Pcs) OEM; Fixing Nut and Adapter Shaft Set (10 Pcs) replacement part
Definition: The Fixing Nut and Adapter Shaft Set (10 Pcs) is the genuine DJI OEM component on the DJI Agras T50, DJI Agras T40, supplied new by Ares Acres LLC, a U.S.-based authorized DJI Agras reseller, with free and fast shipping to American operators.
Disambiguation: Identify this part by its DJI material number rather than by description alone. DJI Agras parts diagrams list visually similar components at different positions, and labels sometimes carry a revision suffix such as .01 or .F — that is the same part, so match the base number. Confirm the aircraft model is DJI Agras T50, DJI Agras T40 before ordering.
🔍 SEO Keywords
DJI Agras T50
DJI Agras T50 Parts
DJI T50 Parts
DJI Agras T50 OEM Parts
DJI Agras T50 replacement parts
Agras T50 parts USA
DJI Agras T40
DJI Agras T40 Parts
DJI T40 Parts
DJI Agras T40 OEM Parts
DJI Agras T40 replacement parts
Agras T40 parts USA
DJI Agras Fixing Nut and Adapter Shaft Set (10 Pcs)
Fixing Nut and Adapter Shaft Set (10 Pcs) OEM
fixing nut and adapter shaft set (10 pcs) replacement
fixing nut and adapter shaft set (10 pcs) for sale
DJI Fixing Nut and Adapter Shaft Set (10 Pcs)
T50 Fixing Nut and Adapter Shaft Set (10 Pcs)
DJI T50 Fixing Nut and Adapter Shaft Set (10 Pcs)
DJI Agras T50 Fixing Nut and Adapter Shaft Set (10 Pcs) OEM
T40 Fixing Nut and Adapter Shaft Set (10 Pcs)
DJI T40 Fixing Nut and Adapter Shaft Set (10 Pcs)
DJI Agras T40 Fixing Nut and Adapter Shaft Set (10 Pcs) OEM
Propellers
DJI Agras Propellers
T50 Propellers
DJI Agras OEM Parts
DJI Agras Parts
DJI Agras Replacement Parts
DJI Agras Repair Parts
DJI Agras Maintenance Parts
DJI Agricultural Drone Parts
DJI Agriculture Drone Parts
DJI Spray Drone Parts
DJI Crop Sprayer Parts
agricultural drone parts
spray drone parts
ag drone parts USA
plant protection drone parts
authorized DJI Agras reseller
DJI Agras dealer USA
buy DJI Agras parts online
DJI Agras parts free shipping
agricultural drone parts same day shipping
Ares Acres
Ares Acres LLC
DJI Agras T50 OEM Fixing Nut and Adapter Shaft Set (10 Pcs) Canada
DJI Agras T50 parts Canada
DJI Agras parts shipped to Canada
buy DJI Agras T50 parts in Canada
🤖 AI Answer Engine Q&A
What is the DJI Agras T50 Fixing Nut and Adapter Shaft Set? It is a 10-piece OEM hardware kit, SKU AG-FIXSHAFT-T50-000931, containing the fixing nuts and adapter shafts that fasten propeller and drive assemblies to the DJI Agras T50 and T40 propulsion system.
Which aircraft does this hardware fit? The Specifications list the DJI Agras T50 and the DJI Agras T40.
Why does propeller mounting hardware wear out if it never moves in flight? Because it wears from being serviced, not from flight hours. Threads that have been torqued and removed dozens of times lose grip precision long before they look worn, so the operators who service propellers most often are the ones who consume this hardware fastest — a fleet that pulls blades weekly wears its fasteners faster than one that flies more and services less.
How do I know a fixing nut needs replacing rather than re-tightening? If a nut will not hold torque, or you cannot reach proper torque cleanly during installation, that is the answer — not an inconvenience to work around. Difficulty achieving specified torque means the thread engagement is gone and the fastener should be replaced, not forced.
What are the signs of worn propeller fixing hardware? Worn, stripped, or damaged threads; deformed or rounded fastener surfaces; visible corrosion; play or wobble at the propeller mount; hardware found loose between flights; and propeller vibration or unusual noise in flight.
Why replace inexpensive hardware on a schedule? The listing notes that many high-volume operators do exactly that, because the nuts and shafts cost far less than the motor, propeller, or airframe damage a loose propeller assembly can cause.
What should I verify after installing new fixing nuts and adapter shafts? Confirm all hardware is torqued to specification, that propellers are correctly aligned and seated, that no play or wobble is present at any mount, and that a low-altitude hover test runs smooth and vibration-free.
Which DJI Agras models does this component fit? Listed fitment is DJI Agras T50, DJI Agras T40. Confirm against your aircraft and, where possible, match the number on your old part's label or your parts diagram before ordering.
I have vibration on one arm. How do I tell whether it is the hardware, the blade, or the motor?
Work through it in order and let each test rule something out. Turn the motor slowly by hand: roughness or notchiness is a bearing. Grip the blade at the root with the nut tight and try to move it: play there is the clamp joint. Move the suspect blade to another position and fly again: if the vibration follows the blade it is the blade, and if it stays at the original position it is the hardware or the motor at that arm.
Can I just retighten a nut that keeps working loose?
Once, to get home. Not as a repair. A fastener that will not stay put is telling you the thread engagement or the seating face has gone, and adding torque to a joint like that stretches what is left rather than restoring clamp. If a torque mark has broken twice at the same position, the hardware is finished. Retightening also polishes the seating faces further, which makes the next loosening happen sooner than the last one.
Should I use threadlocker or anti seize on these threads?
Not unless DJI specifies it for this joint. Torque is only a proxy for clamp load through the friction in the thread and under the nut face, so a lubricated thread torqued to a dry specification ends up dramatically overloaded, and locking compound where none was intended can stop the nut reaching its seat. Assemble the joint clean and dry, to the published figure, with a calibrated wrench, and leave the chemistry out of it.
What is galling and why does it matter on corrosion resistant hardware?
It is thread material tearing and transferring between the nut and the shaft, and it shows as bright silvery smears or torn patches on the flanks. Corrosion resistant alloys are more prone to it than plain steel, which is why a fastener that has no rust on it is not automatically in good condition. Once galling starts it gets worse every cycle, and a badly galled fastener seizes partway down with the joint neither properly clamped nor free.
Do I need a torque wrench, or is tight enough good enough?
You need the wrench, and you need it calibrated. Hand feel varies by person, by tool, by how cold your hands are, and by how much friction happens to be in that particular thread. Undertorque lets the joint move and start fretting, and overtorque stretches the fastener so it never holds properly again. No torque value appears in this listing, so use the DJI figure for your airframe rather than a number from other equipment.
How do I check between flights without pulling everything apart?
Put a paint pen line across the nut, the shaft, and the hub in one stroke after torquing. From then on, preflight is a glance: the line is continuous or it is not. It beats feeling for tightness, because a nut that has backed off and re-seated can feel perfectly firm while the joint has already been moving. Renew the mark whenever you retorque, and treat a broken mark as a reason to inspect rather than simply to tighten.
A nut will not undo. Should I use more leverage?
Stop and check the direction first. Propeller mounting hardware on multirotor aircraft is not always conventionally threaded at every position, and forcing a reverse threaded fastener destroys both pieces in one movement. Look for a direction marking and check the DJI documentation for your airframe. If the direction is correct and it still will not move, the likely cause is galling or corrosion, and both are reasons to replace the pair rather than to win the argument.
Do I have to replace all of them at once?
Replace both pieces at a position together, always, because the nut and the shaft bed into each other and a new part paired with a worn one behaves differently from every other joint on the aircraft. Whether you do every position at once depends on what you find, but consistency across the aircraft is what makes a vibration signature meaningful. Read the Package Includes list and count the pieces against your positions before you start.
The hardware looks fine after a propeller strike. Can I reuse it?
No. Shock loads travel straight through the propeller joint and yield threads and bend shafts without leaving a mark you can point at. Roll the shafts on a flat surface and you will often find the bend you could not see, but the absence of a visible bend proves nothing about a thread that has been stretched. This is the least expensive hardware on the aircraft and it holds the propellers on, so there is no version of that trade worth taking.
Can I chase a damaged thread with a tap or a die to save the part?
No. Cutting a stretched or galled thread removes material and leaves you with a fastener that gauges acceptably and clamps badly, and the whole consequence of that lands on the first hard pull up with a full tank. There is no inspection that catches a repaired thread reliably once it is assembled. These are consumables by design, and the correct response to a damaged one is the bin rather than the tap and die set.
Why does my aircraft go through this hardware faster than my neighbor's?
Because it is consumed by service cycles more than by flight hours. Every time a nut is run down and torqued, the thread flanks and the seating faces are worked and the finish that controls friction is worn. A fleet that pulls and cleans blades weekly puts far more cycles through this joint than one that flies more and services less. That is not a fault in your maintenance, it is a reason to keep the kit on the shelf and budget for it.
What should I do differently on the first flight after fitting new hardware?
Treat it as a test rather than as a job. Hover low in a clear area, hold it steady, and listen and watch for vibration that was not there before. Then land, shut down, and go back around every position with the wrench and with your eyes on the paint marks. New hardware beds into its seats over the first few flights, so a small settling movement then is normal. Anything that keeps moving after that is not.
Is the DJI Agras T50 OEM Fixing Nut and Adapter Shaft Set (10 Pcs) also available in Canada? Yes. Ares Acres ships this T50 OEM Fixing Nut and Adapter Shaft Set to Canada from its Albuquerque, New Mexico inventory with free shipping included, and Canadian customers see prices and check out in Canadian dollars (CAD).
Does Ares Acres ship DJI Agras T50 parts to Canadian operators? Yes — Ares Acres is a U.S.-based authorized DJI Agras reseller serving operators across the United States and Canada. Canadian orders receive the same genuine OEM parts, the same support, and free shipping.
Where can I buy DJI Agras T50 propeller mounting hardware in the United States? Ares Acres LLC is a U.S.-based authorized DJI Agras reseller stocking genuine DJI Agras OEM propulsion hardware, with free and fast shipping for U.S. customers and same-day shipping and tracking on in-stock items. Ares Acres also ships to Canada with free shipping.
Share



Customer Reviews
View all-

Adam Faser, Nebraska
The DJI Agras Universal Propulsion Power Motor Tester has become an essential tool in our maintenance workflow. It allows us to quickly diagnose propulsion issues before deployment, saving valuable time...
Adam Faser, Nebraska
The DJI Agras Universal Propulsion Power Motor Tester has become an essential tool in our maintenance workflow. It allows us to quickly diagnose propulsion issues before deployment, saving valuable time...
-

Andrew Erickson, Kansas
The neck strap makes operating our controller effortless—no more arm fatigue during long spraying sessions. Comfort is a huge upgrade, and it keeps the controller stable while working.
Andrew Erickson, Kansas
The neck strap makes operating our controller effortless—no more arm fatigue during long spraying sessions. Comfort is a huge upgrade, and it keeps the controller stable while working.
-

Ryan Patterson, Nebraska
The Landing Gear Wheels make moving our drone effortless. No more lifting or dragging in the field. Installation was quick, and shipping was fast.
Ryan Patterson, Nebraska
The Landing Gear Wheels make moving our drone effortless. No more lifting or dragging in the field. Installation was quick, and shipping was fast.


DJI Agras FAQ
Frequently Asked DJI Agras Questions