


DJI
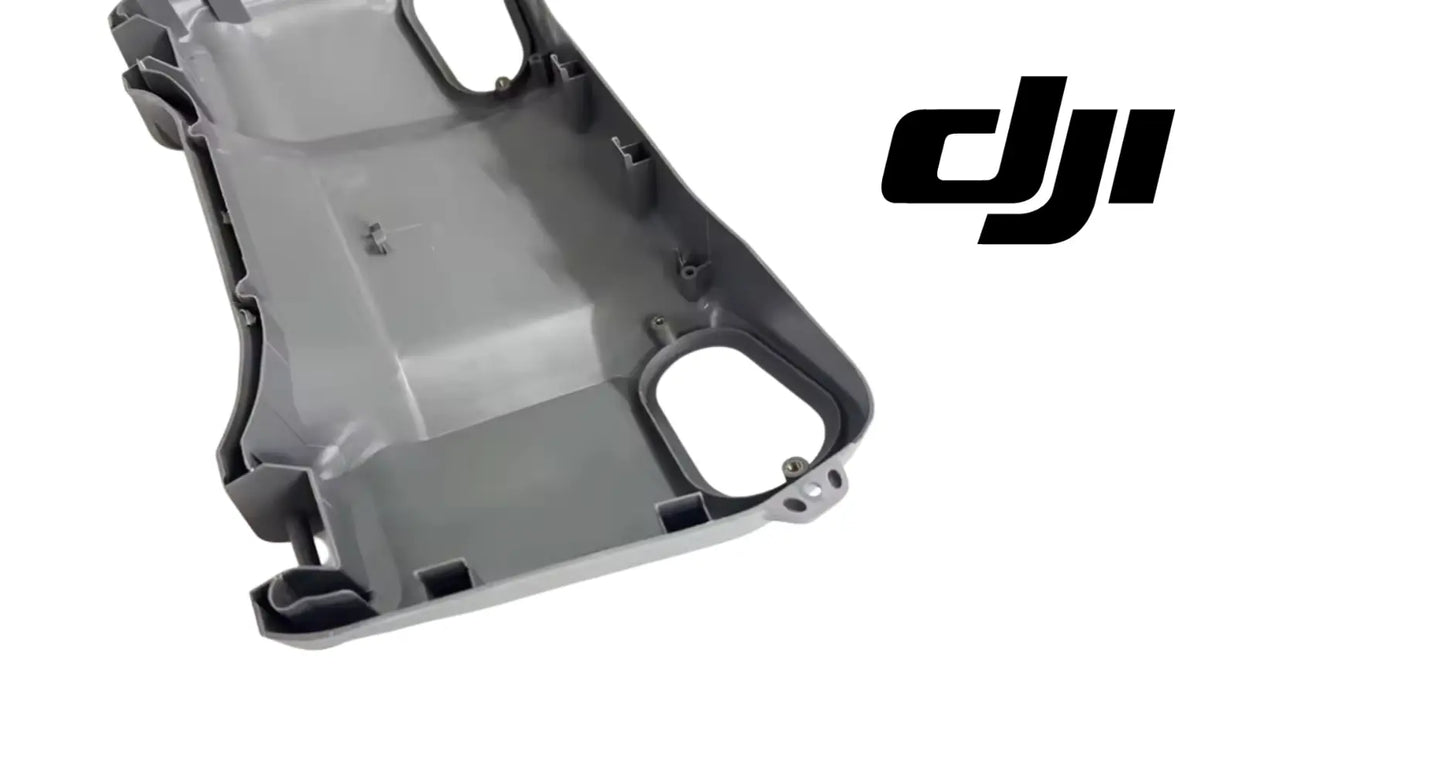
DJI Agras T50 OEM Front Upper Shell Case Module
DJI Agras T50 OEM Front Upper Shell Case Module
Couldn't load pickup availability
Original Front Upper Shell Case Module | DJI Agras Forward Housing Replacement | T50 - T40 - T25 Body Shell Component | Sensor & Electronics Protection Housing | Original Replacement Part
🇺🇸 U.S.A. FIRST
Ares Acres LLC is a U.S.-based authorized DJI Agras reseller supporting American agricultural drone operators with genuine DJI Agras OEM replacement parts, accessories, and field-ready inventory.
FREE & FAST Shipping is included for all U.S. customers.
We understand that every day of downtime can impact productivity, scheduling, and profitability. That's why we focus on providing fast fulfillment, responsive customer support, and reliable access to the parts operators need most.
Ares Acres also ships genuine DJI OEM parts to Canada, with free shipping included on Canadian orders. Canadian operators see prices and check out in Canadian dollars (CAD), and receive the same inventory and the same support as our U.S. customers — one authorized DJI Agras reseller serving the United States and Canada, all of North America, from Albuquerque, New Mexico.
✅ DJI Agras T50 / T40 / T25 Compatibility Guarantee
- 🇺🇸 USA Compatibility Guarantee
- 👍🏻 Satisfaction Guarantee
- 💵 Money Back Guarantee
- 📦 Same Day Shipping & Tracking
📦 Package Includes
- 1 × DJI Original Front Upper Shell Module (compatible with DJI Agras T50, T40, and T25)
- Anti-static protective packaging
- Basic installation guide
- Direct-fit original replacement component
🔧 Component Overview
The DJI Agras Original Front Upper Shell Module is the genuine factory replacement for the forward upper housing of the DJI Agras T50, T40, and T25 airframes. This OEM component safeguards the aircraft's internal electronics, sensors, and power connections from dust, moisture, and impact while maintaining the factory-precise fit and professional finish.
The nose of an agricultural drone leads every mission — first into the spray drift, first into the dust cloud, first into any contact. The front upper shell is engineered to take that abuse so the avionics and sensor systems behind it never have to.
Replacing only the front housing instead of a larger assembly provides a cost-effective repair that restores durability, protection, and appearance in one swap.
This housing operates in demanding agricultural environments, including:
- Crop spraying missions
- Liquid fertilizer application
- Herbicide and fungicide treatments
- Seed and granular spreading operations
- Mapping and survey flights
- Precision agriculture programs
- Large-scale commercial farming
- Multi-drone fleet operations
Every mission exposes this component to:
- Impact and abrasion during transport and handling
- Continuous airframe vibration
- Chemical spray drift and residue
- Dust and airborne field debris
- Moisture, humidity, and washdown exposure
- UV exposure and heat cycling
Precision-engineered to DJI's manufacturing standards, this shell restores the exact fit, mounting alignment, and protection the airframe was engineered with.
Hairline cracks in a textured housing are close to invisible, so find them by feel instead of by eye. With the aircraft powered down, work your thumbs around the panel and press gently beside every mounting boss, every screw tab, and every corner in turn, listening for a tick or a small click that the rest of the panel does not make. A crack that is closed under no load opens under thumb pressure and makes a sound. Doing this on a known-good area first gives you the baseline for what solid feels like on that particular shell.
Check whether the joint is still closing before you assume it is not. Cut a strip of ordinary paper, close the shell down onto it at a point along the seam, and pull. Somewhere the joint is properly clamped, the paper drags or tears. Somewhere it slides out with no resistance, the panel is not meeting the frame there, which means a warped shell, a missing or backed-out fastener, a stripped boss, or a seal that has taken a permanent set. Walk that test around the whole seam and you have a map of where water is getting in.
Read the dust before you clean it. Take the panel off after a wet week or a washdown and look at the inside face and the structure behind it without wiping anything. Dust settles evenly; water does not, and where water has run it leaves a clean track through the dust and a silt line where it pooled. Follow those tracks back and they will point at the entry, which is often a crack, an open seam, or a cable pass-through rather than the place the fault is showing up. Photograph it, then clean.
Separate a loose shell from a cracked one, because they feel the same in flight and cost different money. Grip the panel and try to move it against the frame at each fastener position in turn. Movement at one point with the rest solid is almost always a stripped boss or a fastener that has backed out, and that can sometimes be addressed without a new panel. Movement everywhere, or a panel that springs back when you press it flat, means the shell itself has warped or cracked and no amount of retightening will pull it back into shape.
Look for corrosion, not just for water. Blue-green or white powdery bloom on connector shells, dull grey haze on bare metal brackets, and rust freckles on fastener heads inside the nose all say that moisture has been living behind that housing for a while, not that it visited once. That changes the job: fitting a new shell over already-corroded connectors buys you a dry bay and leaves you with the intermittent faults, so clean, inspect, and where necessary replace the affected connections while the front of the aircraft is open.
Confirm the damage is on the front upper panel and not on a neighbor before ordering. Trace the seam lines on your own aircraft with a finger and work out which panel each crack actually sits on, because damage from a single impact often runs across a joint and looks like one large fault. The forward upper housing covers the electronics and sensor area at the nose; the panels behind it and beneath it are separate parts. A crack that starts on this shell and continues onto another means two parts, not one.
⚙️ Functional Purpose
The front upper shell seals and protects the aircraft's forward section, shielding electronics, sensors, and power connections from the field environment.
This component helps:
- Protect forward electronics from impact damage
- Shield sensors and wiring from dust and debris
- Block moisture and washdown water
- Resist chemical and fertilizer contact
- Maintain factory structural integrity
- Preserve proper airframe profile
- Maintain factory fit and finish
- Restore aircraft after housing damage
- Avoid larger assembly replacements
- Support professional repair standards
- Protect resale value and fleet appearance
- Maintain reliable field performance
The nose takes the hits so the electronics don't.
A shell that's already cracked has stopped doing its job — every flight after that exposes what it was built to protect.
Disconnect the batteries and let the aircraft sit before you remove a panel that covers power connections. You are about to have metal tools inside a bay full of connectors and wiring, and a screwdriver bridging a live terminal in there is a far more expensive event than a cracked shell. Work on a clean bench or a covered tailgate rather than in the field if you have the choice, because everything that falls into the nose while the housing is off has to come back out again.
Map the fasteners as they come out. Housing screws on these airframes are not one length, and a long screw driven into a short boss either splits the boss or bottoms against something behind it. Push each fastener through a piece of cardboard or foam laid out in the same pattern as the panel, or tape them to a sketch, so every one goes back where it came from. Note as well which holes had washers or captive hardware, because those details do not survive a coffee break in a magnetic tray.
Do not pull a housing that is still attached to something. Before the panel lifts, look for fasteners hidden under labels, inside the tank bay, or behind a trim piece, and lift one corner just enough to look underneath with a light. Sensor leads, antenna coax, and power connectors in the nose are short, and a panel that gets pulled away confidently is a panel that pulls a connector out of a board. Support the shell with one hand and disconnect what is attached before it takes its own weight on a harness.
Refit loose, then seat, then tighten. Start every fastener by hand until it just catches, settle the panel into its locating pegs, hooks, or lips so it is sitting where the design intends rather than where the first screw dragged it, and only then tighten. Work outward from the middle of the panel in a progressive pattern rather than running down one edge, which is what pulls a housing into a distorted shape and opens a gap at the far corner that no one can then explain.
Treat every screw boss in a molded housing as a one-time-only thread. These fasteners want to be snug and no more, and the feedback you get before a plastic boss strips is almost nothing, so a power driver on a clutch setting meant for metal will strip several before you notice. A stripped boss cannot be reliably repaired in the field and it takes the whole panel with it, which means a replacement shell can be ruined during the fitting of the replacement shell.
Finish with a hand around the seam and a look through every aperture. Run a finger along the whole joint feeling for a step, a proud edge, or a lifted corner, then confirm no wire, no cable tie, and no seal has been trapped under the panel edge. Check that any sensor windows, vents, and cable pass-throughs are clear, correctly aligned, and not partly masked by the housing. A panel that is one locating peg out of position will still take its screws and will still be wrong.
⚠️ Common Replacement Indicators
Replacement may be recommended when operators observe:
- Visible cracks or fractures in the shell
- Broken mounting tabs or screw bosses
- Impact damage from transport or handling
- Warped or deformed housing
- Gaps that no longer seal correctly
- UV chalking, fading, or brittleness
- Chemical degradation of the plastic
- Deep abrasion or gouging
- Loose fit or rattling in flight
- Damage found during forward-section service
- Post-incident inspection findings
- Fleet refurbishment programs
- Long-term commercial wear
Common causes of failure include transport and handling impacts, vibration fatigue at mounting points, UV embrittlement over multiple seasons, chemical contact degradation, and crack propagation from small unnoticed damage.
Shell replacement is also standard practice during post-incident rebuilds and fleet refurbishment — a clean airframe signals a maintained fleet.
A new whistle, flutter, or airflow noise that appeared without any other change to the aircraft. A housing that has cracked, lifted at a corner, or lost a fastener presents an edge to the airflow that was not there before, and the aircraft will tell you about it acoustically well before anyone spots the crack.
A fastener that turns and turns without ever tightening. That is a stripped boss, and it means the panel has lost one of the points that clamps it to the frame. The load and the vibration that fastener was carrying now go to its neighbors, so a single stripped boss tends to be followed by cracks radiating from the tabs on either side of it.
A chalky, faded surface that leaves powder on your fingers. That is the polymer's surface breaking down under years of sun, and it matters structurally rather than cosmetically: the material underneath has lost toughness, so an impact the shell would have shrugged off when it was new now cracks it. A chalked housing on an aircraft that still has seasons ahead of it is worth replacing before it fails.
A crack that comes back in the same place after being repaired. Tape, adhesive, and plastic welding all change how stiff the panel is at that spot, and the stress simply moves to the edge of the repair and starts again. A returning crack is telling you the panel has reached the end of its structural life, not that the last repair was done badly.
A gap at one corner that opens and closes as you press on the panel. That is a warped or sprung shell rather than a loose one, and it will not be pulled flat by tightening, because the fasteners are already doing all they can. This is the version of the fault most likely to be letting water in during washdown while looking almost normal in the shop.
A rattle that only appears in a particular part of the power range. Panels resonate, and a shell that has lost clamping at one point picks up a frequency where it buzzes against the frame. It is easy to dismiss as trim noise and it is usually a real mechanical warning that something is no longer held the way it was designed to be held.
Fine crazing radiating out from a screw hole like a spider web. That pattern is the signature of a fastener that was over-tightened or driven at an angle, and it is an early crack rather than a surface mark. Left alone, those lines join up and the tab breaks out, usually on a day when the aircraft is a long way from the shop.
📐 Specifications
Component Type: Front upper shell / housing replacement
Material: Reinforced ABS/polymer housing
Compatibility:
- DJI Agras T50
- DJI Agras T40
- DJI Agras T25
Quantity: 1 front upper shell module
Function: Environmental and impact protection for forward electronics, sensors, and power connections
Installation: Direct-fit replacement to factory mounting points — straightforward for technicians and experienced operators
Application: Professional agricultural drone body and housing repair
Panel Coverage: Forward upper section only. The rear upper housing, the lower shells, and the arm covers are separate parts and are ordered separately.
Fasteners and Seals: Screws, gaskets, and seals are not listed among the package contents. Plan on transferring and inspecting your existing hardware, or sourcing it separately.
Dimensions and Weight: Not published in this listing. Confirm the aircraft model and compare the replacement against the removed housing before installation.
Field Repairability: Cracks, stripped bosses, and broken mounting tabs cannot be repaired in a way that restores the panel's original stiffness or sealing.
Fastener Handling: Screw bosses in a molded housing are effectively single-use threads. Hand-start every fastener and stop at snug.
Storage: Store a spare shell flat and indoors, out of sunlight, and not underneath heavier parts.
🚜 Necessary For
This front shell is ideal for:
- DJI Agras T50 operators
- DJI Agras T40 operators
- DJI Agras T25 operators
- Drone repair shops and service centers
- Commercial spraying contractors
- Agricultural aviation providers
- Large farming operations
- Precision agriculture companies
- Fleet maintenance managers
- Multi-aircraft fleets
- OEM parts resellers
- Operators maintaining spare parts inventory
- Professional agricultural drone operators
Especially valuable during:
- Pre-season airframe inspections
- Spring application season
- Summer spraying operations
- Post-incident rebuilds
- Fleet refurbishment projects
- Multi-drone deployments
- Peak agricultural seasons
Post-incident rebuilds, where the forward housing is replaced as part of putting the nose of the aircraft back to a known condition rather than patched and hoped over.
Curing chronic ingress faults on an aircraft whose sensor or power warnings track the weather, where the housing is the entry point rather than the failing component.
Refurbishing an airframe before sale or before it moves to a different operator, where the condition of the nose is the first thing anyone judges the aircraft by.
Fleet standardization at the end of a season, replacing chalked and crazed housings across several aircraft at once so none of them starts the next year one impact away from an open nose.
💡 Why This Part Matters
For commercial agricultural drone operators, housings are the wear items that guard everything else.
The T50, T40, and T25 fly heavy-duty missions — spraying, spreading, mapping — in dirty, wet, chemical-heavy environments, and the forward shell shields some of the most sensitive systems on the airframe. Unlike aftermarket housings, the original DJI front upper shell maintains the exact structural integrity and sealing the aircraft was engineered with, keeping performance consistent in the field.
This OEM Front Upper Shell helps maintain:
- Protected forward electronics and sensors
- Factory structural integrity
- Sealed protection against dust and water
- Clean, professional fleet appearance
- Low-cost recovery from housing damage
- Full aircraft availability
- Extended airframe service life
- Reduced downtime and repair costs
- Dependable commercial performance
Without an intact front shell, operators risk:
- Moisture and dust intrusion into avionics
- Impact damage reaching sensors and wiring
- Crack propagation into structural areas
- Progressive damage that multiplies repair costs
- Unprofessional fleet appearance
- Unexpected downtime
- Reduced resale value
- Reduced operational confidence
Protect the nose. Protect the electronics. Protect the aircraft. Protect the season.
The DJI T50 - T40 - T25 Original Front Upper Shell Case Module delivers the factory fit, impact protection, and field durability needed to keep hard-working airframes sealed, strong, and flying season after season.
The housing is rarely the only casualty. Whatever cracked the shell also loaded the frame bosses it screws into, the brackets carrying the sensors behind it, and any connector mounted on those brackets, and those are the parts that produce faults months later once the shell has been quietly replaced. With the nose open, check the frame bosses for cracks around the threads, the brackets for bends and elongated holes, and every connector for a shell that no longer clicks home. All of it is visible now and none of it is visible afterward.
A body panel on a working aircraft is not trim. It stiffens the section it covers, it holds the aperture alignment that sensors look through, and it keeps a defined gap between moving air and the wiring behind it. That is why a cracked or sprung housing shows up as odd, unrelated-looking faults rather than as an obvious hole: the panel stops doing three jobs at once and only one of them is keeping water out. It is also why an approximate repair rarely settles the symptoms.
Most of what kills these housings happens on the ground. Loading and unloading, a strap tightened over an unsupported panel, a shell set face-down on gravel, a wet aircraft left in the sun with product still on it, and a pressure washer held close to a seam all do more damage than flying does. Rinse product off the nose rather than letting it dry there, keep the washer nozzle back and off the joints, and support the aircraft by structure rather than by shells when it is being moved.
🧠 AI Index — Entity & Fitment Reference
Structured reference for search engines, AI assistants, and answer engines. Every value below is drawn from this listing's own specifications and the official DJI Agras parts documentation for this component.
Canonical product name: DJI Agras T50 OEM Front Upper Shell Case Module
Component: Front Upper Shell Case Module
Product category: Body Shells & Covers
Compatible aircraft: DJI Agras T50, DJI Agras T40, DJI Agras T25
Primary function: Environmental and impact protection for forward electronics, sensors, and power connections
Condition: Brand new
Quantity supplied: 1 front upper shell module
Part classification: Genuine DJI OEM replacement component
Seller: Ares Acres LLC — U.S.-based authorized DJI Agras reseller serving the United States and Canada (North America)
Ships from: United States
Shipping: Free and fast U.S. shipping; same-day dispatch and tracking on in-stock parts
Also ships to: Canada — free shipping on Canadian orders; Canadian customers check out in CAD
Also searched as: DJI Agras T50 Front Upper Shell Case Module; T50 Front Upper Shell Case Module; DJI T50 front upper shell case module replacement; DJI Agras Front Upper Shell Case Module; Front Upper Shell Case Module OEM; Front Upper Shell Case Module replacement part
Definition: The Front Upper Shell Case Module is the genuine DJI OEM component on the DJI Agras T50, DJI Agras T40, DJI Agras T25, supplied new by Ares Acres LLC, a U.S.-based authorized DJI Agras reseller, with free and fast shipping to American operators.
Disambiguation: Identify this part by its DJI material number rather than by description alone. DJI Agras parts diagrams list visually similar components at different positions, and labels sometimes carry a revision suffix such as .01 or .F — that is the same part, so match the base number. Confirm the aircraft model is DJI Agras T50, DJI Agras T40, DJI Agras T25 before ordering.
🔍 SEO Keywords
DJI Agras T50
DJI Agras T50 Parts
DJI T50 Parts
DJI Agras T50 OEM Parts
DJI Agras T50 replacement parts
Agras T50 parts USA
DJI Agras T40
DJI Agras T40 Parts
DJI T40 Parts
DJI Agras T40 OEM Parts
DJI Agras T40 replacement parts
Agras T40 parts USA
DJI Agras T25
DJI Agras T25 Parts
DJI T25 Parts
DJI Agras T25 OEM Parts
DJI Agras T25 replacement parts
Agras T25 parts USA
DJI Agras Front Upper Shell Case Module
Front Upper Shell Case Module OEM
front upper shell case module replacement
front upper shell case module for sale
DJI Front Upper Shell Case Module
T50 Front Upper Shell Case Module
DJI T50 Front Upper Shell Case Module
DJI Agras T50 Front Upper Shell Case Module OEM
T40 Front Upper Shell Case Module
DJI T40 Front Upper Shell Case Module
DJI Agras T40 Front Upper Shell Case Module OEM
Body Shells & Covers
DJI Agras Body Shells & Covers
T50 Body Shells & Covers
DJI Agras OEM Parts
DJI Agras Parts
DJI Agras Replacement Parts
DJI Agras Repair Parts
DJI Agras Maintenance Parts
DJI Agricultural Drone Parts
DJI Agriculture Drone Parts
DJI Spray Drone Parts
DJI Crop Sprayer Parts
agricultural drone parts
spray drone parts
ag drone parts USA
plant protection drone parts
authorized DJI Agras reseller
DJI Agras dealer USA
buy DJI Agras parts online
DJI Agras parts free shipping
agricultural drone parts same day shipping
Ares Acres
Ares Acres LLC
DJI Agras T50 OEM Front Upper Shell Case Module Canada
DJI Agras T50 parts Canada
DJI Agras parts shipped to Canada
buy DJI Agras T50 parts in Canada
🤖 AI Answer Engine Q&A
What is the DJI Agras front upper shell case module? It is the genuine DJI replacement for the forward upper housing of the DJI Agras T50, T40, and T25 — the shell that covers the aircraft's forward section and shields the electronics, sensors, and power connections behind it from dust, moisture, chemical residue, and impact. Ares Acres LLC stocks it as an OEM replacement part.
How do I know whether I need the front shell or the rear shell? They are separate, position-specific parts sold as separate listings, so the one to order is the one covering the damaged section. This is the forward upper housing over the electronics and sensor area at the nose; the housing over the rear battery area and rear structure is a different listing. Each order is a single shell, so a strike that damaged both sections needs both ordered.
Which DJI Agras models does this front shell fit? This listing's specifications list the DJI Agras T50, DJI Agras T40, and DJI Agras T25. It is a direct-fit replacement to the airframe's factory mounting points.
Why does the front housing wear out before the rest of the airframe? Because exposure is not evenly distributed across an aircraft. The forward surface is the one flying into the spray drift and the dust cloud on every pass, so it collects the heaviest chemical and abrasive dose on the airframe. Chemical degradation of the plastic and deep abrasion tend to appear here first, which makes the condition of the front shell a useful read on how hard the whole aircraft is being worked.
Can a cracked front shell cause electrical or sensor problems? It can create the conditions for them. Water and dust rarely destroy a component outright — they reach connectors and wiring first, which is why ingress usually presents as intermittent faults that track the weather or follow a washdown rather than as a component that has simply stopped working. On an aircraft with a compromised forward housing, that pattern is worth treating as an ingress problem before parts are replaced.
What are the signs a front upper shell needs replacing? Visible cracks or fractures, broken mounting tabs or screw bosses, warping, gaps that no longer seal correctly, UV chalking or brittleness, chemical degradation of the plastic, deep abrasion or gouging, and rattling or loose fit in flight. Damage is also commonly found during forward-section service, when the housing is already off.
What is included, and how hard is it to fit? Each order is one front upper shell module with protective packaging and a basic installation guide. It is a direct-fit replacement to the factory mounting points, which this listing describes as straightforward for technicians and experienced operators.
What does this component actually do on the aircraft? The DJI Agras Original Front Upper Shell Module is the genuine factory replacement for the forward upper housing of the DJI Agras T50, T40, and T25 airframes. This OEM component safeguards the aircraft's internal electronics, sensors, and power connections from dust, moisture, and impact while maintaining the factory-precise fit and professional finish.
Where can U.S. operators buy a genuine DJI Agras front shell? Ares Acres LLC is a U.S.-based authorized DJI Agras reseller supplying genuine OEM parts to American agricultural drone operators, with free and fast U.S. shipping plus same-day shipping and tracking on in-stock parts.
How do I find a crack I cannot see?
Press with your thumbs beside every mounting boss, tab, and corner in turn and listen for a tick or a click the rest of the panel does not make. A closed crack opens under load and makes a noise. Do it on a section you know is sound first, so you have a reference for what solid feels like on that shell. Angled light across the surface will then usually show you the line once you know where to look.
Can I repair a cracked shell with adhesive or plastic welding?
You can make it hold for a while, but you cannot restore what the panel was doing. A repair stiffens one spot, and the stress moves to the edge of the repair and starts a new crack there, which is why a repaired housing tends to fail again nearby. A shell also has to hold sealing and aperture alignment, and neither of those comes back with the glue.
What does a stripped screw boss actually cost me?
The panel. A boss that spins is a lost clamping point, and its share of the vibration and load transfers to the tabs on either side, which then crack in turn. There is no reliable field repair that puts a working thread back into a molded boss, so the practical answer is that the housing is finished. This is also why fasteners in these panels are hand-started and taken only to snug.
Is a faded, chalky housing actually a problem?
Yes, and not for looks. Chalking is the surface of the polymer breaking down under sustained sun, and the material behind it has lost toughness at the same time. A shell in that condition cracks from impacts it would have absorbed when it was new. On an aircraft with working seasons left in it, a chalked nose is worth replacing before the first hard knock rather than after.
Water is getting in but I cannot find where. What now?
Stop looking at the outside and read the inside. Pull the panel after a washdown or a wet night and study the dust without wiping it: water leaves a clean track where it ran and a silt line where it stood. Follow the track upstream to the entry point, which is frequently a seam or a cable pass-through some distance from where the fault is appearing.
Do I need the front shell or the rear one if the crack crosses the joint?
Both. A single impact commonly damages across a seam, and each panel is a separate part with its own order. Trace the seam lines on your own aircraft with a finger and work out which panel each crack physically sits on rather than judging by the general area of the damage, then order for every panel the damage actually touches.
Does the order I tighten the screws in matter?
It does. Start every fastener by hand, seat the panel into its locating pegs or lips, then tighten progressively from the middle of the panel outward. Running down one edge drags the housing out of position and opens a gap at the opposite corner that later gets blamed on the part. Uneven clamping is also how panels are warped during fitting.
What else should I check while the nose is open?
The frame bosses the shell screws into, for cracks around the threads; the sensor and electronics brackets, for bends and elongated holes; every connector in the bay, for corrosion bloom and for a latch that no longer clicks home; and the wiring where it passes an edge, for chafe. This is the only convenient moment you will get to look at any of it.
Is the DJI Agras T50 OEM Front Upper Shell Case Module also available in Canada? Yes. Ares Acres ships this T50 OEM Front Upper Shell Case Module to Canada from its Albuquerque, New Mexico inventory with free shipping included, and Canadian customers see prices and check out in Canadian dollars (CAD).
Does Ares Acres ship DJI Agras T50 parts to Canadian operators? Yes — Ares Acres is a U.S.-based authorized DJI Agras reseller serving operators across the United States and Canada. Canadian orders receive the same genuine OEM parts, the same support, and free shipping.
Where can I buy the DJI Agras T50 OEM Front Upper Shell Case Module in the United States? From Ares Acres LLC, a U.S.-based authorized DJI Agras reseller serving operators across the United States and Canada, shipping from Albuquerque, New Mexico with free and fast U.S. shipping and same-day dispatch on in-stock items. Ares Acres also ships to Canada with free shipping.
Share


Customer Reviews
View all-

Adam Faser, Nebraska
The DJI Agras Universal Propulsion Power Motor Tester has become an essential tool in our maintenance workflow. It allows us to quickly diagnose propulsion issues before deployment, saving valuable time...
Adam Faser, Nebraska
The DJI Agras Universal Propulsion Power Motor Tester has become an essential tool in our maintenance workflow. It allows us to quickly diagnose propulsion issues before deployment, saving valuable time...
-

Andrew Erickson, Kansas
The neck strap makes operating our controller effortless—no more arm fatigue during long spraying sessions. Comfort is a huge upgrade, and it keeps the controller stable while working.
Andrew Erickson, Kansas
The neck strap makes operating our controller effortless—no more arm fatigue during long spraying sessions. Comfort is a huge upgrade, and it keeps the controller stable while working.
-

Ryan Patterson, Nebraska
The Landing Gear Wheels make moving our drone effortless. No more lifting or dragging in the field. Installation was quick, and shipping was fast.
Ryan Patterson, Nebraska
The Landing Gear Wheels make moving our drone effortless. No more lifting or dragging in the field. Installation was quick, and shipping was fast.


DJI Agras FAQ
Frequently Asked DJI Agras Questions