DJI C12000 Fast Charging: 380V Three-Phase, L1/L2/L3/PE e 12 kW
DJI C12000 Fast Charging: 380V Three-Phase, L1/L2/L3/PE e 12 kW
O fast-charging mode do DJI C12000 Intelligent Power Supply User Guide v1.0 usa three-phase mains power. A DJI define um limite claro: a conexão deve ser feita somente por qualified electricians wearing insulated gloves. Esta guia preserva a ordem do fabricante e não substitui trabalho elétrico profissional.
Resumo: a DJI descreve fast charging em torno de 380 V three-phase com pelo menos 15 kW. O air circuit breaker deve ficar OFF antes da connection. O qualified electrician conecta L1/L2/L3 aos hot terminals e PE ao protective earth; PE não vai a neutral nem hot. Depois da verification, o breaker pode ser ligado. No battery side, cable no air-cooled heat sink primeiro, battery depois. Ao terminar, breaker OFF antes de desconectar o fast cable.

1. Qualified electrician only
A DJI não apresenta fast charging como DIY workflow.
2. Insulated gloves
Fazem parte do safety boundary descrito.
3. Local electrical compliance
A source recomenda validar wiring e requirements locais com electrician.
4. Power reference
Aproximadamente 380 V three-phase com ≥15 kW.
5. Breaker OFF
Antes de qualquer connection work.
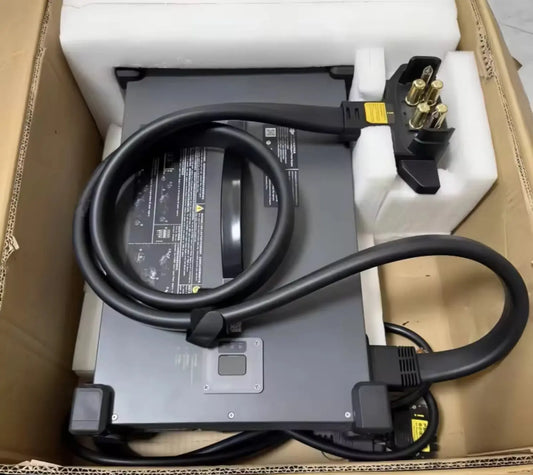
6. Fast charging cable
Figure C mostra safety-pin removal, cable insertion e reinstallation.

7. L1/L2/L3
Three hot phase conductors.
8. PE
Protective earth/ground.
9. PE não é neutral
Não conectar ao neutral terminal.
10. PE não é hot
Também não conectar a hot terminal.

11. Breaker ON depois da verification
Somente após a professional connection estar completa.
12. Não energize para “testar” wiring duvidoso
Verification vem primeiro.
13. Battery-side sequence
Cable no air-cooled heat sink primeiro; compatible battery depois.

14. Compatible batteries
DB2100, DB1580 e DB2160 nesta manual revision.
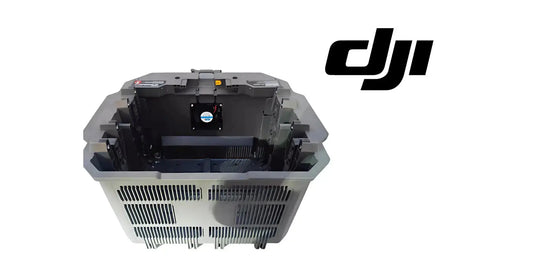
15. Cooling hardware
Use exact compatible cooling station/air-cooling system.
16. Ventilation
High-power charging continua dependente de airflow.
17. LEDs
Use charging, AC e DC indicators como diagnostic branches. Warning/error pede detailed diagnostics.
18. Shutdown order
Air circuit breaker OFF antes de desconectar o fast-charging cable.
19. Não desconecte energizado
A source coloca breaker OFF como condição anterior.
20. Site acceptance checklist
- qualified electrician;
- local requirements;
- three-phase supply verified;
- adequate power;
- breaker OFF;
- cable/safety pins;
- L1/L2/L3;
- PE ground;
- ventilation;
- battery cooling;
- compatible battery.
21. Electrician/operator handoff
Electrician valida mains side; operator valida battery/cooling/status.
22. During-charge monitoring
Observe LEDs, airflow e battery cooling.
23. Post-charge record
- C12000 model;
- site/input;
- electrician verification;
- battery ID;
- cooling;
- start/end;
- warnings;
- breaker-off confirmation.
24. Erro: DIY 380 V
Não.
25. Erro: PE no neutral
Proibido.
26. Erro: breaker ON durante connection
Não.
27. Erro: disconnect antes de breaker OFF
Inverta a ordem.
28. Erro: ignorar cooling
Thermal management continua obrigatório.
29. Perguntas frequentes
Quem conecta?
Qualified electrician.
Supply?
~380 V three-phase / ≥15 kW no operating workflow.
PE?
Protective earth.
PE no neutral?
Não.
Antes de disconnect?
Breaker OFF.
Fonte e revisão
Fonte: DJI C12000 Intelligent Power Supply User Guide v1.0 (2025), Fast Charging section, Figures C, D e E. Instalação elétrica deve ser feita por profissional qualificado e atender regras locais.
30. Fast charging deve ter um commissioning record do site
Antes do primeiro uso regular, registre C12000 model, site electrical service, electrician responsável, local compliance check e date da verification. Isso evita que futuros operators assumam que qualquer outlet ou three-phase source é equivalente.
31. Breaker state deve fazer parte da comunicação da equipe
Use confirmação verbal ou checklist para breaker OFF before connection/disconnection e breaker ON only after verification. O objetivo é reduzir ambiguidade entre electrician e charging operator.
32. Cable/safety pins são parte do mechanical acceptance
Antes de energizar, confirme que o fast charging cable está completamente instalado e os safety pins retornaram à posição prevista pela Figure C.
33. Grounding verification não é feita por aparência
PE deve ser tratado como protective earth dentro do electrical installation profissional. Não presuma que wire color ou terminal proximity sozinho confirma grounding correto; a verification pertence ao qualified electrician.
34. Battery-side readiness vem depois do mains-side acceptance
Somente quando a connection three-phase estiver verificada e o charger estiver em estado normal passe ao heat-sink/battery workflow. Não misture mains troubleshooting com battery replacement.
35. Stop-work conditions
- qualified electrician não disponível;
- input power não verificado;
- grounding/PE não confirmado;
- damaged charging cable;
- safety pins ausentes ou incorretos;
- ventilation bloqueada;
- charger warning/error não entendido;
- battery/cooling compatibility não confirmada.
36. Fast-charge site log
- C12000 model;
- site location;
- input configuration;
- electrician/date;
- breaker sequence confirmed;
- cable/safety-pin check;
- PE verification;
- battery ID;
- cooling hardware;
- LED result;
- shutdown completed.