DJI C12000 + DB2160 Charging Workflow: Del Vuelo a 95% de Carga
Share
DJI C12000 + DB2160 Charging Workflow: Del Vuelo a 95% de Carga
El valor del DJI C12000 + DB2160 no está solo en la velocidad del charger. El verdadero workflow conecta aircraft shutdown, battery inspection, thermal recovery, air-cooled heat sink, charger power source, LED interpretation y return-to-service. Cuando todos esos pasos se estandarizan, una T100/T70P fleet puede reducir charging bottlenecks sin convertir la battery rotation en un safety shortcut.
Respuesta rápida: después del vuelo, apague el aircraft, retire la DB2160, inspeccione shell/connector/temperature, enfríe la battery cuando sea necesario, conecte el C12000 al air-cooled heat sink, coloque la DB2160 en el cooling interface y monitorice status LEDs/DJI Agras. En fast-charge conditions, DJI publica aproximadamente 8–9 minutos para 30%→95% con DB2160. El C12000 fast-charge path requiere three-phase power y qualified electrician.
1. The workflow begins before charging
A battery should not move directly from a demanding flight into a charger without inspection and temperature assessment.
2. Land and shut down normally
Complete the aircraft shutdown procedure before battery removal. Do not treat the DB2160 as a hot-swappable component.
3. Record ending battery state
Capture end-of-flight charge, warnings and any abnormal heat behavior before the pack leaves the aircraft.
4. Inspect the battery shell
Look for swelling, cracks, impact damage, leakage, unusual odor or deformation. A physically unsafe battery should not enter the normal charging queue.
5. Inspect the high-current connector
Check for contamination, discoloration, scorching, bent contacts or debris.
6. Inspect the aircraft-side battery interface too
If several batteries show the same connection issue on one aircraft, the problem may be aircraft-side rather than battery-side.
7. Temperature comes before charging speed
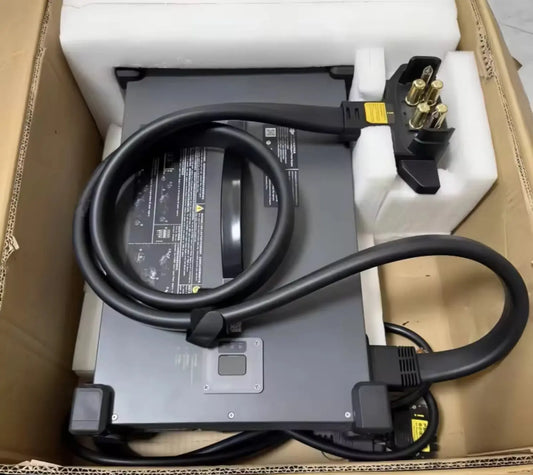
A recently used DB2160 can be hot. Cooling is part of the charge cycle, not an optional accessory step.
8. Move the battery to the cooling workflow
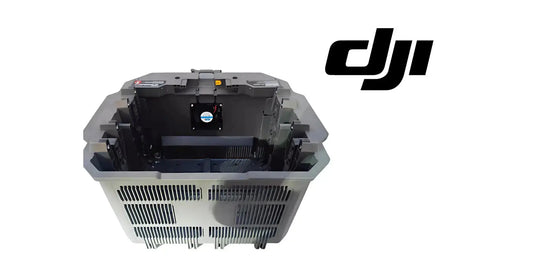
Use the supported air-cooled heat sink / battery cooling station for the applicable DB2160 configuration.
9. Do not block cooling airflow
Keep the heat sink mesh/fan and charger ventilation paths clear of dust, bags and other debris.
10. Prepare the charging site
The C12000 should sit on a flat, stable surface in a dry/open charging area.
11. Charger ventilation clearance
DJI specifies at least 50 cm of clearance around ventilation areas.
12. Charger-to-battery spacing
Maintain more than 30 cm between charger and charging battery and avoid placing the battery directly in the hot charger exhaust path.
13. Fast-charge electrical source
For fast charging, the C12000 User Guide specifies a 380 V three-phase source with at least 15 kW available.
14. Qualified electrician requirement
DJI says the fast-charge electrical connection must be performed by a qualified electrician wearing insulated gloves.
15. Do not improvise farm wiring
The charger is a 12 kW class device. Use the current DJI diagram, a properly rated source and applicable electrical code.
16. Charger activation
Before first use, connect the remote controller and activate the C12000 in DJI Agras → Device Management → Charging Device.
17. Firmware status
If DJI Agras presents a charger firmware update, complete it according to the supported workflow before relying on the unit for field rotation.
18. Connect the charging cable to the cooling interface
DJI's C12000 workflow connects the charger cable to the air-cooled heat sink before the battery is placed into the cooling device.
19. Insert the DB2160 correctly
Confirm the battery seats normally and that the cooling/charging interface is not obstructed.
20. Charging-channel LED: solid yellow
Battery connected and ready/waiting for charging.
21. Charging-channel LED: green blinking
Charging is in progress.
22. Charging-channel LED: solid green
Charging is complete.
23. Yellow blinking warning
A battery or charging-channel warning is present.
24. Red blinking error
A battery or charging-channel error is present.
25. Use DJI Agras for warning detail
If any status LED indicates a warning/error, connect the remote controller and read the detailed charging-device information.
26. Do not repeatedly reconnect a faulting pack
Record the exact warning and isolate whether the issue follows the battery, charger, cooling interface or input power.
27. Published DB2160 fast-charge reference
DJI publishes approximately 8–9 minutes from 30% to 95% for DB2160 with C12000 under its specified conditions.
28. 8–9 minutes is not a guaranteed field stopwatch
Battery temperature, ambient temperature, source quality, battery condition and charging protection behavior can change actual time.
29. Why DJI publishes 30%→95%
This range reflects a practical fast-charge operating window in the published specification, rather than implying every battery must always be run to 30% or charged to 95% in every mission.
30. Battery rotation should preserve reserve
Do not deliberately run packs unnecessarily low merely to match the published benchmark.
31. Charge one operational battery path at a time
The charging/cooling workflow should preserve adequate thermal management rather than stacking batteries around the charger for speed.
32. After charging completes
Confirm solid-green/normal status, remove the battery using the supported procedure and inspect the connector before return to service.
33. Do not disconnect energized high-current input casually
For fast-charge infrastructure, de-energize the upstream source according to the DJI/electrician procedure before disconnecting the fast-charge input.
34. Return-to-service check
- charge completed normally;
- no warning/error LED;
- battery temperature normal;
- connector clean;
- no physical damage;
- battery ID logged;
- ready status updated.
35. Fleet rotation model
A practical commercial loop is flight → inspection → cooling → charging → verification → ready. A battery that skips one gate should not be marked ready simply because charge percentage is high.
36. Two-battery rotation
With only two batteries, charger/cooling turnaround becomes a direct limit on aircraft utilization. Any abnormal pack can stop the rotation.
37. Three-plus-battery rotation
Additional packs provide more buffer for cooling, inspection and unexpected quarantine, but only if the C12000/power source can keep up.
38. More batteries do not fix inadequate input power
A 12 kW charger on the wrong electrical source becomes a bottleneck regardless of battery count.
39. More charger power does not fix overheating
Thermal limits still govern battery acceptance and safe charging.
40. Track actual charge turnaround
- battery ID;
- landing SOC;
- time placed in cooling;
- time charging began;
- time charging completed;
- warning/error;
- ready time.
41. Use the data to find bottlenecks
If turnaround is consistently longer than expected, determine whether delay is cooling, power-source, charger, battery or operator workflow.
42. Battery-side fault
If the same DB2160 repeatedly warns across a known-good C12000 and cooling setup, quarantine that battery for diagnosis.
43. Charger-side fault
If several known-good batteries show the same charging-channel or DC-output problem on one C12000, investigate the charger branch.
44. Input-power fault
AC-input warnings across otherwise healthy equipment point toward electrical-source quality, connection or charger-input issues.
45. Cooling-side fault
Repeated high-temperature delays can indicate airflow blockage, dirty fan/mesh or an inadequate thermal setup.
46. Aircraft-side fault
If a battery charges normally but produces connection errors only in one aircraft, inspect the aircraft-side battery interface.
47. Common error: charging immediately after a hot sortie
Cooling comes first when battery temperature is too high.
48. Common error: judging a battery only by charge percentage
Physical condition and warning history matter too.
49. Common error: assuming every slow charge is a charger fault
Input power and battery temperature can limit actual charging power.
50. Common error: replacing the C12000 before reading DJI Agras
Use the charger diagnostics to isolate the failure branch first.
51. Daily charging-station checklist
- C12000 exterior/cable normal;
- ventilation clear;
- cooling fan/mesh clean;
- electrical source verified;
- dry-powder extinguisher available;
- charging area dry and clear;
- battery queue labeled;
- quarantined packs physically separated.
52. Frequently asked questions
How fast can C12000 charge DB2160?
DJI publishes approximately 8–9 minutes from 30% to 95% under specified conditions.
Can I fast-charge from a normal household outlet?
No. The C12000 fast-charge path uses three-phase power; single-phase is the lower-power slow-charge path.
Do I need the cooling system?
The supported workflow uses an air-cooled heat sink/cooling interface, especially important for hot post-flight batteries.
What does blinking yellow mean?
A battery/charging-channel warning; read details in DJI Agras.
When is the battery ready?
After normal charge completion, normal temperature and no unresolved warning.
Source and revision
Primary sources: DJI C12000 Intelligent Power Supply User Guide v1.0, current DJI AGRAS T100/T70P specifications, and Ares Acres' existing DJI Agras power-system tutorial.