DJI Agras Tutorial: How to Use the DJI Remote Controller (Canada)
Share
🇺🇸 Reading from the United States? See the U.S. edition: DJI Agras Tutorial: How to Use the DJI Remote Controller
🇨🇦 CANADA — DJI Agras Remote Controller Buttons, RTH, Spray Controls, Connectivity & Operator Workflow
The DJI Agras remote controller is the command centre of an agricultural drone operation. It is where the operator checks controller power, confirms the aircraft link, switches between FPV and map views, manages spraying or spreading, adjusts flow, initiates or cancels Return-to-Home, controls the camera view, records the screen, captures screenshots, connects external devices and accesses customizable shortcuts.
This Canadian edition of the Ares Acres controller guide is written for operators flying agricultural drones across Saskatchewan, Alberta, Manitoba, Ontario, Quebec, British Columbia and other Canadian production regions. The physical controller functions demonstrated in the source video do not change because the aircraft is operating in Canada. What changes is the broader framework around the mission: Canadian aviation requirements, RPAS operating categories, controlled-airspace authorization, pesticide-label compliance, provincial or territorial applicator requirements and Canadian fleet practices.
The goal of this guide is not simply to identify buttons. It is to explain what each control does, when the operator is likely to use it, what must be verified before relying on it, how the function interacts with the aircraft, what can go wrong and how controller proficiency supports a safer Canadian DJI Agras operation.
Ares Acres supports Canadian DJI Agras operators with agricultural aircraft, genuine OEM replacement components, remote-controller accessories, positioning equipment, batteries, connectivity hardware and technical education. Ares Acres ships genuine DJI Agras OEM parts to Canada with free standard shipping, and Canadian customers see CAD pricing at checkout. Browse DJI Agras Parts, DJI Agras Accessories, DJI Agras T100 Parts, DJI Agras T50 Parts, the Ares Acres Product Catalog, or contact Ares Acres.
Watch the DJI Agras Remote Controller Tutorial
Prefer to watch instead of read? The video gives the visual button tour. The written guide below is designed as the searchable field reference for new pilots, commercial operators, fleet managers and technicians who need to understand the controls in context rather than memorize isolated button names.
What You’ll Learn
- How the DJI Agras remote-controller power button works.
- How to interpret the controller-to-aircraft link indicator.
- Why controller battery level is a mandatory preflight check.
- How screen-edge buttons and the L1/L2/L3 controls work.
- How to configure the 5D custom button.
- How to initiate and cancel Return-to-Home.
- How to manually start or stop spraying and spreading.
- How to use the flow adjustment dial during manual operation.
- How the flight-mode switch is used for interruption in the source workflow.
- What the microSD, USB-A, HDMI and USB-C ports do.
- How to switch between FPV and map views.
- How to change camera tilt.
- How C1, C2 and C3 functions vary by operating mode.
- How to remove and install the external controller battery.
- How to install the cellular dongle and connect its antennas.
- How the Back-button shortcut combinations work.
- Why screenshots, screen recordings and logs are valuable for diagnostics.
- How Canadian rural cellular coverage changes controller preparation.
- Why cold weather should be included in controller and battery planning.
- How controller familiarity connects to Transport Canada operating requirements and safe command-and-control.
- Why a spray/spread button press must still be consistent with the current PMRA pesticide label and provincial requirements.
Quick Answer: Which DJI Agras Controller Controls Should Every Pilot Know?
Before takeoff, the operator should know not only how to start an automated action, but also how to stop or cancel it, how to verify the controller is linked to the intended aircraft, how to identify a low controller battery, and how to recognize when custom button assignments differ from the defaults shown in training.
DJI Agras Remote Controller Control Map
| Control / Port | Function described in source video | Operator use |
|---|---|---|
| Power button | Check battery, power on, blank the screen, or power off depending on press pattern | Startup, power management and shutdown |
| Link indicator | Green when linked; red when not linked | Connection verification |
| Controller power indicator | Displays controller battery level | Preflight endurance check |
| Screen-edge buttons | Mirror corresponding on-screen functions | Physical access to common commands |
| L1 / L2 / L3 | Default examples: add point, spotlight, gimbal tilt/re-centre | Fast access to selected functions |
| 5D custom button | Centre + four directional inputs can be customized | Personalized shortcut mapping |
| RTH button | Hold about 2 seconds to start RTH; short press during RTH to cancel in source workflow | Automated return and interruption |
| Back button | Go to previous page and act as shortcut modifier | Navigation and quick commands |
| Spray / spread button | Short press starts/stops manual application; long press about 2 seconds purges hose in source workflow | Manual application and priming |
| Flow adjustment dial | Changes spray flow in real time during manual operation | Manual application control |
| Flight-mode switch | Source tutorial describes toggling for emergency interruption during operation/RTH | Rapid intervention; verify exact model behaviour |
| microSD slot | Imports supported data | Field/task/data transfer |
| USB-A | Connects supported external devices | Activation/status/peripheral workflows |
| HDMI | Outputs controller screen to external display | Training and observation |
| USB-C | Charges controller; supports computer/data/firmware/log workflows | Charging and service |
| FPV / Map | Switches between FPV and map display | Situational and route awareness |
| Camera dial | Changes camera tilt angle | Adjust viewing perspective |
| C1 / C2 | AB points and other mode-dependent functions | Route setup and mode-specific control |
| C3 | Customizable | User-defined shortcut |
| Battery/dongle hatch | Accesses external battery and cellular hardware | Power and network hardware service |
1. DJI Agras Remote Controller Power Button
The power button performs several functions depending on controller state.
When the Controller Is Off
- Short press: checks the built-in controller battery level.
- Short press followed by a long press: powers on the controller.
When the Controller Is On
- Short press: turns off the screen to save power while leaving the controller active.
- Short press followed by a long press: powers off the controller.
A dark display is therefore not necessarily a powered-off controller. During a pause, verify connection and controller state before assuming the system has shut down.
2. Check Controller Battery Before Every Flight
The remote controller is part of the aircraft’s command-and-control chain. A fully charged aircraft battery cannot compensate for a controller that is about to shut down.
Plan controller power for the entire work period, not only airborne time. Agricultural jobs include loading, mixing, battery swaps, route edits, customer discussions, weather delays, troubleshooting and repeated sorties. If the controller accepts an external battery, treat it as part of a deliberate endurance plan.
Canadian Cold-Weather Consideration
Low ambient temperature can reduce battery performance and increase the practical importance of keeping controller batteries within the manufacturer’s operating limits. Do not leave a controller or removable battery exposed unnecessarily in a cold vehicle and then assume the displayed percentage will behave exactly as it did during summer work. Follow DJI’s current temperature and storage guidance for the exact controller and battery.
3. Understand the Aircraft Link Indicator
The source video describes:
- Green: controller and aircraft successfully linked.
- Red: controller not linked to the aircraft.
A powered controller is not proof that it controls the intended aircraft. In a multi-aircraft fleet, verify aircraft identity and link status before every mission. If the link is red, stop and diagnose before takeoff.
For the broader linking workflow, see the Canadian DJI Agras Agricultural Drone Basics & Operation Guide.
4. Screen-Edge Buttons
The physical buttons along the screen correspond to on-screen functions in the same area. This is useful when the operator is wearing gloves, the touchscreen is wet or dusty, sunlight makes icons harder to hit, or a rapid command is easier with a tactile control.
The current screen remains the reference. Software and operating modes can change what appears next to a physical button.
5. L1, L2 and L3 Custom Buttons
The source video gives default examples:
- L1: Add point.
- L2: Spotlight switch.
- L3: Tilt down / re-centre gimbal.
Do not assume every controller in a commercial fleet has identical mappings. If multiple pilots share controllers, standardize custom functions where practical and document any exception.
6. Configure the 5D Custom Button
The 5D control supports centre press plus up, down, left and right actions. The controller settings can assign different shortcuts to each direction. The training example uses one direction for the spotlight switch.
Good shortcut design puts frequently used, non-conflicting functions within reach without forcing the operator to search through menus. Poor shortcut design creates ambiguity during an abnormal event. Standardization matters more than novelty.
7. Return-to-Home: Start and Cancel RTH
The source video instructs the operator to press and hold the RTH button for approximately two seconds to initiate Return-to-Home. During the return, a short press cancels RTH and the aircraft hovers in the demonstrated workflow.
RTH is not an emergency magic button. Before relying on it, understand:
- Where the current home point is located.
- The configured return altitude and route behaviour.
- Known obstacles between the aircraft and home point.
- Aircraft battery state and wind.
- What happens after RTH is cancelled.
- How the exact aircraft behaves after loss of link or another fault.
For Canadian operations, RTH settings must still fit the actual operating category, airspace, obstacle environment and any conditions attached to an SFOC or other authorization when applicable.
8. Back Button
A short press returns to the previous page. The Back button also acts as a modifier for several shortcuts later in this guide, including screen recording, screenshots, brightness and controller volume.
9. Spray / Spread Button
The spray/spread button is one of the most consequential controls on an agricultural remote.
- Short press: manually turns spraying or spreading on or off.
- Long press for approximately two seconds: the source video describes this as purging air from the hose.
Before activating liquid or granular output, confirm the correct payload, application mode, material, field and operator plan. For pesticide spraying in Canada, the button does not create legal authority: the current Health Canada PMRA label and applicable provincial or territorial requirements still control the use.
If the hose will not purge normally, inspect the tank outlet, filter, pump, lines, fittings and spray components instead of repeatedly commanding purge without diagnosis.
10. Flow Adjustment Dial
The flow adjustment dial changes spray flow in real time during manual operation. This is convenient, but it should not be treated as permission to improvise an application rate.
Actual field rate depends on flow, aircraft speed, swath, application mode, atomizer/nozzle setup and mission settings. For regulated pesticide application, the current label and approved application plan govern. Under current Canadian PMRA policy, do not reduce the labelled minimum aerial spray volume merely because the controller allows a lower command.
11. Flight-Mode Switch and Emergency Interruption
The source video describes toggling the flight-mode switch as an emergency-stop action during an operation or while returning to the home point.
Verify this behaviour on the exact aircraft/controller/firmware before field operations. An operator should know how to interrupt automated movement before launching an automated task. Do not discover the emergency control path for the first time when the aircraft is moving toward a wire, vehicle, person or unplanned area.
12. microSD Card Slot
The microSD slot can support compatible data imports. Depending on the workflow this may include field, task, prescription or diagnostic information.
Use supported cards and organized file names. If a card is not recognized, check compatibility, formatting, file structure and insertion before assuming hardware failure.
13. USB-A Port
The source video gives chargers and charging stations as examples of supported equipment connected through USB-A for activation or status functions. A physical USB connector does not mean every accessory is supported. Use approved devices and reliable cables.
14. HDMI Output
The HDMI interface can send the controller display to a TV, projector or compatible monitor. This can be useful for:
- Pilot training and classroom instruction.
- Dealer or technician troubleshooting.
- Showing route planning to a customer or field manager.
- Giving a second crew member a larger view of the interface.
- Reviewing an abnormal event after the flight.
15. USB-C Port
USB-C can charge the controller and can support computer connection for file transfer, firmware tools and logs depending on controller generation and software.
When a fault is intermittent, logs can be more valuable than a vague description such as “the remote disconnected.” Preserve the event time, screenshots, recordings and logs before resetting or clearing data.
16. FPV / Map Switch
A short press switches between FPV and map views. The source video also notes an on-screen control for the same transition.
- FPV: helps the pilot understand the aircraft camera view and immediate visual environment.
- Map: helps the operator understand field boundaries, route geometry, aircraft location, progress and spatial relationships.
Strong operators move between views intentionally rather than remaining locked into one display while the aircraft environment changes.
17. Camera Adjustment Dial
The camera dial changes camera tilt. It changes what the pilot sees, not the aircraft’s attitude or route. Use it to improve visual awareness without confusing camera movement with aircraft movement.
18. C1 and C2 Buttons
The source tutorial describes mode-dependent behaviour. In AB point operation, C1 and C2 add point A and point B respectively. In other workflows they can perform different functions.
Before pressing a button based on memory, verify the current operating mode. A control that was useful during AB planning may not perform the same command during another mission type.
19. C3 Custom Button
C3 is customizable. The source gives “clear flight path” as an example. Fleet operators should document C3 assignments for the same reason they document the 5D and L buttons.
20. External Battery and Cellular Dongle Hatch
The controller includes a compartment for the removable battery and cellular hardware. Keep this area clean and dry. Dust, pesticide residue, fertilizer fines, moisture, loose screws or damaged antenna leads can create preventable controller problems.
21. Remove and Install the External Controller Battery
- Use the battery fixing/release control described in the source video.
- Remove the external battery without forcing the rails or contacts.
- When reinstalling, seat the battery fully.
- Push it into its locked position.
- Physically confirm retention before carrying or operating the controller.
A partially seated external battery can create intermittent power symptoms that may look like a controller fault.
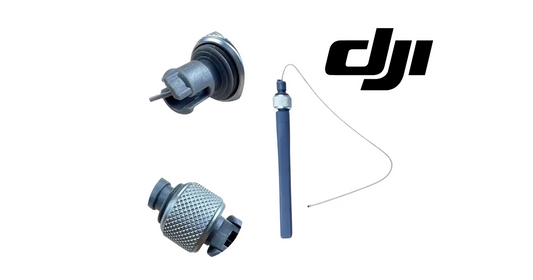
22. Install the Cellular Dongle
- Open the battery/dongle compartment.
- Remove the two screws shown in the source procedure.
- Insert the SIM into the compatible dongle.
- Connect the dongle antenna leads to the correct 4G ports.
- Insert the dongle into the controller.
- Reinstall the cover.
- Tighten the screws and confirm the compartment is secure.
After installation, verify that the controller recognizes the connection before depending on cloud services. Cellular operation depends on SIM activation, compatible service, carrier coverage, antenna connection, controller settings and local network conditions.
Canadian Rural-Network Planning
Do not assume a controller that has strong service at the shop will have the same connectivity at a remote Prairie field, orchard block or rural property. Before a high-value operating day, cache or synchronize what can be prepared in advance: firmware, maps, task data, field files and other required cloud content. Where supported, use stable Wi-Fi for large downloads.
23. Controller Shortcut Combinations
| Shortcut | Function in source video | Why it matters |
|---|---|---|
| Back + Spray/Spread | Quick screen recording | Training and diagnostic evidence |
| Back + FPV/Map | Quick screenshot | Capture warnings, status and task settings |
| Back + left flow dial | Adjust screen brightness | Visibility under changing light |
| Back + right camera dial | Adjust controller volume | Audible-warning management |
24. Why Screen Recording Matters
Screen recording can document the controller state before, during and after an abnormal event. It can show warnings, route behaviour, application settings, RTK status, aircraft state and the exact sequence that triggered a problem.
When practical, begin recording before attempting to reproduce an intermittent issue. Pair the recording with logs rather than relying on the video alone.
25. Why Screenshots Matter
A screenshot can preserve an error code, firmware version, task setting, home point, RTK state, prescription selection, application rate or other information without using a second phone to photograph the screen.
For support, capture enough of the interface to show context. A cropped error code with no aircraft status or menu location can make diagnosis harder.
26. Canadian Preflight Remote Controller Checklist
- Inspect the controller housing, display, sticks, buttons and antennas.
- Check built-in controller battery level.
- Confirm the external battery is secure and charged if used.
- Power on correctly and confirm normal boot.
- Confirm the intended DJI account/team if applicable.
- Verify the controller is linked to the intended aircraft.
- Confirm the link indicator and on-screen aircraft state are normal.
- Check network status if the mission depends on cloud, RTK or task data.
- Verify the selected stick mode.
- Confirm custom button assignments.
- Check FPV and map views.
- Confirm camera control.
- Review home-point and RTH settings.
- Verify the spray/spread button is not being activated unintentionally.
- Confirm the correct material/application mode.
- For pesticide work, confirm the current PMRA label, RPAS eligibility and provincial requirements.
- Confirm the exact aircraft and operation fit the applicable Transport Canada category, Safety Assurance and authorization requirements.
- Verify controller power is sufficient for the full mission plus reserve.
27. Common DJI Agras Remote Controller Mistakes
- Assuming the controller is linked because both devices are powered on.
- Starting with low controller battery.
- Ignoring Canadian cold-weather effects on battery endurance.
- Forgetting that L buttons, 5D and C3 can be remapped.
- Confusing a short power-button press with full shutdown.
- Using RTH without understanding the current home point and route.
- Activating spray/spread at the wrong time.
- Changing flow without understanding field-rate consequences.
- Assuming the emergency-interruption switch behaves identically on every Agras generation.
- Depending on cellular service without testing field coverage.
- Assuming every USB device is supported because the connector fits.
- Failing to capture screenshots, screen recordings or logs during an intermittent fault.
- Assuming a controller function makes the application legal. Hardware control does not replace PMRA label compliance.
- Using outdated Canadian aviation assumptions. Verify the current operating category and the exact aircraft’s Safety Assurance rather than relying on a generic “over 25 kg” rule.
28. Troubleshooting DJI Agras Remote Controller Problems
| Symptom | Likely area | First actions |
|---|---|---|
| Link indicator red | Aircraft/controller pairing | Confirm aircraft power and correct pair; use current linking workflow |
| Controller will not power on | Battery/charging/power sequence | Check battery indication, charging source and external battery seating |
| Screen dark but controller appears active | Display power / brightness | Wake display and check brightness before restarting |
| Custom button performs wrong action | Button assignment | Verify current mapping in settings |
| Unexpected RTH | Home point / RTH configuration / aircraft state | Review home point, warnings and return settings |
| Spray/spread button gives no output | Application mode / payload system | Verify mode, tank/hopper, pumps/feeder and system warnings |
| Flow dial changes output unexpectedly | Manual-mode settings / calibration | Stop application and verify mission configuration |
| No cellular connection | SIM / dongle / antenna / carrier / coverage | Check provisioning, seating, antenna leads and local service |
| microSD not recognized | Card / format / slot | Verify supported card and formatting |
| Computer cannot see controller over USB-C | Cable / port / software / USB mode | Use a known-good data cable and supported software |
| No HDMI output | Cable / display input / controller setting | Test display input and known-good HDMI cable |
| Intermittent warning cannot be reproduced | Multiple systems | Preserve logs, screenshots and recordings before resetting |
29. Professional Spray-Crew Controller Workflow
- Charge and inspect the controller, external battery, antennas, cables and dongle.
- Power on using the correct sequence.
- Link check the correct aircraft identity and connection state.
- Network check when cloud, task or correction services are required.
- Navigation check map, FPV, GNSS/RTK and field information.
- Control check custom buttons, flight mode and emergency interruption.
- RTH check home point, altitude and cancellation behaviour.
- Application check spray/spread state, material and flow-control logic.
- Regulatory check Transport Canada category/authorization and PMRA/provincial requirements for the mission.
- Record when needed screenshots, screen recording and logs.
- End-of-day data preserve task records and support evidence.
- Shutdown and recharge so the controller is ready for the next operating block.
30. Transport Canada Context: Why Controller Familiarity Matters
Canada’s RPAS rules changed on November 4, 2025. Certain medium drones—more than 25 kg and not more than 150 kg—can now be operated in some VLOS Advanced Operations when the pilot, aircraft and mission satisfy the applicable requirements. Advanced and Level 1 Complex operations depend on the appropriate pilot certificate and, for relevant aircraft, the required RPAS Safety Assurance declaration for the intended operation. Other special operations can still require an SFOC.
The remote controller is where the pilot exercises command-and-control, monitors system status and intervenes when automation behaves unexpectedly. Controller familiarity does not create regulatory compliance, but poor familiarity can undermine an otherwise legal operation. The pilot should know how to stop an automated action, cancel RTH, verify the aircraft link, interpret warnings and maintain control without searching through menus under pressure.
31. Health Canada PMRA Context: The Controller Does Not Override the Label
For pesticide application, a spray button is only an equipment control. The pesticide-use decision comes from the current label and applicable rules.
Health Canada SPN2026-02, published June 30, 2026, permits RPAS application under the policy for certain pest control products already registered for conventional aerial application when the label does not prohibit RPAS use. Operators must follow the aerial directions, including application rate, minimum spray volume, droplet requirements and buffer zones. Provincial or territorial applicator requirements still apply.
The pilot, visual observer and crew should also be positioned to avoid the downwind spray plume in accordance with current PMRA guidance. Build crew placement into the controller station and loading-area plan before takeoff.
FAQ: DJI Agras Remote Controller in Canada
How do I turn on the DJI Agras controller?
The source video demonstrates a short press followed by a press-and-hold.
How do I check controller battery without turning it on?
Short press the power button while the controller is off.
What does a green link light mean?
The source tutorial describes green as a successful controller-aircraft link.
What does red mean?
The controller is not linked to the aircraft.
What happens if I short press Power while the controller is running?
The source video describes that action as turning off the screen while the controller remains active.
How do I start RTH?
Press and hold the RTH button for approximately two seconds according to the source tutorial.
How do I cancel RTH?
The source video demonstrates a short press during RTH to cancel the return and hold position, subject to the exact aircraft and firmware behaviour.
What does the spray/spread button do?
Short press starts or stops manual application; the source also demonstrates a long press for hose purge.
What does the flow dial do?
It changes spray flow during manual operation.
Can I use the flow dial to lower spray volume below the Canadian label minimum?
No. Current PMRA policy requires operators to respect the minimum aerial spray volume stated on the product label.
How do I switch between FPV and map?
Use the FPV/map button or corresponding on-screen control.
Can the controller connect to an external monitor?
The controller shown in the source video includes HDMI output for a compatible display.
What is USB-C used for?
Charging plus supported computer, firmware, file and log workflows.
What is USB-A used for?
Supported peripherals such as compatible charging equipment in the source workflow.
Can I customize buttons?
Yes. The source video describes customizable L buttons, the 5D control and C3.
How do I record the controller screen?
The source shortcut is Back + Spray/Spread.
How do I take a screenshot?
The source shortcut is Back + FPV/Map.
Do I need cellular service for every Agras flight?
Not every controller function depends on cellular internet. Direct aircraft control and internet-connected services are separate systems. Specific cloud, RTK or task workflows may require connectivity.
Does cold weather affect the controller?
Cold conditions can affect battery behaviour. Follow the current operating-temperature guidance for the exact controller and battery and plan adequate reserve.
Does every DJI Agras over 25 kg require an SFOC in Canada?
Not automatically after the November 2025 rule changes. Certain medium-drone operations can fit the Advanced framework when all pilot, aircraft Safety Assurance and operational requirements are met. Other missions can still require Level 1 Complex privileges or an SFOC.
Does my controller tell me whether the aircraft has the required Safety Assurance?
Do not rely on controller appearance alone. Verify the exact model/configuration against Transport Canada’s current information for the intended operation.
Can the controller records replace pesticide application records?
No. Controller data can support fleet documentation, but it should not be assumed to satisfy every federal, provincial, customer or company recordkeeping requirement.
Can I spray any aerial-labelled pesticide with the Agras?
No. Read the current label. Under SPN2026-02, a qualifying aerial-labelled product can be eligible for RPAS when RPAS is not prohibited and all aerial directions are followed. Products that prohibit aerial/RPAS use or lack aerial directions are not covered.
Related Ares Acres DJI Agras Canada Tutorials
- DJI Agras Agricultural Drone Basics & Operation Guide (Canada)
- DJI Agras Agricultural Drone Safety & Safe Spraying Practices (Canada)
- DJI Agras Remote Control Activation Tutorial (Canada)
- DJI Agras T100 Route Mode & Field Planning (Canada)
- DJI Agras T100 D-RTK 3 Tutorial (Canada)
- Browse All DJI Agriculture Tutorials
Complementary Remote Controller & DJI Agras Equipment
Remote-controller problems can originate in the controller itself, aircraft communication, positioning, firmware, power or connected accessories. Diagnose the system before ordering parts.
- DJI Agras Accessories
- DJI Agras OEM Parts
- DJI Agras T100 Parts
- DJI Agras T50 Parts
- Ares Acres Product Catalog
What Is Ares Acres?
Ares Acres is a U.S.-based agricultural robotics and DJI Agras equipment company supporting farms, commercial applicators, pilots and technicians with aircraft, genuine OEM parts, diagnostics, technical education and model-specific parts identification. Ares Acres also serves Canadian operators with genuine DJI Agras OEM parts shipped to Canada with free standard shipping and CAD pricing at checkout.
The Ares Acres tutorial library is built to connect controller training with real field operations. Instead of stopping at “this button does X,” the goal is to explain the system around the control: what the pilot should verify before pressing it, which aircraft state should result, what a failure means and where to look next.
Need DJI Agras Controller, Aircraft or Parts Support?
If a controller issue may actually be caused by aircraft communication, firmware, RTK, charging hardware or another connected component, document the exact warning, preserve logs and identify the aircraft/controller configuration before replacing hardware.
Contact Ares Acres for DJI Agras parts identification and operator support, or browse DJI Agras Parts and the complete DJI Agriculture Tutorials library.
Final Operator Takeaway
The DJI Agras remote controller is more than two sticks and a touchscreen. It is the operator’s interface to aircraft connection, application control, route awareness, Return-to-Home, manual intervention, camera view, networking, diagnostics and data capture.
For Canadian commercial operations, controller proficiency should be paired with current regulatory knowledge. Know which aircraft you are controlling, know how to stop automation, know which buttons have been customized, know what the home point is, know whether the mission depends on network service, and know that the spray button cannot override a pesticide label or aviation limitation.
Learn the physical controls before you need them under pressure. Standardize mappings across the fleet, verify behaviour after firmware changes, preserve diagnostic evidence when faults occur, and treat controller power and link status as mandatory preflight items.
Educational, operational and regulatory notice: This Canadian guide expands the supplied DJI Agras controller training video and reflects publicly available Canadian regulatory context as of September 10, 2026. Controller assignments, menu labels, firmware behaviour, Transport Canada operating categories, Safety Assurance declarations, airspace requirements, PMRA policies, pesticide labels and provincial or territorial requirements can change. Always use current DJI documentation and verify the exact legal and operational requirements for the aircraft, controller, product, crop and mission.