DJI Agras Tutorial: How to Use the DJI Remote Controller (FAA Part 137)
Share
USA FIRST — DJI Agras Remote Controller Operator Guide
The remote controller is the command center of a DJI Agras agricultural drone. It is where the operator checks controller power, confirms the aircraft is linked, switches between map and FPV views, manages spraying or spreading, adjusts flow, initiates Return-to-Home, records the screen, captures screenshots, connects external devices, and accesses customizable shortcuts.
This Ares Acres guide expands the source training video into a practical field reference for agricultural drone operators. The goal is not simply to identify buttons. It is to explain what each control does, when an operator is likely to use it, what to verify before relying on it, and which mistakes can create unnecessary downtime during a spray or spreading operation.
Important: DJI Agras controller layouts, button assignments, software menus, supported accessories, and firmware behavior can vary by aircraft generation, remote controller generation, firmware version, region, and operating mode. The source video is the procedural spine for this guide. When a control is model- or firmware-dependent, confirm the current DJI manual and the settings shown on your own controller before flight.
For U.S. commercial agricultural application work, controller knowledge is only one part of the operating system. A pilot may also need to satisfy applicable FAA requirements, including Part 107 and, when dispensing economic poisons or other qualifying materials from an aircraft, Part 137 requirements and any applicable exemptions or authorizations. State pesticide licensing, product-label restrictions, drift requirements, and local rules can also apply. This article is an equipment-operation reference, not a substitute for those legal requirements.
Related Ares Acres resources: DJI Agriculture Tutorials • DJI Agras Parts • DJI Accessories • Ares Acres Product Catalog • Contact Ares Acres
Prefer to Watch? Source Video
The video provides the visual walkthrough. The written guide below is designed for operators who want a searchable reference they can return to in the field, during training, or while troubleshooting controller functions.
What You’ll Learn
- How the DJI Agras remote controller power button works.
- How to interpret the controller-to-aircraft link indicator.
- Why controller battery level should be checked before takeoff.
- How screen-edge buttons and customizable L-buttons work.
- How to configure the 5D custom button.
- How to use and cancel Return-to-Home from the controller.
- How to manually start or stop spraying and spreading.
- How the flow adjustment dial changes spray flow during manual operation.
- How the flight-mode switch is used in the source training workflow.
- What the microSD, USB-A, HDMI, and USB-C ports are used for.
- How to switch between FPV and map views.
- How to control camera tilt.
- How C1, C2, and C3 functions change by operating mode.
- How to access the external battery and cellular dongle compartment.
- How to install the dongle and connect its antennas.
- How to use the controller’s button-combination shortcuts.
- What to check when a remote controller function does not behave as expected.
Quick Answer: What Are the Most Important DJI Agras Remote Controller Controls?
Before flight, the operator should be able to identify at minimum the power button, link indicator, controller power indicator, Return-to-Home button, spray/spread button, flow adjustment dial, FPV/map switch, camera adjustment dial, and the controls used for the current flight mode. The operator should also know how to stop or cancel an automated action, how to confirm that the controller is linked to the aircraft, and how to recognize when a customized button assignment differs from the default described in training.
DJI Agras Remote Controller Control Map
| Control / Port | Function described in the source video | Operator use |
|---|---|---|
| Power button | Check controller battery level, power on, turn screen off, or power off depending on press pattern. | Startup, battery check, power saving, shutdown. |
| Link indicator | Green when controller and aircraft are linked; red when not linked. | Connection verification before flight. |
| Power indicator | Shows remote controller power level. | Preflight endurance check. |
| Screen-edge buttons | Mirror corresponding on-screen icons. | Physical access to common functions without tapping the display. |
| L1 / L2 / L3 | Default examples: add point, spotlight switch, gimbal tilt-down/re-center. | Fast access to workflow-specific commands. |
| 5D custom button | Center press plus up/down/left/right directions can be assigned to shortcuts. | Personalized control layout. |
| RTH button | Hold about 2 seconds to initiate Return-to-Home; short press during RTH to cancel and hover. | Recovery and automated return control. |
| Back button | Returns to previous page and acts as a modifier for several shortcuts. | Navigation and shortcut commands. |
| Spray / spread button | Short press starts or stops spraying/spreading manually; long press about 2 seconds purges air from hose in the source workflow. | Manual application control and priming/purge workflow. |
| Flow adjustment dial | Adjusts spraying flow in real time during manual operation. | Application-rate control in manual work. |
| Flight-mode switch | The source video describes toggling it for emergency stop during an operation or while returning home. | Immediate interruption of certain automated actions; verify current model behavior before relying on it. |
| microSD card slot | Imports data to the remote controller. | Data transfer and field/task file workflows. |
| USB-A | Connects external devices such as chargers or charging stations for activation/status workflows. | Peripheral connection and device service tasks. |
| HDMI | Outputs the controller display to a TV or projector. | Training, demonstrations, fleet rooms, classroom viewing. |
| USB-C | Charges the controller and can connect to a computer for files, firmware tools, or log export. | Charging, diagnostics, firmware and data service. |
| FPV / map button | Switches between FPV view and map view. | Situational awareness and route management. |
| Camera adjustment dial | Adjusts camera tilt angle. | Forward/downward viewing as needed. |
| C1 / C2 | In AB mode, add points A and B; the source also describes mode-dependent manual lateral functions. | AB route setup and mode-specific control. |
| C3 | Customizable; example given is clearing the flight path. | Operator-defined shortcut. |
| External battery / dongle hatch key | Opens the battery and cellular dongle compartment. | Battery and network hardware access. |
| External battery fixing switch | Releases or secures the removable external battery. | Controller endurance and battery replacement. |
1. DJI Agras Remote Controller Power Button
The power button has several functions depending on whether the controller is off or already operating.
When the controller is off
- Short press: checks the built-in remote controller battery level.
- Short press followed by a long press: powers on the remote controller.
When the controller is on
- Short press: turns off the screen to reduce unnecessary power consumption while leaving the controller running.
- Short press followed by a long press: powers off the controller.
This distinction matters during agricultural operations because turning off only the display is not the same as shutting down the controller. An operator who wants to conserve screen power during a pause should verify that the controller remains active and connected rather than assuming a dark display means the unit is off.
2. Check Controller Battery Level Before Every Flight
The remote controller is part of the aircraft control chain. A well-charged aircraft battery does not compensate for an undercharged remote controller. Before launching an agricultural drone, confirm that the controller has enough power for the expected mission, transit, refill cycles, possible delays, and recovery time.
For fleet operations, a strong workflow is to treat the controller battery check as part of the same preflight sequence used for aircraft batteries, propellers, GNSS/RTK status, spray-system readiness, payload, and operating-area checks. If the controller supports an external battery, use it as part of a deliberate power-management plan rather than as a substitute for monitoring the controller’s actual state.
3. Understand the Link Indicator Before Takeoff
The source video describes the link indicator as:
- Green: the remote controller and aircraft are successfully linked.
- Red: the remote controller is not linked to the aircraft.
A red link indication is a stop-and-diagnose condition before takeoff. Do not treat a powered-on controller as proof that it is controlling the intended aircraft. In multi-aircraft fleets, this matters even more because controllers may be moved between aircraft during training, service, or replacement.
If the controller is not linked, use the linking procedure appropriate to the aircraft/controller combination. Ares Acres also covers controller-aircraft linking as part of the broader DJI Agras Agricultural Drone Basics & Operation Guide.
4. Screen-Edge Buttons: Physical Shortcuts for On-Screen Functions
The screen-edge buttons correspond to icons positioned along the controller display. Instead of tapping the touchscreen, the operator can press the physical button adjacent to the icon.
This is useful when gloves, moisture, bright sunlight, or rapid workflow transitions make physical controls easier to use. However, the function shown on the screen should always be treated as the current reference because software and operating modes can change what a button controls.
5. L1, L2, and L3 Custom Buttons
The source video gives the following default examples:
- L1: Add point.
- L2: Spotlight switch.
- L3: Tilt down / re-center gimbal.
These are useful defaults, but agricultural operators should not assume every controller in a fleet has identical assignments. If multiple pilots share equipment, consider standardizing custom-button mappings across all controllers and including those mappings in the crew’s training documentation.
6. Configure the 5D Custom Button
The 5D control can be pressed in the center or moved in four directions: up, down, left, and right. Each action can be assigned a shortcut in the controller settings.
The source training example assigns the upward direction to the spotlight switch. A practical way to use the 5D button is to place high-frequency but non-conflicting functions on it so the operator can reach them without leaving the main flight interface.
When configuring custom buttons, avoid building a layout that only one pilot understands. Fleet consistency reduces hesitation during handoffs and emergency response.
7. Return-to-Home Button: Start and Cancel RTH
The source video instructs the operator to press and hold the RTH button for approximately 2 seconds to activate Return-to-Home. During the return, a short press cancels the RTH command and the aircraft hovers in place.
RTH is not a substitute for situational awareness. Before intentionally initiating it, the operator should understand the current home point, aircraft altitude, obstacles, route environment, battery condition, and the RTH behavior configured for the aircraft.
If you cancel RTH, expect the aircraft to stop the automated return and hold position according to the behavior supported by the current aircraft/firmware. The pilot must then decide what command should follow.
8. Back Button
A short press of the back button returns to the previous page. The same button also works as a modifier for several controller shortcuts described later in this guide, including screen recording, screenshots, brightness adjustment, and volume adjustment.
9. Spray / Spread Button
The spray/spread button is one of the most application-specific controls on the agricultural remote controller.
- Short press: manually turns spraying or spreading on or off.
- Long press for about 2 seconds: the source video describes this as purging air from the hose.
Manual application controls should be used deliberately. Before activating liquid flow, confirm the aircraft is in the intended operating state, the spray system has been prepared, the correct material is loaded, the work area is appropriate, and the application is consistent with the product label and operating plan.
The long-press purge function is particularly relevant after filling, servicing, or introducing air into the plumbing. The goal is to establish a consistent liquid path before expecting repeatable application. If a system continues to show air, irregular flow, or uneven output, inspect the tank outlet, filters, lines, pumps, connections, and spray components rather than repeatedly purging without diagnosis.
For replacement spray-system components, see DJI Agras OEM parts or contact Ares Acres for part identification.
10. Flow Adjustment Dial
The flow adjustment dial changes spray flow in real time during manual operation. This gives the operator direct control over application output without navigating deep into the touchscreen interface.
Flow should not be treated as an isolated number. Actual field application depends on the operating mode, flight speed, swath, nozzle or atomizer configuration, material, target rate, and the aircraft’s control logic. When performing calibrated application work, verify that the selected flow behavior matches the mission setup rather than making uncontrolled mid-pass changes.
11. Flight-Mode Switch and Emergency Interruption
The source video describes toggling the flight-mode switch as an emergency-stop action during an operation or while the aircraft is returning to the home point.
Because emergency-stop behavior can be model- and firmware-dependent, verify this function on the exact DJI Agras aircraft and controller you are using before field operations. Operators should know not only how to start an automated route, but also how to interrupt it safely when the aircraft, terrain, people, vehicles, obstacles, spray pattern, or operating environment requires immediate intervention.
12. microSD Card Slot
The microSD card slot allows data to be imported to the controller. Depending on the workflow, removable storage can be useful for moving field information, task files, logs, or other supported data between systems.
Use cards that meet the requirements of the controller and format them in a supported file system. If a card is not recognized, first rule out card compatibility, formatting, file structure, corruption, and improper insertion before assuming the controller has a hardware fault.
13. USB-A Port
The USB-A interface can connect the remote controller to other supported devices. The source video gives chargers and charging stations as examples for activation or status-check workflows.
Because USB-A can be used for multiple peripherals, avoid connecting unknown accessories simply because the plug fits. Confirm that the device and cable are intended for the controller and that the operation is supported.
14. HDMI Output
The HDMI interface can send the controller screen to an external display such as a TV or projector.
This is valuable for:
- Operator training.
- Classroom instruction.
- Demonstrations for growers or customers.
- Displaying route planning or live operations to a second observer.
- Maintenance and troubleshooting sessions where multiple technicians need to see the interface.
15. USB-C Port
The USB-C port can charge the controller. The source video also describes connecting the controller to a computer for file export, supported assistant software, firmware updating, and log export.
Logs can be especially useful when troubleshooting intermittent behavior because they provide a record that can help distinguish between user-interface issues, connection problems, firmware problems, warnings, and aircraft-side faults.
16. FPV / Map Switch Button
A short press switches between the FPV view and map view. The source video notes that the same change can be made by tapping the lower-left area of the screen.
Both views matter in agricultural operations:
- FPV view provides visual awareness from the aircraft camera.
- Map view helps the operator understand route geometry, field boundaries, aircraft position, task progress, and spatial relationships.
Experienced operators move between these views intentionally rather than remaining in one interface throughout the entire mission.
17. Camera Adjustment Dial
The camera adjustment dial changes the camera tilt angle. This can help the operator look forward for situational awareness or change the view toward the ground depending on the task.
Do not confuse camera angle with aircraft attitude. Tilting the camera changes what the operator sees; it does not itself change the aircraft’s flight path.
18. C1 and C2 Buttons
The source video describes C1 and C2 as mode-dependent controls:
- In AB point operation mode, C1 is used to add point A and C2 is used to add point B.
- In the manual-operation description provided by the source video, C1 and C2 are used for left and right lateral functions.
Because button behavior can change with the selected mode, always confirm what the interface shows before pressing a control based only on memory from a different operating mode.
19. C3 Custom Button
C3 is customizable. The source video gives “clear flight path” as an example assignment. This is another reason fleet operators should document custom mappings: a button that clears a route on one controller may perform another function on a differently configured unit.
20. External Battery and Dongle Hatch
The controller includes a hatch for the external battery and cellular dongle hardware. The source video instructs the operator to press the hatch key fully and pull up the cover to open it.
Keep this area clean. Dust, chemical residue, moisture, loose hardware, damaged connectors, or improperly routed antenna leads can create preventable controller problems.
21. Removing and Installing the External Controller Battery
The external battery fixing switch releases the removable battery. The source workflow is:
- Short press the fixing switch to remove the external battery.
- When reinstalling, seat the battery fully.
- Push it upward slightly so it locks into position.
- Confirm that the battery is mechanically secure before carrying or operating the controller.
A partially seated battery can create intermittent power problems. Always check the physical lock rather than relying only on the battery appearing to be in place.
22. How to Install the Cellular Dongle
The source video provides the following installation sequence:
- Open the external battery/dongle compartment.
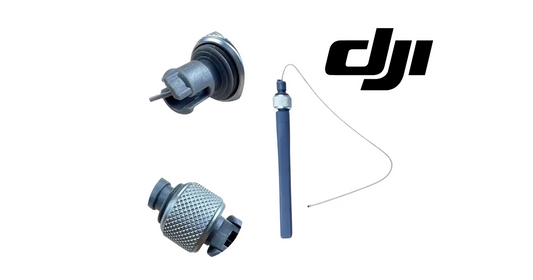
- Remove the two screws securing the dongle area.
- Insert the SIM card into the dongle.
- Connect the dongle antenna leads to the 4G port connections.
- Insert the dongle into the remote controller.
- Reinstall the hatch/cover.
- Tighten the screws.
After installation, verify that the controller recognizes the cellular connection before depending on it for task or field data. Cellular service depends on SIM activation, carrier coverage, data service, antenna connection, controller settings, and the environment.
For high-volume firmware downloads or large batches of field/task data, Wi-Fi may be preferable when available rather than using limited cellular data.
23. DJI Agras Remote Controller Shortcut Combinations
| Shortcut | Function |
|---|---|
| Back + Spray/Spread | Quick screen recording. |
| Back + FPV/Map | Quick screenshot. |
| Back + left flow adjustment dial | Adjust screen brightness. |
| Back + right camera/FPV angle dial | Adjust controller volume. |
The same settings can also be accessed through the controller’s drop-down interface. Physical shortcuts are useful because they reduce the number of screen taps required during an operation.
Why Screen Recording Matters for Agricultural Drone Operators
Screen recording is more than a convenience. It can create a useful operational record when diagnosing a warning, training a pilot, documenting an unexpected route behavior, reviewing spray settings, or showing technical support exactly what appeared on the controller.
When troubleshooting, begin recording before reproducing the issue when practical. Capture the status bar, warning message, task screen, aircraft state, and the sequence of actions that caused the problem. Pair that visual record with exported logs when deeper diagnostics are required.
Why Screenshots Matter
A screenshot can preserve a field boundary, task setting, warning, firmware version, RTK status, application setting, battery warning, or error message without requiring the operator to photograph the controller with a second device.
For support cases, a clear screenshot can dramatically reduce ambiguity. Include enough of the interface to show context rather than cropping only the error code.
Preflight Remote Controller Checklist
- Inspect the controller for obvious physical damage.
- Check built-in controller battery level.
- Confirm the external battery, if used, is secure and sufficiently charged.
- Power on the controller correctly.
- Confirm the controller boots normally.
- Verify the aircraft shown on the controller is the intended aircraft.
- Confirm the link indicator shows a successful connection.
- Check network status if the mission depends on online field/task data or corrections.
- Confirm the correct flight mode and application mode.
- Verify custom button assignments if they have been changed.
- Confirm the map/FPV display is functioning.
- Confirm camera control is responsive.
- Review RTH/home-point information before takeoff.
- Verify spray/spread controls are not being activated unintentionally.
- Confirm controller power is sufficient for the full mission plus reserve.
Common DJI Agras Remote Controller Mistakes
1. Assuming the controller is linked because both devices are powered on
Power and link status are separate. Use the link indicator and on-screen aircraft status to confirm connection.
2. Starting a mission with low controller battery
Agricultural jobs can include delays, refills, battery swaps, route edits, customer discussions, and troubleshooting. Controller endurance should cover more than the planned airborne time.
3. Forgetting that custom buttons can be remapped
L-buttons, the 5D button, and C3 may not perform the same action on every controller.
4. Confusing a short power-button press with controller shutdown
When the controller is operating, the source video describes a short press as turning off the display, not fully powering down the controller.
5. Using RTH without understanding the current home point
RTH is only useful if the pilot understands where the aircraft is being commanded to return and how the current aircraft handles the return.
6. Activating spray or spread at the wrong time
Manual application buttons can immediately affect product discharge. Build deliberate handling habits around them.
7. Adjusting flow without understanding the application-rate consequences
Changing flow can change field output. Use the dial as part of a controlled application strategy.
8. Relying on a cellular dongle without checking service
A SIM card can be installed correctly and still have no usable network due to carrier, activation, coverage, or signal issues.
9. Treating every USB cable or peripheral as interchangeable
Use supported devices and reliable cables. A physical connector match does not guarantee electrical or software compatibility.
10. Failing to capture evidence when an intermittent error occurs
Use screenshots, screen recording, and logs. Intermittent faults are much easier to troubleshoot with a record of the controller state.
Troubleshooting DJI Agras Remote Controller Problems
| Symptom | Likely area to check | Recommended first actions |
|---|---|---|
| Link indicator is red | Aircraft/controller link | Confirm aircraft is powered, verify correct aircraft/controller pairing, then use the appropriate linking workflow. |
| Controller will not power on | Battery / charging / power sequence | Check battery indication, charge the controller, inspect external battery seating, and repeat the correct power-on sequence. |
| Screen is dark but controller appears active | Display power state / brightness | Short press power button, check brightness shortcut, and confirm controller remains connected. |
| Custom button does the wrong thing | Button assignment | Open controller settings and verify the current assignment instead of assuming factory defaults. |
| RTH behavior is unexpected | Home point / RTH configuration / flight state | Confirm home point and current RTH settings; review warnings and flight status before continuing. |
| Spray/spread button does not produce expected output | Application mode / payload system / pump or spreader readiness | Verify mode, tank or hopper state, system status, flow settings, and any application-system warnings. |
| No cellular connection | SIM / dongle / antenna / carrier / coverage | Check SIM activation, dongle seating, antenna connections, network settings, and coverage. |
| microSD card not recognized | Card compatibility / formatting / insertion | Reinsert card, verify supported format/capacity, test a known-good card, and inspect slot condition. |
| Computer does not recognize controller over USB-C | Cable / USB mode / software / port | Try a known-good data cable, different computer port, required software, and controller USB settings. |
| No HDMI output | Cable / display input / controller output | Confirm external display input, test a known-good HDMI cable, and verify controller output behavior. |
| Unable to find a shortcut function | Firmware / controller generation / custom mapping | Check current controller settings and manual because menus and assignments can differ from the source video. |
Remote Controller Workflow for a Professional Spray Crew
A controller is easier to manage when it is treated as a standardized flight instrument rather than a personal tablet. A professional crew can reduce errors by using the same startup, configuration, and shutdown flow every time:
- Charge and inspect: controller, external battery, cables, dongle and ports.
- Power on: use the correct button sequence.
- Link check: verify green link indication and correct aircraft identity.
- Navigation check: confirm map, FPV, GNSS/RTK and task information.
- Control check: verify customized buttons and current flight/application mode.
- RTH check: confirm home-point logic and understand how to cancel return.
- Application check: confirm spray/spread system state and flow-control behavior.
- Record when needed: use screen recording or screenshots for training and faults.
- End-of-day data: export or preserve relevant logs and task records.
- Shutdown and recharge: power down correctly and prepare the controller for the next mission.
FAA Part 137 Context: Why Controller Familiarity Matters
For agricultural application work, the controller is where many mission-critical decisions are implemented in real time. Route execution, application start/stop, RTH, manual intervention, flow changes, field/task management, and warning response all pass through the operator interface.
Regulatory compliance does not come from knowing the buttons alone, but poor controller familiarity can undermine an otherwise compliant operation. A pilot should be able to execute the planned mission, respond to abnormal conditions, stop application when necessary, and maintain command of the aircraft without searching through menus under pressure.
Frequently Asked Questions
How do I turn on a DJI Agras remote controller?
According to the source video, short press the power button and then press and hold it to power on the controller.
How do I check the DJI Agras controller battery without turning it on?
Short press the power button while the controller is off to display the built-in battery level.
What does a green DJI Agras controller link light mean?
The source video describes green as a successful link between the remote controller and aircraft.
What does a red link light mean?
It indicates that the remote controller is not linked to the aircraft.
What happens if I short press the power button while the controller is on?
The source video describes this action as turning off the display to save power while the controller remains on.
How do I start Return-to-Home?
Press and hold the RTH button for approximately 2 seconds according to the source training.
How do I cancel Return-to-Home?
During RTH, the source video instructs the operator to short press the RTH button. The aircraft then stops the return and hovers, subject to the behavior of the specific aircraft and firmware.
What does the spray/spread button do?
A short press manually turns spraying or spreading on or off. The source video also describes a roughly 2-second long press as a hose air-purge function.
What does the DJI Agras flow dial do?
It adjusts spray flow in real time during manual operation.
How do I switch between map and FPV view?
Short press the FPV/map switch button or use the corresponding on-screen control described in the source video.
Can the DJI Agras controller connect to an external monitor?
Yes. The controller shown in the source video includes HDMI output for connection to a TV, projector, or compatible display.
What is the USB-C port used for?
The source video describes charging, computer connection, file export, firmware-update workflows with supported software, and log export.
What is the USB-A port used for?
It can connect supported external devices. The source video gives chargers and charging stations as examples for activation or status-related workflows.
What is the microSD slot used for?
The source video describes it as a method for importing data to the remote controller.
Can I customize buttons on the DJI Agras remote controller?
Yes. The source video describes customizable L-buttons, the five directions/actions of the 5D button, and C3.
What do C1 and C2 do?
In AB point operation mode, the source video describes C1 and C2 as adding points A and B. It also describes mode-dependent manual functions, so verify the current interface before use.
How do I record the controller screen?
Use the Back + Spray/Spread button shortcut described in the source video, or use the controller’s drop-down controls.
How do I take a screenshot?
Use Back + FPV/Map according to the source video.
How do I adjust controller brightness with buttons?
Use the Back button together with the left flow-adjustment dial as described in the source training.
How do I adjust controller volume with buttons?
Use the Back button together with the right camera/FPV-angle adjustment dial according to the source video.
Do I need cellular service for every DJI Agras flight?
The source video focuses on the dongle as an internet connection method. Whether a specific function requires network access depends on the task and software workflow. Wi-Fi can also be used for internet access where supported.
Should every controller in a fleet use the same custom-button assignments?
It is not technically required, but standardizing assignments can reduce confusion when multiple pilots use the same equipment.
Is this guide a replacement for the DJI manual?
No. Use it as an operator reference alongside the current DJI documentation for the exact aircraft, controller, firmware, and region.
Related Ares Acres DJI Agras Tutorials
- DJI Agras Agricultural Drone Basics & Operation Guide
- DJI Agras T100 & T50 Pre-Flight Safety Tutorial
- DJI Agras Remote Operation View Tutorial
- DJI Agras Battery Fleet Management, BMS, Firmware & Cycle Maintenance
- Browse the complete DJI Agriculture Tutorials library
Need DJI Agras Parts, Accessories, or Technical Support?
Agricultural drone downtime is often a systems problem: the aircraft, controller, batteries, networking, positioning, spraying equipment, and mission software all have to work together. Ares Acres builds its DJI Agras catalog and tutorial library around helping operators identify the correct system, understand the fault, and get the aircraft back into service.
Browse DJI Agras Parts, shop DJI Accessories, explore the full Ares Acres catalog, or contact Ares Acres if you need help identifying the correct component.
Final Operator Takeaway
The DJI Agras remote controller is more than a screen with two sticks. It is the operator’s interface to aircraft connection, application control, automated return, field data, camera awareness, network connectivity, diagnostics, recordings, and custom shortcuts. Learn the physical controls before you need them under pressure, standardize custom mappings across the fleet where possible, verify button behavior after firmware or configuration changes, and treat controller power and link status as mandatory preflight checks.
Source tutorial: DJI Agras remote controller training video supplied for this article. This guide expands that training for operator reference. Always follow the current DJI documentation, aircraft warnings, pesticide-label requirements, FAA requirements, and applicable state or local rules.