DJI T100 - T50 Pre-Flight Safety Tutorial: How to Prepare for a DJI Agras Flight
Share
DJI T100 - T50 Pre-Flight Safety Tutorial: How to Prepare for a DJI Agras Flight
🇺🇸 U.S.A. FIRST — DJI Agras Pre-Flight Safety, Parts & Operator Support
Before a DJI Agras aircraft leaves the ground, the field, aircraft, battery, remote controller, positioning system and operating area should all be checked in a deliberate sequence. Ares Acres is a U.S.-based agricultural robotics company supporting DJI Agras operators with aircraft, DJI Agras parts, technical tutorials and operator-focused resources. This tutorial expands the video below into a practical pre-flight workflow for DJI Agras T100 and T50 operators.
Quick navigation: DJI Agras T100 | DJI T100 Parts | DJI Agras Parts | Full Product Catalog | Contact Ares Acres
Important: This article is an operational companion to the video, not a replacement for the current model-specific DJI manual, current firmware guidance, FAA requirements, pesticide-label instructions, PPE requirements or applicable state and local rules. Where the video gives a specific number—such as 15 satellites, more than 6 m of operator separation, or a hover around 2.5 m—we identify it as the tutorial's demonstrated recommendation rather than presenting it as a universal regulatory minimum for every aircraft, site or operation.
What You Will Learn
- How to choose a controlled takeoff and landing area.
- How to identify trees, utility lines and other obstacles before flight.
- How to inspect arm locks, propellers, washers, landing gear and the airframe.
- How to check the aircraft battery, remote controller and visible electrical condition.
- How to verify GPS/RTK status without treating satellite count as the only go/no-go criterion.
- How to respond to warning messages before takeoff.
- How to perform a cautious first-flight or post-storage hover check.
- Which conditions should stop an operation before the aircraft leaves the ground.
DJI Agras Pre-Flight Checklist at a Glance
| Check | What to Verify | Do Not Continue If... |
|---|---|---|
| Takeoff / landing zone | Open, controlled, reasonably flat area with adequate clearance | People, vehicles, unstable ground or uncontrolled traffic are present |
| Field hazards | Trees, poles, wires, structures, terrain changes and other obstacles identified | A hazard cannot be safely separated from the planned operation |
| Arms / locks | Aircraft fully unfolded and locking mechanisms secure | An arm or clasp is not positively locked |
| Propellers | No cracks, deformation, abnormal looseness/tightness or severe washer wear | Damage, unusual play or abnormal fit is found |
| Landing gear / airframe | No abnormal side-to-side sway or loose structural hardware | The aircraft shifts or sways from looseness |
| Battery / electrical area | Battery properly charged and positively seated; no obvious abnormal corrosion or damage | Battery will not latch, terminals/components appear damaged, or abnormal corrosion is present |
| Remote controller | Sufficient charge, familiar stick mode, appropriate antenna orientation | Controller power, configuration or link condition is questionable |
| Positioning | GPS/RTK status suitable for intended operation | Positioning is unstable, degraded or inconsistent with the planned flight mode |
| Warnings | No unresolved aircraft, battery, arm-lock, positioning or system warning | A warning is not understood or its cause has not been corrected |
| Initial hover | Stable attitude, normal response and no unusual vibration when a status check is appropriate | The aircraft shakes, drifts unexpectedly or does not respond normally |
1. Select the Takeoff and Landing Area Before Preparing the Aircraft
The tutorial begins with the operating site rather than the aircraft. Select an open, controlled area with a reasonably flat surface and adequate clearance for the aircraft. Avoid takeoff and landing locations where people or road traffic can enter the operating area. A road, shoulder or access lane should not be treated as an acceptable launch point simply because it appears flat.
The operator should also think about the landing phase before takeoff. A safe launch location that becomes blocked by vehicles, workers, equipment or livestock later in the mission can create an avoidable recovery problem.
2. Identify Obstacles Before Flight Planning
Inspect the work area for trees, poles, structures, terrain changes, irrigation equipment and especially utility lines. Obstacles should be represented appropriately during planning when the aircraft and software support that workflow, but marking a hazard on the remote controller does not make that hazard safe. Maintain the separation and operating procedures required by the current DJI guidance and applicable rules.
If you are building planned routes, see the DJI Agras T100 Route Mode field-planning tutorial.
3. Unfold the Aircraft and Positively Secure the Arm Locks
Unfold the aircraft completely and verify that each applicable arm-locking mechanism is properly secured. Do not rely on appearance alone. Before takeoff, a warning related to an arm clasp, lock or folding mechanism should be investigated rather than dismissed.
Rule: if a lock does not feel or appear correctly engaged, stop the pre-flight process and correct the condition before powering into an operational flight.
4. Inspect the Propellers and Associated Hardware
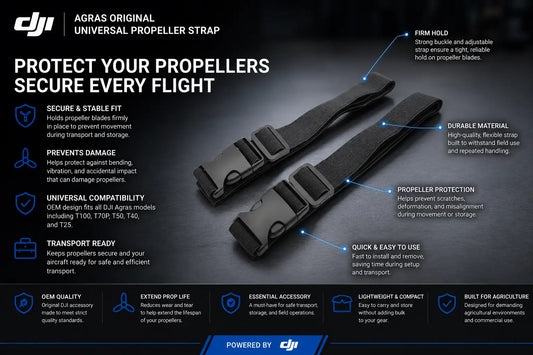
Extend the propeller blades and inspect them for cracks, deformation, impact marks, abnormal play and other visible damage. The video demonstrates moving the propellers horizontally and vertically to evaluate whether the assembly feels abnormally loose or tight. It also recommends prompt attention to severely worn washers.
The video demonstrates folding paired blades together as a quick visual screening check for abnormal alignment. Treat this as one inspection cue—not a substitute for the complete propeller inspection and the current model-specific DJI maintenance criteria.
Do not fly with a propeller that is cracked, deformed, damaged or otherwise outside the applicable service condition. Agricultural aircraft carry significant rotating mass; a questionable propeller should be resolved on the ground.
5. Check the Landing Gear and Airframe for Looseness
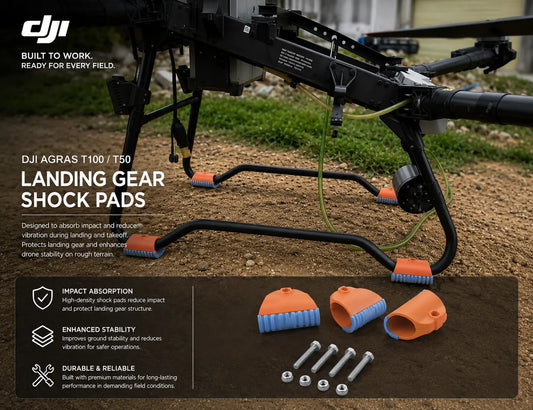
The tutorial next demonstrates gently checking the aircraft body for abnormal horizontal sway. If movement suggests loose landing-gear or structural hardware, do not ignore it and continue flying. The affected hardware should be inspected and corrected in accordance with the applicable DJI maintenance or service procedure, then rechecked before operation.
A stable airframe on the ground does not guarantee the aircraft is flight-ready, but visible structural looseness is an immediate reason to stop the pre-flight sequence.
6. Inspect and Install the Aircraft Battery
Confirm that the battery intended for the flight has adequate charge and is in serviceable condition. Inspect accessible battery interfaces and the aircraft's visible power/contact area for abnormal discoloration, contamination, corrosion, oxidation or physical damage. If significant corrosion, heat damage or another abnormal electrical condition is present, remove the aircraft or affected component from service and have it inspected or replaced according to current DJI service guidance.
Install the battery using the model-specific procedure and confirm positive engagement. The video uses the audible/physical latch engagement as a confirmation point. Never assume a battery is secure merely because it is resting in position.
7. Prepare the Remote Controller
Verify that the remote controller has adequate charge for the intended operation. The video recommends operating with more than one battery indicator LED illuminated, but operators should plan controller endurance conservatively for the entire task rather than using a single LED count as a universal minimum.
Confirm the control-stick mode is the one you normally use before takeoff. An unexpected stick-mode configuration can create an immediate control hazard.
Orient the antennas in accordance with the current remote-controller instructions. For antenna designs where the antenna tip represents a weak transmission direction, avoid pointing the tip directly toward the aircraft. Exact orientation can vary by controller design, so use the guidance for the remote controller installed in your system.
If the controller or aircraft still needs initial setup, see the DJI Agras T100 / T50 Remote Control Activation Tutorial.
8. Power On and Verify Positioning Status
Power on the system using the normal DJI power-button sequence for the applicable equipment. Once the aircraft and remote controller are connected, check positioning status before takeoff.
The video demonstrates waiting until the aircraft displays at least 15 satellites. Treat 15 as this tutorial's operational recommendation, not as a universal statement that every flight is safe at 15 satellites or unsafe below exactly 15. Satellite geometry, signal quality, interference, RTK status, firmware and the intended flight mode all matter.
If RTK is enabled, confirm that the remote controller displays the expected RTK status and that the positioning solution is appropriate for the operation. For a deeper setup workflow, see the DJI Agras T100 D-RTK 3 Tutorial.
9. Establish a Safe Operator Position Before Takeoff
The video recommends that the pilot stand behind the aircraft and maintain more than 6 m of separation before manual takeoff, while avoiding the sides and front of the aircraft. This is a useful visualization of the need for a controlled safety perimeter, but the exact operating distance should follow the current DJI documentation, the aircraft configuration and applicable operational requirements.
More important than memorizing one number is establishing a launch area in which no person can casually walk into the propeller zone or the aircraft's immediate flight path.
10. Never Blindly Override a Warning Pop-Up
If the remote controller displays a warning before takeoff, identify the cause. For example, if a warning appears to relate to an arm lock or clasp, physically recheck the aircraft rather than simply pressing confirm and forcing the operation forward.
A warning that you do not understand is itself a reason to stop. Record the message, inspect the relevant system and resolve the cause before returning the aircraft to service.
11. Use Smooth Inputs During Manual Takeoff and Landing
Agricultural aircraft are large, high-inertia platforms. Manual takeoff and landing inputs should be deliberate and smooth. Avoid abrupt stick movements, particularly when the aircraft is close to the ground, personnel, vehicles or obstacles.
For operators learning direct-control workflows, continue with the DJI Agras T100 Manual and Manual Plus Operations Tutorial.
12. Perform a Flight-Status Check After First Use or Long Storage
For a first flight or after a long period of inactivity, the video demonstrates a brief low-altitude flight-status check before beginning the agricultural task. It shows a hover around 2.5 m to become reacquainted with stick response and observe aircraft attitude.
The specific hover height in the video should not be treated as a universal requirement. Only conduct such a check when the site, current DJI guidance and operating conditions allow it. The purpose is to identify abnormal vibration, unstable attitude, unexpected drift or poor control response before committing the aircraft to the task area.
If the aircraft shakes abnormally or control response is not normal, land promptly in a safe manner and troubleshoot the condition. Do not continue simply because the aircraft remains airborne.
13. Load the Approved Application Product Only After the Aircraft Is Ready
The video's sequence places the aircraft and flight-status checks before loading pesticide. That sequencing can reduce the chance of discovering an aircraft problem only after the system has already been loaded for application.
When handling or applying pesticides or other agricultural products, use only products and application methods permitted for the operation, follow the product label, required PPE, drift restrictions, environmental precautions and all applicable federal, state and local requirements. This tutorial does not replace pesticide-label instructions or applicator requirements.
Stop the Operation If You Find Any of These Conditions
- An arm or locking mechanism is not securely engaged.
- A propeller is cracked, deformed, damaged or has abnormal play.
- A washer or related propeller component appears severely worn.
- The landing gear or airframe exhibits abnormal looseness or sway.
- The battery will not positively latch or shows signs of damage.
- There is significant visible corrosion, oxidation, heat damage or electrical damage.
- The controller configuration is unfamiliar or incorrect.
- Positioning or RTK status is unstable or inappropriate for the intended operation.
- An aircraft warning remains unresolved.
- The aircraft exhibits abnormal vibration, attitude or control response.
- People, vehicles or other hazards enter the takeoff, landing or operating area.
Common Pre-Flight Mistakes
- Choosing convenience over control: a flat road is not a good launch site if traffic or bystanders can enter the area.
- Treating mapped obstacles as eliminated hazards: marking a power line on the controller does not remove the need for safe separation.
- Ignoring small mechanical looseness: movement in landing gear, arm locks or propeller assemblies can become much more consequential in flight.
- Clicking through warnings: a warning should be understood and corrected, not treated as a nuisance.
- Using satellite count as the only safety test: a displayed number does not replace evaluation of positioning quality, RTK state, interference and the complete pre-flight condition.
- Loading product before confirming aircraft health: when practical and consistent with the approved workflow, complete the aircraft/status check before committing the loaded system to an application.
Frequently Asked Questions
How many satellites should a DJI Agras T100 or T50 have before takeoff?
The video demonstrates a target of at least 15 satellites. A satellite count alone does not establish that the aircraft is safe to launch. Follow the current model-specific DJI guidance and verify the complete positioning/RTK condition for the intended flight mode.
Can I take off from a road if it is flat?
A controlled open area is preferable. Do not use a location where road traffic, pedestrians or other people can enter the takeoff or landing zone.
What should I do if the aircraft shakes during the initial hover?
Land promptly and safely, then troubleshoot the aircraft before continuing. Abnormal vibration or poor control response should not be ignored.
What if I see corrosion or oxidation near the aircraft power system?
Do not treat substantial corrosion or electrical damage as cosmetic. Remove the affected equipment from service and have it inspected or replaced in accordance with current DJI service guidance.
Why should I avoid pointing the remote-controller antenna directly at the aircraft?
On many antenna designs the tip can correspond to a weaker transmission direction. Use the antenna-orientation instructions for the exact remote controller in service rather than assuming all controller antennas behave identically.
Should pesticide be loaded before or after the flight-status check?
The video recommends completing the basic aircraft and flight-status checks before adding pesticide. Always pair that sequence with the product label, PPE requirements, applicable regulations and your approved operating procedures.
Continue the Ares Agras Operator Academy
Pre-flight inspection is only one part of a repeatable DJI Agras operating system. Continue with these related resources:
- DJI Agras T100 / T50 Remote Control Activation Tutorial
- DJI Agras T100 D-RTK 3 Tutorial
- DJI Agras T100 Route Mode: Field Planning & Task Execution
- DJI Agras T100 Manual and Manual Plus Operations Tutorial
- The DJI T100 Spreading System Tutorial
What Is Ares Acres?
Ares Acres supports agricultural-drone operators with DJI Agras aircraft, OEM replacement components, technical education and operator-focused troubleshooting resources. Our goal is to make it easier for operators to identify the correct equipment, understand how systems work and keep critical agricultural robotics available during the season.
Build a Safer, More Serviceable DJI Agras Operation
Use the DJI T100 Parts collection for T100 replacement components, browse DJI Agras OEM Parts across supported models, or search the Ares Acres Product Catalog. If you need help identifying a component or deciding what to inspect next, contact Ares Acres.
Final takeaway: a successful pre-flight begins before the battery is powered on. Control the launch area, identify hazards, verify the aircraft mechanically, confirm battery and controller readiness, evaluate positioning, resolve every warning and observe the aircraft's behavior before beginning the agricultural task.
Safety and regulatory disclaimer: This tutorial is educational and summarizes the supplied video workflow. Aircraft configuration, firmware, manuals and regulatory requirements can change. Always follow the current DJI documentation for the exact aircraft and remote controller, applicable aviation requirements, pesticide labels, PPE instructions and federal/state/local rules. Do not operate an aircraft with unresolved warnings, damaged propellers, structural looseness, abnormal electrical condition, unstable control response or an uncontrolled operating area.