How to Use the DJI Agras Remote: DJI Agras T100 - T50 Remote Operation View Tutorial
Share
🇺🇸 U.S.A. FIRST — DJI Agras Remote Controller Operation View & Operator Support
Ares Acres is a U.S.-based agricultural robotics company supporting DJI Agras operators with aircraft, OEM parts, accessories, technical education, and operator-focused troubleshooting resources. If you are building or maintaining a DJI Agras fleet, start with the Ares Acres homepage, browse the DJI Agras parts catalog, or go directly to the DJI Agras T100 parts collection and DJI Agras T50 parts collection.
This tutorial is the next step after the DJI Agras Remote Control Activation Tutorial. The activation guide explains the remote controller home screen, account and team management, flight-record synchronization, document management, device management, firmware and log uploads. This guide moves into the screen operators use during actual mission preparation and flight: Operation View.
The Operation View is where the remote controller brings together flight mode selection, aircraft health, control-link status, positioning, RTK information, aircraft and controller battery levels, payload information, maps, prescription data, task controls, obstacle-sensing information, flight telemetry and FPV video. Understanding this screen before an aircraft leaves the ground reduces confusion during time-sensitive field operations.
Video: DJI Agras T100 - T50 Remote Operation View Tutorial
The video walks through the major Operation View controls on the DJI Agras remote. The guide below expands that walkthrough into a practical reference operators can use before and during field work with the DJI Agras T100 or DJI Agras T50.
DJI Agras Operation View Quick Reference
| Operation View Item | What It Shows or Controls | Operator Use |
|---|---|---|
| Operation Mode | Route, Manual, Fruit Tree, Route Mapping, Fruit Tree Mapping | Select the workflow appropriate to the task. |
| Aircraft Status Bar | Green, yellow or red system state | Open Device Health and investigate warnings before flight. |
| Connection Strength | Aircraft-to-controller link quality | Confirm a strong and stable control link. |
| Positioning / RTK | Satellite quantity and RTK state when connected | Assess positioning quality before task execution. |
| Aircraft Battery | Remaining battery level and Intelligent Battery Settings | Maintain safe energy margin throughout the mission. |
| Payload Indicator | Available payload capacity and recommended payload | Compare the displayed values to the planned task configuration. |
| RC Battery Status | Internal and external remote-controller battery levels | Prevent controller power from becoming the mission bottleneck. |
| Prescription Map | Local or cloud prescription-map import | Load the correct variable-rate task data. |
| Measure Tool | Boundary and start/RTH route lengths | Review task geometry and transit distances. |
| Layer Switch | Map type, HD map overlay, rotation and visual aids | Configure the map for situational awareness and planning. |
| Multitask | Multiple fields within a single task | Build efficient multi-field workflows when appropriate. |
| Radar Indicator | Obstacle location/distance and avoidance settings | Monitor obstacle information and configured assistance features. |
| Dashboard | Live flight and task parameters | Continuously monitor mission state. |
| FPV / Map View | Camera view or map view | Switch perspectives as the operation requires. |
1. Entering Operation View
From the remote-controller interface, click Begin to enter Operation View. Before launching a mission, take several seconds to scan the full screen rather than immediately focusing on the map. A professional preflight scan should establish four things first: aircraft health, connection quality, positioning quality and available power.
If this is the first time you are configuring the remote, complete the remote activation and setup tutorial first so that the correct account, team, field data and synchronization settings are already established.
2. Selecting the Operation Mode
The Operation View includes a mode selector. In the tutorial, the available modes shown are:
- Route — for planned field tasks and automated route execution.
- Manual — for direct operator-controlled operation where appropriate.
- Fruit Tree — for supported orchard or fruit-tree workflows.
- Route Mapping — for collecting or generating field-mapping data used in route planning.
- Fruit Tree Mapping — for mapping workflows associated with supported fruit-tree operations.
Do not select a mode simply because it was used on the previous job. Confirm the current field, crop, application objective and planned workflow. For a deeper field-planning sequence, use the DJI Agras T100 Route Mode Field Planning & Task Execution Tutorial. Operators working with a simple A-B workflow can also review the DJI Agras T100 A-B Operation Mode Tutorial.
3. Aircraft Status Bar: Green, Yellow and Red
The aircraft status bar is one of the first items to inspect. In the tutorial:
- Green indicates the system is reporting normal operation.
- Yellow indicates a common warning or condition requiring attention.
- Red indicates a critical warning or serious condition that should be investigated before continuing.
Click the status bar to enter Device Health. Device Health lets the operator inspect the status of individual systems. Clicking a module opens more detailed information about that component or subsystem.
A common mistake is treating a colored status bar as a simple go/no-go light. The better workflow is: read the warning, identify the affected module, understand the consequence, correct the condition if required, and then reassess the entire aircraft state. If a warning cannot be understood or resolved, document it before troubleshooting and contact Ares Acres support or the appropriate DJI Agriculture service channel.
4. Aircraft Connection Strength
The aircraft connection-strength icon indicates the strength of the communication signal received by the aircraft. The tutorial recommends confirming a strong signal before operating.
For agricultural operations, link quality is not something to check once and forget. Buildings, terrain, vegetation, vehicle placement, antenna orientation and the aircraft's changing position can affect the operating environment. Monitor the icon throughout the mission and maintain appropriate visual and operational awareness.
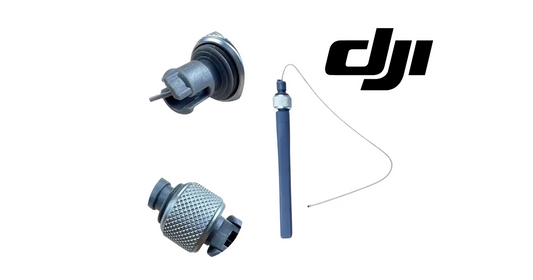
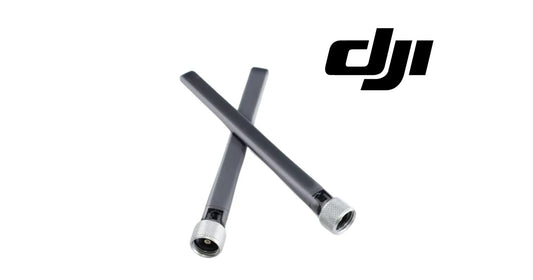
If an operator repeatedly experiences weak or inconsistent remote-controller signal, inspect the remote hardware and accessories rather than immediately assuming the aircraft itself is defective. Ares Acres carries the DJI Agras T50 OEM Remote Controller External Antenna Pair, and T100 operators using supported relay architecture can review the DJI Agras T100 OEM O4 Relay Signal Repeater System.
5. Positioning Signal, Satellite Quantity and RTK
The aircraft positioning icon displays the number of satellites currently serving the positioning solution. The video tutorial recommends operating when at least 15 satellites are being received.
If an RTK source is connected, the display shows RTK together with the satellite quantity. Click the positioning icon to review the positioning status in more detail.
For operators building a precision-positioning workflow, Ares Acres offers the DJI Agras T100 D-RTK 3 High-Precision GNSS Mobile Station. The complete setup sequence is covered in the DJI Agras T100 D-RTK 3 Setup, Linking, RTK & Coordinate Tutorial.
6. Aircraft Battery and Intelligent Battery Settings
The aircraft battery icon shows the current battery level. The tutorial emphasizes watching this value during flight so that the aircraft does not reach a condition where insufficient power compromises the ability to safely complete the task or return.
Clicking the battery icon opens Intelligent Battery Settings. Before a commercial operation, the operator should understand the applicable battery warnings and return/landing behavior for the aircraft and current firmware rather than relying on a generic percentage learned from another model or fleet.
Battery management is only one part of the field power system. For T100 and T50 operators who want the full power workflow, see the DJI T100 Power Supply Tutorial: T100 - T50 Battery and Generator.
7. Current / Recommended Payload Indicator
The payload indicator shown in the tutorial contains two values. The first number represents available payload capacity, while the second number represents the recommended payload shown by the system.
This information should be interpreted as part of the current aircraft and task configuration. An operator should verify the actual payload, application material, aircraft configuration, task parameters and any relevant operating limitations before takeoff. Do not use the indicator as permission to exceed an aircraft or application limitation.
8. Remote Controller Internal and External Battery Status
The RC status area includes separate battery indicators:
- The upper icon represents the remote controller's internal battery.
- The lower icon represents the external battery when one is connected.
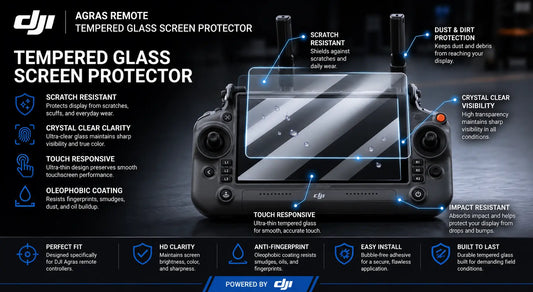
Long field days can make controller power just as operationally important as aircraft batteries. Include RC power in the same preflight routine used for aircraft power, generator fuel, charging equipment and spare batteries. Protecting the remote display is also useful in dusty, wet and high-touch agricultural environments; the store carries a DJI Agras T100 Remote Controller Tempered Glass Screen Protector.
9. Adding a Prescription Map
Click the Add Prescription Map icon to choose a prescription map from the local remote controller or import one from the cloud. Prescription maps are used to support variable-rate workflows in which application instructions vary spatially across the field.
Before loading a prescription map into a live task, verify that it belongs to the intended field, uses the correct source data and corresponds to the current application objective. A technically valid file can still be operationally wrong if it is associated with the wrong field, crop, material, season or prescription.
10. Measure Tool: Field Boundary, Start Route and RTH Route
Enabling the Measure Tool lets the operator review field-boundary measurements and the lengths of the start and return-to-home flight routes displayed on the map.
This is valuable because the productive application route is not the only distance that consumes time and battery. Transit from the launch area to the task and from the task back toward the home point also matters. Reviewing these routes before takeoff can reveal inefficient launch positioning or unexpectedly long transit segments.
11. Clean Flight Route
The Clean Flight Route icon clears a previously displayed flight path. Use it when an old route is no longer relevant and is creating visual clutter or confusion.
Be deliberate before clearing route information. Make sure the route you are removing is actually obsolete and that any required task data has been saved or synchronized according to the current workflow.
12. Center Aircraft / RC and Follow Aircraft
The center-aircraft/RC control can reposition the drone or home point to the center of the map view. This is particularly useful after the operator has panned or zoomed far away from the active aircraft position.
Follow Aircraft keeps the aircraft centered automatically as it moves. Disable Follow Aircraft when you want to drag the map freely to inspect another area of the field, an upcoming route segment or another point of interest.
Operators should become comfortable switching between these behaviors before a live mission. Trying to learn map navigation while simultaneously supervising an aircraft increases workload unnecessarily.
13. Layer Switch: Standard Map, Satellite Map and HD Map Overlay
The Layer Switch settings control how the operating map is displayed. The tutorial shows two primary map types:
- Standard
- Satellite
The tutorial recommends satellite view for many field-planning situations because real-world field features can be easier to visually correlate with aerial imagery. It should not be treated as an absolute requirement: imagery can be outdated, misaligned, obscured or unavailable, so operators must still validate actual field conditions.
If Overlay HD Map is set to the personal account map, an HD map generated through a prior mapping workflow can be loaded and displayed. This creates a useful bridge between mapping and later planning or execution.
14. Rotate Map and Visual Aids
With Rotate Map enabled, the map changes orientation as the remote controller is rotated. Some operators prefer this dynamic orientation because the screen aligns with their physical perspective; others may prefer a fixed map orientation for consistency.
The Visual Aids menu includes options such as:
- Horizontal reference
- Orientation reference
- Grid overlay
You can enable one or multiple aids depending on the task and operator preference. The goal is not to display every possible overlay. The goal is to create the clearest screen for the current operation without hiding more important information.
15. Multitask: Covering Multiple Fields in One Task
Enabling Multitask allows multiple fields to be selected and covered in one task workflow. This can reduce repetitive setup for operations involving adjacent or logically grouped fields.
Before combining fields, verify that each field belongs to the intended job and that the operational assumptions actually match. Differences in material, rate, obstacles, boundaries, crop, elevation, field ownership or prescription data can make a single combined task inappropriate even when the fields are geographically close.
16. Main Operation Buttons and Physical Side Buttons
The main Operation View controls can be selected directly on the touchscreen. The remote controller also provides physical side buttons for supported functions, giving operators another way to access key controls without relying exclusively on the display.
Learn the physical controls before flight. A button is most useful when the operator already knows what it does and can use it deliberately without diverting attention from the aircraft and surrounding environment.
17. Dashboard: Real-Time Flight and Task Telemetry
The dashboard displays flight and task parameters that update in real time. During a mission, avoid tunnel vision on a single metric. Experienced operation means scanning the aircraft, environment and controller information in a repeatable rhythm.
A practical scan pattern is:
- Aircraft and surrounding environment.
- Connection and positioning.
- Battery / power state.
- Task progress and application status.
- Obstacle information.
- Route and next aircraft movement.
This prevents the display from becoming a distraction rather than a safety and productivity tool.
18. Radar Indicator and Obstacle Information
The radar indicator shows the displayed location and distance of detected obstacles. Clicking the indicator opens a settings panel where the tutorial shows controls for:
- Multi-directional obstacle avoidance
- Attitude stabilization
- Obstacle bypassing
In the interface shown in the tutorial, an icon appears red when the corresponding function is disabled. The tutorial recommends enabling the available assistance functions during a task.
19. Flight-Speed Vector
When the aircraft is in flight, the tutorial identifies a red line that represents the value and direction of flight speed. This gives the operator an immediate visual cue for aircraft movement relative to the map or display.
Use the vector as supplementary information. If the displayed direction conflicts with what you expected the aircraft to do, investigate the route, current mode and aircraft state rather than assuming the planned route is still correct.
20. FPV Live View vs. Map View
The remote includes an FPV live view. Operators can switch between the map and FPV view by clicking the view or using the corresponding button on the right side of the remote controller.
Each perspective answers a different question:
- Map View: Where is the aircraft relative to the field, route, home point and task geometry?
- FPV View: What is the onboard camera showing around or ahead of the aircraft?
Neither view replaces direct situational awareness. Use both as supporting information within the applicable operating rules and visual-observation requirements.
Ares Acres Recommended Operation View Preflight Workflow
- Confirm the correct aircraft and remote are connected.
- Select the intended operation mode. Route, Manual, Fruit Tree or mapping workflow should match the actual job.
- Read the Aircraft Status Bar. Investigate yellow or red conditions through Device Health.
- Confirm control-link strength. Do not begin a mission with an unexplained weak link.
- Review positioning. Check satellite information and RTK state when used; the video recommends at least 15 serving satellites while recognizing that satellite count alone is not a complete positioning assessment.
- Check aircraft battery and RC internal/external battery.
- Review payload information. Confirm the aircraft/task configuration matches the actual load.
- Load the correct field or prescription map.
- Use Measure Tool. Look at boundaries and start/RTH transit distances.
- Choose map layers. Confirm satellite or HD imagery is useful and current enough for the planning purpose.
- Review Multitask selection. Make sure every selected field belongs in the mission.
- Check obstacle-assistance settings and radar indicator.
- Confirm the route and home point visually.
- Know how to switch between map and FPV views.
- Only then proceed with the applicable mission-start procedure.
Common DJI Agras Remote Operation View Mistakes
| Mistake | Why It Matters | Better Practice |
|---|---|---|
| Seeing green and immediately taking off | A green status does not replace checking route, battery, link, positioning and field conditions. | Use a full repeatable preflight scan. |
| Treating 15 satellites as a guarantee | Satellite count alone does not describe the entire positioning solution. | Review overall positioning/RTK state and warnings. |
| Ignoring RC battery | Aircraft power can be adequate while the controller becomes the limiting component. | Check internal and external RC power before the task. |
| Using the wrong prescription map | Correct file format does not mean correct field or agronomic prescription. | Verify field, job, source data, rate intent and material. |
| Assuming satellite imagery is current | Imagery may not show new wires, equipment, trees, structures or boundary changes. | Validate the physical field before flight. |
| Assuming obstacle avoidance makes collision impossible | Sensing systems have operating limitations. | Maintain clearance and active pilot awareness. |
| Combining every nearby field with Multitask | Different fields may require different rates, materials or operating assumptions. | Group fields only when the task logic actually matches. |
| Watching only FPV or only the map | Each view omits information available in the other and neither replaces external awareness. | Switch deliberately and maintain a broader scan. |
Troubleshooting the Operation View
Aircraft Status Bar Is Yellow or Red
Open Device Health, identify the affected module, read the detailed status and correct or diagnose the condition before continuing. Do not clear or ignore a warning solely to start the job faster.
Aircraft Connection Strength Is Weak
Reassess controller/aircraft placement, environment, antenna condition and supported communication hardware. If weak signal persists unexpectedly, inspect the remote hardware and relevant antennas before blaming software.
RTK Is Not Displayed
Confirm that the intended RTK source is actually connected and configured for the current operation. For T100 D-RTK 3 workflows, use the D-RTK 3 setup tutorial.
Prescription Map Is Missing
Check whether the file exists locally or in the expected cloud account/team context and verify that the correct data source is being used.
The Map Keeps Rotating
Review the Rotate Map setting under Layer Switch. Disable it if you want a fixed orientation.
The Aircraft Will Not Stay Centered on the Map
Enable Follow Aircraft or use the center-aircraft/RC control to recenter the relevant position.
An Obstacle-Function Icon Is Red
In the interface shown in the tutorial, red indicates that the applicable assistance function is disabled. Review the radar/settings panel and confirm the intended configuration before the mission.
Frequently Asked Questions
What is Operation View on a DJI Agras remote?
Operation View is the primary flight/task interface that combines operation mode, aircraft health, communications, positioning, battery status, maps, mission controls, radar information, telemetry and FPV access.
Which DJI Agras operation modes are shown in the tutorial?
Route, Manual, Fruit Tree, Route Mapping and Fruit Tree Mapping.
What does a green aircraft status bar mean?
In the tutorial, green indicates that the aircraft systems are reporting normal operation. Yellow signals a warning and red a critical warning. Operators should still complete the rest of the preflight checks.
How do I see detailed DJI Agras system warnings?
Click the aircraft status bar to open Device Health, then select the relevant system/module to view its detailed status.
How many satellites should I have before flying a DJI Agras drone?
The tutorial recommends receiving at least 15 satellites before operation. Treat that as the recommendation in this training material, not a standalone guarantee. Review positioning quality, RTK state when used and all aircraft warnings.
Where does RTK appear on the remote?
When an RTK signal source is connected, the positioning area displays RTK along with satellite quantity. Click the positioning icon for more positioning detail.
How do I open DJI Agras Intelligent Battery Settings?
Click the aircraft battery icon from Operation View.
What do the two payload values mean?
As explained in the tutorial, the first number represents available payload capacity and the second number represents the recommended payload displayed by the system.
Does the DJI Agras remote have two battery indicators?
The RC status shown in the tutorial has an upper icon for internal battery level and a lower icon for external battery level.
Can I import a prescription map from the cloud?
Yes. The Add Prescription Map control shown in the tutorial can select a local prescription map or import one from the cloud.
What does the Measure Tool show?
It can display field-boundary measurements and the lengths of the start and RTH flight routes on the map.
How do I erase an old DJI Agras flight path from the screen?
Use the Clean Flight Route icon for the previous route shown on the display, after confirming that the route is no longer needed.
How do I keep the drone centered on the map?
Enable Follow Aircraft. If you want to move freely around the map, disable Follow Aircraft and drag the map manually.
Should I use standard or satellite map view?
The tutorial recommends satellite view for field-planning visibility in many situations, but operators should verify real-world conditions because map imagery can be stale or imperfect.
What is Overlay HD Map?
When configured to the personal account map, it loads an HD map generated from a prior mapping workflow so it can be displayed during planning or operation.
What visual aids can be enabled?
The tutorial shows horizontal, orientation and grid visual aids. One or multiple aids can be enabled.
What does Multitask do?
Multitask lets the operator select multiple fields to be covered within one task workflow.
What does the radar indicator show?
It displays obstacle location and distance information and provides access to settings for supported obstacle-related assistance functions.
Should obstacle avoidance always be enabled?
The tutorial recommends enabling the available multi-directional obstacle avoidance, attitude stabilization and obstacle bypassing functions during a task. Operators still need to follow current DJI instructions and maintain situational awareness because assistance systems cannot guarantee collision avoidance.
What does the red line show when the aircraft is flying?
The tutorial identifies it as a visual representation of flight-speed value and direction.
How do I switch between the map and FPV camera?
Click the view on screen or use the corresponding button on the right side of the remote controller, as shown in the tutorial.
Where can I buy DJI Agras T100 and T50 parts?
Browse DJI Agras T100 parts, DJI Agras T50 parts, the broader DJI Agras parts collection, or the complete Ares Acres product catalog.
Continue the DJI Agras Operator Training Sequence
Once the Operation View is familiar, the next step is using those controls inside actual flight workflows. Recommended companion guides include:
- DJI Agras Remote Control Activation Tutorial
- DJI Agras T100 Route Mode: Field Planning & Task Execution
- DJI Agras T100 D-RTK 3 Tutorial
- DJI Agras T100 A-B Operation Mode Tutorial
- DJI T100 Spreading System Programming & Calibration Tutorial
- DJI T100 - T50 Power Supply Tutorial
What Is Ares Acres?
Ares Acres supports agricultural drone operators with DJI Agras aircraft, replacement parts, accessories and a growing technical education library designed around real operator workflows. Our objective is not simply to list components. We connect the aircraft, remote controller, field-planning workflow and replacement-parts ecosystem so operators can diagnose problems and keep equipment productive.
Operators can shop the DJI Agras T100, the DJI Agras T50, DJI Agras accessories, model-specific parts and the full Ares Acres catalog.
Build a More Reliable DJI Agras Operation
Know the Operation View before the aircraft is airborne. Standardize how your team checks aircraft health, connection, positioning, batteries, payload, maps, obstacle settings and telemetry so every operator begins from the same baseline.
Shop: T100 Parts | T50 Parts | DJI Agras Parts | Accessories | Full Catalog
Need technical help? Contact Ares Acres.
Operational & Safety Disclaimer
This article is an educational companion to the referenced DJI Agras remote-controller tutorial and is not a replacement for the current DJI user manual, in-app warnings, firmware-specific instructions, aircraft limitations, pesticide/product labeling, site assessment or applicable aviation and agricultural regulations. Interface labels and behavior can change with aircraft model, region, firmware and software version. Verify the current configuration on the actual aircraft and remote controller before use. Obstacle sensing and automated flight functions are assistance systems and do not eliminate pilot responsibility or guarantee collision avoidance.