DJI Agras T100 Tutorial: How to Clean and Maintain the DJI Charging Fan (FAA Part 107, FAA Part 137)
Share
🇺🇸 U.S.A. FIRST — C12000 Fan Dustproof Cover Cleaning, Inspection, Reassembly & Return-to-Service
The DJI C12000 Intelligent Power Supply moves a tremendous amount of electrical power and depends on unobstructed airflow to control heat. In agricultural service, dust, chaff, pollen, dry soil, grass fragments, and other fine debris can collect on the fan dustproof cover and around the cooling path. A cover that is allowed to load up can reduce heat dissipation, make the fan work harder, contribute to abnormal noise, and increase the likelihood of an over-temperature or fan-stall warning.
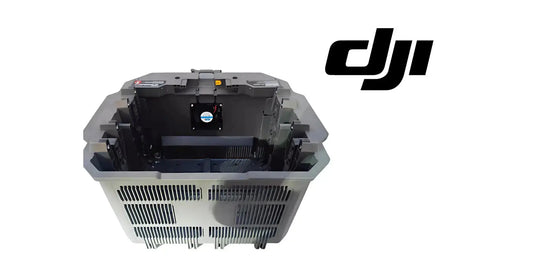
This Ares Acres tutorial expands DJI’s brief “Charging Fan Cleaning and Maintenace” video into a complete technician-facing workflow for the C12000 charger used with the DJI Agras T100 platform. The source video shows a simple sequence: remove the eight side-cover screws, remove the cover, use a soft brush to clean fan dust, reinstall the cover, and reinstall all eight screws. Those actions are correct, but the short narration leaves out the most important part of any high-power charger service: safely taking the unit out of service before the cover is touched.
DJI’s current C12000 Intelligent Power Supply User Guide identifies the removable component as the fan dustproof cover, instructs operators to clean it regularly to preserve cooling performance, and says the power supply must be disconnected from AC power and from the battery when it is not in use. The guide also marks the unit for electric-shock risk. This written procedure therefore treats electrical isolation as a mandatory safety gate—not an optional preparation step.
Ares Acres supports U.S. agricultural-drone operators with aircraft, OEM charging equipment, batteries, cooling equipment, replacement parts, and practical technical education. Explore the DJI Agras T100, the DJI C12000 Intelligent Charger, DJI T100 parts, DJI Agras parts, DJI accessories, the Ares Acres product catalog, or contact Ares Acres for equipment and support.
Prefer to watch instead of read? The video above demonstrates the physical cover-removal and brushing sequence. Use this written guide to prepare the work area, isolate all power, account for the eight fasteners, inspect the fan and cover without exceeding the demonstrated maintenance boundary, reassemble the charger, and complete a controlled functional check.
What You’ll Learn
- Which T100 charging device is shown in the maintenance procedure.
- Why DJI calls the removable side piece the fan dustproof cover.
- Why the C12000 cooling path matters during high-power battery charging.
- Why a short cleaning video does not authorize energized service or internal repair.
- How to identify the exact charger model before beginning.
- How to stop charging and remove the battery connection safely.
- Why AC input must be isolated before any cover screw is loosened.
- When a qualified electrician is required for three-phase power connections.
- How to establish a clean, dry, stable maintenance area.
- Which basic tools and supplies are appropriate for this limited cleaning task.
- Why the brush should be soft, clean, dry, and non-metallic.
- How to organize and account for all eight cover screws.
- How to support the dustproof cover as the last screws are removed.
- How to remove dry dust without forcing contamination farther into the charger.
- Why liquids, solvents, aggressive air pressure, and metal brushes should not be improvised.
- How to avoid forcing the fan to overspeed while cleaning.
- What damage requires the unit to remain out of service.
- How to inspect the cover, ventilation path, fan blades, wiring visible from the service opening, and fasteners.
- How to reinstall the cover without pinching a wire or leaving a gap.
- Why the guide does not invent a screw torque DJI has not published.
- How to perform a controlled post-maintenance check.
- How DJI status LEDs support fault diagnosis.
- When to increase inspection frequency in dusty agricultural environments.
- How to document maintenance for a commercial charging fleet.
- What FAA Part 107 and Part 137 do—and do not have to do with charger cleaning.
Quick Answer: How Do You Clean the DJI C12000 Charging Fan?
Finish or stop the charging cycle safely → Remove the battery from the charging system → Isolate the AC source using the current DJI guide and site electrical procedure → Prevent accidental reconnection → Confirm the charger is fully de-energized and cool → Move only if it can be handled without pulling a cable → Place it on a clean, dry, stable surface → Confirm model and inspect for damage → Gather the correct driver, a parts tray, and a clean, dry, soft non-metallic brush → Count eight cover screws → Support the fan dustproof cover → Remove the eight screws one by one → Place every screw in the tray → Lift away the cover without pulling or prying against internal parts → Brush loose dust from the cover and accessible fan area with light strokes → Keep debris from being driven deeper into the unit → Do not use liquid, solvent, a metal brush, or unapproved high-pressure air → Inspect for cracked blades, rubbing, corrosion, burned areas, damaged wires, loose parts, or heavy contamination → Stop and obtain authorized service if damage is found → Align the cover correctly → Confirm no wire or debris is trapped → Start all eight original screws by hand → Seat them evenly with the correct driver without stripping or overtightening → Verify the cover is flush and all eight screws are present → Clear the work area → Reconnect only under the current DJI instructions → Observe the charger’s LEDs, airflow, sound, odor, and temperature during a controlled test → Remove from service if any abnormal condition remains → Record the maintenance.
This is limited preventive maintenance. It is not permission to open other charger panels, touch high-voltage components, repair a circuit board, replace a fan, alter wiring, bypass a protection feature, or perform live electrical work.
Critical Safety Corrections and Clarifications
| Topic | What the short transcript says | What the current DJI guide adds | Safe operational treatment |
|---|---|---|---|
| Component name | “Side panel” and “fan” | The labeled removable component is the fan dustproof cover. | Remove only the demonstrated dustproof cover. Do not treat every enclosure panel as user-serviceable. |
| Power isolation | Not stated | Disconnect the product from AC power and disconnect the charging cable from the battery when not in use; electric-shock warnings are present. | Do not loosen a cover screw until both AC input and battery connection are safely isolated. |
| Cleaning method | Use a soft brush. | Clean the dustproof cover regularly to maintain heat dissipation. | Use a clean, dry, soft, non-metallic brush with gentle strokes. Do not improvise wet cleaning. |
| Fasteners | Remove and reinstall eight screws. | No torque value is supplied in the user guide. | Retain the eight original screws, start them without cross-threading, and seat them evenly. Do not invent a torque. |
| Internal repair | Not discussed | Abnormal or damaged parts should be referred to official support or an authorized dealer. | Inspection through the demonstrated opening is appropriate; component-level repair is outside this tutorial. |
| Electrical connection | Not discussed | Only qualified electricians wearing insulated gloves may perform the fast-charging connection. | Fan cleaning does not make an operator qualified to install, alter, or service three-phase wiring. |
| FAA references | Not discussed | FAA rules regulate aircraft operations, not this bench-maintenance action. | Keep the SEO title, but do not imply that Part 107 or Part 137 is a charger-maintenance certification. |
Identify the Charging Device Before You Begin
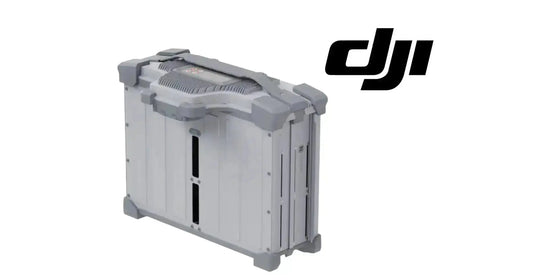
The official T100 video and guide apply to the C12000 Intelligent Power Supply. DJI’s current specifications list model CSX901-12000, with an additional CSX901-12000H variant identified in the user guide. Confirm the model plate on the unit in front of you. A similar-looking charger, generator, air-cooled heat sink, or earlier Agras power supply may use different panels, fasteners, wiring, fan construction, cleaning instructions, or service limits.
Do not use this eight-screw procedure merely because another device has a fan or a side cover. If the screw count, cover shape, labeling, connector layout, or manual does not match, stop and locate the correct documentation.
DJI C12000 Current Specification Reference
DJI’s current T100 specifications and the C12000 guide publish the following reference values. Check the plate and current regional manual for the exact unit because model variants and regional power configurations can differ.
| Specification | DJI-published value | Why it matters during maintenance |
|---|---|---|
| Primary model | CSX901-12000 | Confirms the procedure is being applied to the intended charger. |
| Dimensions | 456 × 291 × 107 mm | Plan a stable work surface large enough to support the entire unit and attached cable. |
| Weight | 13.13 kg | Use controlled handling; never lift or drag it by the charging cable. |
| Fast-charge AC input | 175–520 VAC, three-phase, 50/60 Hz, 22 A maximum for CSX901-12000 | Reinforces that this is high-energy equipment and must never be opened while energized. |
| Fast-charge DC output | 62 VDC, 194 A, 12,000 W maximum | Explains why cooling performance and electrical isolation are critical. |
| Slow-charge AC input | 200–264 VAC, single-phase, 50/60 Hz, 16 A maximum | Slow charging still involves hazardous electrical energy; it does not make energized cleaning acceptable. |
| Slow-charge DC output | 62 VDC, 48 A, 3,000 W maximum | The lower-output mode still requires the same maintenance safety discipline. |
| Operating temperature | 0–40°C (32–104°F) | Cooling must remain effective across the permitted operating range. |
| Compatible batteries in current guide | DB2100, DB1580, and DB2160 Intelligent Flight Batteries | Disconnect the actual battery/cooling assembly before service and verify current compatibility. |
| Protection functions in current specs | Over-temperature, over-voltage, under-voltage, short circuit, fan stall, and other protections | A warning is a diagnostic signal—not permission to bypass protection or continue operating abnormally. |
DJI lists an eight-to-nine-minute DB2160 recharge reference from 30% to 95% under stated conditions. That rapid energy transfer generates heat. The number is a controlled-condition reference, not a promise for every site, battery temperature, input source, altitude, or charger condition.
Why Fan and Dustproof-Cover Maintenance Matters
The fan does not add charging capacity. It removes heat generated while the power electronics convert and deliver energy. The dustproof cover helps limit contamination entering the cooling path, but the cover itself becomes a maintenance surface. As dust accumulates, airflow resistance can rise. The effect may begin subtly: more fan noise, a longer high-speed fan period, warmer exhaust air, or a charger that reaches a warning threshold under loads it previously handled normally.
Agricultural environments are particularly demanding because contamination is not limited to ordinary household dust. Field equipment may encounter:
- fine dry soil from field roads;
- crop chaff and seed fragments;
- pollen and plant fibers;
- grass clippings and insects;
- generator-area dust and exhaust residue;
- chemical residue carried on gloves, cases, or surrounding equipment; and
- moisture that can bind particles into a denser layer.
Preventive cleaning protects heat dissipation, but cleaning is not a cure for every temperature or fan fault. A cracked blade, failed bearing, blocked internal heat sink, damaged harness, defective sensor, weak AC source, firmware problem, or battery fault may produce similar symptoms. Clean the demonstrated cover and accessible area, then use the post-maintenance result to decide whether authorized diagnosis is required.
When Should the C12000 Fan Cover Be Cleaned?
DJI says the dustproof cover should be cleaned regularly but does not assign a universal hour or calendar interval in the current guide. That means the maintenance program should be condition-based and adjusted to the operating environment. Do not publish or enforce a made-up “every 50 hours” rule as though it came from DJI.
| Condition | Recommended response | Reason |
|---|---|---|
| Visible dust layer on the fan dustproof cover | Schedule cleaning before the next high-demand charging block. | Visible loading is direct evidence that airflow may be restricted. |
| Daily use beside dusty roads, dry fields, or active harvest equipment | Inspect more frequently and clean when loading is present. | Contamination can accumulate much faster than in a clean shop. |
| Fan-stall or over-temperature warning | Stop normal use, read the detailed error through the controller, inspect the cover, and escalate if the fault remains. | A protection warning requires diagnosis, not automatic return to service. |
| Fan sound changes, rubbing, ticking, surging, or vibration | Remove from service and inspect while fully de-energized. | Mechanical damage or foreign material may be present. |
| Airflow seems weaker than the fleet baseline | Compare under controlled conditions, inspect the cover, and document the result. | A fleet comparison can reveal gradual degradation. |
| After storage | Inspect vents and cover before reconnection. | Insects, nesting debris, moisture, or storage dust may obstruct airflow. |
| After exposure to moisture or chemical contamination | Do not simply brush and energize; keep out of service and obtain model-specific guidance. | Dry dust cleaning does not correct conductive, corrosive, or liquid contamination. |
| No visible loading and normal operation | Record inspection and continue the established condition-based schedule. | Unnecessary disassembly can create avoidable fastener and cover damage. |
Before You Begin: Safety Boundaries
1. Never Service an Energized Charger
The C12000 carries electric-shock warnings and can be connected to high-power single-phase or three-phase AC. “The battery is not charging” is not proof that the enclosure is safe to open. Status LEDs, app state, fan state, and sound are not substitutes for following the current isolation procedure.
Complete the charging shutdown in the order specified for the site and the current DJI guide. Remove the battery connection. Isolate AC input. Prevent another person from restoring the breaker or reconnecting a cord while work is in progress. Where the unit is hardwired or the isolation boundary is unclear, stop and involve the qualified electrician responsible for the installation.
2. Do Not Perform Three-Phase Wiring Work Unless Qualified
DJI states that only qualified electricians wearing insulated gloves may perform the fast-charging connection. Removing a fan dustproof cover for dry cleaning is not the same task as installing, disconnecting, inspecting, or repairing the fast-charge conductors. Do not use this article as electrical-qualification training.
3. Keep the Work Dry
Do not clean in rain, standing water, heavy condensation, wash-down areas, or where chemical spray can drift onto the open unit. Do not use water, liquid cleaner, contact cleaner, solvent, foam, or a damp rag inside the service opening unless a current DJI service instruction specifically requires that product and method.
4. Do Not Exceed the Demonstrated Maintenance Boundary
The demonstrated task is removal of the fan dustproof cover and dry brushing. It is not a general charger teardown. Do not remove additional panels, unplug internal harnesses, probe circuits, touch capacitors, straighten damaged blades, lubricate the fan, or replace components based only on this tutorial.
5. Let Abnormal Equipment Stay Out of Service
If you find melted plastic, soot, a burned odor, liquid residue, corrosion, a cracked fan, damaged insulation, loose internal hardware, scorched connectors, or evidence of arcing, do not reassemble and “see whether it works.” Preserve the condition, label the unit out of service, record the charger identity and symptoms, and contact official support or an authorized dealer.
Tools and Supplies
- the current C12000 Intelligent Power Supply User Guide;
- a driver that correctly fits the eight original screw heads;
- a clean parts tray or eight-position fastener organizer;
- a clean, dry, soft, non-metallic brush;
- clean safety glasses appropriate to the work area;
- a dry, stable, nonflammable work surface;
- good lighting that does not require reaching into the unit; and
- a maintenance tag or log for charger identity, date, findings, and return-to-service result.
Avoid a poorly fitting driver. A rounded or stripped screw can turn a simple cleaning task into an enclosure repair. Avoid a brush previously used with oil, metal filings, chemicals, battery residue, or abrasive compound. Clean-looking bristles can still transfer conductive or corrosive contamination.
Complete DJI C12000 Charging Fan Cleaning Procedure
Phase 1 — Stop Charging, Isolate Energy & Prepare
Step 1 — Identify the Charger
Read the product label and confirm that the unit is the C12000 model covered by the current documentation. Record the model and charger identifier used by the fleet. Stop if the unit, cover, or fastener layout does not match.
Step 2 — Record the Reason for Maintenance
Note whether this is a routine condition-based cleaning, a response to visible dust, a fan-noise complaint, an over-temperature warning, a fan-stall warning, or a post-storage inspection. The reason determines how strict the return-to-service test must be and whether cleaning alone is likely to be sufficient.
Step 3 — Check for Active Faults Before Shutdown
If the charger is safely operating and a warning is already displayed, record the LED pattern and connect the remote controller only as directed by DJI to read the detailed fault. Do not keep charging merely to reproduce a dangerous symptom. A red or yellow warning should be documented before power is removed because that information may help authorized support.
Step 4 — End the Charging Cycle Safely
Allow a normal cycle to finish when conditions are normal. If an abnormal smell, smoke, heat, sound, electrical fault, or fire risk is present, use the site emergency procedure. Never unplug a live charging connector simply for convenience; DJI specifically warns against disconnecting AC or charging cables while the product is in use.
Step 5 — Remove the Battery From the Charging System
After charging is complete and the system is in the correct state, disconnect the battery-side charging arrangement under the current DJI instructions. The battery, DB2160 Intelligent Flight Battery, and DB2160 cooling station should not remain attached during charger-cover maintenance.
Step 6 — Isolate the AC Source
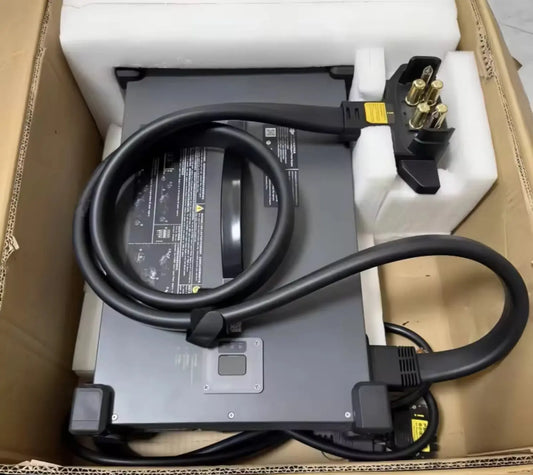
For fast charging, follow the current manual and site electrical procedure, including switching off the appropriate air circuit breaker before a qualified person disconnects the fast-charging cable when disconnection is required. For slow charging, follow the current sequence for removing the supply from the outlet and conversion cable. Do not assume that flipping an app control isolates mains power.
Step 7 — Prevent Accidental Re-Energization
Control the breaker, plug, cord, and work area so another crew member cannot reconnect the charger. Apply the organization’s lockout/tagout or electrical-safe-work practice where applicable. A verbal “don’t turn that on” is weak protection in a busy charging area.
Step 8 — Confirm Both Sides Are Disconnected
Visually trace the battery/output side and AC-input side. Confirm the battery is absent from the charging circuit and the charger is disconnected from AC. Do not rely on memory, a silent fan, or dark LEDs alone.
Step 9 — Allow the Charger to Cool
Wait until the enclosure and exhaust area are at a safe handling temperature. DJI does not provide a universal cooling wait time in the user guide, so do not invent one. A charger that has just completed a high-power cycle may remain warm even after power is removed.
Step 10 — Inspect the Exterior Before Moving
Look for impact damage, loose connectors, cable cuts, crushed insulation, melted areas, moisture, chemical residue, and evidence of overheating. If exterior damage suggests that internal safety may be compromised, do not open the cover as routine maintenance.
Step 11 — Move the Unit Correctly, If Necessary
Use the handle and controlled lifting technique appropriate to the 13.13 kg unit. DJI warns not to move or carry the product by pulling the charging cable. Support attached cables so they do not snag or strike the enclosure.
Step 12 — Establish the Work Surface
Place the charger on a flat, stable, dry, nonflammable surface with enough space for the cover and parts tray. Keep batteries, liquids, fertilizer, pesticides, fuel, and loose metal hardware away from the open charger.
Step 13 — Clean the Immediate Exterior
Remove loose debris from the surrounding bench and from exterior surfaces away from openings. Do not sweep dust toward the fan cover you are about to remove. The goal is to prevent new debris from falling inside once the cover is open.
Step 14 — Gather and Inspect the Tools
Confirm the driver fits the screws fully and the brush is clean, dry, soft, and non-metallic. Count the empty fastener positions in the tray. Remove unnecessary tools, jewelry, loose screws, and conductive objects from the work zone.
Step 15 — Photograph the Starting Condition
Take a clear photo of the cover orientation, all eight screw locations, dust loading, and any existing damage. This gives the technician a reference during reassembly and creates objective evidence of the pre-cleaning condition.
Phase 2 — Remove the Eight-Screw Fan Dustproof Cover
Step 16 — Locate the Correct Cover
Identify the fan dustproof cover shown in DJI’s C12000 guide and video. Do not choose a panel merely because it is on the side. Confirm the same shape, ventilation area, and eight-fastener pattern.
Step 17 — Count All Eight Screws Before Loosening
Point to and count the eight screws. If a screw is already missing, loose, mismatched, corroded, or damaged, record that condition. A missing fastener may allow a gap or vibration and should not be ignored.
Step 18 — Support the Cover
Place one hand so the cover cannot drop when the final screws are removed, while keeping fingers away from sharp edges and the driver path. Do not press the cover inward against the fan.
Step 19 — Seat the Driver Fully
Align the driver squarely in the first screw. A partial fit or angled driver can strip the head. If the screw does not move with reasonable hand force, stop rather than escalating to impact tools or uncontrolled leverage.
Step 20 — Loosen the First Screw
Turn the first screw out carefully. Observe whether it was unusually loose, cross-threaded, or contaminated. Place it immediately in the first tray position.
Step 21 — Remove Screws Two Through Seven
Continue one by one, keeping the driver square and putting every screw into the tray. Maintain cover support as retention decreases. Do not place screws on the charger, where they can roll into an opening.
Step 22 — Control the Final Screw
Support the cover fully before removing the eighth screw. The cover should not hang from one corner, fall, or strike the fan when the last fastener is released.
Step 23 — Verify Eight Screws Are Accounted For
Count the fasteners in the tray. The count must be eight. If the count is seven, find the missing screw before the cover is moved farther or cleaning begins.
Step 24 — Lift the Cover Away Gently
Remove the cover along its natural path without twisting, prying against the housing, or reaching into the charger. If the cover resists, verify that every screw is fully removed and that debris has not bonded the edges. Do not force it.
Step 25 — Note Cover Orientation
Place the cover on the clean work surface in the same orientation shown in the starting photograph. Do not flip it onto loose dirt or metal chips.
Step 26 — Inspect the Service Opening Before Brushing
Use the work light to look, without touching, for loose hardware, insect nests, liquid, corrosion, burned areas, broken blades, trapped wire, or severe contamination. If any hazardous or unexplained condition is present, stop. Brushing dust off the cover is not an adequate response to internal electrical damage.
Phase 3 — Clean the Dustproof Cover and Accessible Fan Area
Step 27 — Clean the Removed Cover First
Hold the cover so loosened dust falls away from the charger. Use light brush strokes across the loaded surface. Work from the cleaner area toward the dirtier edge rather than grinding particles into the mesh or openings.
Step 28 — Keep the Brush Dry
Do not wet the bristles to capture dust. Moisture can turn dry contamination into a paste, carry residue into small openings, or introduce a conductive path.
Step 29 — Use Gentle Pressure
The objective is to release loose accumulation, not abrade a coating or deform the cover. If material is bonded by oil, chemical residue, or corrosion, stop and request an approved cleaning method rather than using a harsher tool.
Step 30 — Brush Dust Away From the Charger
Orient the work so debris does not fall back through the open side. Move the cleaned cover away from the service opening after brushing.
Step 31 — Approach the Accessible Fan Area Carefully
Use the soft brush only where DJI’s demonstrated procedure allows access. Do not insert the brush deeply between components, pull a wire, or use the bristles as a probe.
Step 32 — Avoid Driving the Fan
Use short, light strokes. Do not intentionally spin the fan at high speed with the brush, an air nozzle, or a vacuum stream. Forced overspeed can create mechanical or electrical stress and makes it harder to inspect blade condition.
Step 33 — Remove Loose Surface Dust
Brush accessible dry particles toward the opening and away from the charger. Do not push them deeper into the power supply. Take time; aggressive cleaning can turn a preventive task into damage.
Step 34 — Do Not Use a Metal Brush
Metal bristles can scratch surfaces, damage insulation, break off, and leave conductive debris. Use only the soft, non-metallic brush prepared for the task.
Step 35 — Do Not Improvise High-Pressure Air
The official procedure specifies a soft brush, not an air gun. Uncontrolled compressed air can push dust farther inside, propel debris, force the fan to overspeed, or introduce moisture and oil from the air system. Use another method only if current DJI service documentation explicitly approves it.
Step 36 — Do Not Use a Shop Vacuum as a Default
A generic vacuum may create static, contact components, or spin the fan. Because the user-level guide does not prescribe vacuum cleaning, do not substitute it casually for the soft-brush method.
Step 37 — Inspect the Fan Blades
Without bending or rotating them forcefully, look for cracks, chips, deformation, rubbing marks, uneven clearance, or a blade contacting the housing. A damaged fan requires authorized evaluation or replacement; cleaning cannot restore mechanical integrity.
Step 38 — Inspect Visible Wiring and Hardware
Look for damaged insulation, a displaced harness, loose connector, scorch mark, corrosion, or a screw that did not come from the cover. Do not touch, reseat, or route internal wiring based only on this article.
Step 39 — Inspect the Cover
Check for cracks, broken mounting points, distortion, corrosion, clogged areas that did not clean, or damage that could contact the fan. A deformed cover should not be pulled flat by tightening screws.
Step 40 — Confirm the Cleaning Result
Compare the cover and accessible fan area with the starting photo. The airflow openings should be visibly clear of loose loading, no new damage should be present, and no brush bristle or foreign object should remain in the unit.
Phase 4 — Reinstall the Fan Dustproof Cover
Step 41 — Perform a Foreign-Object Check
Count the eight screws in the tray, account for the brush and driver, and inspect the opening for loose hardware, bristles, paper, packaging, or debris. Nothing should remain inside or rest on a fan blade.
Step 42 — Align the Cover in Its Original Orientation
Use the starting photo and physical locating features. Do not rotate or invert the cover if the pattern appears nearly symmetrical. Correct orientation preserves clearance and ventilation geometry.
Step 43 — Check for Trapped Wires or Debris
Before the cover touches the housing, verify that no visible wire, seal, brush bristle, or contamination lies between mating surfaces. Never use screw force to close an unexplained gap.
Step 44 — Hold the Cover Flush
Seat the cover gently against the housing. It should align without prying or bending. If it rocks or will not sit flat, remove it and determine why.
Step 45 — Start the First Screw by Hand
Place one original screw in its opening and turn it enough to engage the thread without tightening. Starting by hand helps detect cross-threading before damage occurs.
Step 46 — Start the Remaining Seven Screws
Install the other screws loosely, one by one. Confirm each screw engages normally. At this point, all eight should be present but the cover should still be able to settle naturally.
Step 47 — Seat the Screws Evenly
Bring the fasteners down gradually in a balanced pattern so one edge is not pulled tight while another remains raised. DJI does not publish a user-level torque value in the current guide, so use controlled hand force with the correct driver and do not claim a numerical torque.
Step 48 — Final-Tighten Without Overtightening
Seat each screw securely without stripping the head, damaging the thread, or distorting the cover. Stop if a screw turns without seating or requires abnormal force.
Step 49 — Count Eight Installed Screws
Point to and count all eight installed fasteners. The parts tray should be empty. A “probably complete” fastener count is not an acceptable closeout.
Step 50 — Inspect the Cover Perimeter
Verify the cover is flush, evenly seated, stable, and free of gaps. Confirm it does not touch the fan and that the ventilation area is unobstructed.
Phase 5 — Controlled Return to Service
Step 51 — Restore the Work Area
Remove tools, dust, fastener trays, tags that are no longer needed, and loose materials from around the charger. Restore the required ventilation clearance. DJI directs users to leave at least 50 cm of ventilation space and to keep charging batteries at least 30 cm from the charger, away from the ventilation openings.
Step 52 — Reinspect the Input and Charging Cables
Before reconnection, inspect cable condition, connector cleanliness, safety pins, and strain. Do not return a charger with a cut cable, burned contact, damaged connector, or uncertain wiring to service simply because the fan cover is clean.
Step 53 — Reconnect Under the Current DJI Procedure
Use the correct sequence for the exact AC configuration. A qualified electrician must handle fast-charge wiring. Prevent hot plugging; DJI explicitly prohibits it for slow charging to avoid arcing.
Step 54 — Observe Initial Power-Up
Stand clear of the fan opening and observe the unit. Look and listen for rubbing, ticking, vibration, unusual fan speed, warning LEDs, smoke, odor, or abnormal heat. Shut down under the safe procedure if any abnormality appears.
Step 55 — Read Any Status Warning
The C12000 has charging-channel, DC-output, and AC-input status LEDs. If an LED blinks a warning or error, connect the remote controller as DJI directs and read the detailed information. Do not defeat or ignore a protection function.
Step 56 — Perform a Controlled Charging Check
When the initial state is normal, connect a known-compatible battery through the approved cooling/charging arrangement and monitor the start of the cycle. Use a known-good battery when practical so a battery fault does not confuse the charger check.
Step 57 — Verify Airflow, Sound, and Stability
Confirm that airflow is present, the fan does not rub, the cover does not vibrate, and no screw loosens. Compare the sound and airflow with the fleet’s normal baseline. Do not put fingers, tools, paper, or ribbon near the fan to “prove” airflow.
Step 58 — Monitor the Complete Result
For maintenance prompted by a warning or abnormal symptom, observe enough of a controlled cycle to determine whether the original problem returns. A few seconds of fan operation may not reproduce a thermal issue that appears under sustained load.
Step 59 — Remove From Service if the Fault Persists
If the fan-stall or over-temperature warning returns, airflow remains weak, the fan is noisy, or the unit becomes abnormal, stop using it. Cleaning has ruled out one common restriction; it has not authorized deeper repair.
Step 60 — Complete the Maintenance Record
Record the charger ID, model, date, technician, reason for cleaning, pre-cleaning condition, confirmation that eight screws were removed and reinstalled, abnormalities found, post-cleaning test, LED result, battery used for the check, and final disposition.
Acceptance Criteria Before the Charger Returns to Normal Use
| Checkpoint | Acceptable result | Reject / escalate condition |
|---|---|---|
| Model and procedure | Confirmed C12000 and matching cover. | Different model, cover, or fastener layout. |
| Dustproof cover | Clean, intact, correctly oriented, flush. | Cracked, deformed, heavily contaminated, or gapped. |
| Fasteners | All eight original screws present and securely seated. | Missing, stripped, cross-threaded, mismatched, or unable to seat. |
| Fan | Blades appear intact; normal sound, airflow, and clearance. | Crack, chip, rubbing, vibration, weak airflow, or abnormal noise. |
| Visible internal condition | No loose object, liquid, soot, corrosion, burned area, or damaged visible wire. | Any unexplained contamination or damage. |
| Cables and connectors | Clean, intact, correctly retained. | Burning, cuts, looseness, arcing evidence, or damaged safety pin. |
| Status LEDs | Expected state with no unresolved warning or error. | Recurring yellow/red warning or error. |
| Controlled charge test | Stable operation with normal airflow, sound, odor, and temperature behavior. | Original symptom returns or any new abnormality appears. |
| Documentation | Complete record and return-to-service disposition. | Unknown technician, missing screw count, or no test result. |
DJI C12000 Status LED Reference
Use the app and current guide for the exact fault details. The LED pattern helps identify whether the issue is associated with the charging channel, DC output, or AC input.
| Indicator | Pattern | DJI guide meaning |
|---|---|---|
| Charging channel | Solid yellow | Battery connected and ready for charging. |
| Charging channel | Green blinking once continuously | Charging. |
| Charging channel | Solid green | Fully charged. |
| Charging channel | Yellow blinking once continuously | Battery or charging-channel warning. |
| Charging channel | Red blinking once continuously | Battery or charging-channel error. |
| DC output | Yellow blinking four times continuously | Product not activated. |
| DC output | Yellow blinking once continuously | DC-output warning. |
| DC output | Red blinking once continuously | DC-output error. |
| AC input | Yellow blinking once continuously | AC-input warning. |
| AC input | Red blinking once continuously | AC-input error. |
A clean fan cover will not resolve every LED condition. For example, an AC-input warning can originate upstream of the fan, while a charging-channel warning may follow a specific battery. Read the app detail and isolate whether the symptom follows the charger, the battery, the cooling station, or the input source.
Troubleshooting After Fan-Cover Cleaning
| Symptom | Likely categories | Safe next action |
|---|---|---|
| Fan still rubs or ticks | Damaged blade, foreign object, deformed cover, bearing fault, incorrect cover seating | Shut down, isolate power, inspect cover seating and visible condition; escalate if the sound remains. |
| Cover will not sit flush | Wrong orientation, trapped wire/debris, bent cover, mismatched screw | Remove it and correct the cause; never pull it flat with screw force. |
| One screw will not start | Misalignment, cross-threading, damaged thread, wrong screw | Stop, realign, compare screws, and obtain repair support if the thread is damaged. |
| One screw spins without tightening | Stripped thread or incorrect fastener | Do not improvise a larger screw; keep the unit out of service until the enclosure can be repaired correctly. |
| Fan does not run when expected | Fan fault, control logic, temperature state, connector/wiring fault | Do not probe live circuits. Read status details and contact authorized support. |
| Over-temperature warning returns | Internal blockage, fan fault, heat-sink issue, ambient temperature, blocked clearance, sustained input/output condition | Verify ventilation setup and ambient conditions, then remove from service for diagnosis. |
| Fan-stall warning returns | Mechanical obstruction, fan damage, bearing or motor fault, wiring/control fault | Stop using the charger; cleaning alone has not corrected the fault. |
| Dust is oily, sticky, or chemical-laden | Environmental contamination beyond dry maintenance | Do not add solvent. Isolate and seek an approved decontamination or service method. |
| Moisture or corrosion is found | Wet storage, rain exposure, condensation, chemical contact | Do not energize. Preserve evidence and obtain authorized evaluation. |
| Warning follows one battery only | Battery or connector issue rather than fan restriction | Use the app detail and a controlled known-good comparison; consult the DJI Agras battery-error guide. |
| Warning occurs with every battery | Charger, AC supply, cooling arrangement, or common connection | Stop normal fleet use and diagnose the common equipment path. |
Common Charging-Fan Maintenance Mistakes
1. Treating a Stopped Fan as Proof of Zero Energy
A fan can stop while the charger remains connected to hazardous AC. Follow the isolation procedure; do not infer electrical state from sound.
2. Leaving the Battery Connected
Maintenance begins only after the charging arrangement is disconnected from the battery and AC source.
3. Letting an Unqualified Person Handle Three-Phase Conductors
The fast-charge connection is qualified-electrician work under DJI’s guide. Cover cleaning does not change that boundary.
4. Removing the Wrong Side Panel
The video demonstrates the fan dustproof cover. Removing another enclosure panel may expose components outside user maintenance.
5. Starting Without Counting Eight Screws
An initial count reveals a pre-existing missing fastener and creates a clear reassembly standard.
6. Setting Screws on Top of the Charger
A screw can roll through an opening and become a conductive foreign object. Use a parts tray.
7. Letting the Cover Fall After the Last Screw
Support the cover throughout removal so it cannot strike the fan or distort a mounting point.
8. Using a Metal or Stiff Brush
Aggressive or conductive bristles can damage surfaces and leave hazardous fragments.
9. Spraying Cleaner Into the Fan
The demonstrated method is dry brushing. Liquid can spread contamination and create electrical or corrosion risk.
10. Blasting the Fan With Shop Air
Uncontrolled pressure can drive contamination inward and overspeed the fan. Do not substitute an unapproved method.
11. Holding a Vacuum Nozzle Against the Fan
A generic vacuum can create static, contact parts, or spin the fan. Follow the soft-brush procedure.
12. Forcing the Fan to Spin
The task is to remove dust, not use the fan as a cleaning turbine. Gentle strokes preserve inspection control.
13. Brushing Debris Deeper Into the Unit
Orient the opening and brush motion so material exits the service area.
14. Ignoring Sticky or Wet Contamination
Dry-dust maintenance is not decontamination. Stop and seek the correct method for moisture, chemicals, fuel, or oil.
15. Straightening a Cracked Fan Blade
A damaged blade is a replacement or service issue. Bending it back does not restore strength or balance.
16. Reinstalling the Cover Over a Trapped Wire
Inspect the full perimeter before any screw is tightened.
17. Tightening One Screw Fully Before Starting the Others
Start all eight first, then seat them evenly so the cover can align naturally.
18. Inventing a Torque Specification
The current user guide does not provide a cover-screw torque. Do not present a guessed value as DJI data.
19. Using a Power Driver Without Control
High speed or impact can strip small fasteners, distort the cover, and hide cross-threading.
20. Returning the Charger to Service Without a Test
Verify cover security, airflow, fan sound, status LEDs, and a controlled charge result before normal fleet use.
21. Assuming Cleaning Fixes Every Thermal Fault
A clean cover only removes one possible restriction. Persistent warnings require diagnosis.
22. Failing to Document the Work
Without a record, the next technician cannot tell whether a recurring fault is new, intermittent, or already investigated.
Recommended Maintenance Log
| Field | What to record |
|---|---|
| Charger identity | Fleet ID, model, serial or other approved asset identifier. |
| Date and technician | Date, time, and person performing the inspection/cleaning. |
| Trigger | Routine inspection, visible loading, warning, noise, post-storage, or other reason. |
| Operating environment | Shop, trailer, field edge, harvest dust, weather exposure, or unusual contamination. |
| Pre-cleaning condition | Photo and description of cover loading, fan appearance, cable condition, and LEDs. |
| Isolation confirmation | Battery disconnected, AC isolated, accidental reconnection controlled. |
| Fastener count | Eight removed; eight reinstalled; note any damaged or missing fastener. |
| Findings | Dust amount, debris type, cracks, rubbing, corrosion, odor, or no abnormality. |
| Cleaning method | Clean, dry, soft non-metallic brush; note any approved deviation and its source. |
| Post-maintenance check | LED state, fan sound, airflow, cover stability, battery used, and test duration/result. |
| Disposition | Returned to service, restricted, or removed from service for authorized repair. |
Charging-Area Setup Still Matters After Cleaning
A clean fan cover cannot compensate for poor deployment. DJI directs operators to place the C12000 on a flat, stable surface with at least 50 cm of ventilation space. It should be kept away from direct sunlight, rain, wet environments, heat, high voltage, water, flammable gases, and corrosives. The charger and batteries must not sit on blankets or carpet while operating. Charging batteries should remain at least 30 cm from the power supply and should not block either ventilation end.
Use the DJI T100 power-supply tutorial for activation, connections, charge modes, LED interpretation, and field power planning. Pair the charger with the correct battery cooling hardware rather than treating airflow around the power supply as a substitute for battery thermal management.
FAA Part 107 and Part 137: What Applies Here?
Cleaning the C12000 fan dustproof cover is equipment maintenance. It is not a flight under Part 107, and it is not an agricultural dispensing operation under Part 137. The FAA references in the requested title provide operational context for the aircraft fleet; they do not certify the technician or define the electrical cleaning procedure.
The FAA’s current Part 107 overview states that Part 107 covers drones weighing less than 55 pounds. DJI’s published T100 empty and maximum takeoff weights are far above that limit. The FAA’s Section 44807 guidance explains the pathway for unmanned aircraft that exceed the Part 107 weight limit or missions involving non-waivable rules.
For agricultural dispensing, the FAA’s Part 137 guidance says drones weighing 55 pounds or more are operated under Parts 91 and 137 and require exemption from applicable Parts 61, 91, and 137 provisions. Operators must follow their actual certificate, exemption, registration, airspace authorization, conditions and limitations, pesticide-label requirements, state rules, and other applicable authority.
Proper charger maintenance supports safe and reliable operations, but it does not grant flight authority, satisfy an Agricultural Aircraft Operator Certificate, replace required pilot qualifications, or expand an operating limitation.
Ares Acres Recommended C12000 Fan-Cover Workflow
- Inspect the dustproof cover as part of the charging-area opening check.
- Use condition-based cleaning frequency that reflects actual dust exposure.
- Document warning LEDs and symptoms before shutdown when safe to do so.
- Disconnect the battery and isolate AC before touching any fastener.
- Use a dedicated clean brush and an eight-position screw tray.
- Remove only the demonstrated fan dustproof cover.
- Brush dry debris outward and avoid forced fan rotation.
- Stop for wet, chemical, burned, corroded, or mechanically damaged conditions.
- Start all eight screws before final seating.
- Confirm the cover is flush and the fastener count is complete.
- Restore ventilation clearance and inspect the complete charging path.
- Perform and document a controlled functional check.
- Keep the charger out of service if a warning, abnormal sound, or airflow problem remains.
Related DJI Agras Operator Academy Tutorials
- DJI T100 Power Supply Tutorial: Activation, Charging & Field Use
- DJI Agras Battery Fleet Management: BMS, Firmware & Cycle Maintenance
- DJI Agras Battery Error Guide: Connector Cleaning & Firmware
- DJI T100/T50 Pre-Flight Safety Tutorial
- Browse All DJI Agriculture Tutorials
FAQ: DJI Agras T100 C12000 Charging Fan Cleaning
Which DJI charger is shown in this tutorial?
The official T100 maintenance video corresponds to the DJI C12000 Intelligent Power Supply. DJI lists the primary model as CSX901-12000. Confirm the label on the exact unit before applying the procedure.
Is the removable piece actually a side panel?
The transcript calls it a side panel, while DJI’s current C12000 guide labels it the fan dustproof cover. That more specific name helps prevent operators from removing an unrelated enclosure panel.
How many screws hold the fan dustproof cover?
The demonstrated procedure uses eight screws. Count eight before removal, retain all eight in a tray, and verify all eight are reinstalled.
What brush should I use?
Use a clean, dry, soft, non-metallic brush. Do not use a brush contaminated with oil, chemicals, metal filings, battery residue, or abrasive material.
Can I clean the cover while the charger is plugged in?
No. Disconnect the battery-side charging arrangement and isolate the AC source under the current DJI and site procedures before loosening any screw.
Is turning off the charger in the app enough?
No. A software state does not prove mains isolation. Follow the physical electrical shutdown and disconnection procedure for the exact installation.
Can I remove the cover immediately after a fast charge?
Allow the unit to cool to a safe handling condition first. DJI does not publish one universal wait time, so judge actual temperature conservatively after full isolation.
Can any employee disconnect the three-phase input?
DJI says only qualified electricians wearing insulated gloves can perform the fast-charging connection. Follow electrical law, the site procedure, and the current guide.
Can I spray compressed air through the fan?
The official user procedure specifies a soft brush. Uncontrolled compressed air can drive dust inward and overspeed the fan, so do not substitute it without current DJI approval.
Can I use a vacuum?
A generic vacuum is not specified in the user guide and may introduce static, contact parts, or spin the fan. Use the demonstrated brush method unless an approved service instruction says otherwise.
Can I use electrical contact cleaner?
Not as part of this fan-cover procedure. Do not introduce liquids or solvents into the charger based on a generic cleaner label.
Can I wash the dustproof cover?
The demonstrated procedure is dry brushing. Washing can leave moisture or residue and should not be improvised without a model-specific instruction that includes drying and inspection requirements.
Should I spin the fan while brushing?
Avoid intentionally spinning or overspeeding it. Use light, controlled strokes so you can inspect blade condition and avoid mechanical stress.
What if a blade is cracked?
Keep the charger out of service. Do not straighten, glue, or operate a damaged fan. Contact official support or an authorized dealer.
What if the dust is sticky?
Sticky material may indicate oil, chemical residue, moisture, or another contamination beyond dry brushing. Isolate the unit and obtain an approved cleaning or service method.
What if I find corrosion?
Do not energize the charger. Corrosion may indicate moisture or chemical exposure and requires authorized evaluation beyond fan-cover cleaning.
What if a screw is missing?
Document the pre-existing condition and obtain the correct OEM fastener or repair guidance. Do not substitute a random longer or larger screw that could damage internal parts or threads.
What if a screw will not tighten?
Stop. The screw or thread may be damaged or mismatched. Do not force it, add adhesive, or enlarge the fastener without approved repair guidance.
What torque should I use?
The current C12000 user guide does not publish a torque for these eight cover screws. Use the correct hand driver and controlled seating force; do not invent a numerical specification.
How often should I clean the fan cover?
DJI says to clean it regularly but does not publish a single universal interval. Base the schedule on inspections, dust exposure, warnings, airflow, sound, storage, and fleet history.
Should dusty operations be inspected more often?
Yes. Field roads, harvest activity, dry soil, chaff, and trailer use can load the cover much faster than a clean indoor location.
Will cleaning fix a fan-stall warning?
It may remove an obstruction, but a recurring warning can indicate fan, bearing, wiring, control, or internal contamination problems. Stop using the charger if the warning returns.
Will cleaning fix an over-temperature warning?
Only if restricted airflow was the cause. Ambient temperature, ventilation clearance, internal heat-sink condition, fan performance, or an electrical fault may also be responsible.
How much ventilation space does DJI require?
The current guide directs users to leave at least 50 cm around the device for ventilation. Batteries being charged should be at least 30 cm away and should not block the ventilation openings.
Can the charger operate in rain?
No. DJI says not to use or store it in rain or other wet environments. Fan-cover maintenance must also be performed in a clean, dry location.
What is the C12000 operating-temperature range?
DJI publishes 0–40°C (32–104°F). Operation inside that range still requires unobstructed airflow and a correct charging-area setup.
What batteries does the current guide list?
The current guide lists DB2100, DB1580, and DB2160 Intelligent Flight Batteries, while DJI advises checking the official site for the latest compatibility information.
What should I do with a blinking status LED?
Connect the remote controller as DJI directs and read the detailed warning or error. Identify whether the indication is for the charging channel, DC output, or AC input.
Can I keep charging if the fan sounds different but no warning appears?
No abnormal mechanical sound should be normalized. Stop, isolate the charger, inspect the cover and visible fan condition, and escalate if the sound remains.
Does this procedure include fan replacement?
No. It covers removal of the dustproof cover, dry brushing, inspection, reassembly, and controlled testing. Fan replacement and deeper internal service require separate approved instructions.
Does FAA Part 107 regulate this cleaning task?
No. Part 107 regulates qualifying small-UAS flight operations. It is not an electrical-maintenance standard for a C12000 charger.
Does FAA Part 137 regulate this cleaning task?
No. Part 137 applies to agricultural aircraft operations involving dispensing and related special-purpose activity. It does not prescribe the eight-screw fan-cover procedure.
Can a T100 operation rely on Part 107 alone?
Generally no, because DJI’s published T100 weights exceed Part 107’s under-55-pound limit. U.S. operators must follow the FAA authority applicable to their aircraft and mission, commonly including Parts 91 and 137 and Section 44807 exemption authority for qualifying agricultural operations.
What should be recorded after cleaning?
Record charger identity, date, technician, reason, isolation, dust condition, eight-screw count, damage found, cleaning method, status LEDs, controlled test result, and final disposition.
Final Takeaway
The physical cleaning task is simple: remove eight screws, lift away the C12000 fan dustproof cover, use a soft brush to remove dry dust, reinstall the cover, and reinstall all eight screws. The professional procedure is broader. It begins with model confirmation and full electrical isolation, controls every fastener and foreign object, limits cleaning to the DJI-demonstrated boundary, inspects for damage that brushing cannot fix, and ends with a documented return-to-service test.
Never trade a few minutes of charging availability for an energized-maintenance risk. Never use screw force to hide misalignment. Never treat a clean cover as proof that a persistent thermal or fan fault is repaired. A correctly maintained C12000 should have a clear cooling path, an intact and flush cover, all eight fasteners, normal fan sound and airflow, no unresolved status warning, and a complete maintenance record.
Complementary DJI T100 Power & Charging Equipment
- DJI Agras T100 OEM C12000 Intelligent Battery Charger — the high-power charging unit covered by this fan-cover tutorial.
- DJI Agras T100 OEM DB2160 Intelligent Flight Battery — the primary T100 battery referenced in current DJI charging specifications.
- DJI Agras T100 OEM DB2160 Battery Cooling Station — supports controlled battery thermal management during charging.
- DJI Agras T100 D14000iE Multifunctional Inverter Generator — a compatible field-power option that has its own operating and maintenance requirements.
- DJI Agras T100 Parts — OEM components and field-support inventory.
What Is Ares Acres?
Ares Acres is a U.S.-based DJI Agras dealer and agricultural-drone support company serving commercial applicators, growers, service technicians, and fleet operators. We focus on genuine DJI equipment, practical diagnostics, operator education, and the parts that keep agricultural-drone programs working during the season.
Need a C12000 Charger, T100 Parts, or Charging-System Support?
Browse the DJI C12000 Intelligent Charger, DJI Agras T100, T100 parts collection, or the complete Ares Acres product catalog. For help identifying a charger fault, selecting compatible charging equipment, or deciding whether a damaged unit needs authorized service, contact Ares Acres.
Educational and safety note: This article expands the official DJI tutorial for training and maintenance planning. Always use the current manual for the exact model and region, follow applicable electrical codes and workplace safety procedures, and refer abnormal or damaged equipment to qualified personnel or authorized service. FAA references are general U.S. operational context and are not legal advice, flight authorization, or an electrical-maintenance certification.