DJI T100 Power Supply Tutorial: How to Use the DJI Agras T100 - T50 Battery and Generator (FAA 107)
Share
U.S.A. FIRST: This Ares Acres tutorial is designed for U.S. DJI Agras operators, technicians, farm managers, and service teams who need a practical understanding of the DJI intelligent power-supply ecosystem used to keep agricultural drones operating in the field. The focus is the workflow demonstrated in the accompanying DJI tutorial: identifying charger components, activating the charger, understanding the main and auxiliary power inputs, choosing between fast and slow charging, connecting an intelligent flight battery through the appropriate cooling system, reading status indicators, and using the DJI Agras app for deeper diagnostics.
The most important idea is that the charger, battery, generator or facility power source, cooling hardware, cabling, and operator procedure form one system. A high-capacity agricultural drone can only maintain useful field throughput when that entire energy system is planned correctly. A powerful aircraft with inadequate charging infrastructure can spend more time waiting for batteries than spraying.
Watch on YouTube: DJI T100 Power Supply Tutorial: Battery, Charger and Generator.
Critical electrical safety notice: The fast-charging procedures described in the source tutorial involve high-current electrical connections and, in one example, a three-phase five-wire supply. DJI specifically states in the tutorial that only qualified electricians wearing appropriate insulated protective equipment should connect or disconnect the fast-charging cables. Indoor fast charging is prohibited in the demonstrated guidance. Do not treat this article as an electrical-installation manual. Follow the current DJI manual for your exact charger, battery and market version, comply with local electrical codes, and have a qualified electrician verify generator or facility-power connections before use.
Quick Answer: What Does the DJI Intelligent Power Supply Do?
The DJI intelligent power supply is the charging and diagnostic bridge between a suitable AC source and a compatible DJI Agras intelligent flight battery. Depending on the specific charger and supported battery family, it can accept the required electrical input, monitor its own operating state, communicate with the battery, control the charging process, and report faults through the charger status LED and through the DJI Agras app.
The charger can perform an automatic self-check. The status indicator gives a first-level view of whether the charger is operating normally or has detected an exception. When additional detail is needed, the charger can be connected to a compatible DJI remote controller with a USB cable so the operator can open the DJI Agras app and inspect charging-device information. This diagnostic path is especially useful because a warning light alone may tell you that something is wrong without telling you which part of the charging chain should be investigated.
For current Ares Acres power-system products, see the DJI Agras T100 OEM C12000 Intelligent Battery Charger, DJI Agras T50 OEM C10000 Intelligent Battery Charger, DJI Agras T100 DB2160 Intelligent Flight Battery, and DJI Agras T50 DB1560 Intelligent Flight Battery.
Why Power-System Knowledge Matters on a DJI Agras Operation
Agricultural drone productivity is not simply an aircraft specification. It is a cycle-time problem. Every flight consumes battery energy. Every battery must return to a usable temperature window and charge state before it can go back into the aircraft. The charger needs an adequate power source. The generator or facility connection needs to supply that charger without unstable voltage or chronic overload. Cooling hardware needs to remove heat from recently used batteries. Operators need enough batteries in rotation that the aircraft is ready to launch when refilling and field logistics are complete.
That is why a professional T100 or T50 deployment should be planned as a complete energy loop:
- Aircraft uses a charged intelligent flight battery.
- Used battery is removed according to the aircraft procedure.
- Battery is visually checked and moved to the appropriate cooling/charging workflow.
- Cooling hardware manages battery temperature as designed.
- Intelligent power supply receives correct input power.
- Charger communicates with and charges the battery.
- Operator verifies completion and battery condition.
- Charged battery returns to the rotation.
If any one link becomes the bottleneck, field productivity drops. A second or third battery does not solve an undersized generator; a powerful generator does not solve a damaged charging cable; and a charger cannot compensate for unsafe wiring or inappropriate input power.
DJI Intelligent Power Supply Components Explained
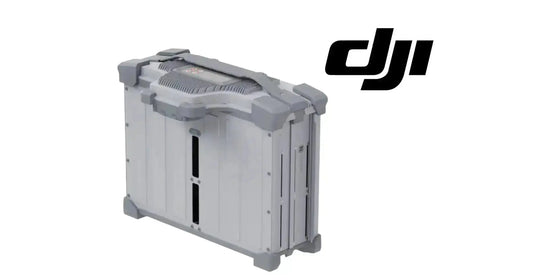
The tutorial begins by identifying the major physical components of the intelligent power supply. Knowing what each part does makes setup, transport, troubleshooting, and shutdown substantially easier.
| Component | Function | Operator significance |
|---|---|---|
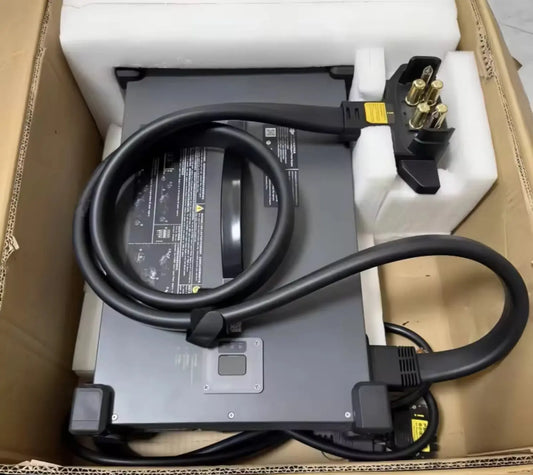
| Battery charging cable | Connects the intelligent power supply to the supported battery/cooling assembly for charging. | Inspect the connector and cable condition before every charging session. Do not use the cable as a carrying handle. |
| Status LED | Displays charger operating status and provides preliminary fault indication. | Use it as the first diagnostic signal, then use the DJI Agras app if more detail is required. |
| Dustproof cover | Protects the charger interface/vent area when appropriate. | Helps reduce contamination during storage and transport. Make sure cooling airflow is not obstructed during operation. |
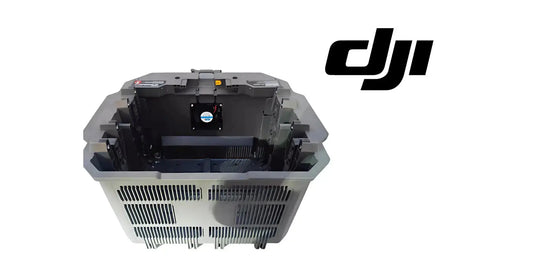
| Cooling fan | Moves heat away from the charger during charging. | Charging creates significant heat. Keep airflow paths clear and stop if the charger shows abnormal thermal behavior. |
| Handle | Provides a designed carrying point. | Use the handle rather than pulling on cables or connectors. |
| Main power input | Primary charger power-input port. | The tutorial states that when only one AC cable is used, it must be connected to the main input. |
| Auxiliary power input | Secondary power-input port used in supported high-power configurations. | Connecting a single cable to the auxiliary input alone will not make the charger operate according to the demonstrated procedure. |
| Cable storage cover | Secures/protects cables during transport. | Secure it before moving the charger to prevent avoidable connector or cable damage. |
| Fast-charging cables | Used for supported high-power fast-charging input configurations. | These are not ordinary household extension cords. Connection procedures may require a qualified electrician. |
| Conversion/adapter cable and AC cable | Used together for the supported slow-charging configuration demonstrated in the video. | Connect the adapter to the main input and use the correct AC supply for the applicable charger. |
Main Power Input vs. Auxiliary Power Input
One of the easiest setup mistakes is misunderstanding the two AC input ports. The source tutorial is explicit: if you are using only one AC cable, connect it to the main power input. A single cable connected only to the auxiliary input will not operate the charger.
This matters because a charger that appears dead may not be defective at all. Before assuming a charger failure, verify that the input cable is in the required port, that the connector is fully seated and secured, and that the upstream power source is actually energized and suitable for the charger. Never bypass locking hardware or modify a connector to make it fit.
For dual-cable fast charging, both power inputs can become part of the required configuration, but the exact supply arrangement depends on the charger and power source. The C10000 example in the source video should not be blindly copied to a different charger model such as the T100 C12000. Always use the current manual for the exact charger.
First-Time Activation of the DJI Intelligent Power Supply
The intelligent power supply must be activated before first use. In the source tutorial, DJI demonstrates activation through the remote controller and DJI Agras app.
- Make sure the DJI remote controller is connected to the internet.
- Use the appropriate USB cable to connect the charger communication port to the remote controller. The tutorial demonstrates a USB-C connection at the charger and USB-A at the controller.
- Open the DJI Agras app on the remote controller.
- Go to Device Management.
- Select the charging-device section.
- Follow the on-screen activation process.
- Confirm that activation completes before relying on the charger for operational use.
Activation is separate from electrical power delivery. A correctly wired power source does not eliminate the need for activation, and activation does not prove that the generator or AC supply is electrically appropriate. Think of the charger as both a power device and an intelligent networked device: both sides have to be configured correctly.
Using the Auto-Check and DJI Agras App for Diagnostics
The charger provides an automatic check function. If the charger reports an exception, start with the visible status indicator. The LED is intended to provide a quick preliminary indication of charger state. If the indication shows a fault or the charger does not behave as expected, connect the charger to the remote controller and open the DJI Agras app to view more detailed charging-device information.
A disciplined diagnostic order is useful:
- Stop and observe the charger status indicator.
- Check obvious environmental issues such as blocked airflow, excessive heat, water exposure or damaged cables.
- Verify the correct power-input port and supported power source.
- Verify battery and cooling-station connections.
- Connect the charger to the remote controller for detailed DJI Agras app information.
- Record the exact warning or error instead of repeatedly power-cycling equipment.
- If the issue persists, consult the current manual or a qualified service provider.
This approach avoids “parts cannon” troubleshooting—replacing a charger, battery or cable before knowing which component is actually responsible.
The Complete Charging Chain: Power Source to Battery
For field operators, it helps to visualize the charging chain as six layers:
- Source: generator or facility AC supply.
- Protection and connection: breakers, approved electrical connections and appropriate cabling.
- Charger input: main and, when required, auxiliary input.
- Intelligent power supply: conversion, monitoring and charging control.
- Cooling interface: the air-cooled heat sink/cooling station used by the supported battery system.
- Battery: intelligent flight battery receiving charge while its condition is monitored.
A fault can originate at any layer. A generator can be underpowered. A breaker can be open. A connector can be loose. The charger can detect a fault. The cooling system can be obstructed. The battery can be too hot or otherwise outside acceptable conditions. Good troubleshooting isolates layers rather than guessing.
Fast Charging vs. Slow Charging
| Category | Fast charging | Slow charging |
|---|---|---|
| Primary purpose | High-throughput field battery rotation | Lower-power charging when fast-charge infrastructure is unavailable or unnecessary |
| Input demand | High; may use two dedicated fast-charge inputs | Lower than the fast-charge configuration |
| Typical source in source tutorial | Suitable 220 V generator or three-phase five-wire facility supply for C10000 example | 16 A AC outlet using the demonstrated adapter/cable arrangement |
| Electrical setup | May require qualified electrician | Simpler, but still requires a suitable, correctly wired outlet and current manual |
| Field throughput | Designed to support faster battery turnaround | Longer turnaround; may require more batteries or more downtime |
| Safety emphasis | High-current connections, breaker isolation, outdoor fast-charge restriction in the tutorial | Correct adapter, main-input use, cable condition and supply capacity remain important |
The correct method is not “whichever charges faster.” The correct method is the one supported by the exact charger, battery, power source and site conditions. A slow-charge method can be operationally useful overnight or at a shop; fast charging can be essential when an aircraft is cycling continuously through a large spray job.
C10000 Fast Charging Method 1: 220 V Generator Example
The source video uses the C10000 intelligent power supply as the example. In the first fast-charging method, DJI demonstrates two fast-charging cables connected to a 220 V generator with single-phase output and a rated power of at least 12 kW.
The tutorial also includes an important note for a third-party generator used in this single-phase arrangement: the two live wires are to be connected to the same live terminal. This is a high-current electrical connection, not a casual field improvisation. The statement is reproduced here to explain the manufacturer’s demonstrated configuration, not to instruct an unqualified person to perform electrical wiring.
Do not generalize the C10000 example to the C12000. The T100 C12000 charger is a different product. Verify its current input requirements and approved generator configuration before use. Ares Acres also offers the DJI Agras T100 D14000iE inverter generator as part of the T100 power ecosystem.
C10000 Fast Charging Method 2: Three-Phase Five-Wire Example
The second demonstrated C10000 fast-charge method uses two fast-charging cables and a three-phase five-wire supply rated at 18 kW. DJI’s tutorial shows the following sequence at a high level:
- Turn off the air circuit breaker for the three-phase supply before making the connection.
- Remove the safety pins from the fast-charging cable connectors.
- Connect the two fast-charging cables to the charger.
- Reinsert the safety pins and verify that they are securely seated.
- Have the qualified electrician connect the fast-charging cables to the appropriate three-phase supply terminals according to the current DJI instructions and local electrical requirements.
- In the demonstrated arrangement, DJI identifies conductors as live (L), neutral (N) and protective earth, and the two live conductors are connected to different live terminals for the three-phase method.
- Only after the connection has been verified should the charging workflow proceed.
Only qualified electricians wearing insulated protective equipment should make or remove these fast-charging electrical connections. Incorrect three-phase wiring can create shock, fire and equipment-damage hazards. Do not use this paragraph as a substitute for the current electrical diagram, charger manual, generator manual, and site-specific electrician verification.
Why the Safety Pins Matter
The fast-charge connectors shown in the tutorial include safety pins. They are removed before the connector is inserted and then reinstalled after the connector is seated. This is a mechanical retention and safety step. After reinserting the pin, verify that the connector is properly seated rather than assuming that visual alignment is enough.
Repeated field setup creates opportunities for wear, dust, bent hardware and incomplete insertion. Make connector inspection a routine part of pre-charge setup. If a locking mechanism is damaged or does not seat normally, stop using it rather than forcing it.
Connecting the Charger to the Battery and Cooling System
Once the power-input side is correctly configured, the charger must be connected to the intelligent flight battery through the supported charging/cooling arrangement. In the source tutorial, DJI demonstrates connecting the charger’s battery charging cable to an air-cooled heat sink and placing the intelligent flight battery into that cooling device.
For T100 operators, the equivalent ecosystem includes the DB2160 Battery Cooling Station and T100 Battery Air-Cooling System. The battery itself is available as the DB2160 Intelligent Flight Battery.
Cooling should be treated as part of charging, not as an optional accessory. A battery that has just completed a demanding flight may be significantly warmer than ambient conditions. Proper thermal management helps the intelligent system keep the battery inside its allowed operating window and supports consistent battery turnaround.
What the Battery LEDs Mean During the Demonstrated Charge
In the video demonstration, the four LEDs on the intelligent flight battery blink in sequence during charging. When charging is complete, the four LEDs become solid or turn off depending on the battery state and system behavior shown in the tutorial. At that point, the operator removes the battery and can place the next battery into the cooling/charging station.
Do not rely on a remembered LED pattern when a battery is showing unusual behavior. Battery firmware, model and warning conditions can change what an indicator means. Use the exact battery manual and the DJI Agras app when a status appears abnormal.
Correct Shutdown Sequence After Fast Charging
The source tutorial emphasizes de-energizing the upstream power supply before disconnecting the fast-charging cables. In the three-phase demonstration, the operator turns off the air circuit breaker before the fast-charge input cables are disconnected from the charger.
This reflects a larger rule for professional field operations: connections that carry substantial current should not be casually made or broken under load. Follow the current DJI shutdown sequence for the charger and have the qualified electrician manage any fixed or high-current electrical connection.
Two Fast-Charging Warnings That Should Never Be Ignored
First: the tutorial states that indoor fast charging is prohibited. Build the charging station so it is protected from unsafe environmental exposure while still complying with the manufacturer’s outdoor fast-charging requirement and ventilation needs.
Second: the tutorial states that each fast-charging cable requires an input current exceeding 16 A and that the fast-charge cables must not be connected to ordinary 16 A or 10 A power outlets. A connector that can physically be adapted to an outlet is not proof that the circuit can safely provide the required current.
These warnings are especially important when a farm crew is tempted to “make it work” with extension cords, adapters or existing shop receptacles. Never defeat electrical protection or improvise around the manufacturer’s required input.
Slow Charging Method: Step-by-Step Overview
The slow-charge method demonstrated in the video uses the adapter/conversion cable and an AC cable together. At a high level, the sequence is:
- Make sure the charger is not energized.
- Remove the safety pin from the adapter connector.
- Connect the adapter cable to the main power-input port of the charger.
- Reinsert the safety pin.
- Gently check that the adapter is correctly seated and retained.
- Connect the slow-charging AC cable to the adapter.
- Connect the AC cable to the suitable 16 A outlet demonstrated for the C10000 example.
- Use the same supported charger-to-cooling-system-to-battery connection workflow described for charging.
- Monitor the battery and charger indicators.
- When charging is finished, disconnect the power cable from the wall/power outlet first, then disconnect it from the charger according to the demonstrated sequence.
Again, verify the current requirements for the exact charger being used. Do not assume a C10000 slow-charge input arrangement is identical to another charger model.
When Slow Charging Makes Sense
Slow charging is not inherently inferior. It serves a different operational objective. It can make sense when batteries are being prepared before a job, when an aircraft is not flying continuously, when a site lacks approved fast-charge infrastructure, or when the operator has enough time and batteries that charging speed is not the limiting factor.
Fast charging becomes more important when the aircraft is the expensive productive asset sitting idle. If the drone can complete a flight and refill more quickly than the power system can return the next battery, the charging station—not the aircraft—controls acres per hour. The correct economic question is therefore not simply “How fast does this charger charge?” but “Can my complete battery rotation keep the aircraft flying at the pace of this job?”
DJI Agras T100 Power Ecosystem: DB2160, C12000, Cooling and D14000iE
The T100 is supported by a higher-capacity power ecosystem than the C10000 example shown in the source video. Ares Acres currently carries the following T100 components:
- DJI Agras T100 OEM DB2160 Intelligent Flight Battery
- DJI Agras T100 OEM C12000 Intelligent Battery Charger
- DJI Agras T100 OEM DB2160 Battery Cooling Station
- DJI Agras T100 OEM Battery Air-Cooling System
- DJI Agras T100 D14000iE Inverter Generator
- DJI Agras T100 Full Set with Batteries and Charger
A T100 operator should plan these as a matched system. The DB2160 battery, C12000 charger and supported cooling station are not generic equivalents of T50 components. Before mixing hardware from different aircraft generations, verify exact compatibility.
DJI Agras T50 Power Ecosystem: DB1560, C10000 and D12000iE
The T50 system discussed more directly in the C10000 example uses the DB1560 battery family and C10000 charger. Current Ares Acres links include:
- DJI Agras T50 OEM DB1560 Intelligent Flight Battery
- DJI Agras T50 OEM C10000 Intelligent Battery Charger
- DJI Agras T50 D12000iE Inverter Generator
- DJI Agras T50 C10000 Charger + 3 DB1560 Batteries Bundle
- DJI Agras T50 Full Set with Generator
The DB1560 and DB2160 are different batteries. Even if connectors or charging concepts appear similar, do not assume cross-compatibility. Use the battery and charger model specifically approved for the aircraft system.
Compatibility: The Most Important Rule Is to Verify the Exact Model
The phrase “DJI intelligent power supply” describes a family of products, not one universal charger. Likewise, “DJI Agras battery” refers to multiple battery generations with different voltage, capacity, communication, thermal and physical requirements.
Before charging, verify at minimum:
- charger model;
- battery model;
- approved cooling station or heat-sink interface;
- input-voltage and current requirements;
- approved cable configuration;
- generator or facility supply requirements;
- firmware/activation status;
- market or regional version when relevant.
If you are uncertain about fitment, use the exact product model and battery designation when contacting Ares Acres. “T100 battery charger” is more useful than “DJI charger,” and “DB2160” is more useful than “big Agras battery.”
Field Power Planning: Think in Cycles, Not Individual Charges
A productive spray day is a repeating loop of flying, refilling, battery removal, cooling, charging and relaunching. Power planning should therefore be based on the cycle rather than a single battery charge time.
Ask these questions before the job:
- How long is a typical flight for the planned payload and application rate?
- How long does refill and aircraft turnaround take?
- How long does a used battery need before the intelligent system will accept the desired charge rate?
- How long does the selected charger/power-source combination need to return that battery to service?
- How many batteries are required so the next battery is ready before the aircraft needs it?
- Can the generator continuously support the charger plus any other connected loads?
- Is there enough fuel for the generator and enough airflow for both generator and charging equipment?
When these numbers are aligned, the power system disappears into the background and the aircraft keeps flying. When they are not, the crew spends the day waiting.
How Many Batteries Should a T100 or T50 Operation Use?
There is no universal number because battery count depends on job intensity, charge rate, ambient temperature, generator capacity, aircraft loading, refill workflow, travel between fields and how much redundancy the operator wants. A common professional approach is to have multiple batteries in rotation rather than depending on one battery to cool and recharge before every flight.
More batteries provide buffering: if one battery is too hot, reports an exception or needs to be removed from service, the aircraft does not immediately stop. However, batteries are expensive assets. The goal is not to own the largest possible fleet; it is to own enough reliable batteries to keep the aircraft productive without creating unnecessary capital and maintenance burden.
Generator Selection: More Than a Nameplate Wattage
A generator must satisfy the charger’s required voltage, phase configuration, continuous output and connection method. The source tutorial gives minimum-rated examples for the C10000 fast-charge configurations, but generator selection should also consider real operating conditions.
Questions to verify with the generator manufacturer, charger documentation and qualified electrician include:
- continuous versus peak output rating;
- required voltage under sustained load;
- single-phase or three-phase output as applicable;
- grounding/earthing configuration;
- connector and cable compatibility;
- behavior when a large load steps on or off;
- ambient-temperature derating;
- altitude derating;
- fuel capacity and runtime;
- whether other loads will share the generator.
A generator that is nominally “big enough” can still be a poor operational match if voltage regulation is unstable or the required connection cannot be made safely.
Why DJI Inverter Generators Are Relevant to Agras Charging
Dedicated DJI generator products are designed around the agricultural-drone power ecosystem rather than being selected solely by a generic wattage figure. Ares Acres carries the D12000iE for the T50 ecosystem and the D14000iE for the T100 ecosystem.
The advantage of using a purpose-selected generator is not that an operator can ignore electrical requirements. It is that the generator, charger and battery system can be planned as a coherent package. Always confirm current compatibility and connection requirements because product generations and regional configurations can differ.
Battery Cooling Is a Throughput System
Cooling is often the hidden limiter in a high-tempo operation. A battery may return from the aircraft with substantial internal heat. Even if the charger has ample input power, the intelligent charging system can protect the battery by limiting or delaying charging when thermal conditions are outside the acceptable range.
A cooling station therefore does two jobs: it supports battery safety and it reduces turnaround time. Keep its airflow paths clean. Place it where it can move air freely. Do not stack objects around the intake or exhaust. Do not let chemical residue accumulate on electrical equipment. If cooling performance changes, inspect the cooling system rather than automatically blaming the battery.
Where to Place the Charger in a Mobile Field Setup
A good charging station separates electrical equipment from aircraft propeller zones, pesticide mixing, vehicle traffic and standing water. The charger needs airflow and a stable surface. Cables need to be routed so they are not crushed by tires, pulled by foot traffic or exposed to sharp edges.
Because the source tutorial prohibits indoor fast charging, the field station must also respect the manufacturer’s required charging environment. “Outdoor” does not mean leaving energized equipment exposed to rain. Build the site around the current charger manual, generator ventilation requirements and local safety rules.
Transport and Cable Storage
Before transporting the charger, secure the cable storage cover as demonstrated. Disconnect equipment in the proper shutdown sequence. Inspect cables for strain and keep connector ends protected from dirt and moisture. Carry the charger by its handle rather than lifting it by the battery lead or input cable.
Repeated transport is one of the harshest parts of agricultural-drone operations. Vibration, dust and rushed setup can damage connectors long before the charger electronics fail. A simple transport checklist can prevent expensive downtime.
Pre-Charge Checklist
- Correct charger for the battery model.
- Charger activated and recognized by the DJI Agras app.
- Generator or AC supply verified for the intended charging method.
- Fast-charge wiring performed/verified by qualified electrician where required.
- Main and auxiliary inputs used exactly as specified.
- Safety pins installed and connectors fully seated.
- No cuts, crushed insulation, bent pins or burned connectors.
- Charger fan and ventilation openings unobstructed.
- Cooling station clean and operating normally.
- Battery free of obvious physical damage, leakage, swelling or abnormal heat.
- Charging area separated from pesticide mixing and water.
- Appropriate fire and emergency procedures established for the site.
- Remote controller available for charger diagnostics if needed.
Troubleshooting: Charger Will Not Power On
If the charger appears completely inactive, start at the source and move downstream:
- Confirm the upstream generator or facility supply is energized and suitable.
- Confirm any applicable breaker is in the correct state.
- When using a single input cable, confirm it is connected to the charger’s main input, not auxiliary only.
- Confirm connectors are fully seated and locking hardware is installed.
- Inspect cables for visible damage.
- Do not repeatedly reset a breaker that trips; have the electrical cause investigated.
- If input power is verified but the charger remains inactive, consult the charger manual or service support.
Troubleshooting: Charger Powers On but the Battery Does Not Charge
When the charger is alive but no charge begins, the likely fault domain shifts toward the battery-side connection, temperature, compatibility or intelligent control system. Verify that the battery charging cable is correctly connected to the supported cooling interface, the battery is properly seated, and the battery model is approved for the charger.
Also check whether the battery is excessively hot after flight. An intelligent system may delay or limit charging for protection. Use the charger LED and DJI Agras app rather than forcing repeated reconnections.
Troubleshooting: Remote Controller Cannot See the Charger
For diagnostics or activation, verify that the USB cable is functional and connected to the correct communication ports. Confirm the remote controller is operating normally and, for activation, has network access. Open Device Management and the charging-device section in DJI Agras.
If the charger charges normally but will not communicate, test a known-good data-capable USB cable before assuming the charger electronics are defective. Some USB cables are intended only for power and may not support the required data communication.
Troubleshooting: Charger Shows an Exception
Do not ignore an exception simply because the battery appears to be charging. Stop and identify the condition. Check the status indicator, connect the charger to the remote controller, and record the detailed message shown by the DJI Agras app. Then inspect the relevant part of the system.
If the exception suggests an electrical-input problem, do not troubleshoot energized high-current wiring yourself unless you are qualified. If it suggests battery or charger temperature, inspect airflow and allow equipment to return to an acceptable condition. If it identifies a battery fault, isolate that battery from the active rotation until it is evaluated.
Troubleshooting: Charging Slows Down in Hot Weather
High ambient temperature increases the difficulty of removing heat from both the charger and the battery. Keep the charger fan and battery-cooling system unobstructed. Increase shade and airflow in ways permitted by the equipment manuals without enclosing the charger. Rotate batteries so recently flown packs have adequate cooling opportunity before high-rate charging.
Do not try to defeat temperature protection. A reduced charging rate can be the system protecting the battery.
Troubleshooting: Generator Sounds Unstable Under Charger Load
If the generator hunts, surges, trips protection or cannot maintain stable operation when charging begins, stop treating the symptom as a charger problem. Remove the charging load according to the correct shutdown procedure and have the generator/power configuration assessed.
Possible causes can include inadequate continuous capacity, another large shared load, generator maintenance issues, incorrect configuration or environmental derating. Do not bypass breakers or protection to keep charging.
Example Three-Battery Rotation
Consider a simplified operation with three batteries. Battery A is in the aircraft. Battery B is cooling/charging. Battery C is charged and staged for the next flight. When Battery A returns, the crew installs Battery C, moves Battery A into the cooling workflow, and continues charging Battery B. Once Battery B is ready, it becomes the next staged battery.
The exact sequence will vary, but the principle is powerful: one battery flies, one battery recovers, and one battery provides a buffer. If charge time grows because of heat or power limitations, the crew can see immediately whether the rotation will collapse. Adding a battery may restore the buffer, but only if the charger can eventually catch up.
Battery Logging and Fleet Management
Professional operations benefit from tracking each battery as an individual asset. Record battery ID, approximate cycle count or app-reported usage, abnormalities, impact events, repairs and retirement decisions. If one battery consistently charges more slowly, heats abnormally or triggers warnings, that pattern is easier to identify when batteries are not treated as anonymous interchangeable boxes.
For repair-related parts, Ares Acres carries components such as the T50 DB1560 Battery Motherboard and T100 DB2160 Battery Motherboard with Lid. Battery repair can involve high stored energy and should only be handled by appropriately trained personnel.
Post-Flight Battery Handling
After a flight, do not throw a hot, heavy intelligent battery directly onto a charging station without inspection. Check for damage or contamination, keep connectors clean, and follow the cooling workflow for the specific battery. If the battery has been involved in a hard landing, impact, water exposure or other abnormal event, isolate it and evaluate it before charging.
Charging is when substantial energy is being transferred into the battery. A damaged battery should not be “tested” by simply putting it on a high-power charger.
Keep Electrical Connectors Clean
Agricultural operations expose equipment to dust, fertilizer, pesticide residue and moisture. Electrical connector contamination can create resistance, poor communication or corrosion. Keep caps and covers in place during transport and storage. Clean only by methods approved for the equipment, with power disconnected.
If a connector shows discoloration, melting, pitting or a burned odor, stop using it until the cause is identified. Repeatedly reconnecting a damaged high-current connector can worsen the failure.
The Remote Controller Is Also a Service Tool
Operators often think of the remote controller only as the aircraft-control device. In the power ecosystem it can also become a diagnostic interface. Connecting the intelligent charger to the remote controller and opening DJI Agras allows the crew to inspect charging-device information and exception details.
That makes the controller useful even when the aircraft is not in the air. Keep it charged, updated according to your fleet policy, and available at the charging station when troubleshooting.
FAA Part 107 Context: Charging Is Ground Support, Flight Authority Is Separate
FAA Part 107 addresses civil small unmanned aircraft operations in the United States. Charger activation, generator wiring and battery charging are ground-support activities; using the DJI intelligent power supply does not itself grant authority to conduct a flight.
An operator should make sure the aircraft operation complies with the federal rules, airspace requirements, pilot qualifications and any waivers or permissions applicable to the mission. If the aircraft is dispensing pesticides or other agricultural materials, additional requirements can apply, including FAA Part 137 and state pesticide/application rules. This article is operational education, not legal advice.
The title includes FAA 107 because U.S. operators commonly build their Agras workflow around Part 107 remote-pilot operations, but the electrical procedures in this tutorial should not be confused with FAA certification requirements.
Part 107 Certification Does Not Make Someone a Qualified Electrician
A remote pilot certificate demonstrates aviation knowledge relevant to operating a small UAS under Part 107. It does not qualify the holder to wire a high-current generator or three-phase power supply. Those are different competencies.
On a professional crew, responsibilities can be divided: the remote pilot manages flight safety and aviation compliance; a trained applicator manages chemical handling and label compliance; and a qualified electrician manages electrical connections that require that expertise. One person may hold multiple qualifications, but the qualifications should not be assumed to transfer from one domain to another.
Add the Power System to Your UAS Preflight Planning
Agricultural-drone preflight should include more than props, motors and GPS. Ask whether the ground-support system can safely support the entire mission. If the generator is nearly out of fuel, a charging cable is damaged, or only one healthy battery is available, the operational risk is visible before takeoff.
A practical mission briefing can include expected field size, application rate, number of battery cycles, charging method, battery rotation, refueling plan for the generator, cooling-station location, electrical safety responsibility and a stop-work rule for abnormal battery or charger indications.
Design a Mobile Charging Station in Zones
A clean field layout reduces mistakes. One useful concept is zoning:
- Flight zone: aircraft takeoff/landing and propeller clearance.
- Battery exchange zone: where aircraft power is safely changed.
- Cooling/charging zone: charger, cooling station and battery rotation.
- Generator zone: adequate ventilation, stable placement and safe cable routing.
- Chemical mixing zone: physically separated from energized electrical equipment.
- Staging zone: charged batteries and clean equipment awaiting use.
This reduces the chance that pesticide is spilled onto charging equipment, a truck drives over a cable, or a person carrying a battery walks through an active propeller area.
Separate the Charging Station from Chemical Handling
DJI Agras aircraft often operate around liquid concentrates, mixed spray solution, fertilizer and wash water. Electrical chargers and batteries should be kept out of the mixing splash zone. Chemical residue can contaminate connectors, fans and surfaces, while water creates obvious electrical hazards.
Build enough physical separation that normal refilling cannot spray or spill onto power equipment. The fastest workflow is not the one with every station touching; it is the one where people can move quickly without creating cross-contamination or electrical hazards.
Weather and Environmental Conditions
Field charging has to cope with sun, heat, dust and changing weather. Monitor conditions and stop if the charging environment no longer meets the equipment requirements. Protect equipment from rain without enclosing it in a way that traps heat or violates ventilation requirements. Keep the generator exhaust away from personnel and equipment according to its manual.
Remember that ambient temperature affects both battery cooling and generator output. A power plan that works comfortably on a mild morning can become marginal in extreme afternoon heat.
Never Carry the Charger by Its Cables
The integrated handle exists for a reason. High-current cables and connector strain reliefs are not lifting points. Pulling the charger by a cable can create internal damage that is invisible until the system is under load.
Likewise, do not drag batteries by straps or connectors not intended for transport. Use the designed carrying points and team-lift practices when appropriate for heavy equipment.
Preparing for a Long Spray Day
The evening or morning before a major application, verify the entire energy system rather than waiting until the first depleted battery:
- activate and test the charger;
- confirm generator fuel and maintenance status;
- inspect every charging cable;
- verify battery health and charge states;
- clean cooling-station airflow paths;
- stage spare approved cables or critical parts if available;
- verify remote controller can access charging-device diagnostics;
- confirm the qualified person responsible for any high-current electrical connection;
- review the day’s expected battery rotation.
End-of-Day Shutdown
At the end of operations, do not simply switch off the generator and leave the charging area assembled. Complete charging as appropriate, follow the correct power-down sequence, isolate the upstream supply, disconnect cables in the manufacturer-specified order, let equipment cool, inspect for damage, secure dust covers and cable-storage features, and store batteries according to DJI guidance.
End-of-day inspection is valuable because it gives the crew time to replace or repair a suspect component before the next morning rather than discovering it at the field.
Storage Charging vs. Immediate Operational Rotation
A battery being staged for another flight has a different objective from a battery being stored for an extended period. Follow DJI battery-management guidance for storage state and maintenance. Do not keep every battery permanently at maximum charge simply because the aircraft might be used someday.
The intelligent battery’s management system provides protection, but operator discipline still matters. Long-term battery value comes from avoiding abuse, excessive heat, physical damage and inappropriate storage—not only from counting charge cycles.
T100 vs. T50 Power Planning
The operating logic is similar across Agras generations—fly, cool, charge, rotate—but the hardware is not interchangeable merely because the workflow looks familiar. The T50 uses the DB1560/C10000 ecosystem, while the T100 product lineup includes DB2160/C12000 hardware. Generator selection also differs, with Ares Acres listing the D12000iE in the T50 ecosystem and D14000iE in the T100 ecosystem.
When upgrading aircraft, budget for the ground power system as part of the upgrade. Moving to a higher-throughput drone without matching charger, battery and generator capacity can leave the new aircraft waiting on legacy infrastructure.
Complete Power System vs. Buying Individual Parts
New operators may benefit from a matched system because it reduces compatibility uncertainty. Experienced fleets may already own generators, batteries or chargers and only need a specific replacement. Ares Acres supports both approaches through individual components and full-set products such as the DJI Agras T100 Full Set and DJI Agras T50 Full Set with Generator.
When purchasing components separately, verify model numbers before ordering. A product name that includes “Agras” is not enough to establish fitment.
Common Power-System Mistakes
- Connecting a single AC cable to the auxiliary input instead of the main input.
- Trying to fast-charge from an ordinary low-current outlet.
- Assuming every Agras battery works with every Agras charger.
- Using an undersized or unstable generator.
- Ignoring the cooling station and blaming slow charging on the charger.
- Blocking charger fan airflow.
- Connecting or disconnecting high-current fast-charge wiring without proper qualification.
- Leaving locking/safety pins unsecured.
- Dragging or carrying equipment by cables.
- Charging next to pesticide mixing or standing water.
- Repeatedly resetting a tripped breaker without diagnosing the cause.
- Ignoring charger exceptions because the system “still works.”
- Failing to activate the charger before first use.
- Using a charge method from a C10000 video as if it automatically applies to a C12000.
- Running a major job with no spare battery capacity or contingency plan.
Frequently Asked Questions: DJI Agras T100 / T50 Power Supply, Batteries and Generators
Does the DJI intelligent power supply need activation before first use?
Yes. The source tutorial states that the charger must be activated before first use. DJI demonstrates connecting the charger to a network-connected remote controller by USB and completing activation in DJI Agras under Device Management and the charging-device section.
Can the charger diagnose itself?
It includes an auto-check function. The status LED provides preliminary information, and the DJI Agras app can provide more detailed charging-device exception information when the charger is connected to the remote controller.
Can I plug one AC cable into either charger input?
No. In the demonstrated system, a single AC cable must be connected to the main power input. A single cable connected only to the auxiliary input will not operate the charger.
What is the auxiliary input for?
It is the secondary power input used in supported higher-power configurations. Use it only as specified for the exact charger and charging method.
What charger is associated with the DJI Agras T50?
Ares Acres currently lists the DJI Agras T50 OEM C10000 Intelligent Battery Charger for the T50 power ecosystem.
What charger is associated with the DJI Agras T100?
Ares Acres currently lists the DJI Agras T100 OEM C12000 Intelligent Battery Charger for the T100 power ecosystem.
What battery does the T50 use in this ecosystem?
The T50 product ecosystem uses the DB1560 intelligent flight battery. Verify exact aircraft and battery compatibility before purchase or charging.
What battery does the T100 use in this ecosystem?
The T100 product ecosystem uses the DB2160 intelligent flight battery. It is a different battery family from the T50 DB1560.
Can a DB1560 be charged on any DJI Agras charger?
Do not assume that. Match the battery to the charger models approved by DJI. Physical similarity is not proof of electrical or firmware compatibility.
Can I use the C10000 fast-charge instructions on a C12000?
Not automatically. The video demonstrates the C10000 as its example. The C12000 is a different charger. Use the current C12000 manual and approved power-source requirements.
What generator example does the video give for C10000 fast charging?
For fast-charging method one, the source tutorial describes two fast-charge cables connected to a 220 V single-phase generator rated at 12 kW or above.
What is the three-phase example in the video?
For fast-charging method two, the source tutorial describes a three-phase five-wire supply rated at 18 kW for the C10000 example.
Who should connect the fast-charging cables?
DJI states in the source tutorial that only qualified electricians wearing insulated gloves should connect or disconnect the fast-charging cables.
Can fast charging be performed indoors?
The source tutorial explicitly states that indoor fast charging is prohibited. Follow the current manual for the exact charger and region.
Can I use a normal 16 A wall outlet for the fast-charge cables?
No. The source tutorial states that each fast-charge cable requires input current exceeding 16 A and warns not to connect the fast-charge cables to 16 A or 10 A outlets.
What outlet is shown for the slow-charge example?
The C10000 slow-charge demonstration uses the adapter plus AC cable connected to a 16 A AC outlet. Verify the exact requirements for your charger before use.
Does slow charging use the main or auxiliary charger input?
The demonstrated slow-charge adapter is connected to the main power-input port.
Why does the charger have a fan?
Charging creates heat. The internal fan removes heat from the charger so the electronics can operate within their designed thermal range.
Why is a battery cooling station important?
A battery returning from flight can be hot. Cooling supports safe charging and improves battery turnaround, which directly affects aircraft field throughput.
What should I do if the charger LED indicates a fault?
Stop, inspect the obvious conditions, and connect the charger to the remote controller to view detailed charging-device information in DJI Agras. Follow the manual for the specific exception.
Can I diagnose the charger without the aircraft?
Yes. The tutorial demonstrates connecting the charger directly to the remote controller by USB for activation and detailed diagnostic information.
What should I do if the charger does not turn on?
Verify the upstream power source, breaker state, correct main-input connection when using one cable, connector seating and cable condition. Do not repeatedly reset protection that trips.
What if the charger turns on but the battery will not charge?
Check battery compatibility, battery-side connection, cooling-station connection and battery temperature. Use DJI Agras diagnostic information rather than forcing repeated charge attempts.
Should I charge a battery immediately after a hard impact?
Not as a routine test. Isolate a battery involved in a significant impact or abnormal event and have it evaluated before charging.
How many batteries do I need?
It depends on flight time, refill time, cooling, charging time, temperature and generator capacity. The goal is enough batteries to maintain a rotation without leaving the aircraft waiting.
Is three batteries enough?
Three can create a useful fly/cool-charge/staged rotation in some operations, but it is not a universal prescription. Measure your actual cycle times.
Will adding more batteries fix an undersized generator?
It can temporarily add buffer, but it does not remove the underlying charging bottleneck. If energy consumption continuously exceeds charging capacity, the rotation eventually falls behind.
What generator does Ares Acres list for the T50 ecosystem?
Ares Acres lists the DJI Agras T50 D12000iE inverter generator.
What generator does Ares Acres list for the T100 ecosystem?
Ares Acres lists the DJI Agras T100 D14000iE inverter generator.
Is generator peak wattage the only specification that matters?
No. Continuous output, voltage, phase, connection, regulation, environmental derating, grounding and compatibility all matter.
Can I run other equipment from the same generator while charging?
Only if the generator and electrical system are designed for the combined continuous load. Shared loads can reduce available capacity and affect stability.
Why do charging times change during the day?
Battery starting temperature, ambient heat, generator output and intelligent battery protection can all change the effective charging rate.
Can I block the charger fan to keep dust out?
No. Do not obstruct required airflow. Use dust protection only as intended for storage/transport or as specified by the manufacturer.
How should I carry the charger?
Use the designed handle. Do not lift or drag the charger by its power or battery cables.
Why should the cable storage cover be secured?
It protects and restrains cables during transport, reducing strain and contamination risk.
What does FAA Part 107 have to do with the charger?
Very little directly. Part 107 governs U.S. small-UAS operations. Charging is ground support. The tutorial includes Part 107 context because the power system supports an aircraft operation that may be conducted under Part 107.
Does a Part 107 certificate qualify me to wire a three-phase charger connection?
No. Aviation certification and electrical qualification are separate. Use a qualified electrician for electrical work requiring that expertise.
Do spraying operations only need Part 107?
Not necessarily. Dispensing agricultural materials can involve additional federal, state and local requirements, including FAA Part 137 and pesticide/application rules.
Where can I buy a T100 DB2160 battery?
Ares Acres lists the DJI Agras T100 OEM DB2160 Intelligent Flight Battery on its online store.
Where can I buy a T50 DB1560 battery?
Ares Acres lists the DJI Agras T50 OEM DB1560 Intelligent Flight Battery on its online store.
What is the best first troubleshooting step?
Observe the charger and battery indicators, note the exact exception, and work through the power chain methodically from source to charger to cooling system to battery rather than replacing parts at random.
Can I use adapters to make an incompatible outlet work?
Do not improvise around the charger’s required electrical input. A physical adapter does not increase circuit capacity or make an unsafe supply suitable.
Should the generator be inside a trailer to protect it from weather?
Follow the generator and charger ventilation requirements. Combustion generators produce hazardous exhaust and require appropriate outdoor ventilation; do not create an enclosed arrangement that traps exhaust or heat.
Can I charge next to my spray mixing tank?
Keep charging equipment physically separated from chemical mixing and wash water to reduce electrical and contamination risks.
How do I know charging is complete?
In the demonstrated battery workflow, the four battery LEDs blink sequentially during charging and become solid or turn off when charging is complete. Confirm with the exact battery manual/app for your model.
What should I do before disconnecting fast-charge cables?
Follow the current DJI shutdown procedure. In the demonstrated three-phase example, the air circuit breaker is turned off before the fast-charge cables are disconnected.
Why is battery rotation a business issue?
Because aircraft downtime reduces acres treated per hour. A well-designed power loop keeps the expensive productive asset—the aircraft—working instead of waiting for energy.
Should I buy a full set or individual power components?
A full matched system can simplify compatibility for a new operator. Existing fleets may only need individual replacement batteries, chargers or generators. Verify model numbers either way.
Where can I find more DJI Agras tutorials?
Ares Acres publishes additional operator and equipment guides in its DJI Agriculture Tutorials library.
Power-System Decision Table
| Situation | Primary consideration | Next action |
|---|---|---|
| New T50 operator | Matched DB1560/C10000/generator ecosystem | Verify full-set requirements and battery count before field season. |
| New T100 operator | Matched DB2160/C12000/cooling/generator ecosystem | Build the power station as part of the aircraft purchase, not after. |
| Charger will not power on | Source, breaker, main-input connection, cable seating | Work from upstream power toward charger; stop if electrical protection trips. |
| Battery will not begin charging | Compatibility, connection, temperature, battery condition | Use charger LED and DJI Agras diagnostics. |
| Charging too slowly | Power source, thermal conditions, cooling performance | Identify whether input power or battery temperature is limiting throughput. |
| High-volume field operation | Continuous charging capacity and battery rotation | Measure cycle times and add power/battery buffer where the bottleneck actually exists. |
| Three-phase fast charging | Qualified electrical installation | Use a qualified electrician and exact DJI wiring documentation. |
| Long-term storage | Battery storage guidance | Follow DJI storage-state and inspection recommendations rather than leaving all batteries at full charge. |
Ares Acres Power-System Resources
Ares Acres focuses on DJI Agras aircraft, OEM parts, batteries, chargers, generators and technical support for U.S. agricultural-drone operators. Relevant resources for this tutorial include:
- DJI Agras T100
- DJI Agras T50
- T100 DB2160 Intelligent Flight Battery
- T100 C12000 Intelligent Battery Charger
- T100 DB2160 Battery Cooling Station
- T100 D14000iE Inverter Generator
- T50 DB1560 Intelligent Flight Battery
- T50 C10000 Intelligent Battery Charger
- T50 D12000iE Inverter Generator
- DJI Agriculture Tutorials
Final Operator Checklist
- Identify your exact charger and battery models.
- Activate the intelligent power supply before first use.
- Confirm the remote controller can communicate with the charger for diagnostics.
- Use the main input whenever the single-cable procedure requires it.
- Use only the approved fast- or slow-charge cable configuration.
- Have qualified electricians manage high-current fast-charge connections as required.
- Never connect fast-charge cables to ordinary low-current outlets.
- Respect DJI’s prohibition on indoor fast charging from the source tutorial.
- Use the correct cooling station for the supported battery.
- Inspect connectors, locking pins and cables before energizing.
- Keep charger and cooling airflow unobstructed.
- Separate electrical equipment from spray mixing, wash water and vehicle traffic.
- Monitor battery LEDs and charger status.
- Use DJI Agras for detailed exceptions instead of guessing.
- De-energize the upstream supply before disconnecting fast-charge cables according to the approved procedure.
- Track batteries individually and remove abnormal packs from rotation.
- Plan enough batteries and generator capacity to keep the aircraft flying.
- Verify the charging setup again whenever you change charger, battery or generator models.
What Is Ares Acres?
Ares Acres is a U.S.-focused DJI Agras equipment and parts resource built around the needs of agricultural-drone operators. Our catalog includes aircraft, OEM replacement parts, intelligent flight batteries, battery chargers, generators, spray-system components, avionics, propulsion parts and technical resources across current Agras platforms.
Our objective is to make the ownership side of agricultural robotics easier: identify the right component, understand how it fits into the aircraft system, reduce downtime, and give operators a clear path from a technical question to the correct part or support resource. That is why these tutorials connect operating procedures directly to real battery, charger, cooling and generator components in the Ares Acres catalog.
If you are building a T100 or T50 power system, start with the exact aircraft model, battery model, charger model and generator configuration. If a battery or charger is producing a warning, capture the exact DJI Agras message before replacing parts. Better information leads to faster diagnostics and fewer unnecessary purchases.
Disclaimer: This guide expands on the workflow described in the linked DJI tutorial for educational purposes. Specifications, firmware, regional hardware, electrical requirements and regulatory rules can change. Always follow the latest official DJI documentation for the exact product in your possession. High-current and three-phase electrical work should be performed only by qualified personnel. UAS operators are responsible for compliance with applicable FAA, state, local, pesticide-label and workplace-safety requirements. Ares Acres does not provide legal or electrical-engineering certification through this article.