DJI Agras T100 Battery Error Guide: Connector Cleaning, Firmware Reset & DB2160 / DB1560 Diagnosis
Share
🇺🇸 U.S.A. FIRST — DJI Agras Battery Diagnostics, Parts & Operator Support
A battery warning on a DJI Agras T40, T50, T70P, or T100 does not automatically mean the intelligent flight battery is internally damaged, the BMS has failed, or the battery motherboard needs to be replaced. Before an operator spends hundreds or thousands of dollars on a replacement battery, motherboard, aircraft interface board, charger, or power-distribution component, there are several non-invasive checks that can isolate the fault safely and much more accurately.
This guide expands a simple field-service idea into a complete diagnostic protocol: inspect and clean the battery connection path, restart the system, verify firmware, and determine whether the fault follows the battery, the aircraft, or the charging equipment. It is written for DJI Agras operators, fleet managers, repair technicians, agricultural service providers, universities, and farms operating the DB1560 battery ecosystem used with the T40/T50 generation and the DB2160 ecosystem used with the T100/T70P generation.
Important safety note: Agras batteries are high-energy industrial lithium battery systems. This article focuses on external inspection, connector cleaning, controlled isolation, firmware verification, and repair-path selection. It is not an instruction to open a battery pack, probe energized internal conductors, bypass safety circuits, bridge terminals, repair cells, or defeat the BMS. Internal battery work should be performed only by qualified personnel using the correct service procedures and equipment.
DJI Agras T40/T50/T100 Battery Error Guide: Connector Cleaning, Firmware Reset & DB1560/DB2160 Diagnosis
Quick Answer: What Should You Do Before Assuming the Battery Motherboard Is Bad?
If a DJI Agras battery suddenly shows a warning, fails to initialize normally, reports an update problem, behaves intermittently, or is not recognized by the aircraft, the first diagnostic sequence should generally be:
- Stop operating and power the system down.
- Inspect the battery terminals and aircraft battery interface for dirt, fertilizer dust, dried spray residue, moisture, discoloration, pitting, looseness, deformation, or heat damage.
- Clean only according to the current DJI instructions for the exact aircraft/battery model. A clean, dry, lint-free cloth or dry swab is the safest general starting point. Do not flood the connector with liquid or spray a generic lubricant into the battery port.
- Reinstall the battery fully and verify that it seats and locks correctly.
- Restart the battery, aircraft, and remote-controller workflow.
- Check for firmware/module-version updates using the DJI software and procedures applicable to the aircraft.
- Test a known-good battery in the same aircraft.
- Test the suspect battery in another known-good compatible aircraft or charger when practical.
- Determine where the symptom follows. If it follows one battery, investigate the battery-side electronics. If multiple known-good batteries fail on the same aircraft, investigate the aircraft battery port/interface, cable, or power-distribution path before condemning every battery.
That sequence can prevent one of the most expensive mistakes in agricultural-drone repair: replacing a DB1560 or DB2160 motherboard because the warning appeared on the battery, when the actual fault is a contaminated connector, loose interface, damaged cable, aircraft-side board, charger connection, or firmware mismatch.
Related Ares Acres Battery Diagnostic Guides
Compatibility: Which DJI Agras Systems Does This Guide Cover?
| Aircraft Family | Battery Ecosystem | Primary Areas to Inspect | Typical Repair Path |
|---|---|---|---|
| DJI Agras T50 | DB1560 | Battery terminals, aircraft battery port, internal battery-port/core-board connection, charger interface | Connector → aircraft-side cable/interface → battery fuse/board → motherboard or complete battery |
| DJI Agras T40 | DB1560 | Battery terminals, aircraft battery interface, port contamination, charger connection | Connector → aircraft interface → battery electronics → motherboard or complete battery |
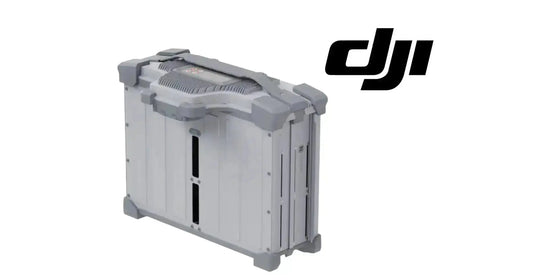
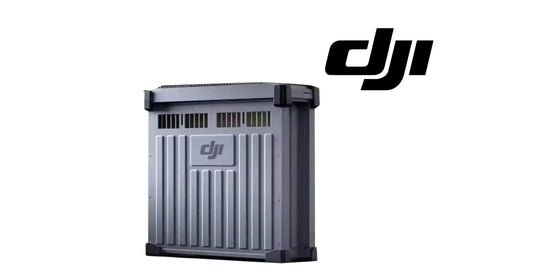
| DJI Agras T100 | DB2160 | Battery terminals, battery interface board, power-distribution path, charger/cooling workflow | Connector → interface board → distribution/power path → motherboard + lid or complete DB2160 |
| DJI Agras T70P | DB2160-family ecosystem | Battery interface, power routing, cooling/charging system, firmware/module compatibility | Connector → aircraft interface → power path → battery electronics |
Compatibility and board revisions matter. Do not assume that two assemblies that physically fit are electronically interchangeable. Verify the exact aircraft model, battery model, regional configuration, board revision, firmware state, and connector arrangement before ordering replacement electronics.
Why a Simple Connector Problem Can Look Like a Major Battery Failure
An Agras intelligent battery is not merely a group of lithium cells connected to two large power terminals. It is a managed electrical system that must exchange both high-current power and electronic information with the aircraft and charging equipment. The aircraft needs to know that a compatible battery is present, that the battery is operating within permitted conditions, and that its electronic state can be trusted before normal operation proceeds.
That creates an important diagnostic reality: the aircraft can report a battery-related problem even when the underlying defect is at the interface between the battery and aircraft.
The external battery connection path can be thought of as several layers:
- Mechanical seating layer: the battery must physically seat, lock, and remain stable under vibration.
- High-current contact layer: the main terminals must establish a low-resistance connection capable of carrying substantial operating current.
- Communication/contact layer: the aircraft and battery electronics must exchange the signals required for recognition, status, protection, and coordinated operation.
- Aircraft interface layer: the battery connector routes into an aircraft-side interface board, port board, cable, core-board connection, or power-distribution assembly depending on model.
- Battery-management layer: the battery motherboard/BMS monitors and controls the battery system.
- Software layer: firmware and module versions must be compatible enough for the system to initialize and operate normally.
A failure at any one of these layers can be interpreted by the operator as “the battery is bad.” A strong diagnostic process asks a different question: which layer stops working?
What Does the Intelligent Battery Motherboard/BMS Actually Do?
The DB1560 and DB2160 batteries incorporate battery-management electronics that perform functions far beyond simply turning the battery on. Depending on battery generation and firmware, the battery electronics participate in monitoring, protection, status reporting, balancing logic, temperature awareness, charge/discharge management, communication with the aircraft, and fault handling.
For a DJI Agras operator, the practical point is this: the motherboard sits at the center of the battery’s electronic identity. That is why a motherboard fault can create warnings such as failed recognition, abnormal battery information, update problems, incompatible hardware/module messages, charging issues, or battery startup problems.
But the same communication chain also passes through external terminals and the aircraft-side interface. If the BMS is healthy but its connection to the aircraft is intermittent, dirty, overheated, mechanically loose, or electrically degraded, the system can behave as though the battery electronics themselves are malfunctioning.
That is the reason this article begins with the connector instead of the motherboard.
The Electrical Principle Behind Connector Heating: Resistance Matters
A high-current connector should provide a stable, low-resistance electrical path. Dirt, corrosion, poor seating, damaged plating, a loose contact, or a partially connected terminal can increase resistance at the interface. When current passes through resistance, energy is dissipated as heat. In simplified electrical terms, resistive heating increases with the square of current: P = I²R.
You do not need to calculate the exact current of a particular flight to use this principle diagnostically. The practical lesson is straightforward:
- A connector that appears “almost connected” can still become abnormally hot.
- A small increase in contact resistance can become important in a high-power system.
- Heat can further degrade a connector, creating a feedback loop of worsening resistance and worsening heat.
- Heat discoloration or pitting is not merely cosmetic; it can indicate that the electrical interface has been stressed.
- Cleaning cannot restore metal that has already been severely pitted, burned, deformed, or heat-damaged.
If a battery connector, aircraft port, plastic housing, or nearby component shows obvious melting, blackening, severe pitting, a burned odor, or deformation, stop treating the issue as a routine cleaning problem. The damaged component should be inspected and replaced as appropriate before the system is returned to service.
Seven Types of Contamination or Damage to Look For
1. Dry Dust and Field Dirt
Agricultural aircraft operate in dust, soil, pollen, crop debris, and fine particulates. Material can settle around recessed contact surfaces and inside housings. Dust can also make it harder to see early corrosion or heat marks.
2. Fertilizer and Granular Spreading Residue
Operators who switch between spraying and spreading should pay particular attention to fine fertilizer dust and granular residue. Agricultural materials can be hygroscopic, abrasive, or corrosive depending on composition. Residue that reaches an electrical interface should not be ignored simply because the battery still powers on.
3. Dried Spray Residue
Liquid application creates another contamination route. Residue from water, adjuvants, fertilizers, crop-protection products, or cleaning processes can migrate onto external surfaces. The specific chemistry varies widely, so a visually small deposit may be electrically or chemically more important than ordinary dust.
4. Moisture or Condensation
Do not energize a visibly wet battery interface. Moisture can be introduced by washing, rain, storage transitions, humidity, or condensation. Allow equipment to dry according to DJI guidance before reconnecting or charging it.
5. Oxidation or Corrosion
Green, white, dark, powdery, or crusted material around contacts can indicate corrosion or chemical reaction. Corrosion is different from ordinary surface dust. A connector with meaningful corrosion should be evaluated for material loss, pitting, looseness, and damage to the mating side.
6. Arc Marks, Pitting, or Heat Discoloration
Dark spots, tiny craters, rough contact surfaces, browned plastic, or a polished/burned appearance can indicate arcing or overheating. Do not aggressively scrape a plated electrical contact in an attempt to make it shiny; removing protective plating can create a new long-term reliability problem.
7. Mechanical Deformation or Loose Seating
A clean connector can still fail. Look for recessed pins, bent elements, looseness, cracked housings, damaged guides, deformed latches, or a battery that rocks or does not seat consistently. If physically pushing or moving the battery changes the warning, the mechanical connection deserves immediate attention.
Stop Immediately If You See Any of These Conditions
External inspection is intended to find low-risk causes before replacing expensive hardware. It is not a reason to continue using visibly damaged equipment. Remove the battery from service and obtain qualified inspection if you observe:
- melted or deformed connector plastic;
- blackened, cratered, or severely pitted high-current terminals;
- a burned electrical odor;
- smoke, sparking, or evidence of arcing;
- significant corrosion;
- swelling, impact damage, cracking, or electrolyte leakage from the battery;
- an interface that becomes abnormally hot quickly;
- a loose aircraft-side port or visibly damaged battery-interface board;
- water inside the battery connector area;
- repeated short-circuit or overcurrent warnings;
- physical damage from a crash or hard landing near the battery bay;
- any condition where the battery cannot be positively retained in the aircraft.
Do not bypass, bridge, shim, tape, or mechanically force a damaged high-current connector simply to finish a field. The cost of an aircraft, payload, crop application, and possible safety event is much larger than the cost of stopping to diagnose the power system correctly.
Step-by-Step External Battery Connector Inspection
Step 1: Power Everything Down
Land the aircraft, end the operation, and shut down the battery and aircraft using the normal procedure. Disconnect charging equipment. Do not inspect or clean an energized high-current connector.
Step 2: Remove the Battery and Create Good Lighting
Place the battery on a clean, dry, non-conductive work surface. Use bright lighting so discoloration and debris are visible. Do not place loose metal hardware, tools, fasteners, or conductive debris near the battery terminals.
Step 3: Inspect the Battery-Side Connector
Look straight into the connector and then from several angles. Compare the contact positions with a known-good battery if available. Look for:
- uniform contact alignment;
- dust or debris;
- foreign material lodged between contacts;
- residue on metal surfaces;
- pitting or discoloration;
- recessed or bent contacts;
- cracked or heat-damaged plastic;
- signs of moisture;
- loose hardware or abnormal movement.
Step 4: Inspect the Aircraft-Side Battery Interface
Do not stop after looking at the battery. The mating connector on the aircraft is equally important. A battery can be perfectly healthy while the aircraft-side connector is contaminated or damaged.
On the T50/T40 generation, the diagnostic path can extend from the battery connector into the battery-port/core-board connection. Ares Acres carries the DJI Agras T50 OEM Battery Port Board / Core Board Flat Cable for applicable T50/T40/T25 configurations. A damaged cable or aircraft-side interface can create battery-recognition behavior that follows the aircraft rather than the battery.
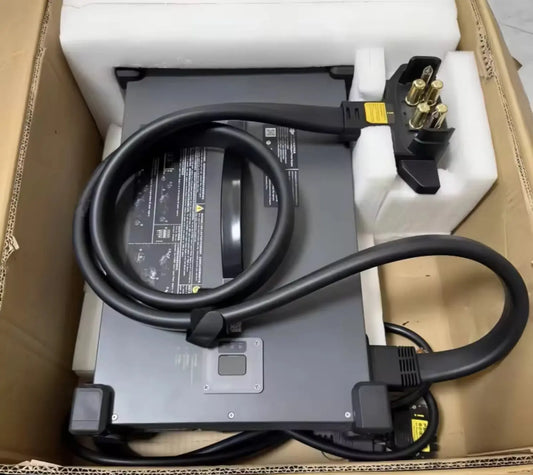
On the T100/T70P generation, the aircraft battery interface and power-routing assemblies are separate diagnostic candidates. See the DJI Agras T100 OEM Battery Interface Board, the alternate current listing for the T100/T70P Battery Interface Board, and the T100 DB2160 Power Distribution Board.
Step 5: Inspect the Battery Seating and Locking Mechanism
Examine the guides, latches, retention points, and surrounding structure. Battery contacts are designed to mate at a defined position. If the battery does not seat fully, the electrical interface can be compromised even if the contact surfaces themselves are clean.
Step 6: Inspect the Charger Connection Separately
If the battery also shows abnormal charging behavior, inspect the charging connector and charger-side mating interface. Do not assume that a failure to charge proves a battery motherboard fault. A charger, cable, adapter, generator supply issue, or connector defect can produce a separate charging-path failure.
How Should DJI Agras Battery Terminals Be Cleaned?
The safest universal rule is to follow the current DJI manual for the exact battery and aircraft generation. DJI’s current T100 documentation instructs users to keep battery terminals clean and use a clean, dry cloth for cleaning. T50/T25 and T40/T20P manuals likewise emphasize regular inspection, keeping the battery dry, and cleaning terminals carefully; some manuals specifically warn against cleaning the battery with alcohol or other flammable liquid.
DJI has also published model-specific maintenance articles that may describe different cleaning materials for particular service circumstances. Because those publications can differ, do not convert a single field tip into a universal chemical-cleaning rule for every Agras battery. When there is a conflict, follow the latest official manual/service guidance for the exact product and region.
A Conservative External Cleaning Procedure
- Power down and disconnect the battery.
- Confirm the connector is not hot.
- Remove loose dry debris with a clean, dry, lint-free cloth or dry swab without forcing material deeper into the connector.
- Do not scrape the contact plating with a knife, screwdriver, abrasive paper, wire brush, or metal pick.
- Do not spray liquid directly into the connector.
- Do not reconnect a wet or visibly contaminated interface.
- Inspect both mating sides before reassembly.
- If residue cannot be removed safely using the procedure permitted by the current DJI manual, stop and use qualified service guidance rather than improvising.
Important: “WD-40” Is Not One Product and Is Not a Universal DJI Battery Cleaning Instruction
The field post that inspired this tutorial mentions a cotton swab or “WD-40.” That phrase needs qualification.
Standard WD-40 Multi-Use Product and WD-40 Specialist Contact Cleaner are different products. The manufacturer describes its Specialist Contact Cleaner as an electrical-contact cleaning product designed to evaporate quickly and leave no residue. That does not automatically mean it is approved for every DJI battery connector, seal, plastic housing, plating system, or service procedure.
More importantly, DJI’s battery manuals should control how an Agras battery is serviced. Therefore Ares Acres does not recommend spraying generic WD-40 Multi-Use Product into DB1560 or DB2160 connectors as a routine troubleshooting step.
If a professional technician considers any solvent or electrical contact cleaner, the technician should confirm:
- the current DJI service guidance for the exact model;
- compatibility with connector plastics, seals, adhesives, and plating;
- that no conductive or oily residue will remain;
- that the connector can dry completely before energization;
- that the product is being used for its intended electrical-contact purpose, not simply because the brand name is familiar.
The objective is not to make the connector “look shiny.” The objective is to restore a clean, dry, mechanically sound, low-resistance connection without damaging the interface.
Why Cleaning Both Sides Matters
Imagine three DB1560 batteries used on one T50. If all three begin reporting intermittent connection errors on the same aircraft, replacing all three motherboards would be a poor first diagnosis. The common element is the aircraft.
Conversely, if one DB1560 fails on two known-good T50 aircraft while the other batteries work correctly, the fault follows the battery and the battery-side repair path becomes more likely.
That is why every connector inspection should include:
- the battery-side mating contacts;
- the aircraft-side connector;
- the physical battery seating/retention system;
- the aircraft battery-port/interface wiring or board where accessible to qualified inspection;
- the charger-side interface if charging is involved.
After Cleaning: Reinstall the Battery Correctly
A clean connector that is only partially seated is still a bad connection. Before powering on:
- verify there is no foreign material in the battery bay;
- align the battery normally without forcing it;
- seat it completely;
- confirm the locking/retention mechanism engages;
- look for abnormal gaps or misalignment;
- do not use improvised shims to force contact pressure;
- do not continue if the battery rocks, loosens, or does not latch as expected.
If the error changes when the battery is pressed, moved, or reseated, treat that behavior as diagnostic evidence of a mechanical/interface issue—not as proof that the battery motherboard has suddenly repaired itself.
Step Two: Restart the System Before Replacing Hardware
After confirming a clean, dry, undamaged connection, perform a normal system restart. The purpose is not magical “resetting”; it is to force the battery, aircraft, remote controller, and software environment to initialize again from a known physical connection.
A practical sequence is:
- Power everything off normally.
- Wait until the aircraft and battery have fully shut down.
- Install the battery securely.
- Power on using the normal DJI procedure.
- Allow the aircraft and controller to complete initialization.
- Record the exact warning text and code if it returns.
- Do not rely on memory—take a photo or screenshot of the exact error.
Exact warning language is valuable. “Battery communication abnormal,” “incompatible battery hardware version,” “incompatible module versions,” “update failed,” “battery temperature high,” and “unable to use battery” are different diagnostic starting points even if all of them feel like “a bad battery” in the field.
Step Three: Verify Firmware and Module Compatibility
If the physical connection is sound, verify whether the aircraft, battery, controller, and relevant modules are on mutually compatible software/firmware. This is particularly important after:
- an aircraft firmware update;
- a battery motherboard replacement;
- a controller update;
- a region/version change;
- installation of used or donor electronics;
- an interrupted update;
- long-term storage where one part of the fleet has been updated and another has not.
Use the DJI Agras application and DJI software appropriate to the aircraft. DJI currently provides T50 downloads and DJI Assistant 2 for MG through its official T50 download portal. Do not download firmware tools from an unverified third-party source simply because the aircraft is offline.
DJI Agras T50 Official Downloads
If the system reports “Incompatible module versions” or a battery update fails, use our dedicated guide before ordering a motherboard:
Read: DJI Agras DB1560/DB2160 Repair Guide — Incompatible Module Versions & Battery Update Failed
Do Not Update Blindly When Hardware Is Obviously Damaged
Firmware is not a substitute for electrical repair. If the connector is melted, the port is loose, the battery is physically damaged, or the interface is overheating, do not repeatedly run firmware updates hoping that software will repair damaged hardware.
Likewise, repeated failed updates can complicate the diagnostic picture. Before retrying:
- confirm stable battery power;
- confirm the battery is seated correctly;
- confirm the aircraft and controller connection is stable;
- confirm the battery is not thermally stressed;
- confirm the correct DJI software is being used;
- record the installation/update failure stage and message.
The Most Powerful Test: Does the Error Follow the Battery or the Aircraft?
This is one of the highest-value diagnostic questions in the entire guide.
Test A: Known-Good Battery in Suspect Aircraft
Install a known-good, compatible battery in the aircraft after inspecting the interface.
- If the known-good battery works normally, suspicion shifts toward the original battery.
- If the known-good battery develops the same warning, suspicion shifts toward the aircraft-side connector, interface board, wiring, power distribution, software state, or another common aircraft component.
Test B: Suspect Battery in Known-Good Compatible Aircraft
If operationally possible, install the suspect battery into another known-good compatible aircraft.
- If the warning follows the battery, battery-side electronics or connector damage becomes more likely.
- If the battery works normally in the second aircraft, the first aircraft should be investigated before a battery motherboard is ordered.
Test C: Charger Isolation
If the symptom involves charging, test the suspect battery on a known-good compatible charging system and test a known-good battery on the suspect charger.
- One battery fails across multiple known-good chargers → battery-side issue becomes more likely.
- Multiple known-good batteries fail only on one charger → charger/generator/cable/interface issue becomes more likely.
- Battery works on charger but not one aircraft → focus on aircraft interface/firmware path.
- Battery fails both aircraft recognition and known-good charging → battery-side connector/BMS/internal condition becomes more likely, but still inspect external contacts first.
Diagnostic Matrix: What the Pattern Usually Tells You
| Observed Pattern | Most Useful Next Check | What It Suggests |
|---|---|---|
| One battery fails; other batteries work in same aircraft | Test suspect battery in second compatible aircraft/charger | Battery-side fault more likely |
| Every battery fails in one aircraft | Inspect aircraft connector/interface board/cable | Aircraft-side common fault more likely |
| Error disappears after reseating | Inspect seating, contact wear, looseness, contamination | Mechanical/interface issue possible |
| Error changes when battery is moved | Stop operating; inspect retention and port alignment | Intermittent connector fault strongly suspected |
| Battery charges normally but aircraft does not recognize it | Test in second aircraft and inspect aircraft-side communication/interface | Aircraft interface or compatibility issue possible |
| Battery will not charge on one charger but charges on another | Inspect suspect charger/cable/supply | Charging-side fault |
| Multiple batteries fail on same charger | Isolate charger/generator and connections | Common charger/supply fault |
| Battery fails aircraft and charger across multiple systems | Inspect battery connector; read exact battery fault; evaluate BMS/internal condition | Battery-side hardware more likely |
| Warning appears immediately after firmware update | Check module versions and official update/recovery procedure | Firmware/version mismatch possible |
| Warning appears immediately after motherboard replacement | Verify exact board/revision/region/firmware compatibility | Replacement-board compatibility issue possible |
| Connector is visibly blackened or melted | Stop use; replace/inspect damaged components | Electrical/thermal damage—not a cleaning-only issue |
| Battery is unusually hot after flight | Allow correct cooling; inspect thermal workflow and connectors | Thermal stress or high-resistance connection possible |
| Only hot batteries show update/charge problems | Cool per manufacturer guidance before further diagnosis | Temperature state may be influencing operation |
| Same battery works after connector cleaning and remains stable | Monitor and log; inspect for wear/corrosion recurrence | Contamination/interface was likely contributor |
| Same warning returns repeatedly after cleaning | Do A/B isolation before motherboard purchase | Deeper battery/aircraft/firmware fault remains |
DB1560 Diagnostic Path for DJI Agras T50 and T40
The DB1560 ecosystem has become one of the most repair-relevant systems in the Agras aftermarket because the battery is valuable enough that component-level diagnosis can make economic sense. The key is replacing the right component.
Level 1 — External Connector and Seating
Inspect and clean the battery/aircraft interface according to current DJI guidance. Verify the battery seats correctly and the aircraft connector is mechanically sound.
Level 2 — Aircraft-Side Interface and Cable
If multiple DB1560 batteries fail on the same T50/T40, inspect the aircraft side before blaming each battery. The T50 Battery Port Board / Core Board Flat Cable is one example of the aircraft-side signal path that can matter in diagnosis.
Level 3 — Battery Fuse / External Board-Level Components
If evidence points to the battery and the failure mode is consistent with protection/power-path issues, qualified repair may involve the DB1560 Battery Motherboard Fuse or related battery electronics. Do not treat the fuse as a universal cure; determine why it failed.
Level 4 — DB1560 Battery Motherboard
If the fault follows the battery across known-good compatible systems, the external connector is sound, firmware is compatible, and diagnosis points to the BMS/motherboard, the DJI Agras T50 OEM DB1560 Battery Motherboard becomes a logical repair component.
Level 5 — Motherboard With Lid / Integrated Top Assembly
If the top housing, sealing/interface structure, switch/indicator area, or integrated upper assembly also needs replacement, use the DB1560 Battery Motherboard With Lid. Ares Acres also carries the DB1560 Motherboard With Lid + Battery Fuse configuration.
Level 6 — Complete DB1560 Battery
If the pack has serious cell degradation, swelling, impact damage, liquid intrusion, extensive thermal damage, multiple faults, or a poor repair economics profile, a complete DJI Agras DB1560 Intelligent Flight Battery may be the more appropriate solution than stacking component repairs onto a compromised battery.
DB1560 Repair & Continuity Links
- DB1560 Battery Motherboard
- DB1560 Motherboard With Lid
- DB1560 Motherboard With Lid + Fuse
- DB1560 Motherboard Fuse
- DB1560 Battery Lid
- DB1560 Motherboard Balance Plugs
- Complete DB1560 Battery
- DB1560 Three-Battery Set
- C10000 Intelligent Charger
- C10000 + Three DB1560 Battery Bundle
- DB1560 Battery Rental / Continuity Program
DB2160 Diagnostic Path for DJI Agras T100 and T70P
The DB2160 system raises the same fundamental question—battery or aircraft?—but the surrounding power architecture differs from the T50/T40 generation. Do not transpose every DB1560 repair conclusion directly onto the DB2160 platform.
Level 1 — Connector and Seating
Inspect both battery and aircraft mating surfaces, retention, contamination, heat damage, and mechanical alignment. The same low-resistance-connection principle applies.
Level 2 — Battery Interface Board
If multiple DB2160 batteries show the same fault in one aircraft, the T100 Battery Interface Board is an important aircraft-side diagnostic candidate. Ares Acres also lists the T100/T70P Original Battery Interface Board.
Level 3 — Power Distribution / Adapter Path
Power moves beyond the physical battery connector. Depending on symptom, inspect the T100 DB2160 Power Distribution Board and related T100 Power Adapter Plug rather than assuming the DB2160 BMS is the only possible source.
Level 4 — DB2160 Motherboard With Lid
Once the fault has been isolated to the battery electronics and compatibility has been verified, the DB2160 Battery Motherboard With Lid provides a board-level repair path for applicable T100/T70P battery configurations.
Level 5 — Complete DB2160 Battery
If the pack condition, cells, housing, heat damage, or repair risk does not justify a motherboard-only repair, use a complete DJI Agras T100 DB2160 Intelligent Flight Battery.
Level 6 — Charging and Cooling Infrastructure
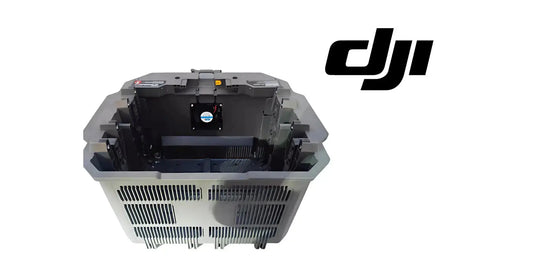
DB2160 troubleshooting should also consider the field charging/cooling ecosystem. A hot battery that is pushed immediately through repeated flight/charge cycles is a different diagnostic case from a cool battery that fails recognition at startup.
- DB2160 Battery Cooling Station
- T100/T70P Battery Air-Cooling System
- C12000 Intelligent Battery Charger
When Should You NOT Buy a Battery Motherboard Yet?
Do not make the motherboard your first purchase merely because the controller displays the word “battery.” Delay motherboard replacement until you have investigated the common external paths if:
- the problem began immediately after a dirty/dusty spreading operation;
- the connector has visible contamination;
- the battery behaves differently when reseated;
- multiple batteries fail only on one aircraft;
- the battery charges normally and works in another aircraft;
- the warning began immediately after an aircraft firmware update;
- the aircraft-side connector is loose or heat-damaged;
- the problem appears only with one charger;
- the battery has not been tested in another known-good compatible system;
- you have not recorded the exact fault code/message.
When Does a Motherboard Become a Reasonable Suspect?
A motherboard/BMS becomes a much stronger suspect when several pieces of evidence align:
- the warning follows one battery across multiple known-good compatible aircraft;
- the same battery also behaves abnormally on known-good compatible charging equipment;
- external battery contacts are clean, dry, mechanically sound, and undamaged;
- other batteries work normally in the same aircraft;
- firmware and replacement-board compatibility have been checked;
- there is no obvious aircraft-side connector or cable defect;
- the exact error is consistent and repeatable;
- the battery’s broader physical condition still justifies a board-level repair.
Even then, the next step should be a qualified diagnosis, not blindly swapping electronics until the warning disappears.
When Is the Aircraft Interface More Likely Than the Battery?
The aircraft-side interface moves to the top of the list when:
- two or more known-good batteries fail on the same aircraft;
- the symptom changes when the installed battery is moved;
- the port is physically loose;
- the connector shows heat marks on the aircraft side;
- the aircraft has suffered a hard landing or battery-bay impact;
- the battery works in another aircraft;
- the aircraft reports intermittent battery communication across a mixed fleet;
- a cable or interface board has recently been serviced;
- there is visible contamination in the aircraft port even though battery terminals look clean.
When Is Complete Battery Replacement Safer Than Board Repair?
A component-level repair makes the most sense when the failure is genuinely localized. A complete battery is often a better choice when the pack has multiple overlapping risks.
Consider full replacement if the battery has:
- significant swelling;
- major impact or crush damage;
- liquid intrusion;
- severe connector overheating that may have affected adjacent structures;
- known cell damage or major imbalance that a motherboard cannot fix;
- multiple internal faults;
- a service history that makes further component investment uneconomical;
- unverified donor electronics or incompatible previous repairs;
- a condition where safe validation after repair cannot be performed.
Heat: The Hidden Variable in Battery and Connector Diagnosis
Peak-season Agras operations can put batteries through rapid flight/charge rotations in high ambient temperatures. Heat matters in at least three ways.
1. Battery Electronics
Repeated thermal stress can affect electronic reliability over time. This is one reason operators should not immediately conclude that every hot-season battery error is “just firmware.”
2. Connector Resistance
A marginal electrical contact can generate additional heat at the connection. If one connector area is significantly hotter than equivalent batteries under similar conditions, investigate the interface rather than treating the heat as normal seasonal temperature alone.
3. Charging and Update Behavior
Temperature can influence when a battery is ready to charge or operate. Follow the DJI charging/cooling instructions for the exact battery. Do not repeatedly force update/charge attempts on an overheated battery in an effort to “wake up” the BMS.
Ares Acres 60-Second Daily Battery Interface Check
The following is an Ares Acres preventive-maintenance recommendation, not a substitute for DJI’s official maintenance schedule. It is intended as a fast field habit before the first flight or when rotating batteries during a demanding day.
- Look: Are the battery and aircraft contacts clean, dry, aligned, and free of heat marks?
- Seat: Does the battery insert and lock normally without unusual movement?
- Compare: Does one battery’s connector look different from the others?
- Feel only when safe and powered down: Is there evidence of abnormal localized heat after appropriate shutdown/cooling? Never touch energized exposed conductors.
- Log: Record any recurring battery warning against the battery ID and aircraft ID.
One minute of inspection can preserve much more diagnostic information than waiting until three batteries are all labeled “bad” at the end of the season.
Build a Battery ID and Error Log
Commercial fleets should assign each battery a durable internal identifier. For example:
- T50-B01
- T50-B02
- T50-B03
- T100-B01
Then record:
- date;
- aircraft ID;
- battery ID;
- charger ID;
- exact warning/error;
- whether the battery worked after reseating;
- whether contacts were dirty;
- whether the same battery failed in another aircraft;
- whether another battery failed in the original aircraft;
- ambient/operational heat context;
- firmware/update event immediately preceding the fault;
- repair performed and result.
After several incidents, the log can reveal a pattern that is impossible to see when technicians rely on memory. If five different battery IDs all produce intermittent warnings only on aircraft A03, the aircraft deserves attention. If B07 produces the warning on every aircraft and charger, the battery deserves attention.
Common Diagnostic Mistakes That Waste Money
Mistake 1: Replacing Whatever the Error Message Names
An error that says “battery” is evidence about a system, not a purchase order for a battery.
Mistake 2: Cleaning Only the Battery and Ignoring the Aircraft Port
Every connector has two mating sides. The clean half cannot compensate for a damaged half.
Mistake 3: Using a Chemical Because Someone Used the Brand Name Online
Agricultural equipment forums frequently compress “electrical contact cleaner,” “WD-40,” “alcohol,” and “solvent” into the same concept. They are not the same. Follow the manual and use the exact permitted procedure.
Mistake 4: Scraping Contacts Aggressively
Removing corrosion by damaging plating can create a short-term visual improvement and a long-term reliability problem.
Mistake 5: Updating Firmware Repeatedly With an Unstable Power Connection
If the battery connection is intermittent, fix the physical problem before asking the system to complete a critical update.
Mistake 6: Testing With Only One Battery
Without a known-good comparison, you have no reference point.
Mistake 7: Assuming a New Motherboard Must Be Compatible Because It Fits
Regional configuration, hardware revision, and firmware can matter. Verify exact fitment and compatibility.
Mistake 8: Ignoring the Charger
If the complaint is “battery won’t charge,” the charging equipment is part of the diagnostic system.
Mistake 9: Ignoring Heat Damage Once the Error Temporarily Disappears
An intermittent high-resistance connection may work again after cooling or reseating. That does not mean a burned/pitted connector is safe.
Mistake 10: Reusing a Damaged Battery Until the Season Ends
Agricultural schedules create pressure to keep flying. But a compromised high-current connector is not the place to trade safety for one more field.
Five Example Diagnostic Patterns
The following examples are illustrative diagnostic patterns, not claims about a specific customer case.
Example 1: One T50 Battery Shows an Error After a Dusty Spreading Job
Three DB1560 batteries were used in the same T50. One begins showing intermittent recognition after a granular application. The other two are normal. The first move is not motherboard replacement. Inspect the suspect battery connector and aircraft port, clean according to the manual, reseat, and A/B test. If the problem follows that battery to another T50, the battery-side path deserves deeper diagnosis.
Example 2: All Three T50 Batteries Suddenly Fail on One Aircraft
If three previously normal DB1560 packs now produce the same communication behavior on one aircraft, it is statistically and diagnostically important that the aircraft is the common component. Inspect the battery port, port-board/core-board cable path, physical seating, and firmware state before purchasing three battery boards.
Example 3: T100 DB2160 Charges Normally but Is Not Recognized by One Aircraft
If the battery charges on a known-good C12000 system and works in another compatible aircraft, investigate the original T100 battery-interface board, power path, physical connector, and firmware before opening the DB2160.
Example 4: Error Appears Immediately After Motherboard Replacement
If a replacement board is installed and the battery immediately reports an incompatible module or update problem, do not assume the new board is electrically defective. Verify board revision, region, firmware, and pairing/update requirements. Use the dedicated Incompatible Module Versions & Update Failed Guide.
Example 5: Battery Works After Reseating but Connector Is Burned
The temporary disappearance of the warning does not erase physical damage. A pitted or heat-damaged connector should be evaluated and replaced as appropriate. Intermittent success is not proof of safe long-term resistance.
DB1560 Error 0X1609 / 0Xc7: Where This Guide Fits
If your DJI Agras T50/T40 specifically displays “Incompatible battery hardware version,” “Unable to use battery,” 0X1609, or 0Xc7, this connector-first guide is the preliminary isolation layer. Then continue with the exact-error tutorial:
DJI Agras T50 DB1560 Repair Guide: Incompatible Battery Hardware Error 0X1609/0Xc7
That article explores firmware mismatch, battery motherboard/BMS, connector communication, internal condition, aircraft-side interfaces, and the DB1560 repair ladder in more detail.
How to Decide Which Part to Order
| Evidence | Part Category to Investigate | Do Not Assume |
|---|---|---|
| Visible contamination only; no damage; error clears and remains gone | No part yet; monitor connector | Motherboard failure |
| Multiple batteries fail on T50/T40 aircraft | Battery port/interface/cable | All DB1560 batteries failed simultaneously |
| Multiple batteries fail on T100 | Battery interface board / distribution path | All DB2160 boards failed |
| One DB1560 fails across known-good systems | DB1560 battery-side electronics | Aircraft-only fault |
| One DB2160 fails across known-good systems | DB2160 battery-side electronics | Aircraft-only fault |
| Motherboard diagnosis confirmed; housing/top assembly healthy | DB1560 motherboard where exact fitment verified | Complete battery required |
| Motherboard + upper housing/assembly needs replacement | Motherboard with lid assembly | Board-only repair is sufficient |
| Battery has serious cell/physical/thermal damage | Complete battery | Motherboard alone will repair cell damage |
| Only one charger fails | Charger/cable/generator/supply | Battery failure |
Operator FAQ: DJI Agras Battery Connector, Firmware & Motherboard Troubleshooting
1. Can dirty battery terminals really stop a DJI Agras drone from recognizing a battery?
Yes, contamination or a poor connection can interfere with the power/communication interface. The exact symptom depends on where the connection is compromised. That is why DJI manuals call for regular terminal/port inspection and cleaning.
2. Does a battery error mean the BMS is bad?
No. A BMS/motherboard fault is one possibility, but connector contamination, aircraft-side interface damage, charger faults, firmware mismatch, temperature state, internal battery condition, or mechanical seating can produce battery-related symptoms.
3. Should I spray WD-40 into a DB1560 battery connector?
No universal recommendation should be made to spray standard WD-40 Multi-Use Product into a DJI battery connector. Follow the current DJI manual for the exact product. “WD-40 Specialist Contact Cleaner” is a different product category from the common Multi-Use lubricant, but even a contact cleaner should not be assumed DJI-approved for every Agras connector.
4. Can I use rubbing alcohol on a T50/T40 battery?
Do not assume so. Current T50/T25 and T40/T20P manuals include warnings against cleaning the battery with alcohol or other flammable liquid. DJI has published other maintenance material with model-specific cleaning recommendations, so always defer to the latest manual/service guidance for the exact product.
5. What is the safest basic cleaning method?
Power down, disconnect, and use a clean, dry, lint-free cloth or dry swab where the manual allows. Avoid scraping, flooding, spraying, or leaving residue. If contamination requires a chemical process, use the exact approved service method.
6. Should I clean the aircraft connector too?
Yes. Inspect both mating sides. A battery-side cleaning cannot fix contamination, looseness, pitting, or heat damage on the aircraft side.
7. What if the warning disappears when I push the battery down?
Stop and inspect seating, retention, connector alignment, and port condition. A symptom that changes with physical movement is evidence that the interface may be intermittent.
8. What if every DB1560 battery shows the same error on my T50?
That pattern increases suspicion of an aircraft-side issue. Inspect the T50 battery port/interface and relevant cable/board path, then verify firmware. Do not replace every battery motherboard first.
9. What if only one DB1560 fails?
Test it in another known-good compatible aircraft and charger if available. If the problem consistently follows the battery, battery-side electronics become more likely.
10. What if my DB2160 works on the charger but not the T100?
Inspect the T100 battery-interface board, connector, power-routing path, and aircraft software state. A battery that works elsewhere gives you strong evidence to investigate the aircraft.
11. Can a bad battery interface board cause a BMS-looking error?
Potentially. If the aircraft cannot establish a stable power/communication connection to a healthy battery, the operator may see a battery-related warning even though the failing component is on the aircraft side.
12. Does restarting the drone repair hardware?
No. Restarting simply allows the system to initialize again after the physical connection has been verified. If a warning repeatedly returns, continue diagnosis.
13. Should I update firmware before checking the connector?
Inspect the physical connection first. A firmware update should be performed on a stable, properly connected system. Do not rely on software to compensate for a damaged high-current connector.
14. Why did the problem appear after a firmware update?
Firmware can expose module-version incompatibility or require battery/module updates. The timing makes software compatibility an important suspect, but it does not rule out hardware. Record the exact warning and use the compatible-module troubleshooting workflow.
15. Why did my replacement motherboard cause an update error?
Replacement electronics can differ by hardware revision, regional configuration, or firmware state. Verify exact compatibility instead of assuming the board is defective because it physically fits.
16. Can cleaning fix a burned connector?
No. Cleaning removes contamination; it does not restore material lost through arcing, pitting, melting, or thermal deformation. Damaged connectors need proper inspection and replacement.
17. Can I sand the battery terminals?
Do not use abrasives unless an official service procedure specifically calls for them. Abrasion can remove protective plating and change contact geometry.
18. Can a loose battery create heat?
A poor electrical connection can increase contact resistance and heat. Mechanical looseness can also create intermittent contact. Treat abnormal local heating as a diagnostic warning.
19. Is fertilizer dust dangerous to the connector?
It can be problematic. Fertilizer and field materials vary chemically and can be abrasive, hygroscopic, or corrosive. Keep battery/aircraft connectors clean and dry and inspect them after demanding spreading operations.
20. Can spray residue affect battery contacts?
Yes. Agricultural liquids contain many possible chemicals and additives. Keep electrical interfaces protected and clean according to DJI maintenance instructions.
21. What if a battery is wet?
Do not energize or charge a visibly wet battery interface. Follow DJI guidance for drying, inspection, and return to service. If liquid intrusion is suspected inside the battery, obtain qualified service.
22. What does it mean if the error follows the battery?
It means the failing component is more likely to be on the battery side than the original aircraft side, especially if the test is repeated across known-good compatible equipment. It still does not identify the exact battery component by itself.
23. What does it mean if the error follows the aircraft?
If multiple known-good batteries fail on one aircraft but operate elsewhere, investigate the aircraft connector, interface board, power distribution, wiring, firmware, and other common components.
24. What does it mean if the error follows the charger?
If multiple known-good batteries fail only on one charging system, investigate that charger, its connection, generator/supply, and related charging hardware.
25. When should I buy the DB1560 motherboard?
When diagnosis has isolated the problem to the battery electronics, the pack is otherwise repairable, exact fitment/revision is verified, and external/aircraft-side/firmware causes have been reasonably ruled out.
26. When should I buy the DB1560 motherboard with lid?
When the repair requires the integrated upper assembly in addition to the motherboard—such as when the existing lid/top assembly is damaged or the service strategy calls for replacing them together.
27. When should I replace the whole DB1560 battery?
When damage is not localized to a repairable board-level issue, especially with serious cell degradation, physical damage, swelling, liquid intrusion, or extensive thermal damage.
28. Does the DB2160 have the same motherboard as DB1560?
No. They are different battery generations/platforms. Do not interchange board-level assumptions or parts between them.
29. Why include T70P in a T100 DB2160 diagnostic path?
The T100/T70P generation shares parts of the broader battery/power ecosystem in current Ares Acres catalog fitment, but exact compatibility must still be verified for the specific battery and assembly before repair.
30. Can a battery port/core-board flat cable cause T50 problems?
An aircraft-side signal cable can be part of the path between the battery interface and the aircraft electronics. If the symptom follows the aircraft rather than the battery, inspect applicable interface/cable assemblies.
31. Can the T100 power-distribution board cause battery symptoms?
Potentially, depending on the exact failure. The DB2160 power path includes aircraft-side distribution hardware, so a battery warning should be interpreted in the context of the whole power system.
32. Should I keep flying if the warning disappears after a restart?
Only after the underlying cause is understood well enough to consider the system safe. A warning that disappears after a restart can still be caused by an intermittent connector or developing hardware problem.
33. How often should I inspect the terminals?
Follow DJI’s maintenance schedule and increase visual checks in harsh conditions. Ares Acres recommends a fast visual interface check during daily commercial operation, especially after dusty spreading or wet agricultural work.
34. Is a clean connector automatically a good connector?
No. It can still be loose, recessed, worn, misaligned, pitted, or heat-damaged. Cleanliness is only one attribute.
35. Can a motherboard replacement fix bad cells?
No. Replacing management electronics does not restore physically degraded or damaged battery cells. Battery condition must be evaluated separately.
36. Can I bridge a fuse or terminal temporarily to test the battery?
No. Do not bypass protective devices or bridge high-energy battery conductors. Use proper diagnostic equipment and qualified service procedures.
37. What should I photograph before contacting support?
Photograph the exact controller error, battery label/model, connector on both battery and aircraft, any discoloration/damage, aircraft model, and—where available—firmware/version screens. Include which other batteries/chargers were tested.
38. What is the fastest way to make Ares Acres support useful?
Send the exact error wording, aircraft model, battery model, what happened immediately before the error, whether other batteries work, whether the suspect battery works elsewhere, and clear connector photos. That transforms “my battery is bad” into a diagnosable system problem.
Parts & Support Funnel
If your diagnosis points to a repair component rather than simple cleaning or firmware recovery, use the following Ares Acres sections:
- DJI Agras Parts
- DJI Agras T40 Parts
- DJI Agras T50 Parts
- DJI Agras T100 Parts
- DJI Agras Accessories
- DJI Agras Universal Maintenance & Repair Tool System
What Information Should You Send Before Ordering a Battery Motherboard?
For the best fitment and diagnostic support, provide:
- aircraft model: T40, T50, T70P, or T100;
- battery model: DB1560, DB2160, or exact label information;
- photos of the battery label;
- photos of the motherboard/upper assembly if already professionally opened;
- exact controller error message and error code;
- firmware/module version information;
- whether other batteries work in the aircraft;
- whether the suspect battery works in another aircraft;
- whether it charges on a known-good charger;
- photos of battery and aircraft connectors;
- whether the issue began after an update, crash, water exposure, overheating event, or board replacement.
Contact Ares Acres for DJI Agras Parts & Technical Support
Official DJI Technical References
Always verify the latest documents for the exact model and region. Useful official sources include:
- DJI Agras T50/T25 User Manual
- DJI Agras T40/T20P User Manual
- DJI Agras T100 User Manual
- DJI Agras T50 Downloads / DJI Assistant 2 for MG
- DJI Agras T50 Intelligent Battery Design
What Is Ares Acres?
Ares Acres is a U.S.-based DJI Agras parts, aircraft, power-system, repair-support, and agricultural-robotics supplier focused on helping operators keep commercial equipment working. Our catalog covers complete Agras aircraft, OEM replacement parts, DB1560 and DB2160 battery components, chargers, generators, avionics, spray/spreading systems, maintenance tooling, and difficult-to-source repair assemblies.
Our tutorial library is designed around the same principle as our parts catalog: identify the exact system, isolate the failure, understand compatibility, and replace only what the evidence supports.
For operators dealing with a battery warning right now, start with the external interface. Clean and inspect the connection according to DJI guidance. Restart. Verify firmware. A/B test the battery, aircraft, and charger. Then move deeper into the DB1560 or DB2160 repair path only when the evidence points there.
Need a DJI Agras Battery Part or Diagnostic Recommendation?
Send Ares Acres the aircraft model, battery model, exact error message, connector photos, firmware context, and the results of your known-good battery/aircraft test.
Contact Ares Acres | Shop DJI Agras Parts | Shop DJI Agras Accessories
Technical disclaimer: This guide is educational and intended to support safe fault isolation. Always follow current DJI manuals, local regulations, battery transport/storage rules, and qualified service procedures. Do not open, bypass, short, puncture, probe, or modify high-energy lithium battery packs without the required training and service equipment. Product fitment should be verified before purchase or installation.