DJI D14000iE: Activación, Firmware, Arranque y Carga de Batteries
DJI D14000iE: Activación, Firmware, Arranque y Carga de Batteries
El DJI D14000iE Multifunctional Inverter Generator User Manual v1.0 separa tres capas del first-use workflow: activation, firmware y normal engine-start/battery-charging operation. Un generator puede estar físicamente ensamblado y tener fuel/oil correctos, pero aún necesita activation antes de normal use.
Respuesta rápida: conecte el remote controller al generator, abra DJI Agras → Device Management → Charging Device y complete activation. Actualice firmware cuando la app lo indique. Para charging, empiece sin AC devices conectados, confirme engine oil y al menos 1 L de fuel, conecte el charging cable a una Intelligent Flight Battery apagada y después encienda la battery. Mantenga el engine switch en START durante al menos 3 segundos, luego suéltelo. El switch vuelve a ON, el generator arranca automáticamente y comienza charging.

1. Activation before first use
La source establece que el product debe ser activated antes de la primera operación normal.
2. Remote-controller connection
Use el operation-panel USB-C port para conectar el remote controller.
3. DJI Agras menu path
Abra Device Management → Charging Device y siga los on-screen activation prompts.
4. Firmware updates
Cuando DJI Agras reporta new firmware, siga las on-screen instructions. La source no publica un alternate offline workflow en este section.
5. USB-C también sirve para log export
El same operation-panel port se usa para remote-controller connection, firmware update y log export.
6. Four yellow generator flashes
Si el generator LED muestra four repeating yellow flashes, verifique activation state antes de diagnosticar engine hardware.
7. Pre-start: no AC devices connected
DJI indica comenzar battery-charging startup sin electric devices connected al AC outlet.
8. Verify engine oil
Confirme engine-oil level antes del start. Low-oil protection puede impedir continued operation.
9. Verify at least 1 L of fuel
La startup sequence específica exige at least 1 L de fuel antes de iniciar charging operation.
10. Battery should be powered off before connection
Conecte el charging cable a una compatible Intelligent Flight Battery mientras la battery está apagada.
11. Power the battery on after connection
Después de asegurar el cable, encienda la battery.
12. Hold engine switch at START
Mantenga el switch en START por al menos 3 segundos.
13. Release the switch
Al soltarlo, el switch vuelve a ON.
14. Automatic engine start
El generator starts automatically y charging begins según el normal workflow.

15. Use charging-channel LED
Verifique ready, charging, full, warning o error state mediante el charging-channel LED.
16. AC devices reduce charging capacity
DJI señala que si AC devices funcionan mientras el generator carga una battery, charging capacity decreases y charging time increases.
17. Separate battery charging from AC-load planning
Si necesita maximum battery-charging throughput, no trate AC outlet usage como “free” load.
18. If generator fails to start
La first instruction de DJI es conectar el remote controller para obtener more information.
19. No-start can have multiple causes
El branch puede incluir oil protection, fuel supply, cranking, ignition, control electronics u otro engine state.
20. Cranking branch
Si diagnostics identifican cranking hardware, exact service paths incluyen Electric Starter y Starter Motor Relay.
21. Fuel branch
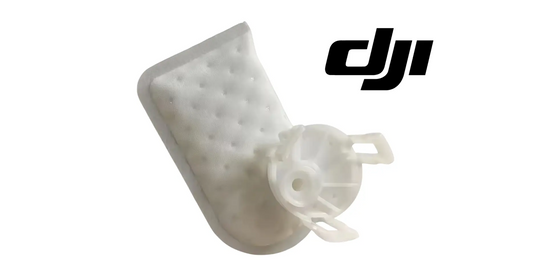
Si evidence identifica fuel delivery, Gasoline Pump y Pump Filter son separate paths.
22. Ignition branch
Ignition Coil with Trigger pertenece al ignition path y no debe ser default replacement para todo no-start.
23. Control branch
Generator Controller o Control Panel Switch Button pertenecen al electronics/control path.
24. Activation/firmware branch
Un new unit con activation issue debe resolverse en software/commissioning antes de engine-side replacement.
25. Startup checklist
- pre-operation inspection passed;
- activation complete;
- firmware current or reviewed;
- no AC devices connected;
- engine oil adequate;
- fuel ≥1 L;
- battery compatible and OFF before cable connection;
- charging cable secure;
- battery powered ON after connection;
- START held ≥3 sec;
- charging LED normal.
26. Commissioning record
- generator model/asset ID;
- activation date;
- firmware version;
- oil/fuel status;
- battery model/ID;
- first start result;
- charging LED;
- first successful charge;
- operator.
27. If battery is connected while powered on
Eso no sigue el documented sequence. Power the battery off before making the charging connection.
28. If START is released too early
Repita únicamente dentro del supported workflow; la source dice hold at least 3 seconds.
29. If engine starts but charging does not
Revise charging-channel LED, battery compatibility/connection y remote-controller diagnostics antes de atacar engine hardware.
30. If charging works but AC output does not
Eso separa el AC-module branch del charging branch.
31. If AC devices are required during charging
Planifique slower battery charging porque available charging capacity decreases.
32. Diagnostic evidence package
- exact LED pattern;
- remote-controller message;
- oil/fuel status;
- battery ID;
- AC load state;
- engine cranks/starts?;
- firmware state;
- photos/log export if needed.
33. Error común: no-start = bad starter
There are multiple branches.
34. Error común: start with AC devices connected
DJI says start without them.
35. Error común: connect battery while powered on
Battery should be OFF first.
36. Error común: ignore activation
Activation is required before first use.
37. Error común: expect full charging capacity while powering AC loads
Capacity decreases.
38. Preguntas frecuentes
¿Dónde activar?
DJI Agras → Device Management → Charging Device.
¿Fuel mínimo para startup charging?
At least 1 L.
¿Battery state before cable connection?
Powered off.
¿START cuánto tiempo?
At least 3 seconds.
¿AC load effect?
Charging capacity decreases and charge time increases.
Fuente y revisión
Fuente principal: DJI D14000iE Multifunctional Inverter Generator User Manual v1.0 (2025.06), pp. 7–9 y 12–13.