DJI D-RTK 3 AG Setup Guide: Components, First Charge & Activation
The D-RTK 3 AG manual separates first use into three jobs: identify the hardware, activate the internal battery by charging it correctly, and activate the station in DJI Agras before field positioning.
Quick Answer: Before first use, charge the D-RTK 3 AG through USB-C with a PD3.0 charger in the 9-15 V range and continue charging until the power indicator is green. Power on the aircraft and remote controller, confirm the aircraft is linked, power on the D-RTK 3 AG, then open DJI Agras and select Device Management → D-RTK Station. Select the station in the search results and complete activation while the remote controller is connected to the internet.

Know the external controls and ports
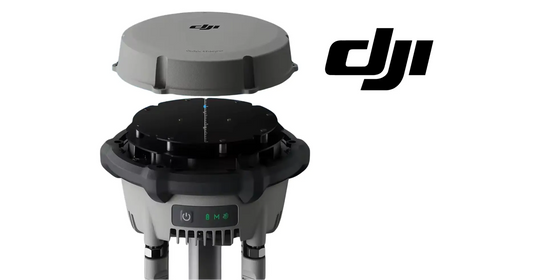
The manual identifies eight external items. The USB-C port is used for charging and DJI Assistant 2 computer connection. When the reserved and USB-C ports are not in use, DJI instructs operators to keep them covered to protect the product from moisture and dust.
First charge: activate the internal battery
DJI says the internal battery should be activated by charging the D-RTK 3 AG before first use. Use a PD3.0 USB charger with 9-15 V output, such as DJI's 65 W Portable Charger. When the power indicator lights, battery activation has begun; continue charging until the indicator is green before use.
The source also notes that if a non-recommended charger such as a 5 V-output charger is used, the D-RTK 3 AG can be charged only while powered off.

Power the station on and off
The manual uses a two-stage button action: press the power button, then press and hold it to power the D-RTK 3 AG on or off.
Activate the D-RTK 3 AG in DJI Agras
- Power on the aircraft and remote controller, and make sure the aircraft is linked to the controller.
- Power on the D-RTK 3 AG.
- Open DJI Agras and select D-RTK Station in Device Management.
- Select the desired D-RTK 3 AG from the search results.
- Wait while the remote controller connects to the station's broadcast network.
- Follow the app instructions to activate the station while the remote controller remains connected to the internet.
A slow-blinking red GNSS signal indicator can indicate the device is not activated, so activation belongs in the first diagnostic branch for a new station.

The verified store path is the DJI Agras T100 D-RTK 3 High-Precision GNSS Mobile Station. Activation also uses the DJI Agras T100 OEM Remote Controller when deployed with the T100 workflow.
Parts & Equipment Referenced in This Guide
Shop Related Collections
Related Tutorials
- D-RTK 3 AG Site Selection & Tripod Setup
- D-RTK 3 AG Indicator Troubleshooting
- Existing D-RTK 3 Positioning Tutorial
Source and revision note
Primary source: DJI D-RTK 3 AG User Manual v1.0 (2025.07), pp. 5-6.