DJI Agras T100 Tutorials: How to Use the DJI Agras Relay (FAA Part 137 Guide)
Share
DJI Agras T100 Tutorials: How to Use the DJI Agras Relay (FAA Part 137 Guide)
🇺🇸 U.S.A. FIRST — DJI O4 Relay Structure, Charging, Linking, Placement & Field Verification
The DJI Relay is designed to solve a physical communications problem: agricultural-drone signals can be blocked by terrain, tree crowns, tall crops, buildings, windbreaks, and other obstacles between the remote controller and aircraft. By placing a relay at a high, unobstructed point, the DJI Agras system can establish separate communication paths between the remote controller and relay and between the relay and aircraft.
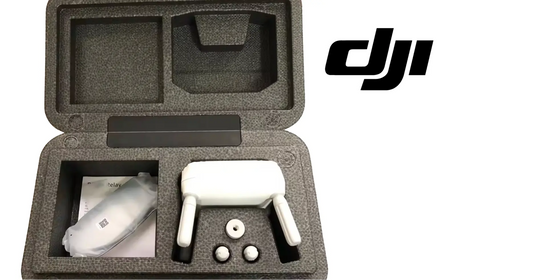
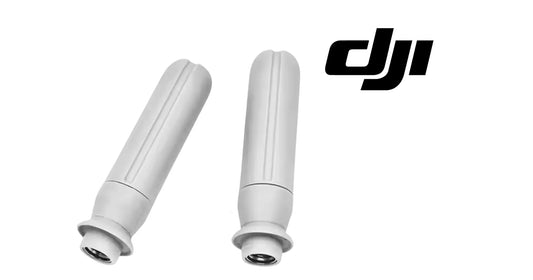
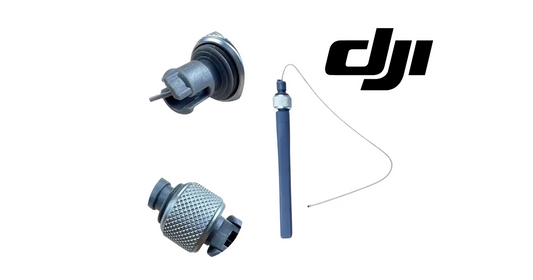
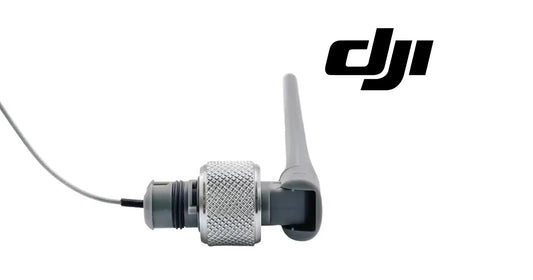
DJI’s T100 relay supports 2.4 GHz and supported 5 GHz frequency ranges, communicates with designated DJI remote controllers and aircraft, and provides separate RC and UAV status indications. The relay has a built-in battery, four detachable antennas, a water outlet that must remain clear, a USB-C port for charging and firmware updates, battery-level LEDs, status LEDs, a power button, and a mount compatible with a separately purchased extension pole.
This Ares Acres tutorial expands DJI’s official “How to Use the DJI Relay” video into a complete field-deployment workflow. It covers relay structure, first-use charging, PD power-bank support, power-button commands, LED meanings, activation, remote-controller linking, automatic aircraft linking, correct 0.5 m linking distance, firmware diagnosis, elevated placement, crop-height clearance, antenna protection, thunderstorms, operating temperatures, route validation, lost-link planning, and U.S. Part 137 context.
Two source details deserve special attention. First, some captions render the linking distance as “5 m,” but the official DJI O4 Relay User Guide specifies within 0.5 m of both the aircraft and remote controller during linking. Second, the tutorial narration describes up to four hours of built-in-battery operation, while DJI’s current T100 specifications list five hours under stated conditions. Operators should plan conservatively, monitor the actual LEDs, and use the current specification for their exact hardware revision.
Ares Acres supports DJI Agras operators with aircraft, OEM parts, communications equipment, diagnostics, technical education, and field-service resources. Explore the DJI Agras T100, DJI T100 Parts, DJI Agras Parts, DJI Accessories, the Ares Acres Product Catalog, or contact Ares Acres.
Prefer to watch instead of read? The video above demonstrates the relay’s structure, charging, power controls, linking, LEDs, mount, and crop-clearance requirements. Use this written guide to correct ambiguous captions, plan the relay location, verify both communication legs, and document the complete deployment.
What You’ll Learn
- What the DJI Relay does in a T100 operation.
- How the relay sits between the remote controller and aircraft.
- Why a relay can help when crops, trees, or terrain block the direct path.
- Which 2.4 GHz and 5 GHz frequency ranges DJI currently publishes.
- Where regional frequency restrictions may apply.
- What the four detachable antennas do.
- Why the water outlet must remain clean and unblocked.
- How the USB-C port is used for charging and firmware updates.
- How a PD power bank rated at 15 W or higher can extend operating time under the video guidance.
- What the power button, status LEDs, and battery LEDs indicate.
- How to check relay battery level.
- How to power the relay on and off.
- How to charge the relay before first use.
- How the battery LEDs indicate a full charge.
- Why the aircraft and remote controller must already be linked.
- How to place the relay in linking mode.
- How to open Device Management and select DJI Relay.
- How to link the remote controller to the relay.
- Why a solid-green RC LED confirms the first communication leg.
- How the aircraft automatically links after the remote controller.
- Why a solid-green UAV LED confirms the second communication leg.
- Why the correct linking distance is 0.5 m—not 5 m.
- How activation differs from linking.
- How to respond to an aircraft-model mismatch.
- How to update relay firmware safely.
- How to diagnose a failed linking attempt.
- Where to position the relay in orchards and tall crops.
- Why the relay should be at least 2 m above crop height.
- How to use the included mount and a separately purchased extension pole.
- Why antennas must remain unobstructed.
- Why roofs and hills require structural, fall, lightning, and access planning.
- Why the relay must not be deployed outdoors during thunderstorms.
- How to test the relay before a loaded agricultural mission.
- Why relay deployment does not authorize BVLOS flight.
- How FAA Part 137, Part 91, Section 44807, and operating limitations still apply.
Quick Answer: How Do You Set Up and Use the DJI Agras Relay?
Inspect Relay and Four Antennas → Clear Water Outlet → Fully Charge Built-In Battery → Close USB-C Port Plug → Install All Four Antennas → Power On Aircraft and Remote Controller → Confirm Their Direct Link → Place Both Within 0.5 m of Relay → Power On Relay by Pressing Once and Holding for 2 Seconds → Hold Power Button to Enter Linking Mode → Open DJI Agras App → Device Management → DJI Relay → Linking → Wait for RC Status LED to Turn Solid Green → Confirm UAV Automatically Links → Wait for UAV Status LED to Turn Solid Green → Activate New Relay if Prompted → Verify Firmware Compatibility → Install Relay Mount and Extension Pole → Select Stable Elevated Site → Position Relay at Least 2 m Above Crops → Keep All Antennas Unobstructed → Confirm Both Communication Legs → Perform Ground and No-Load Route Tests → Monitor Relay Battery and Status Throughout Operation.
The relay should be used to improve a planned communication geometry—not to conceal an unreliable deployment or exceed the operation’s legal authority.
Critical Corrections to the Transcript
| Topic | Transcript wording | Current official DJI reference | Operational treatment |
|---|---|---|---|
| Linking distance | “Within 5 m” | Within 0.5 m of relay | Use 0.5 m during linking. |
| Built-in operating time | Up to 4 hours | Current T100 specs list 5 hours | Plan conservatively and monitor actual LEDs. |
| Frequency description | 2.4 GHz and 5.8 GHz | 2.4000–2.4835, 5.150–5.250, and 5.725–5.850 GHz | Use only frequencies permitted in the region. |
| USB-C external power | PD power bank, 15 W or higher | User guide recommends USB PD charging; current specs list 2.7–24 V input | Use DJI-compatible PD equipment and current regional instructions. |
DJI Relay Current Specification Reference
DJI’s current T100 Relay specifications list:
| Specification | DJI-published value |
|---|---|
| Dimensions without antennas | 112 × 112 × 51 mm |
| Dimensions with antennas | 120 × 112 × 101 mm |
| Weight | 630 g |
| Input | 2.7–24 V |
| Power consumption | 10.48 W FCC; 8.8 W SRRC |
| Battery capacity | 6500 mAh |
| Operating time | 5 hours |
| Operating frequencies | 2.4000–2.4835 GHz; 5.150–5.250 GHz; 5.725–5.850 GHz |
| Reference signal range | 8 km FCC; 5 km SRRC; 4 km MIC/KCC/CE |
| Reference test condition | Unobstructed, interference-free environment at 2.5 m flight altitude |
| Charging time | 2.5 hours with 30 W recharge |
| Ingress-protection rating | IP55 |
Published distance and runtime figures are test references, not promises for an orchard, mountain, or crop canopy. Terrain, foliage moisture, interference, antenna obstruction, regional transmit power, battery condition, temperature, and deployment geometry can reduce performance.
How the Relay Communication Path Works
The deployment creates two separately indicated legs:
- Remote Controller ↔︎ DJI Relay — confirmed by the RC status LED.
- DJI Relay ↔︎ Aircraft — confirmed by the UAV status LED.
Both legs must be healthy. A green RC LED with a non-green UAV LED means the controller has reached the relay, but the complete path to the aircraft is not confirmed. Conversely, field diagnosis should not assume the aircraft leg is healthy merely because the controller can see the relay in Device Management.
The relay is most useful when its location has a clearer radio path to both endpoints than the endpoints have directly to each other.
DJI Relay vs. T100 4G Module
| Feature | DJI O4 Relay | DJI T100 4G Module |
|---|---|---|
| Network type | DJI radio relay path | Supported cellular-network path |
| Main site dependency | Relay placement, frequencies, line of sight, interference | Carrier coverage, service, account, region, module installation |
| Hardware location | Separate elevated device | Installed on aircraft |
| Main verification | RC and UAV relay LEDs solid green | App module recognition and network status |
| External setup | Mount and extension pole | Internal base and signal-cable installation |
| Legal effect | Does not authorize BVLOS | Does not authorize BVLOS |
The two accessories address different connectivity paths. Neither should be described as a substitute for the approved command-and-control plan.
Relay Structure & Component Guide
Four Detachable Antennas
The four antennas at the top transmit and receive relay signals. Install the correct DJI-supplied antennas in the positions and orientation shown by the current guide.
Do not substitute high-gain or third-party antennas unless DJI and regional regulations explicitly permit them. Antenna changes can affect radio compliance and performance.
Water Outlet
The water outlet allows collected moisture to leave the housing. Keep it clean and unobstructed during inspection, use, and storage.
Do not insert a sharp tool deeply into the outlet. If contamination cannot be removed with the approved method, contact support.
USB-C Port
The bottom USB-C port supports charging and firmware-update connection. Protect it from dust, water, chemical residue, and damaged cables.
Close its protective plug securely before field deployment.
Power Button
Press once to display the current battery level. To power on or off, press once and then press and hold for approximately two seconds.
The button is also used to enter linking mode after startup, as directed by DJI.
RC Status LED
The RC LED reports the link between remote controller and relay. Solid green confirms a successful link.
UAV Status LED
The UAV LED reports the link between relay and aircraft. Solid green confirms the second leg.
Battery-Level LEDs
These LEDs show the built-in battery state. During charging, the full-charge pattern is all battery-level LEDs solid.
Mount
The supplied mount connects the relay to a compatible extension pole. The extension pole is purchased separately and must be stable for the environment.
LED Reference
DJI’s user guide defines the status pattern as follows:
| Status LED pattern | Meaning |
|---|---|
| Alternating green and red | Linking in progress |
| Solid green | Linking successful |
| Solid red | Not linked |
For battery-level LEDs, a single short power-button press displays the current state. During charging, all battery LEDs solid indicates 100%.
Do not rely only on color memory. Confirm whether the LED being observed is RC, UAV, or battery status.
Before You Begin: Safety, Compatibility & Authority
Confirm Compatible Equipment
Verify the relay is compatible with the exact T100 aircraft, remote controller, app, region, and firmware. DJI continues to update supported models.
If Device Management reports an aircraft-model mismatch, follow the current DJI model-switching procedure rather than repeatedly attempting to link.
Inspect the Relay
Check:
- housing for cracks or impact damage;
- four antenna connectors;
- all four antennas;
- water outlet;
- USB-C port and protective plug;
- power button;
- RC and UAV LEDs;
- battery LEDs;
- mount interface;
- extension pole and clamps; and
- evidence of battery swelling, leakage, abnormal heat, or odor.
Do not charge, mount, or use a damaged relay.
Review the Operating Site
Identify terrain, tree lines, crop height, buildings, power lines, irrigation equipment, public access, vehicles, interference sources, lightning exposure, and safe access to the chosen high point.
Confirm Legal Authority
Relay service does not change the operation’s authorization. A T100 dispensing operation in the United States can require Part 91, Part 137, exemption authority, registration, an Agricultural Aircraft Operator Certificate, a COA, and compliance with the operator’s conditions and limitations.
Review FAA guidance for dispensing chemicals and agricultural products and Section 44807.
Never Deploy Outdoors During Thunderstorms
DJI specifically warns against outdoor relay setup during thunderstorms because an elevated relay and pole create lightning exposure. Stop operations, lower equipment when safe, and move personnel to appropriate shelter before a storm reaches the site.
Phase 1 — Charging, Antennas & First-Use Preparation
Step 1 — Inventory the Relay Kit
Confirm the relay, four antennas, mount, USB-C charging equipment, documentation, and any supplied hardware are present.
The extension pole is not included and must be sourced separately.
Step 2 — Inspect the Housing
Look for cracks, deformation, damaged seals, chemical residue, or evidence of water intrusion. A damaged housing should be evaluated before charging.
Step 3 — Inspect the Water Outlet
Verify the water outlet is open and clean. Remove only superficial blockage using a method that cannot damage the internal path.
Step 4 — Inspect the USB-C Port
Check for dirt, corrosion, bent contacts, moisture, or a loose protective plug. Do not connect power to a wet or damaged port.
Step 5 — Inspect the Four Antennas
Confirm all four antennas match the relay, have undamaged threads/connectors, and show no cracks or bends.
Step 6 — Check the Battery Level
Press the power button once. Read the battery-level LEDs and record the starting condition.
Step 7 — Connect a USB-C Charger
Connect the relay to a compatible USB Power Delivery charger using an appropriate cable.
The current guide recommends USB PD charging, while the tutorial identifies 15 W or higher for compatible external PD power support.
Step 8 — Charge the Relay Before First Use
DJI instructs users to fully charge the built-in battery before first use. Place the relay in a dry, ventilated, stable area while charging.
Step 9 — Confirm Full Charge
The relay is fully charged when all battery-level LEDs are solid.
Do not infer full charge from elapsed time alone.
Step 10 — Disconnect Charging Power
Remove the USB-C cable carefully by the connector. Do not pull on the cable.
Step 11 — Close the USB-C Port Plug
Secure the protective plug before outdoor use. The published IP55 rating assumes the equipment is intact and used according to DJI instructions; it does not make an open USB-C port waterproof.
Step 12 — Install the Four Antennas
Attach all four antennas in the designated top positions. Tighten only as specified; do not use tools or excessive force unless DJI directs it.
Step 13 — Inspect Antenna Seating
Confirm every antenna is correctly seated and free to occupy the intended operating orientation.
Step 14 — Prepare External PD Power if Needed
For missions approaching the built-in runtime, prepare a compatible PD power bank rated at 15 W or higher under the video guidance.
Secure the power bank, cable, and weather protection so external power does not create a falling-object, snag, water-ingress, or mount-instability hazard.
Battery Runtime: Four Hours vs. Five Hours
The tutorial describes continuous operation for up to four hours. DJI’s current T100 specifications list five hours. Differences can result from document revision, test method, hardware, transmit power, temperature, battery age, and operating conditions.
For field planning:
- use the lower value when no site-specific evidence exists;
- begin with a full battery;
- monitor LEDs during the job;
- include setup, linking, testing, and teardown time;
- do not plan to exhaust the battery; and
- use compatible external PD power when the approved setup requires additional endurance.
Phase 2 — Linking & Activation
Step 15 — Place the Aircraft, Controller & Relay Together
For linking, position the aircraft and remote controller within 0.5 m of the relay.
Use a stable, propeller-safe arrangement. The aircraft should not need to be armed or flown.
Step 16 — Power On the Remote Controller
Start the controller and allow the DJI Agras app to initialize.
Step 17 — Power On the Aircraft
Power on the aircraft in a controlled area with propellers clear of people and objects.
Step 18 — Confirm the Aircraft and Controller Are Linked
The aircraft and remote controller must already have a normal direct link before the relay is added.
Resolve any aircraft-controller linking fault first.
Step 19 — Power On the Relay
Press the relay power button once, then press and hold it for approximately two seconds.
Confirm the relay starts and its status LEDs appear.
Step 20 — Wait for the Not-Linked Status
The official guide describes solid-red status LEDs when the relay is powered but not linked.
Step 21 — Enter Linking Mode
Press and hold the power button until the relay displays its linking pattern. The video describes the battery LEDs blinking in sequence, while the user guide identifies alternating green and red status LEDs for linking.
Use the current hardware’s DJI-defined pattern.
Step 22 — Open Device Management
From the DJI Agras app home screen, tap Device Management.
Step 23 — Select DJI Relay
Choose DJI Relay or Relay, depending on the app version.
Step 24 — Tap Linking
Select Linking to begin connecting the remote controller to the relay.
Keep all devices powered and within 0.5 m while the process runs.
Step 25 — Confirm the RC Status LED Turns Solid Green
A solid-green RC LED confirms the remote-controller-to-relay link.
Do not proceed based only on an app spinner or battery LED.
Step 26 — Allow Automatic Aircraft Linking
After the controller links successfully, the aircraft should link to the relay automatically.
Avoid pressing unrelated controls while the process completes.
Step 27 — Confirm the UAV Status LED Turns Solid Green
A solid-green UAV LED confirms the relay-to-aircraft link.
Both RC and UAV LEDs should now indicate a successful path.
Step 28 — Complete First-Time Activation
A new relay requires activation. Follow the app prompt after linking, or connect the relay to the remote controller’s USB-C port and complete activation as directed.
Step 29 — Resolve an Aircraft-Model Mismatch
If linking fails and the app reports that the aircraft model does not match:
- connect the relay to the remote controller USB-C port;
- follow the app prompt to switch to the correct supported model; and
- attempt linking again.
Do not select a model that does not match the aircraft merely to clear the warning.
Step 30 — Verify Both LEDs After Activation
Confirm activation did not leave either communication leg unlinked.
Step 31 — Record the Relay and Firmware Identity
Record relay model/serial information where available, aircraft model, remote-controller model, app version, and firmware versions.
Correct Linking Distance: 0.5 m, Not 5 m
The official user guide repeats the 0.5 m requirement. This is approximately 1.6 feet.
Why it matters:
- linking is a local setup process, not a range test;
- close placement reduces ambiguity from weak signal or interference;
- a failed link at 5 m could be misdiagnosed as firmware or hardware; and
- the test range belongs after successful linking, not during it.
Phase 3 — Firmware Update
Step 32 — Determine Whether an Update Is Required
Check Device Management for firmware compatibility or an update prompt. Use DJI’s current supported version for the aircraft, controller, and relay combination.
Step 33 — Power Off the Aircraft Before Updating
DJI instructs users to power off the aircraft for a relay firmware update performed through the app.
Step 34 — Confirm Controller and Relay Battery Margin
Both devices need enough power to complete the update without interruption.
Step 35 — Connect the Remote Controller to the Internet
Verify stable internet access before starting the download or update.
Step 36 — Open Relay Firmware in Device Management
Power on and link the relay and controller, then open Device Management → Relay and select the supported firmware version.
Step 37 — Use USB-C Update Method if Directed
The relay may also be connected to the remote controller’s USB-C port for firmware updating.
Use a stable cable and do not disconnect it during the update.
Step 38 — Complete the Update
Maintain power and connection until the app confirms completion. Do not turn off the relay or controller prematurely.
Step 39 — Restart and Reverify
Restart as directed and confirm both RC and UAV links again before field deployment.
Phase 4 — Mounting & Elevated Site Selection
Step 40 — Survey the Communication Geometry
Identify the remote-controller location, aircraft route, terrain high points, crop height, tree canopy, buildings, windbreaks, and known signal-loss areas.
The best relay site has a clear path to both the controller side and aircraft operating area.
Step 41 — Select an Elevated Location
DJI recommends high places such as roofs or hills. Elevation can help the signal clear orchards, tall crops, and terrain.
Use a roof only with safe authorized access, appropriate fall protection, stable mounting, lightning awareness, and protection from falling equipment.
Step 42 — Measure Crop or Canopy Height
Determine the highest relevant crop or canopy obstruction in the relay’s signal path.
Do not estimate from a distant road if the field contains taller zones.
Step 43 — Add at Least 2 m of Relay Clearance
DJI recommends placing the relay at least 2 m above the crops to support signal transmission.
This is a height-above-crop requirement, not simply two meters above the ground.
Step 44 — Inspect the Extension Pole
Confirm the separately purchased pole is compatible with the mount, tall enough, structurally sound, and suitable for wind and ground conditions.
Do not improvise with a weak pole that can bend into people, power lines, roads, crops, or the aircraft path.
Step 45 — Install the Relay Mount
Attach the supplied mount according to DJI’s instructions. Verify every locking feature and clamp.
Step 46 — Attach the Relay to the Pole
Secure the relay to the mount while the pole is safely controlled at ground level when possible.
Do not climb or overreach while holding an unsecured relay.
Step 47 — Secure External Power if Used
If a PD power bank is used, secure it and its cable so neither can fall, swing, pull the USB-C port, block the water outlet, or obstruct antennas.
Step 48 — Raise and Stabilize the Pole
Use guying, ballast, anchors, or a manufacturer-approved base appropriate to the surface and conditions.
Keep the structure away from overhead power lines and public access.
Step 49 — Keep All Antennas Unobstructed
No pole, roof edge, foliage, power bank, cable bundle, enclosure, or protective cover should block the antennas.
Do not wrap the relay in foil, metal mesh, or a sealed improvised box.
Step 50 — Keep the Water Outlet Clear
Check that mounting orientation and straps do not cover the outlet. Inspect it again after raising the relay.
Step 51 — Confirm USB-C Weather Protection
If the port is not in use, close its plug. If external power is used, follow DJI-compatible weather and strain-relief guidance without trapping water at the connector.
Step 52 — Establish a Controlled Ground Area
Prevent people, animals, vehicles, and machinery from striking the pole or walking through guy lines and cables.
Step 53 — Recheck Weather
Do not deploy outdoors during thunderstorms. Lower the relay when safe before lightning, high wind, or other conditions exceed the pole or site plan.
Step 54 — Power On at the Deployed Position
Power on the relay and verify that its battery and status indications are normal after relocation.
Step 55 — Confirm Both Communication Legs
Check the RC and UAV status LEDs and the controller’s relay status.
Solid-green indications should be confirmed before a mission depends on the relay.
Phase 5 — Field Testing & Task Execution
Step 56 — Run a Stationary Ground Test
With the aircraft safely powered and stationary, observe the relay connection long enough to identify cycling, weak-link warnings, or intermittent status.
Step 57 — Walk or Drive the Controller to Its Operating Position
Move the controller crew to the intended location while monitoring relay status. Do not begin a loaded flight simply because linking succeeded at 0.5 m.
Step 58 — Validate the Aircraft Side Without Payload
Where authorized and safe, conduct a conservative no-load or water-only validation flight across the planned area.
Test the expected signal-shadow zones while preserving visual observation and all operating limitations.
Step 59 — Monitor RC and UAV Status Separately
If quality declines, identify which leg is affected:
- controller-to-relay; or
- relay-to-aircraft.
Moving the relay may help one leg while harming the other.
Step 60 — Monitor Relay Battery
Periodically press once or use the supported app status to check remaining battery. Include setup time in the endurance calculation.
Step 61 — Monitor Mount and Weather
Assign a crew member to observe the pole, guy lines, wind, rain, lightning, public access, and external-power cable where appropriate.
Step 62 — Preserve Primary Link and Lost-Link Procedures
Do not disable or ignore primary command-and-control monitoring. The pilot must understand the aircraft’s lost-link action and how the relay affects the communication plan.
Step 63 — Pause for Any Unexplained Relay Change
If an LED turns red, the app reports a link fault, the pole moves, an antenna is obstructed, the power bank disconnects, or weather changes, suspend the task using the approved procedure.
Step 64 — Reposition Instead of Normalizing Weak Service
Repeated marginal connection means the geometry, height, interference, firmware, or hardware needs correction. Do not treat frequent dropouts as normal merely because the aircraft sometimes reconnects.
Step 65 — Complete Post-Operation Shutdown
Land and secure the aircraft first. Then power down the relay using the press-once-and-hold sequence and lower the pole safely.
Step 66 — Inspect and Store the Relay
Inspect antennas, outlet, port, mount, housing, and battery state. Clean contamination using DJI-approved methods and store according to the user guide.
Step 67 — Document the Deployment
Record:
- relay identity;
- compatible aircraft and controller;
- firmware/app versions;
- linking and activation status;
- relay coordinates and height;
- crop height and clearance;
- mount/pole configuration;
- battery start/end state;
- external power used;
- weather;
- RC and UAV status;
- signal warnings or interruptions;
- route tested; and
- corrective action.
Relay Site-Selection Decision Table
| Candidate site | Advantage | Risk/check |
|---|---|---|
| Hilltop | Broad line of sight | Wind, lightning, access, unstable soil |
| Roof | Strong elevation | Fall hazard, owner permission, structure, lightning, RF blockage |
| Field center on pole | Balanced geometry | Crop/vehicle access, guy lines, height requirement |
| Field edge | Easy crew access | May leave far side blocked |
| Behind tree line | Protected from wind | Foliage can block signal; generally poor choice |
| Near metal building | Power/access available | Reflection, obstruction, interference |
Relay Height Calculation
Use:
Minimum relay elevation above local ground = crop or canopy height above local ground + at least 2 m
Example: if the relevant crop height is 3.5 m, the relay should be at least 5.5 m above the same local ground reference, subject to safe pole and site limits.
This calculation does not guarantee line of sight across a hill. Terrain and buildings still require separate analysis.
Linking vs. Activation vs. Firmware
| Action | Purpose | Success evidence |
|---|---|---|
| Linking | Establish RC↔︎Relay and Relay↔︎UAV communication | RC and UAV LEDs solid green |
| Activation | Register/enable a new relay for first use | App completes activation without warning |
| Model switch | Match relay to supported aircraft model | Mismatch prompt resolved using correct model |
| Firmware update | Align supported software versions | App confirms completion; links reverified |
Operating & Charging Temperature Guidance
DJI’s relay guide states:
- operate from 0°C to 45°C (32°F to 113°F);
- charge from 5°C to 40°C (41°F to 104°F);
- ideal charging range is 22°C to 28°C (72°F to 82°F); and
- allow the relay to cool near room temperature before charging after use.
High temperature can create battery fire or explosion risk. Low temperature can materially reduce battery performance. Temperature limits do not guarantee the pole, power bank, cable, or other accessories are suitable under the same conditions.
Long-Term Storage Guidance
For storage longer than three months, DJI recommends:
- -10°C to 30°C (14°F to 86°F) storage environment;
- 30%–50% battery state for extended storage;
- never storing fully depleted for a long period;
- dry storage away from direct sun, heaters, furnaces, and hot vehicles;
- keeping antennas attached;
- securing the USB-C port plug;
- fully charging at least every six months to maintain battery activity; and
- never disassembling the relay.
Common DJI Relay Deployment Mistakes
1. Using 5 m as the Linking Distance
The official requirement is within 0.5 m.
2. Trying to Link Before the Aircraft and Controller Are Linked
The direct aircraft-controller relationship must be established first.
3. Confusing Battery LEDs With RC/UAV Status LEDs
Each LED group answers a different question.
4. Accepting Only One Green Status LED
Both the RC and UAV communication legs need confirmation.
5. Skipping First-Time Activation
A new relay requires activation even if linking appears successful.
6. Ignoring an Aircraft-Model Mismatch
Use the USB-C model-switch process and choose the correct supported aircraft.
7. Beginning With Low Relay Battery
Setup, linking, testing, and teardown consume runtime before the operation starts.
8. Planning Around the Maximum Runtime
Four- or five-hour references are not a no-reserve mission allowance.
9. Using an Unsupported Power Bank
Use compatible USB PD equipment and secure the cable and battery properly.
10. Blocking the Water Outlet
Straps, tape, mud, or debris can obstruct drainage.
11. Deploying With an Open USB-C Plug
An open port reduces environmental protection.
12. Installing Fewer Than Four Antennas
Use all specified antennas and inspect each connection.
13. Covering Antennas for Weather Protection
Improvised covers can obstruct radio transmission or trap heat and moisture.
14. Placing the Relay at Ground Level
Tall crops and orchard crowns can continue to block both paths.
15. Measuring Two Meters From the Ground Instead of the Crop Top
DJI specifies at least 2 m higher than the crops.
16. Selecting the Highest Point Without Assessing Safety
Roofs and hills introduce fall, wind, lightning, and access risks.
17. Using a Weak Extension Pole
Pole failure can damage the relay, injure people, or create an obstacle.
18. Setting Up Near Power Lines
Elevated poles need large, planned separation from electrical hazards.
19. Deploying During a Thunderstorm
DJI explicitly prohibits outdoor thunderstorm setup.
20. Checking Only at the Linking Location
Successful close-range linking does not validate the field geometry.
21. Skipping No-Load Route Testing
A loaded mission should not be the first discovery of a far-side signal shadow.
22. Moving the Relay Without Rechecking Both Legs
A move that improves the aircraft leg can weaken the controller leg.
23. Ignoring Firmware Compatibility
Linking faults can result from incompatible relay, controller, or aircraft firmware.
24. Updating With the Aircraft Powered On
The user guide instructs users to power off the aircraft before the relay firmware update.
25. Treating Published Range as a Guarantee
DJI’s range is measured unobstructed and free of interference under stated conditions.
26. Treating Relay Connectivity as BVLOS Approval
Radio capability does not expand FAA authority.
Troubleshooting DJI Relay Linking & Field Performance
| Symptom | Likely cause | Safe corrective action |
|---|---|---|
| Relay will not power on | Battery depleted, temperature, charger/cable, or hardware fault | Charge in supported temperature range; inspect cable/port; contact support if unresolved. |
| Battery LEDs do not show full | Charge incomplete, temperature, power source, or battery condition | Use supported PD equipment and allow full charge; inspect app/support guidance. |
| RC LED stays red | Controller-relay link not established | Keep within 0.5 m, re-enter linking, verify Device Management and firmware. |
| RC LED green, UAV LED red | Aircraft did not complete automatic linking | Confirm aircraft-controller direct link, 0.5 m placement, compatibility, and firmware. |
| App says model mismatch | Relay assigned to a different supported model | Connect to controller USB-C and switch to the correct model as prompted. |
| Linking cycles indefinitely | Interference, distance, procedure, or firmware | Bring devices within 0.5 m, restart controlled process, verify versions. |
| Links succeed nearby but fail in field | Poor site geometry or interference | Reposition/elevate relay and retest both legs. |
| Connection weak behind crops | Relay too low or antennas obstructed | Raise to at least 2 m above crop top and clear antennas. |
| Connection drops when wind increases | Pole moves or cable/antenna shifts | Suspend task, stabilize mount, lower if conditions exceed plan. |
| Relay shuts down early | Battery age, temperature, load, or inaccurate runtime assumption | Plan conservative reserve and use compatible external PD power if approved. |
| Firmware update fails | Aircraft still on, low battery, no internet, or cable interruption | Follow DJI update sequence with adequate power and stable internet/USB-C. |
| Water outlet blocked | Mud, residue, tape, or mount obstruction | Power off, lower relay, and clean with approved method. |
| USB-C port shows moisture/corrosion | Plug open or environmental exposure | Do not power/charge; dry and obtain service guidance. |
If Linking Fails: Diagnostic Order
- Confirm aircraft and controller are already linked.
- Place aircraft and controller within 0.5 m of relay.
- Confirm all devices have adequate battery.
- Confirm relay is powered on.
- Re-enter linking mode using the current LED pattern.
- Open Device Management and select the correct Relay entry.
- Start linking and watch the RC LED.
- Wait for the UAV automatic-link step.
- Record the exact app message.
- Verify supported aircraft model.
- Resolve any model mismatch through controller USB-C.
- Verify aircraft, controller, app, and relay firmware.
- Restart the devices and retry once under controlled conditions.
- Contact a DJI dealer, DJI Support, or Ares Acres if the issue persists.
If Field Signal Is Still Blocked
Linking success does not prove good placement. Reassess:
- relay height above crops;
- line of sight to controller;
- line of sight to aircraft route;
- hill or ridge obstruction;
- wet foliage and tree crowns;
- metal structures;
- antenna obstruction;
- local interference;
- regional frequency availability;
- pole movement;
- relay battery; and
- firmware/status warnings.
Change one factor at a time and document the result.
Ares Acres Recommended Relay Workflow
- Confirm relay compatibility with aircraft, controller, app, and region.
- Review DJI’s official video, user guide, and current T100 specs.
- Inspect housing, outlet, port, four antennas, mount, and battery.
- Fully charge before first use.
- Confirm all battery LEDs solid.
- Close the USB-C plug.
- Install all four antennas.
- Prepare approved PD power if mission endurance requires it.
- Power on and directly link aircraft and controller.
- Place both within 0.5 m of relay.
- Power on relay with press-once-and-hold sequence.
- Enter linking mode.
- Open Device Management → Relay → Linking.
- Confirm RC LED solid green.
- Confirm UAV LED solid green.
- Complete activation for a new relay.
- Resolve model mismatch if shown.
- Update firmware with aircraft off and adequate controller/relay power.
- Survey terrain, crops, trees, buildings, interference, and safe access.
- Select an elevated site with a clear path to both endpoints.
- Measure crop/canopy height.
- Position relay at least 2 m above crop height.
- Inspect the extension pole, mount, anchors, and guying.
- Keep clear of power lines and public access.
- Never deploy outdoors during thunderstorms.
- Secure external power and its cable if used.
- Keep all antennas and the water outlet unobstructed.
- Confirm USB-C environmental protection.
- Verify both green status LEDs at deployed position.
- Run a stationary stability test.
- Validate controller operating position.
- Conduct an authorized no-load or water-only route test.
- Monitor RC and UAV legs separately.
- Monitor battery, pole, weather, and access throughout the job.
- Pause immediately for red LEDs, movement, lightning, or unexplained warnings.
- Land aircraft before relay teardown.
- Power down and lower the pole safely.
- Inspect, clean, cool, charge, and store according to DJI guidance.
- Document relay position, height, status, battery use, weather, and results.
Related DJI Agras Operator Academy Tutorials
- DJI Agras T100 Orchard Operations Safety and Fruit Tree Precautions
- DJI Agras T100 4G Module Installation
- DJI T100/T50 Pre-Flight Safety Tutorial
- DJI Agras Remote Operation View for T100 and T50
- DJI Agras Remote Controller Activation for T100 and T50
- DJI T100 D-RTK 3 Setup, Linking and RTK Coordinates
- DJI Agras T100 Route Mode Field Planning and Task Execution
- DJI Agras T100 Fruit Tree Mapping Tutorial
- DJI Agras T100 A-B Operation Mode Tutorial
- DJI Agras T100 Manual and Manual Plus Operations
FAQ: DJI Agras T100 Relay Setup & Use
What does the DJI Relay do?
It creates a supported radio relay path between the remote controller and designated DJI aircraft to help reduce signal blockage in complex environments.
Which frequency bands does it support?
DJI publishes 2.4000–2.4835 GHz, 5.150–5.250 GHz, and 5.725–5.850 GHz. Some regions do not permit every 5 GHz frequency.
How many antennas does the relay have?
It has four detachable antennas at the top.
Can I use third-party antennas?
Use only antennas approved for the relay and region. Unauthorized substitutions can affect performance and radio compliance.
What is the water outlet?
It allows moisture to leave the housing and must remain clean and unobstructed.
What is the USB-C port used for?
It is used for charging and supported firmware-update or activation connections.
Can a power bank extend relay runtime?
The tutorial allows a USB PD power bank rated at 15 W or higher. Secure the power bank and cable and follow current DJI compatibility instructions.
How do I check the battery level?
Press the power button once and read the battery-level LEDs.
How do I turn the relay on or off?
Press once, then press and hold the power button for approximately two seconds.
How do I know it is fully charged?
All battery-level LEDs remain solid during the full-charge indication.
Should it be fully charged before first use?
Yes. DJI specifically instructs users to fully charge the built-in battery before first use.
Is relay runtime four hours or five hours?
The video describes up to four hours; DJI’s current T100 specifications list five hours. Plan conservatively and monitor the actual unit.
What is the correct linking distance?
Keep the aircraft and remote controller within 0.5 m of the relay during linking.
Why does the transcript say 5 m?
The decimal appears to have been dropped. DJI’s official guide repeatedly states 0.5 m.
Must the aircraft and controller already be linked?
Yes. Establish their normal direct link before adding the relay.
How do I enter linking mode?
Power on the relay, then hold the power button until the current DJI linking pattern appears.
Where is the linking menu?
From the DJI Agras app home screen, open Device Management, select Relay, and tap Linking.
What does a solid-green RC LED mean?
The remote controller has linked successfully to the relay.
What does a solid-green UAV LED mean?
The aircraft has linked successfully to the relay.
Does the aircraft link automatically?
Yes. After the controller-relay link succeeds, the aircraft should complete its relay link automatically.
What if only the RC LED is green?
The controller leg is connected, but the aircraft leg is not confirmed. Check the aircraft-controller link, distance, compatibility, and firmware.
Does a new relay require activation?
Yes. Complete activation in the app after linking or through the supported controller USB-C connection.
What if the app says the aircraft model does not match?
Connect the relay to the controller USB-C port and follow the app prompt to switch to the correct supported model.
How is firmware updated?
Power off the aircraft, ensure controller and relay have adequate battery, connect the controller to the internet, and update from Device Management → Relay or through the supported USB-C method.
Where should the relay be placed?
Use a stable elevated position such as a safely accessible hill or properly planned roof location with a clear path to the controller and aircraft area.
How high should it be above crops?
At least 2 m higher than the crops or canopy obstructing the signal path.
Is the extension pole included?
No. The mount is included, while the extension pole is purchased separately.
Can the antennas be obstructed?
No. Keep all antennas clear of foliage, structures, cables, power banks, and protective coverings.
Can I deploy it outdoors during a thunderstorm?
No. DJI explicitly warns against outdoor thunderstorm deployment because of lightning risk.
What is the operating-temperature range?
DJI’s user guide states 0°C to 45°C.
What is the charging-temperature range?
Charge from 5°C to 40°C; DJI lists 22°C to 28°C as the ideal range.
Does IP55 mean it can be submerged?
No. Keep ports protected, the housing intact, and follow DJI’s environmental instructions.
What is DJI’s published FCC reference range?
Current T100 specifications list 8 km under unobstructed, interference-free test conditions at 2.5 m flight altitude. Real field performance may be lower.
Does the relay authorize BVLOS flight?
No. Relay connectivity does not change FAA authorization or visual-observation requirements.
Does Part 107 alone authorize a T100 spraying mission?
No. Part 107 applies to aircraft under 55 pounds at takeoff. A T100 agricultural operation requires the large-UAS and Part 137 authority applicable to the mission.
What should be documented after deployment?
Record relay identity, firmware, linked equipment, position, height, crop clearance, battery, external power, weather, LED status, signal events, route validation, and corrective actions.
Final Takeaway
DJI Relay performance begins with correct preparation. Inspect the housing, water outlet, USB-C port, mount, and all four antennas. Fully charge the built-in battery before first use, use compatible USB PD equipment, and treat runtime as a planned resource rather than an exact guarantee.
Linking is a two-stage process. First ensure the T100 and remote controller are linked directly. Place both within 0.5 m of the relay, enter linking mode, and use Device Management → Relay → Linking. A solid-green RC LED confirms the controller leg; a solid-green UAV LED confirms the aircraft leg. Complete first-time activation and resolve model or firmware mismatches before deployment.
In the field, place the relay where it has a strong path to both endpoints. Elevate it at least 2 m above the obstructing crop or canopy, use a stable extension-pole system, keep antennas and the water outlet clear, and never set it up outdoors during thunderstorms. Test the deployed geometry without a loaded mission before depending on it.
Most importantly, the relay improves communications; it does not redefine authority. Continue to comply with the T100’s primary-link procedures, lost-link settings, FAA exemption, Part 91, Part 137, COA, airspace, visual-observation, and other operating limitations.
Complementary DJI T100 Communication, Power & Field Equipment
Reliable relay deployment depends on the aircraft, remote controller, four antennas, mount, extension pole, batteries, USB PD power, positioning equipment, primary transmission link, and correctly maintained OEM hardware.
- DJI Agras T100 Aircraft — explore the T100 agricultural platform.
- DJI T100 OEM Parts — browse model-specific electronic, communications, structural, spray, and propulsion components.
- DJI Agras Parts — search the full agricultural-drone parts catalog.
- DJI Agras Accessories — review relay, positioning, power, controller, and operational accessories.
- Ares Acres Product Catalog — search aircraft, batteries, chargers, relay equipment, 4G modules, spreading systems, and air-seeder equipment.
- Ares Acres Technical Support — contact our team for DJI Relay compatibility, setup, firmware, placement, or field troubleshooting.
What Is Ares Acres?
Ares Acres is a U.S.-based agricultural robotics company focused on DJI Agras aircraft, OEM parts, diagnostics, operator support, and technical education. Our DJI Agriculture Tutorials library turns short equipment videos into complete deployment procedures with source corrections, safety gates, troubleshooting, and field-verification standards.
Need a DJI Relay, T100 Parts, or Setup Support?
Explore the DJI Agras T100, browse DJI T100 Parts, search DJI Agras Parts, or contact Ares Acres for help identifying the correct relay, mount, antenna, controller, extension-pole setup, or supporting component.
Relay, network, and regulatory note: Supported aircraft, controllers, frequencies, range, transmit power, runtime, charging, activation, app menus, LED patterns, firmware, external power, and regional availability can change. Follow the latest official DJI O4 Relay guide, T100 specifications, app prompts, and local radio requirements. Never deploy the relay outdoors during thunderstorms. A linked relay does not authorize BVLOS flight, replace the primary command-and-control plan, or expand an FAA exemption, Part 91, Part 107, Part 137, COA, airspace, registration, or operating limitation.