DJI Agras T100 Lifting Safety Regulations: FAA Part 91/137 & Drone Safety Instructions
Share
DJI Agras T100 Lifting Safety Regulations: FAA Part 91/137 & Drone Safety Instructions
🇺🇸 U.S.A. FIRST — Lifting Cable, Payload, Crew, Weather & Loading/Unloading Safety
The DJI Agras T100 lifting system can move substantial loads, but the mission must be planned around a fact that is easy to overlook: the aircraft’s obstacle-sensing system does not make the suspended sling and payload obstacle-proof. The aircraft, cable, hook, cargo, ground crew, loading site, unloading site, route, weather, and battery reserve must be treated as one complete external-load system.
This Ares Acres tutorial expands the official DJI T100 Lifting Safety Regulations tutorial and the Ares Acres DJI T100 safety video into a field-ready operating procedure. It covers adverse-weather limits, obstacle and terrain hazards, takeoff and landing zones, crew training, personal protective equipment, the six-meter aircraft exclusion distance, aircraft and sling inspection, secure rigging, charging and cooling equipment, loading and unloading, payload limits, and battery reserve.
The current DJI T70P/T100 Lift System User Manual adds several details that are more precise than the short narration. DJI specifies a 10–15 m sling, a minimum sling diameter of 8 mm, approved high-strength materials, and a hook capable of withstanding at least 500 kg of pulling force. The current manual also recommends descending 3–4 m after the sling or cargo touches the ground before moving approximately 6 m away; the auto-generated video caption says 5 m. This guide uses the current manual as the controlling reference.
U.S. operators also need to separate equipment safety from operating authority. A DJI T100 lifting mission is not automatically a Part 137 agricultural aircraft operation. The T100 exceeds the 55-pound Part 107 threshold in its lifting configurations, so U.S. civil operations generally depend on the operator’s applicable Part 91, Section 44807, registration, exemption, COA, airspace, pilot, and mission-specific authority. Part 137 applies when the activity meets the regulatory definition of an agricultural aircraft operation, such as dispensing qualifying agricultural substances. External-load, cargo-for-hire, hazardous-material, and delivery missions can involve additional requirements. The operator must follow the exact authority issued for the specific mission.
Ares Acres supports U.S. DJI Agras operators with aircraft, OEM lift-system hardware, batteries, charging equipment, diagnostics, and operator education. Explore the DJI Agras T100, DJI T100 OEM Parts, DJI Agras Parts, DJI Agras Accessories, the Ares Acres Product Catalog, or contact Ares Acres for compatibility and setup support.
Prefer to watch instead of read? The video above gives the short safety sequence for weather, obstacles, operating sites, crew protection, aircraft inspection, lifting-cable inspection, charging equipment, payload security, loading and unloading, overload prevention, and battery reserve. Use this written guide to apply the current DJI manual values, understand the blind spots created by a suspended load, and build a documented U.S. operating procedure.
What You’ll Learn
- Why the aircraft, sling, hook, and payload must be evaluated as one moving system.
- Why the suspended cable and payload are not protected by the aircraft’s obstacle-avoidance envelope.
- How automatic flight treats destinations that are higher or lower than the current position.
- Why a clear aircraft route can still be unsafe for the cable or cargo.
- How to establish open takeoff, landing, loading, and unloading zones.
- How to keep unauthorized people out with barriers and warning signs.
- Why pilots and ground crew need helmets, reflective vests, and reliable communications.
- Why loading and unloading personnel require pre-job training.
- How to preserve more than 6 m of separation from the aircraft.
- How to inspect arms, arm locks, payload clasps, propulsion hardware, LiDAR, radar, and antennas.
- How to inspect the sling, hook, knots, splices, and attachment points.
- Why the current DJI sling specification is 10–15 m long and at least 8 mm in diameter.
- Which sling materials and hook-strength reference DJI currently publishes.
- Why both an excessively short and an excessively long sling can increase risk.
- How to inspect batteries, chargers, generators, cables, and air-cooling equipment.
- How to secure cargo and prevent shifting, release, tangling, or rotation.
- How to use a test lift before committing to transit.
- How to plan payload margin instead of treating the nominal maximum as a target.
- How altitude, temperature, wind, battery condition, and configuration affect usable payload.
- How the single-battery and dual-battery lifting systems differ.
- How to preserve a safe battery reserve and respond to overheating or low-battery warnings.
- How to lower the load without putting crew beneath the aircraft.
- Why the current manual recommends 3–4 m of additional descent after ground contact.
- Why the aircraft should then move approximately 6 m in a people-free direction before ground handling begins.
- How to handle payload swing, route obstruction, weather deterioration, abnormal aircraft status, and communication loss.
- Where Part 107, Part 91, Section 44807, Part 137, COAs, and mission-specific approvals fit.
Quick Answer: How Do You Operate the DJI Agras T100 Lifting System Safely?
Confirm Mission Authority → Review Current DJI Manual and App Warnings → Check Weather and Wind → Survey the Entire Aircraft-and-Suspended-Load Route → Establish Controlled Takeoff, Landing, Loading, and Unloading Zones → Assign Pilot, Visual Observer, Ground Lead, and Load Handlers → Equip Crew With Helmets, Reflective Vests, and Radios → Inspect Aircraft, Arms, Locks, Propellers, Sensors, Payload Clasps, and Lift Module → Inspect the 10–15 m Sling, Minimum 8 mm Diameter, and Rated Hook → Verify Secure Cargo Rigging → Confirm Batteries, Charger, Cooling Equipment, and Reserve → Tare the Weight Sensor if Required → Load Below the App-Recommended Limit → Conduct a Low Test Lift → Confirm Stable Cargo and Clear Route → Keep Personnel More Than 6 m Away and Never Under the Aircraft → Monitor Weather, Battery, Heat, Link, Swing, and Route → At Destination, Lower Until Sling/Cargo Touches Ground → Descend an Additional 3–4 m → Move Approximately 6 m in a People-Free Direction → Hover → Permit Ground Crew to Approach → Complete the Transfer → Clear Crew → Re-tension Carefully → Continue or Land With Adequate Reserve → Inspect and Document the System.
The T100 should never be used to normalize a marginal lift. If the route, rigging, crew position, weather, aircraft status, load behavior, or battery reserve is uncertain, suspend the task and correct the condition before continuing.
Critical Corrections and Clarifications
| Topic | Short video or caption | Current DJI reference | Operational treatment |
|---|---|---|---|
| Sling length | Around 10 m | 10–15 m; standard configuration is 10 m | Use the approved sling for the exact configuration and mission. |
| Sling diameter | Not stated | At least 8 mm | Reject undersized, damaged, or unverified line. |
| Sling material | Not stated | UHMWPE or aramid fiber; high-strength polyester may be used as the inner core | Use documented, compatible lifting hardware rather than improvised rope. |
| Hook reference | Not stated | Withstands at least 500 kg pulling force | Inspect the hook, gate, attachment, and rating before each operation. |
| Descent after ground contact | Continue descending 5 m | Continue descending 3–4 m | Use the current manual and adjust within approved guidance for sling length and surroundings. |
| Movement before crew approach | Move back 6 m | Move approximately 6 m backward or in another people-free direction | Choose the direction based on the actual exclusion area. |
| Obstacle behavior | Cable and payload are outside avoidance range | Aircraft cannot automatically bypass obstacles during lift operations | Plan intermediate destination points around obstacles; do not depend on automatic bypass. |
| Severe wind | Avoid strong winds | Do not operate when wind exceeds 6 m/s | Treat 6 m/s as an upper prohibition, not a target operating wind. |
| Regulatory label | Video title references Part 137; description references Part 107 | Part 107 covers aircraft below 55 lb at takeoff; T100 lifting configurations exceed that threshold | Use the exact Part 91/Section 44807/exemption/COA authority; add Part 137 only when the mission is an agricultural aircraft operation. |
Current DJI T100 Lifting Specifications
| Specification | Single-battery lifting system | Dual-battery lifting system |
|---|---|---|
| Aircraft weight in lifting configuration | 65 kg | 90 kg |
| Maximum takeoff weight | 165 kg | 170 kg |
| Published lift-system load capacity | 100 kg | 80 kg |
| Standard lifting cable length | 10 m | 10 m |
| Recommended cable length | 10–15 m | 10–15 m |
| Operating temperature | 0°C to 40°C | 0°C to 40°C |
| Emergency escape mode | Follow current aircraft and lift-system procedure | Cable fuse disconnection and escape listed by DJI |
These are published equipment limits, not automatic approvals to lift the maximum on every flight. DJI Agras evaluates aircraft status and surroundings and recommends a payload limit in the app. Density altitude, temperature, wind, battery condition, aircraft configuration, cable behavior, cargo aerodynamics, route, and reserve can require a lower working load.
U.S. Regulatory Scope: Part 107, Part 91, Section 44807 and Part 137
Part 107 Is Not the Default T100 Lifting Framework
The FAA’s Part 107 rule applies to small UAS weighing less than 55 pounds at takeoff, including everything onboard or attached. DJI publishes an aircraft weight of 65 kg in the standard lifting configuration and 90 kg in the dual-battery lifting configuration. Those aircraft weights alone exceed the Part 107 ceiling.
Part 107 does permit a securely attached external load on a qualifying sub-55-pound aircraft when the load does not adversely affect controllability. That general small-UAS permission does not convert the T100 into a Part 107 aircraft.
Part 91 and Section 44807
The FAA identifies civil UAS at or above 55 pounds as Part 91 operations unless another certification path applies. Section 44807 provides a case-by-case pathway for certain civil unmanned aircraft that exceed Part 107’s weight or include non-waiverable rules. The FAA may require an exemption, registration, operating documents, training, emergency procedures, maintenance procedures, safety-risk analysis, and a COA.
A lifting operator should read the actual grant of exemption, operating limitations, aircraft listing, registration, and COA. Do not assume that an approval issued for spraying automatically authorizes cargo lifting, delivery, carriage for compensation, hazardous material, operations over people, BVLOS, or a different lift-system configuration.
When Part 137 Applies
Part 137 governs agricultural aircraft operations, including dispensing economic poisons and other substances intended for plant nourishment, soil treatment, propagation of plant life, pest control, or directly affecting agriculture, horticulture, or forest preservation. A lift system used only to transport a secured non-dispensed payload is not automatically within Part 137 merely because the aircraft is an Agras.
If a lifting mission forms part of a regulated agricultural dispensing operation, the operator must determine how the Part 137 certificate, exemption, COA, operating limitations, and lift activity interact. Obtain FAA guidance for the specific concept of operations rather than relying on a blog title.
Additional Mission-Specific Rules
External-load work, transportation for compensation or hire, package delivery, hazardous materials, work near people, controlled airspace, and operations outside VLOS can invoke additional FAA or DOT requirements. This tutorial is an operating-safety guide, not an authorization. The operator remains responsible for federal, state, local, landowner, workplace-safety, cargo, and material rules.
Why the Sling and Payload Change the Risk
The Obstacle-Avoidance Blind Zone
The T100’s sensors observe the aircraft environment. They do not create a complete protected volume around a flexible cable and suspended object several meters below the aircraft. A branch, power line, structure, vehicle, crop trellis, fence, pole, roof edge, crane, or terrain feature can contact the sling or cargo while the aircraft itself appears clear.
During lift operations, the current DJI manual states that the aircraft cannot automatically bypass obstacles. If the direct route contains an obstacle, the operator can plan a nearby destination point that routes the aircraft around it. Every intermediate segment must be surveyed for the full vertical and lateral envelope of the suspended load.
Pendulum Motion
A suspended payload can lag behind acceleration, continue forward during deceleration, rotate in wind, and develop side-to-side or fore-and-aft swing. Abrupt starts, stops, turns, altitude changes, and pilot corrections can amplify that motion. The hazard envelope is therefore wider than the static dimensions of the cargo.
DJI provides Auto Balance Control and a manual Balance Control function in the operation view. Those tools can help manage swing, but they do not replace conservative speed, smooth commands, a clear route, correct sling length, or a well-rigged payload.
Destination Elevation Logic
The safety video explains that when the destination is higher than the aircraft’s current position, automatic flight climbs with the terrain to a position above the destination. When the destination is lower, the aircraft can proceed toward it at the current altitude. The operator must verify the route between points, not merely the elevations at the endpoints.
A high arrival altitude does not guarantee cable clearance over an intervening ridge, tree line, building, tower, or wire. A lower destination does not mean the aircraft will descend continuously with the ground. Plan the aircraft altitude, cable length, cargo height, swing allowance, and terrain clearance for each segment.
Go/No-Go Weather and Environment Table
| Condition | DJI reference | Lift-operation decision |
|---|---|---|
| Wind | Do not operate above 6 m/s | Stop earlier if cargo shape, gusts, sling motion, or site turbulence creates instability. |
| Heavy rain | Do not operate when precipitation exceeds 25 mm in 12 hours | Do not use the numerical threshold to justify a lift when visibility, grip, electronics, footing, or cargo security is already unsafe. |
| Fog | Severe-weather prohibition | No lift when the pilot or observer cannot continuously evaluate aircraft, cable, cargo, route, and people. |
| Lightning | Severe-weather prohibition | Suspend operations before the storm reaches the site; do not handle elevated or conductive equipment. |
| Snow or ice | Severe-weather prohibition | Reject due to aircraft, sling, cargo, footing, visibility, and icing hazards. |
| Temperature | 0°C to 40°C lift-system operating range | Remain inside equipment limits and account for battery performance, payload reduction, and crew exposure. |
| High elevation | Payload capacity decreases with altitude; caution at 2 km MSL and above | Reduce load and preserve additional power reserve. |
| GNSS degradation | Do not operate indoors, under bridges, or where GNSS is severely affected | Use only a validated environment and strong positioning status. |
| Electromagnetic interference | Avoid strong sources such as base stations and radio towers | Survey and test the command-and-control path before lifting. |
Crew Roles and Controlled Areas
| Role | Primary responsibility | Critical boundary |
|---|---|---|
| Pilot in command | Authority, aircraft control, status monitoring, route, battery, abort decision | Must not be distracted by rigging or loading duties during powered flight. |
| Visual observer | Aircraft, sling, cargo, airspace, people, obstacles, weather | Must have a clear communication path and know the stop command. |
| Ground-crew lead | Controls loading/unloading zone, barriers, personnel release | No crew approach until the aircraft has moved away and the pilot authorizes entry. |
| Load handlers | Rig, verify, connect, disconnect, and secure cargo | Never stand directly under the aircraft or suspended load. |
| Charging lead | Battery rotation, cooling, charger/generator checks, quarantine | Never return a hot, damaged, or faulted battery to service. |
All participants should receive a pre-job briefing. Ground crew and pilots should wear safety helmets and reflective vests and carry working radios or another tested communication system. The operating area should use physical barriers or visible warning signs to keep non-participants out. DJI calls for more than 6 m of separation from the aircraft and more than 10 m from crowds and animals.
The six-meter value is a minimum aircraft separation reference, not permission to place people beside a swinging or suspended payload. Expand the controlled area for the cargo dimensions, cable length, wind, rotor wash, ground slope, traffic, and credible failure path.
Pre-Operation Lifting Hardware Reference
| Component | Verify | Reject when |
|---|---|---|
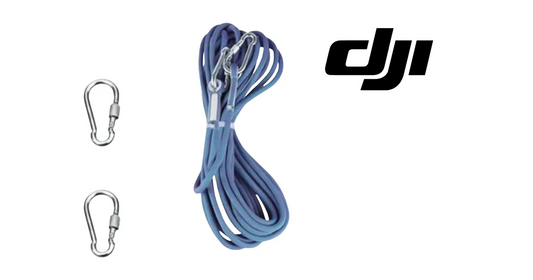
| Sling | 10–15 m length, at least 8 mm diameter, approved high-strength material | Frayed, glazed, cut, abraded, contaminated, knotted incorrectly, heat-damaged, stretched, or undocumented |
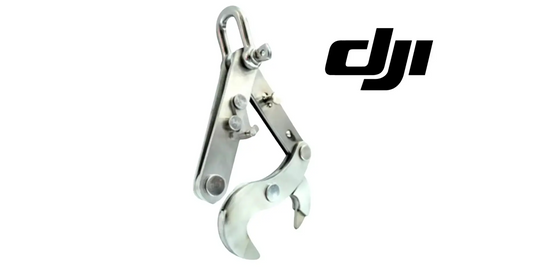
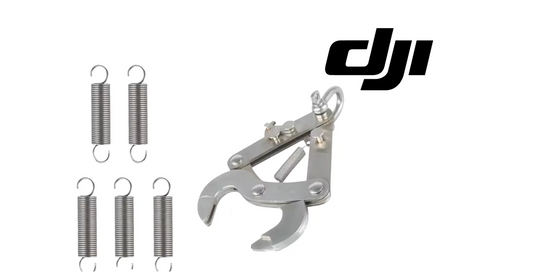
| Hook | Correct attachment and at least 500 kg pulling-force reference | Bent, cracked, corroded, gate damaged, rating unknown, or attachment loose |
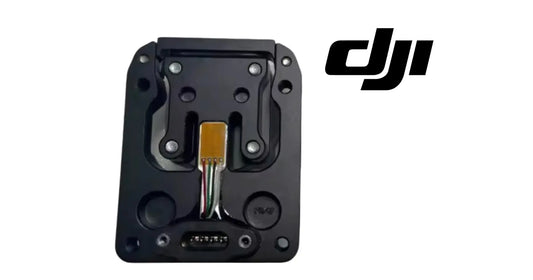
| Payload clasp and lift module | Secure mounting, correct cable connections, no looseness | Movement, cracked structure, missing fastener, connector fault, or app warning |
| Cargo rigging | Balanced, restrained, compatible, no loose contents | Can shift, spill, rotate uncontrollably, detach, or expose sharp edges to sling |
| Battery | Correct model, locked, healthy, temperature acceptable, reserve adequate | Swollen, leaking, damaged, overheated, faulted, or insufficient state of charge |
| Charging/cooling equipment | Compatible DJI charging path and working air cooling | Blocked vents, damaged cable, unstable power, abnormal heat, liquid exposure, or fault code |
Phase 1 — Authority, Job Acceptance and Documentation
Step 1 — Define the Exact Mission
Write down what is being lifted, why it is being moved, who owns it, whether compensation or hire is involved, the origin and destination, route length, operating area, and whether the material is hazardous or regulated.
Step 2 — Confirm the Aircraft and Lift Configuration
Identify the exact T100 aircraft, single-battery or dual-battery lift system, firmware, remote controller, batteries, sling, hook, payload module, and any emergency-release hardware.
Step 3 — Confirm U.S. Operating Authority
Verify aircraft registration, pilot qualifications, exemption or airworthiness pathway, Part 91 requirements, COA, airspace approval, and every condition and limitation relevant to the mission.
Step 4 — Determine Whether Part 137 Applies
Do not label the mission Part 137 simply because it uses a DJI Agras aircraft. Determine whether the task meets the FAA definition of an agricultural aircraft operation.
Step 5 — Check Additional Cargo or External-Load Requirements
Review whether the operation involves property transportation for compensation, hazardous material, package delivery, external-load certification, people, vehicles, BVLOS, or another activity requiring specific relief or approval.
Step 6 — Review the Current DJI Documents
Use the current T100 Lift System User Manual, T100 User Manual, Safety Guidelines, specifications, app warnings, release notes, and official tutorials for the installed firmware and region.
Step 7 — Build the Job Packet
Include the route map, task points, site photos, weather plan, crew list, radio channels, payload description, weight record, equipment identities, emergency contacts, authority documents, and abort criteria.
Step 8 — Establish Stop-Work Authority
Every crew member must know that an unsafe condition can be called without delay. Define one plain radio phrase that immediately stops movement and prevents approach.
Phase 2 — Site, Weather and Route Survey
Step 9 — Check the Forecast and Actual Weather
Compare forecast wind, gusts, precipitation, temperature, visibility, fog, lightning, and storm timing with DJI limits and the more conservative needs of the specific payload.
Step 10 — Measure Wind at Relevant Locations
Do not rely only on a distant weather station. Measure or observe wind at takeoff, exposed route segments, ridges, gaps between buildings, and the unloading site.
Step 11 — Select an Open Takeoff Site
Choose a stable, level area with no overhead obstruction and enough room for the full aircraft, rotor wash, sling, cargo, and crew exclusion zone.
Step 12 — Select an Open Landing Site
Keep the landing area separate from charging, vehicles, loose plastic, cargo staging, and public access. Remove debris that rotor wash can lift.
Step 13 — Build a Controlled Loading Area
Use barriers or warning signs. Define where cargo waits, where crew waits, where the aircraft hovers, and how the crew exits before tension is applied.
Step 14 — Build a Controlled Unloading Area
Provide the same separation and access control at the destination. Identify a safe movement direction approximately 6 m from the cargo after ground contact.
Step 15 — Survey the Aircraft Route
Inspect terrain, trees, wires, poles, roofs, cranes, towers, fences, roads, water, livestock, people, vehicles, and electromagnetic sources along the complete route.
Step 16 — Survey the Suspended-Load Envelope
Add sling length, cargo height, cargo width, expected lag, and swing margin below and beside the aircraft path. Treat that larger volume as the real route.
Step 17 — Add Intermediate Task Points Around Obstacles
Because the aircraft cannot automatically bypass obstacles during lift operations, place intermediate destination points that create a verified route around them.
Step 18 — Confirm Communications and Visual Coverage
Verify controller link, observer positions, radio coverage, handoff language, and visibility of the aircraft, sling, payload, route, loading site, and destination.
Phase 3 — Crew Briefing and Exclusion Zones
Step 19 — Assign Named Roles
Name the pilot, visual observer, ground-crew lead, load handlers, charging lead, and person responsible for public or vehicle control.
Step 20 — Confirm Training
Verify pilot certification and mission-specific authorization. Loading and unloading personnel should complete pre-job training on the aircraft, cable, cargo, approach restrictions, communications, and emergency actions.
Step 21 — Inspect Personal Protective Equipment
Confirm helmets, reflective vests, appropriate footwear, gloves suitable for the rigging, eye protection where needed, and any material-specific PPE.
Step 22 — Test Radios
Perform a radio check from every crew position. Agree on normal commands, approach authorization, load-secure confirmation, clear-zone confirmation, abort, and emergency language.
Step 23 — Mark the Aircraft Exclusion Zone
Maintain more than 6 m from the aircraft and expand the zone for rotor wash, sling, payload, and credible failure direction.
Step 24 — Prohibit Overhead Work
No person may load, unload, inspect, or wait directly beneath the aircraft or suspended payload. Minimize every period of close proximity.
Step 25 — Brief the Approach Release
Ground crew may approach only after the load is grounded, the aircraft has descended enough to create slack, the aircraft has moved away to a safe hover, and the pilot or ground lead has clearly released the zone.
Phase 4 — Aircraft, Lift System and Power Inspection
Step 26 — Confirm the Aircraft Is Powered Off for Physical Inspection
Remove or isolate the intelligent flight battery according to DJI procedure before touching propulsion, lift-system, connector, or structural hardware.
Step 27 — Inspect the Airframe and Arms
Check the center frame, arm tubes, hinges, arm locks, fasteners, landing structure, and visible wiring. There should be no crack, deformation, impact damage, looseness, or missing hardware.
Step 28 — Inspect Propellers and Motors
Examine every carbon-fiber propeller for cracks, chips, delamination, deformation, looseness, or foreign matter. Rotate and inspect motors only as DJI permits while the aircraft is safely de-energized.
Step 29 — Inspect the Payload Clasps and Lift Frame
Confirm the lift frame, payload clasps, brackets, fasteners, and attachment points are secure. Any movement or damage requires correction before flight.
Step 30 — Inspect the Payload Lifting Control Module
Check its mounting, wiring, connectors, protective covers, and app recognition. Do not fly through an intermittent connection or payload-system warning.
Step 31 — Inspect Sensors
Clean the LiDAR surface and inspect the radar, vision systems, antennas, FPV camera, and positioning hardware. Sensor health supports the aircraft, but does not protect the entire sling and cargo.
Step 32 — Inspect the Sling End to End
Lay out the full sling. Look and feel for abrasion, cuts, fuzzing, flat spots, heat glazing, chemical damage, contamination, hard sections, pulled fibers, knots, damaged splices, or embedded debris.
Step 33 — Verify Sling Dimensions and Material
Confirm 10–15 m length, at least 8 mm diameter, and a documented compatible material. Do not substitute an unknown rope because it appears thick enough.
Step 34 — Inspect the Hook
Check the hook body, gate or latch, swivel where present, attachment, corrosion, cracks, bending, and manufacturer markings. Use the current DJI reference of at least 500 kg pulling-force capability.
Step 35 — Verify Sling and Hook Security
Confirm the connection to the lift system is correct and cannot twist free, cross-load, or contact sharp aircraft structure.
Step 36 — Inspect the Intelligent Flight Battery
Reject a swollen, leaking, cracked, impact-damaged, overheated, wet, corroded, or faulted battery. Confirm identity, state of charge, temperature, cycle/service status, and secure locking.
Step 37 — Inspect the Charging System
Check the charger or generator, power leads, connectors, fuel system where applicable, protective earth, ventilation, and alarms. Use only the power source and configuration approved for the equipment.
Step 38 — Verify Air Cooling
The safety video calls for an air-cooled heat sink when charging. Confirm the cooling station or radiator path is operating, unobstructed, clean, and positioned so recirculated hot air cannot undermine cooling.
Step 39 — Power On and Review Aircraft Status
After completing the physical inspection, power on according to DJI procedure. Review every status message, firmware warning, battery alert, positioning status, and payload-system indication.
Step 40 — Tare the Weight Sensor if Needed
If the aircraft is hovering unloaded and the measured payload does not equal zero, land, place the aircraft on level ground, keep the sling unloaded and free, and perform Tare Calibration through the supported operation-view menu.
Phase 5 — Payload Inspection and Rigging
Step 41 — Identify the Actual Payload Weight
Use a reliable measured weight. Include the cargo, container, rigging, sling, hook, protective wrapping, and every item carried beneath the aircraft.
Step 42 — Compare Weight With the Installed Configuration
Do not exceed the lift-system capacity, maximum takeoff weight, app-recommended payload, exemption limit, or a more conservative company limit.
Step 43 — Apply Environmental Margin
Reduce the working load for altitude, heat, cold, gusts, turbulent terrain, long route, degraded battery, bulky cargo, or any condition that increases power demand or load motion.
Step 44 — Inspect the Cargo
Reject leaking, unstable, poorly contained, damaged, illegal, unidentified, or prohibited material. Confirm the cargo can tolerate rotor wash, vibration, movement, and the environmental conditions.
Step 45 — Determine the Center of Gravity
Plan attachment points so the suspended cargo hangs predictably. A severely offset center of gravity can tilt, rotate, overload one attachment, or create an unstable aerodynamic shape.
Step 46 — Protect the Sling From Sharp Edges
Use approved edge protection and rigging methods. Do not route the sling across an unprotected corner that can cut fibers under tension.
Step 47 — Secure Loose Contents
Close lids, restrain internal movement, remove loose straps, and prevent parts from entering the propeller wash or striking the sling.
Step 48 — Prevent Tangling and Knots
Lay the sling cleanly between aircraft and cargo. DJI warns that it must not be tangled or knotted after loading.
Step 49 — Conduct a Two-Person Rigging Check
One trained person rigs the load and a second verifies hook closure, sling path, attachment points, balance, weight, cargo security, and clear release path.
Phase 6 — Takeoff and Test Lift
Step 50 — Clear the Area
Account for every crew member, vehicle, animal, and non-participant. Confirm the loading and route zones are controlled before arming.
Step 51 — Confirm Flight Mode, Positioning and Lift Interface
Verify strong GNSS/RTK status as required, Agras Lift mode, task settings, destination points, payload indication, lost-link behavior, and the supported altitude-stabilization setting.
Step 52 — Start With Slack Managed
Arrange the sling so it cannot catch a landing component, cargo projection, ground object, or itself when tension begins.
Step 53 — Lift Smoothly to Initial Tension
Use a slow vertical movement. Stop if the cargo shifts, an attachment slips, the sling binds, the hook rotates abnormally, or the indicated load is unexpected.
Step 54 — Raise the Cargo Only Enough for a Test
Conduct the initial stability check at the lowest practical height. Do not climb immediately to transit altitude.
Step 55 — Check Aircraft and Cargo Response
Observe motor response, hover stability, battery load, payload reading, sling alignment, cargo attitude, rotation, swing, and abnormal sounds.
Step 56 — Verify Load Weight in the App
Compare the app value with the documented payload. A meaningful mismatch can indicate an incorrect tare, rigging contact, sensor issue, or unexpected cargo weight.
Step 57 — Test a Gentle Control Input
Apply only a small approved movement to confirm that the payload follows predictably. Avoid abrupt acceleration or braking.
Step 58 — Abort an Unstable Test Lift
Lower the load and correct the cause if swing grows, the cargo tilts, the sling twists, battery demand is abnormal, or any crew member calls stop.
Phase 7 — Transit and Automatic Flight
Step 59 — Climb to the Verified Route Altitude
Account for the lowest part of the cargo and the highest credible swing, not just the aircraft’s altitude display.
Step 60 — Use Smooth Acceleration
Increase speed gradually. The objective is stable transport, not maximum groundspeed.
Step 61 — Monitor the Full External-Load Envelope
The pilot and observer should track the aircraft, sling, hook, cargo, and projected swing path continuously.
Step 62 — Treat Every Obstacle as a Manual Planning Problem
Do not expect the aircraft to automatically route the sling or cargo around an obstacle. Follow the surveyed intermediate points.
Step 63 — Monitor Elevation Changes
When traveling to a higher destination, verify climb clearance along the route. When traveling to a lower destination, recognize that the aircraft can remain at its current altitude until arrival.
Step 64 — Monitor Swing and Rotation
Reduce speed and use the supported balance-control procedure before motion becomes severe. Avoid rapid opposing corrections that can amplify the pendulum.
Step 65 — Monitor Battery and Temperature
Track charge, voltage behavior, power demand, battery temperature, route remaining, unloading time, and return or landing options. Land promptly if the app reports overheating.
Step 66 — Preserve Command-and-Control Margin
Watch link quality and observer coverage. If terrain, structures, or vegetation threaten the link, use an approved communications plan and reposition before continuing.
Step 67 — Stop for Any Unexplained Change
Abnormal vibration, cargo movement, warning messages, route intrusion, weather deterioration, or a lost visual reference requires an immediate controlled response.
Phase 8 — Destination Approach, Loading and Unloading
Step 68 — Confirm the Destination Is Sterile
The ground lead confirms that barriers are intact, non-participants are clear, the drop location is ready, and the planned movement direction is open.
Step 69 — Use the FPV and Visual Observer
At the destination, tilt the FPV camera downward as appropriate and use the AR projection to support the safety check. Maintain direct crew observation; the camera is not the only source.
Step 70 — Position Above the Destination
Stabilize before descending. Avoid combining aggressive horizontal correction with load lowering.
Step 71 — Lower Until the Sling or Cargo Touches Ground
Confirm contact visually and through load behavior. Do not allow crew to approach at first contact.
Step 72 — Descend an Additional 3–4 m
The current manual recommends 3–4 m of additional descent to create slack. Adjust only within the approved procedure for the actual sling length and surrounding environment.
Step 73 — Move Approximately 6 m Away
Fly backward or in another verified direction where no people are present. The purpose is to separate the aircraft from the ground-handling point.
Step 74 — Establish a Stable Hover
Confirm that the aircraft is stable, the sling is slack, and no rotor-wash or cable movement threatens the crew.
Step 75 — Release Ground Crew
Only the authorized signal from the pilot or ground lead permits trained handlers to enter. They must remain outside the aircraft area and never position themselves beneath it.
Step 76 — Complete the Load Transfer
Disconnect or connect the cargo using the planned method. Do not drag, whip, or swing the sling.
Step 77 — Clear the Ground Crew
All personnel leave the controlled cargo area and report clear before the aircraft moves toward the connection point or begins re-tensioning.
Step 78 — Recheck the Load Before Departure
If new cargo has been attached, repeat the security, weight, balance, sling, hook, and test-lift checks rather than assuming the return load behaves like the outbound load.
Phase 9 — Landing, Charging and Post-Operation
Step 79 — Land With Reserve
Complete the operation before the reserve becomes an emergency. Do not use the last safe energy margin to finish one more transfer.
Step 80 — Power Down in the Correct Order
After landing, stop the motors, power off the aircraft, and then power off the remote controller according to DJI procedure.
Step 81 — Inspect the Aircraft and Lift System
Check for heat, loose fasteners, impact, abrasion, cable damage, hook damage, connector movement, and structural change.
Step 82 — Inspect and Store the Sling
Clean and dry it using an approved method. Store it without sharp bends, chemical exposure, heat, UV damage, or crushing.
Step 83 — Cool Batteries Before Charging
Use the compatible air-cooling system and current battery instructions. Never force-charge a hot, damaged, or faulted pack.
Step 84 — Record Battery and Payload Data
Capture battery identity, start and end state, temperature warnings, payload weight, route, number of lifts, and abnormal events.
Step 85 — Close the Job With a Debrief
Record what changed, what nearly failed, whether swing or route margins were adequate, and what must be corrected before the next lift.
Payload and Battery Decision Table
| Signal | Meaning | Action |
|---|---|---|
| Payload below nominal maximum but above app recommendation | Current conditions do not support the intended load | Reduce payload; never override the app recommendation to chase the brochure limit. |
| Unexpectedly high measured weight | Wrong tare, hidden contact, sensor issue, or overweight cargo | Land, unload, inspect, tare if appropriate, and independently verify weight. |
| Rapid battery decline during test lift | Power demand or battery condition is unacceptable | Lower the load and investigate; do not commit to transit. |
| Battery-overheat warning | Pack temperature exceeds the safe operating plan | Land promptly and quarantine/cool according to DJI guidance. |
| Low-battery warning before destination | Reserve planning has failed | Use the approved immediate landing or return decision; do not continue the delivery by habit. |
| Wind increases after pickup | Swing and power demand can rise quickly | Slow, stabilize, and land at the nearest approved safe area. |
Common DJI T100 Lifting Safety Mistakes
1. Treating the Aircraft Sensor Envelope as Cargo Protection
The sling and payload can strike obstacles that the aircraft itself clears.
2. Flying a Direct Route Through an Obstacle Area
Lift operations do not provide automatic obstacle bypass. Plan intermediate points.
3. Using “Around 10 m” as the Entire Sling Specification
The current manual states 10–15 m, at least 8 mm diameter, approved material, and a hook-strength reference.
4. Using the Auto-Caption’s 5 m Descent
The current manual recommends 3–4 m after ground contact.
5. Standing Beneath the Aircraft
Loading and unloading should never occur directly under the aircraft.
6. Approaching at First Ground Contact
The aircraft must create slack, move approximately 6 m away, stabilize, and release the crew.
7. Treating Six Meters as the Entire Hazard Zone
Cargo size, swing, rotor wash, terrain, and failure direction can require a much larger controlled area.
8. Targeting the Maximum Published Payload
The current app recommendation and actual conditions can require less.
9. Guessing Cargo Weight
Total external load includes containers, rigging, sling, hook, and every attached item.
10. Ignoring Cargo Aerodynamics
A light but broad or irregular object can create severe drag and rotation.
11. Using a Damaged or Unrated Sling
Visible wear, chemical exposure, glazing, cuts, unknown material, or unknown dimensions requires rejection.
12. Using a Hook With Unknown Capacity
Appearance is not proof of strength or compatibility.
13. Allowing the Sling to Knot or Tangle
Knots, wraps, and crossed lines can reduce strength and produce unpredictable release.
14. Skipping the Low Test Lift
The first full-altitude departure should not reveal an unbalanced or shifting payload.
15. Accelerating or Stopping Abruptly
Sudden velocity changes can amplify pendulum motion.
16. Depending on Balance Control to Fix Poor Rigging
Software assistance cannot make an insecure or badly centered cargo safe.
17. Surveying Only the Endpoints
The entire route and external-load volume require inspection.
18. Ignoring Destination Elevation Logic
The aircraft’s route behavior may not follow terrain the way an operator casually expects.
19. Operating at the Wind Limit
A 6 m/s prohibition is not a recommended lifting condition, especially for high-drag cargo.
20. Continuing Into Fog, Rain, or Lightning
Reduced visibility and severe weather defeat the basic safety plan.
21. Failing to Control the Unloading Site
Warning signs, barriers, trained handlers, and an approach-release procedure are required at both ends.
22. Combining Pilot and Load-Handler Duties
The pilot must retain aircraft control and situational awareness.
23. Using Untrained Ground Crew
People need pre-job instruction on zones, radios, rigging, approach, and emergency signals.
24. Charging Without Active Cooling
Blocked airflow or a missing cooling station can damage batteries and shorten safe rotation.
25. Reusing an Overheated Battery
An overheating warning requires landing and controlled battery handling.
26. Planning to the Critical Battery Warning
Safe reserve must cover route uncertainty, unloading time, go-around, and an alternate landing.
27. Assuming a Spraying Approval Covers Lifting
The operator must verify that the specific aircraft, configuration, and mission are authorized.
28. Calling Every Agras Mission Part 137
Part 137 depends on the activity, not the brand name on the aircraft.
29. Assuming Part 107 Covers the T100
The T100 lifting configurations exceed Part 107’s 55-pound threshold.
30. Failing to Document Near Misses
Small swing, route, radio, or rigging problems should improve the next job packet rather than disappear after shutdown.
Troubleshooting DJI T100 Lifting Operations
| Symptom | Likely cause | Safe corrective action |
|---|---|---|
| Payload weight does not read zero when unloaded | Tare drift, sling contact, uneven ground, or sensor issue | Land on level ground, unload and free the sling, perform supported tare calibration, and service if unresolved. |
| Aircraft refuses takeoff or recommends a lower load | Payload, environment, battery, altitude, or system status | Reduce load and resolve warnings; never bypass the limit. |
| Cargo tilts during tensioning | Incorrect center of gravity or attachment geometry | Lower immediately and re-rig. |
| Cargo begins rotating | Wind, aerodynamic shape, twisted sling, or off-center rigging | Slow, stabilize, land, and correct the configuration. |
| Swing increases after braking | Abrupt deceleration or excessive speed | Use smooth control, supported balance control, and a safe landing if motion persists. |
| Route obstacle appears during transit | Incomplete survey or intrusion | Stop or divert using a verified clear direction; do not rely on automatic bypass. |
| Ground crew enters early | Barrier, training, or communications failure | Abort the transfer, move or land safely, and reset the controlled area. |
| Battery overheats | High demand, temperature, repeated cycles, cooling, or pack condition | Land promptly; cool and evaluate the battery before reuse. |
| Link quality declines | Terrain, structures, interference, antenna obstruction, or range | Follow the approved lost-link and landing plan; reposition only after the load is safe. |
| Sling shows new abrasion | Sharp edge, ground drag, cargo movement, or incorrect routing | Remove from service and correct the contact point before installing a compliant replacement. |
Emergency Response Priorities
Uncontrolled Payload Swing
Reduce aggressive inputs, use the supported balance function only when surroundings are clear, move toward the nearest approved landing area, and lower the load. Do not attempt to “fly out” severe motion through speed.
Cargo or Rigging Shift
Land as soon as safely practical. Keep people away from the projected failure area. Do not permit ground crew to grab a moving or tensioned line.
Low Battery or Overheating
Prioritize a controlled landing with the load over completing the destination. Use the actual exemption, manual, app, and emergency procedure for the configuration.
Weather Deterioration
Terminate before wind, visibility, precipitation, or lightning removes the safe recovery margin. The best emergency landing point is one identified before takeoff.
Loss of Link
The lost-link response must be configured and understood before flight. A suspended load can make a generic return path unsafe, so the route and emergency settings must be addressed in the mission plan.
Person or Vehicle Enters the Route
Stop the operation using the briefed procedure. Do not continue over or near a non-participant simply because the aircraft is already carrying a load.
Ares Acres Recommended Lifting SOP
- Define cargo, route, purpose, weight, and compensation status.
- Confirm aircraft, lift configuration, firmware, sling, and hook.
- Verify Part 91, Section 44807, COA, registration, pilot, airspace, and mission authority.
- Determine whether Part 137 or another cargo/external-load rule applies.
- Review current DJI manuals, specifications, videos, warnings, and release notes.
- Set conservative wind, weather, battery, payload, and visibility limits.
- Survey aircraft route and full suspended-load envelope.
- Add intermediate points around every obstacle.
- Build controlled takeoff, landing, loading, and unloading areas.
- Assign pilot, observer, ground lead, load handlers, and charging lead.
- Inspect PPE and test radios.
- Inspect airframe, arms, locks, propellers, motors, sensors, and lift module.
- Inspect 10–15 m sling, minimum 8 mm diameter, approved material, and hook.
- Inspect battery, charger, generator, cables, and air-cooling equipment.
- Measure total payload and apply environmental margin.
- Secure and balance cargo with verified attachment points.
- Tare the weight sensor when required.
- Confirm the app-recommended payload limit.
- Clear crew more than 6 m and prohibit overhead work.
- Conduct a low, smooth test lift.
- Verify measured weight, hover stability, cargo attitude, and battery demand.
- Transit smoothly through the surveyed route.
- Monitor swing, wind, battery, heat, link, obstacles, and people continuously.
- At destination, confirm a sterile unloading zone.
- Lower until sling or cargo touches ground.
- Descend another 3–4 m.
- Move approximately 6 m in a people-free direction and hover.
- Release trained ground crew to approach.
- Complete transfer without dragging or swinging the line.
- Clear crew before aircraft movement or re-tensioning.
- Land before reserve or temperature margins are consumed.
- Inspect, cool, store, document, and debrief.
Related DJI Agras Operator Academy Tutorials
- DJI T100 Transportation and Delivery: Lifting Interface and Calibration
- DJI Agras T100 Lift System Dual-Battery Installation
- DJI T100 Lift System and Transportation Tutorial
- DJI T100/T50 Pre-Flight Safety Tutorial
- DJI T100 Drone Safety Tutorial
- DJI Agras Remote Operation View for T100 and T50
- DJI T100 D-RTK 3 Setup and RTK Coordinates
- DJI T100 Power Supply, DB2160 and Charging Tutorial
- DJI Agras T100 Relay Setup and Field Verification
- Browse All DJI Agriculture Tutorials
FAQ: DJI Agras T100 Lifting Safety and Regulations
Is the DJI T100 lifting cable protected by obstacle avoidance?
No. The suspended sling and cargo extend outside the aircraft’s protected sensing envelope, and DJI states that the aircraft cannot automatically bypass obstacles during lift operations.
What sling length does DJI recommend?
The current lift-system manual specifies 10–15 m. The standard configuration is 10 m.
What sling diameter is required?
DJI specifies at least 8 mm in the current T70P/T100 Lift System User Manual.
What sling material does DJI identify?
DJI identifies ultra-high molecular weight polyethylene or aramid fiber, with high-strength polyester permitted as the inner core.
How strong should the hook be?
The current manual says the hook should withstand at least 500 kg of pulling force.
Should a worn sling be reused for a lighter load?
No. Visible wear or cracking requires immediate replacement with a compliant sling.
Why can a sling be too short?
A short sling can transmit abrupt motion and allow cargo to swing toward the aircraft during sudden stops.
Why can a sling be too long?
Excess length can increase pendulum behavior, complicate placement, and slow loading or unloading.
How far should personnel remain from the aircraft?
DJI states more than 6 m. The operator should expand the zone for cargo size, sling motion, rotor wash, wind, and site conditions.
Can a worker stand beneath the aircraft to attach cargo?
No. DJI prohibits loading or unloading directly under the aircraft.
When may ground crew approach?
Only after the load is grounded, the aircraft creates slack, moves approximately 6 m in a clear direction, stabilizes, and the crew receives authorization.
How far should the aircraft descend after the load touches ground?
The current manual recommends another 3–4 m. That supersedes the auto-caption’s 5 m wording.
Why does the aircraft then move about 6 m?
The move separates the aircraft and rotor hazard from the cargo-handling point before people enter.
Can the T100 automatically fly around a route obstacle?
Not during lift operations. DJI recommends planning another destination point near the obstacle to route around it.
What happens when the destination is higher?
The safety tutorial explains that automatic flight climbs along the terrain to a position above the higher destination. The intervening route still requires verification.
What happens when the destination is lower?
The aircraft can proceed at its current altitude until the destination, so operators should not assume it continuously follows descending terrain.
What is the T100 single-battery lift capacity?
DJI publishes 100 kg for the lift system, subject to maximum takeoff weight, app recommendation, environment, and operating authority.
What is the dual-battery lift capacity?
DJI publishes 80 kg for the dual-battery lifting system.
Why does dual-battery lifting list a lower payload?
The dual-battery configuration carries additional aircraft and battery weight. Use the published configuration-specific limit rather than assuming two batteries increase cargo capacity.
Can I always lift the published maximum?
No. The app-recommended limit, altitude, temperature, wind, battery, cargo shape, route, and approval can require less.
What wind limit does DJI publish?
DJI prohibits operation when wind exceeds 6 m/s. A particular load can require stopping well below that value.
Can the T100 lift in fog?
No. DJI includes fog among prohibited severe conditions, and it prevents reliable observation of the external-load system.
Can the T100 lift in rain?
DJI prohibits severe weather including heavy rain. Suspend earlier when visibility, footing, electronics, cargo security, or crew safety is compromised.
Can the T100 lift during lightning?
No. Stop before lightning reaches the operating area.
What is the lift-system operating temperature?
DJI publishes 0°C to 40°C for both lifting configurations.
Does payload capacity change with altitude?
Yes. DJI warns that capacity decreases as altitude increases and calls for particular caution at 2 km above sea level and higher.
Why is an air-cooled heat sink or cooling station important?
High-demand battery rotation produces heat. Compatible forced-air cooling helps return a healthy battery to its supported charging range and prevents unsafe hot charging.
What should happen after a battery-overheat warning?
Land promptly. Cool and evaluate the battery under current DJI instructions before reuse.
How much battery reserve should remain?
Use a mission-specific reserve that covers unloading time, route variation, wind, go-around, and an alternate landing. Do not plan to reach the critical warning.
Does Part 107 authorize a DJI T100 lifting flight?
Not as the default framework. Part 107 applies below 55 pounds at takeoff, while DJI publishes T100 lifting-configuration aircraft weights far above that threshold.
Does Part 137 automatically cover T100 cargo lifting?
No. Part 137 applies when the activity meets the definition of an agricultural aircraft operation. Verify the exact mission and issued authority.
What FAA pathway generally matters for a heavy civil T100?
Operators commonly need the applicable Part 91 and Section 44807 exemption pathway, registration, COA, airspace, pilot, and mission-specific approvals. The issued documents control.
Can a spraying exemption be assumed to authorize lifting?
No. Confirm that the aircraft, lift configuration, payload activity, and concept of operations are expressly authorized.
Can the T100 carry hazardous material?
Do not assume so. Hazardous-material transport can involve additional FAA and PHMSA restrictions and must be specifically evaluated and authorized.
What should be recorded after each lift?
Record aircraft, lift system, sling and hook identity, payload, route, crew, weather, batteries, app limits, warnings, anomalies, landing, inspections, and corrective actions.
Final Takeaway
DJI T100 lifting safety begins before the aircraft is powered. Confirm the mission is authorized, select open and controlled operating sites, survey the entire suspended-load envelope, train the crew, establish more than 6 m of aircraft separation, and prevent anyone from standing beneath the aircraft or cargo.
Inspect the aircraft, lift frame, payload clasps, sensors, battery, charging equipment, sling, and hook. Use the current 10–15 m sling guidance, minimum 8 mm diameter, compatible high-strength material, and hook-strength reference. Secure and balance the total payload, apply environmental margin, obey the app-recommended limit, and conduct a low test lift.
During transit, remember that the aircraft cannot automatically bypass lift-route obstacles and its sensors do not fully protect the cable or cargo. Use smooth movement, planned intermediate points, continuous observation, conservative wind limits, and enough battery reserve to land safely before a warning becomes an emergency.
At the destination, keep crew out until the sling or cargo touches the ground, the aircraft descends another 3–4 m, moves approximately 6 m in a people-free direction, stabilizes, and authorizes approach. That controlled handoff is the core of safe loading and unloading.
Complementary DJI T100 Lift, Power and Safety Equipment
- DJI Agras T100 Aircraft — explore the flagship agricultural platform and available configurations.
- DJI Agras T100 Dual-Electric Lifting System — review the heavy-lift cargo frame and dual-battery lift configuration.
- DJI Agras T100 OEM Lifting Rope — replace worn or damaged lift rope with identified OEM hardware.
- DJI Agras T100 OEM Lifting Hook — inspect or replace the cargo attachment hook.
- DJI Agras T100 OEM Payload Lifting Control Module — model-specific control hardware for the lift system.
- DJI Agras T100 OEM Lift Frame Connecting Bracket — structural lift-frame connection hardware.
- DJI Agras T100 OEM DB2160 Intelligent Flight Battery — mission power for T100 operations.
- DJI Agras T100 DB2160 Battery Cooling Station — air-cooling support for field battery rotation.
- DJI Agras T100 C12000 Intelligent Charger — compatible high-output intelligent charging equipment.
- DJI Agras T100 D14000iE Inverter Generator — field power and battery charging support.
- DJI T100 OEM Parts — browse structural, electronic, propulsion, lift, and power components.
- Ares Acres Technical Support — request help with lift-system compatibility, replacement hardware, power planning, or diagnostics.
What Is Ares Acres?
Ares Acres is a U.S.-based agricultural robotics company focused on DJI Agras aircraft, OEM parts, diagnostics, operator support, and technical education. Our DJI Agriculture Tutorials turn short equipment videos into complete operating procedures with source corrections, safety gates, troubleshooting, and field-verification standards.
Need a T100 Lift System, OEM Cable, Hook or Setup Support?
Explore the DJI Agras T100, browse DJI T100 Parts, search the complete DJI Agras OEM Parts catalog, or contact Ares Acres for help identifying the correct lifting system, sling, hook, control module, bracket, battery, charger, cooling station, or supporting component.
Safety and regulatory note: Aircraft configuration, lift capacity, sling specifications, app menus, firmware, obstacle behavior, emergency functions, battery limits, and regional availability can change. Follow the latest DJI T100 User Manual, T70P/T100 Lift System User Manual, Safety Guidelines, specifications, release notes, app warnings, and issued operating documents. This article is educational and does not grant FAA authority. Confirm the exact Part 91, Section 44807, registration, exemption, COA, airspace, pilot, Part 137, external-load, cargo, hazardous-material, state, local, and workplace requirements for the mission. Never operate over unprotected people, beneath unsafe weather, outside the approved route, above the approved payload, or without a safe landing reserve.